• About
  • Nav Social Icons

  • Skip to primary navigation
  • Skip to main content
  • Skip to primary sidebar
  • Skip to footer
  • Home
  • About
  • Recipes
    • Blackstone
    • Breads
    • Breakfast
    • Drinks
    • Dessert
    • Dinner
    • Sides
    • Snacks
  • Shop
  • Cart
  • My account
  • Mobile Menu Widgets

    Connect

    Search

The Farmstyle

The Farmstyle

by Kayla Zenner

  • Home
  • About
  • Shop
  • Recipes
    • Blackstone
    • Breads
    • Breakfast
    • Drinks
    • Dessert
    • Dinner
    • Snacks
    • Sides
    • All Recipes
  • Cart

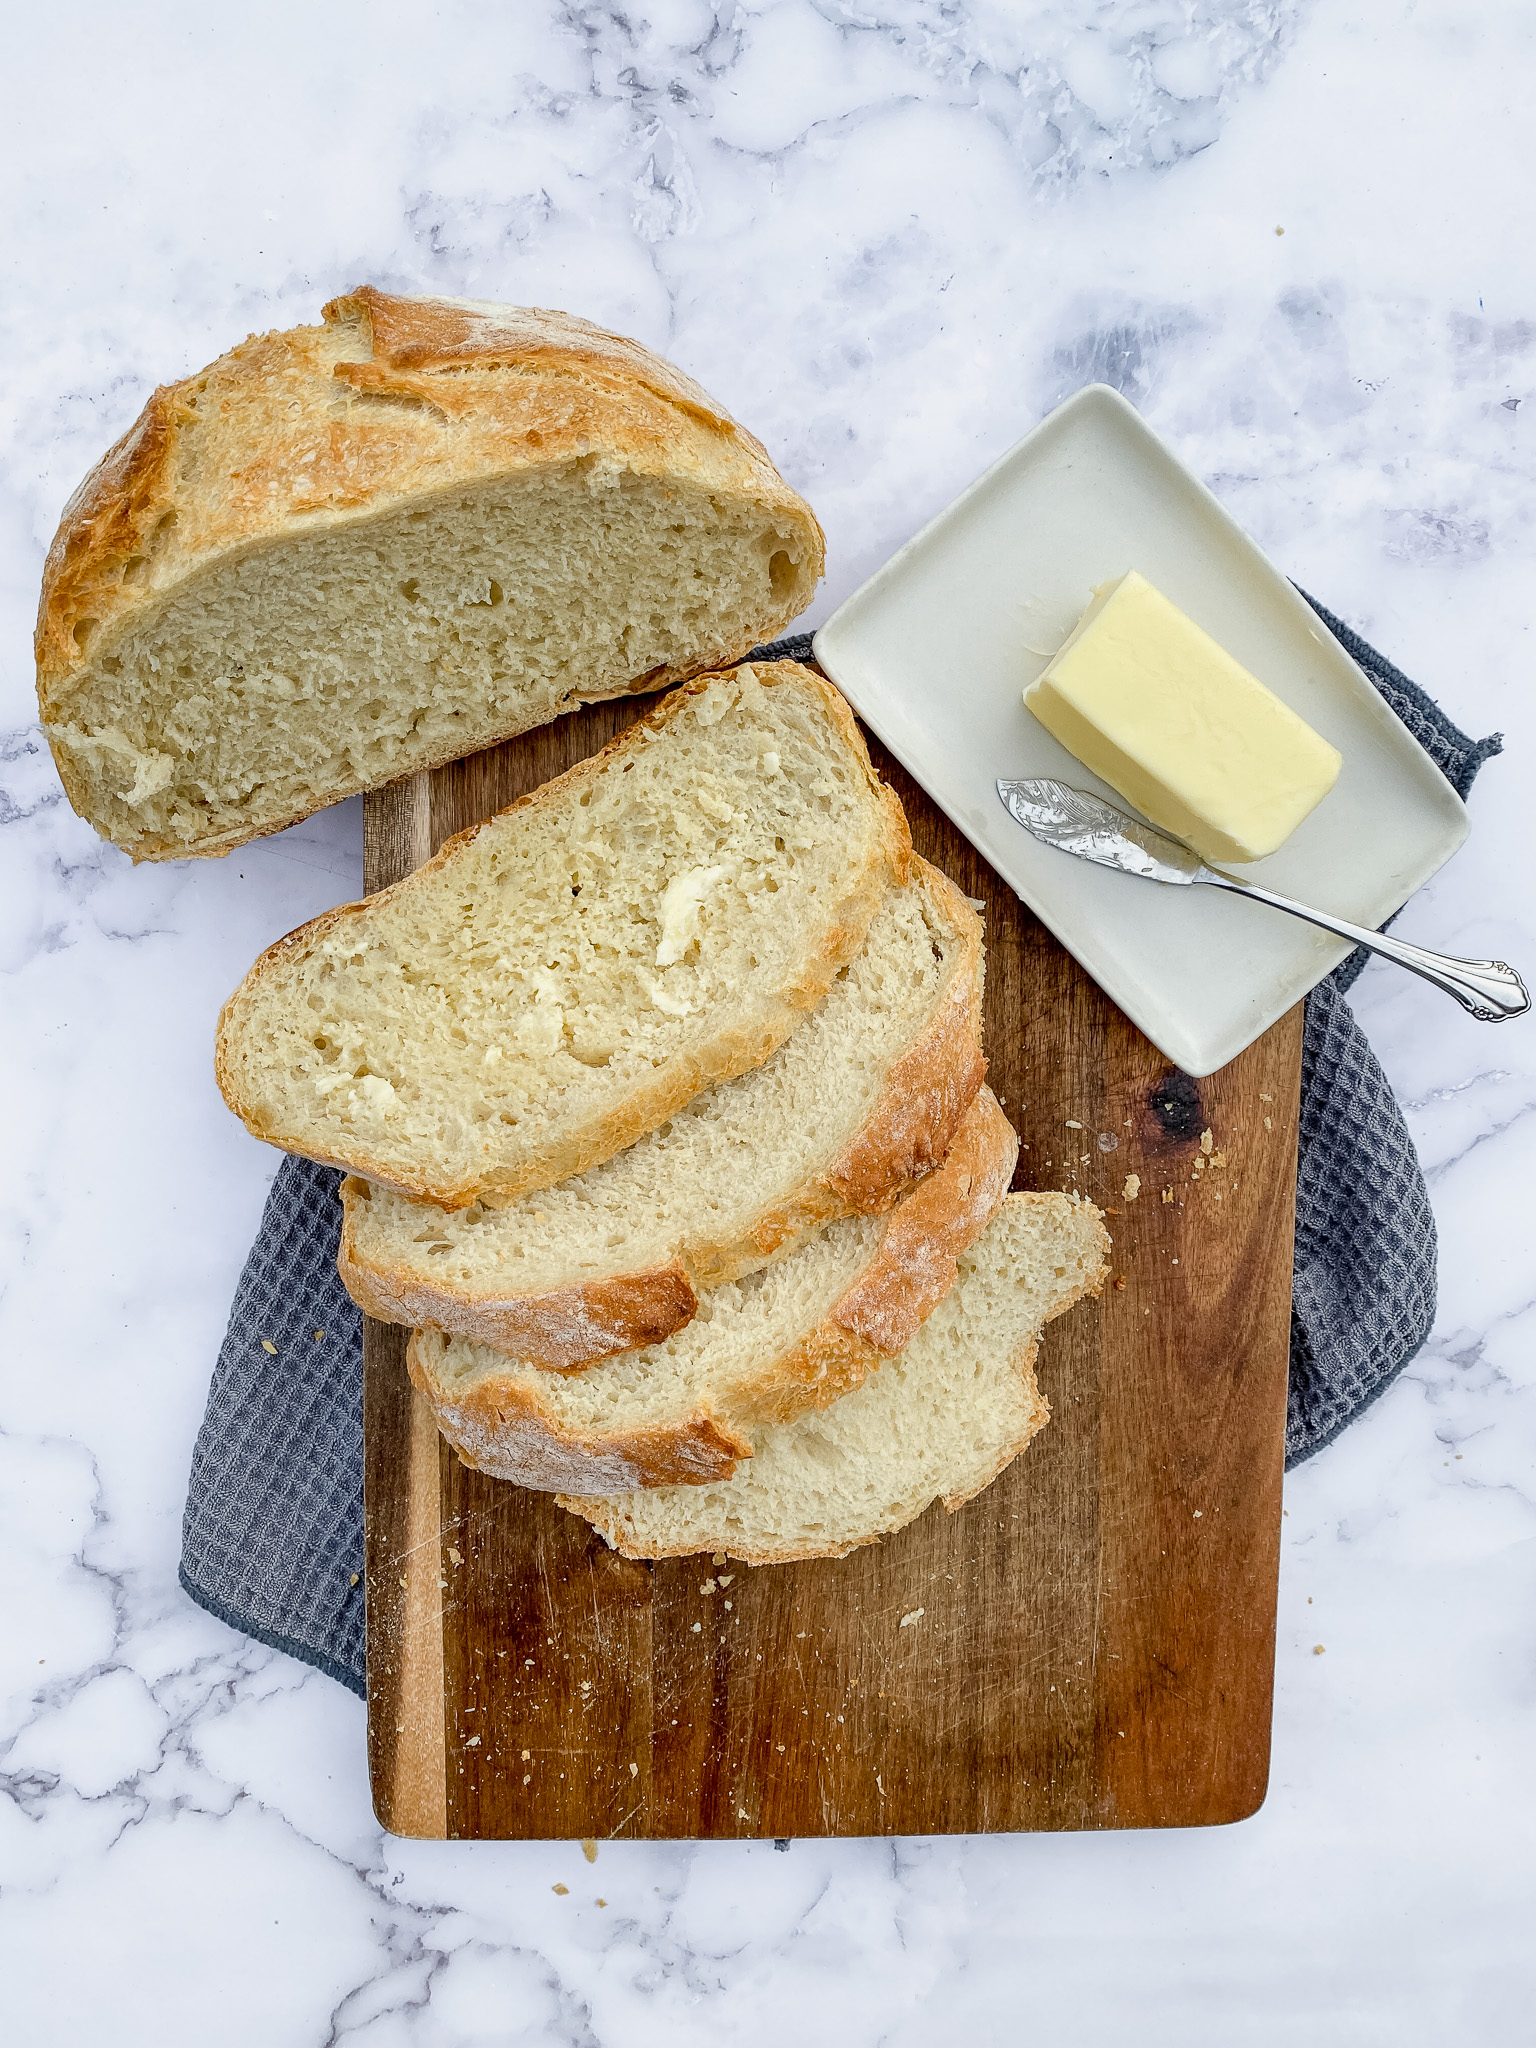
No Knead Artisan Bread | Only 4 Ingredients

January 5, 2024 · In: Breads, Recipes, Sides

FacebookTweetPin
Jump to Recipe Print Recipe

This no knead artisan style bread has only 4 ingredients and is a great introduction to for people those who want to get started baking bread.

Are you wanting to get into bread making, but feel intimidated by all the steps and rules you have to follow? Well this super easy no knead artisan style bread is going to be right up your alley! You simply mix together the four basic ingredients, let sit for a few hours, fold up, and bake. Super simple, super easy, super delicious!

This no knead bread features a crusty exterior and fluffy interior, the best of both worlds! This recipe is is great for someone who wants to start baking sourdough bread, but isn’t quite ready to take the plunge into caring for a sourdough starter. Although I will say baking sourdough isn’t as hard as you may think! (Check out my online class if you are interested in learning more).

Ingredients for Artisan Bread

Flour: This recipe works great with bread flour or all purpose flour. You will get a slightly fluffier interior with bread flour, but if you don’t have it on hand then try it with all purpose!

Yeast: I almost always use active dry yeast here, but rapid rise works great as well!

Salt: adds flavor and structure to your dough.

Water: warm water is best Try not to get it too hot, I like to keep it about the temperature I would make a baby bottle, no warmer than 130F.

How to Make Artisan Style Bread

  • In a large bowl combine all four ingredients. Mix until there are no longer any dry bits in the bowl. 
  • Cover the bowl and let sit for 4-12 hours. Yes! The timeline is that forgiving!
  • When the dough is done rising it will be sticky and bubbly. Pour onto a well floured counter. 
  • Gently fold the edges of the dough into the center to form a rough circle shape. Place into a bowl or proofing basket. Cover and allow to rise for another hour. 
  • While the dough is rising preheat the oven with a dutch oven to 450 degrees. 
  • Place the dough onto a piece of parchment paper, and carefully place into the preheated dutch oven. Baked covered for 20 minutes. 
  • Uncover the bread and reduce temperature to 425, bake an additional 15-20 minutes. 
  • Remove from oven and allow to cool for 1-2 hours before slicing. 

Share Your Experience

I would love to hear about your experience making and enjoying my No Knead Artisan Style Bread! Feel free to tag me on Instagram or leave a review below. Your feedback helps me improve our recipes and provides inspiration to fellow home bakers.

Save this recipe for later by simply using the pin button on the recipe card or any of the photos above. Happy cooking!

Artisan Style No Knead Bread

4.88 from 8 votes
This no knead artisan style bread has only 4 ingredients and is a great introduction to for people those who want to get started baking bread.
Print Recipe Pin Recipe
Prep Time:10 minutes mins
Cook Time:40 minutes mins
Rise Time:4 hours hrs
Total Time:4 hours hrs 50 minutes mins
Course: Side Dish
Keyword: bread
Servings: 1 loaf

Ingredients

  • 4 cups all purpose flour
  • 1 1/2 cups water warm
  • 1 tsp active dry yeast
  • 1 tsp salt
US Customary – Metric

Instructions

  • In a large bowl combine all four ingredients. Mix until there are no longer any dry bits in the bowl.
  • Cover the bowl and let sit for 4-12 hours. Yes! The timeline is that forgiving!
  • When the dough is done rising it will be sticky and bubbly. Pour onto a well floured counter.
  • Gently fold the edges of the dough into the center to form a rough circle shape. Place into a bowl or proofing basket. Cover and allow to rise for another hour.
  • While the dough is rising preheat the oven with a dutch oven to 450 degrees.
  • Place the dough onto a piece of parchment paper, and carefully place into the preheated dutch oven. Baked covered for 20 minutes.
  • Uncover the bread and reduce temperature to 425, bake an additional 15-20 minutes.
  • Remove from oven and allow to cool for 1-2 hours before slicing.

Share this:

  • Share on X (Opens in new window) X
  • Share on Facebook (Opens in new window) Facebook
  • Share on Pinterest (Opens in new window) Pinterest

Like this:

Like Loading…
FacebookTweetPin

By: Kayla · In: Breads, Recipes, Sides · Tagged: bread

About Kayla

Hi! I'm Kayla. I'm here to help inspire busy moms to get back in the kitchen and feel beautiful along the way! I'm married to my high school sweetheart and live on a farm with our two busy boys.

you’ll also love

Honey Whole Wheat Sandwich Bread
Soft and Fluffy Sandwich Bread
apple bread with cream cheese apple butter and cinnamonApple Bread with Apple Butter and Cream Cheese Filling

Reader Interactions

Comments

  1. Leeyah says

    November 22, 2024 at 7:16 pm

    Hi I have a question! Do I leave the dough to rise in the fridge or outside?

    Loading...
    Reply
    • Kayla says

      November 24, 2024 at 1:56 pm

      On the counter!

      Loading...
      Reply
  2. Sydney says

    February 8, 2025 at 8:49 pm

    Came across this recipe and looked so beginner friendly that I have to try! Do we preheat the oven to 450 with the dutch oven lid on?

    Loading...
    Reply
    • Kayla says

      February 9, 2025 at 4:59 am

      I usually do, but I don’t know that it matters too much.

      Loading...
      Reply
  3. Marian says

    April 26, 2025 at 7:57 pm

    5 stars
    I tried this bread for the first time and my husband loved it. I usually make kneaded bread. I will make again. I am going to experiment by adding herbs and may even try a cinnamon raisin sweet bread out of it.

    Loading...
    Reply
    • Kayla says

      April 28, 2025 at 12:53 pm

      Thank you so much for leaving your review! I am so glad that you enjoyed the recipe!

      Loading...
      Reply
  4. Ashley Mills says

    June 12, 2025 at 3:07 pm

    Do I leave the Dutch oven in the oven for an hour as I’m waiting for the last rise? Or just as long as the pre heat is done? Thanks!!

    Loading...
    Reply
    • Kayla says

      June 13, 2025 at 1:34 pm

      I just leave the dutch oven in while it preheats.

      Loading...
      Reply
  5. KK says

    October 2, 2025 at 2:23 pm

    Hi, I live in a really hot tropical country (Thailand) and I’m concerned that it will be too hot overnight to leave this dough to rise. By chance, do you know if it’s possible to let it rise in the fridge? Or is that too cold for the yeast to do its thing? Do you think it’s possible for me to leave it in the fridge at night, then let it warm up and keep rising on the counter after that? No worries if you’re not sure, I know this deviates from your recipe instructions. Thank you in advance for your reply, and for this great free recipe! I really appreciate it 🙂

    Loading...
    Reply
    • Kayla says

      October 2, 2025 at 4:23 pm

      You would be better off letting it rise during the day so that you can keep an eye on it. If it is hot and humid it will proof very quickly. Another alternative would be to let it proof for an hour or two on the counter, then transfer to the fridge for an overnight proof.

      Loading...
      Reply
  6. Kassya says

    November 26, 2025 at 3:49 pm

    Hi! I was wondering if I could make this in a 2qt dutch oven? Or if I could make more loaves out of this one batch. I’ve never made bread before so I’m not sure if I am able to use this size.

    Loading...
    Reply
    • Kayla says

      November 26, 2025 at 4:14 pm

      My 4 qt Dutch oven is perfect. If you wanted to use a smaller one, I would divide the dough into 2 or 3 loaves when shaping.

      Loading...
      Reply
  7. Claire says

    February 4, 2026 at 6:18 pm

    Hello! What temperature should the water be? Thank you.

    Loading...
    Reply
    • Kayla says

      February 4, 2026 at 6:19 pm

      Room temp is great. If you want to speed up the proof time use warm water.

      Loading...
      Reply

Trackbacks

  1. Homemade Butter - The Farmstyle says:
    June 4, 2024 at 8:28 am

    […] No Knead Artisan Bread […]

    Loading...
    Reply

Leave a ReplyCancel reply

Next Post >

Soft and Fluffy Sandwich Bread

Primary Sidebar

Meet Kayla

Meet Kayla
hello!

LIVING OURFARM(LIFE)STYLE WHERE WE ​JUGGLE THE CHAOS OF MOTHERHOOD ONE ​KITCHEN ADVENTURE AT A TIME!

Read More

Connect

join the list

Categories

  • Blog
  • Recipes

Follow Along

@thefarmstyle


Tomato season is officially underway 🍅🌱

I finally
Tomato season is officially underway 🍅🌱

I finally got all of my tomato plants in the ground and filled the beds in with some of my favorite companion plants too! Not only do they help maximize space, but they also help attract pollinators, improve soil health, and keep pests away naturally. 

This year I’m planting:
✨ Basil – helps improve flavor + keeps pests away
✨ Marigolds – a garden must for pest control
✨ Onions – great companions for tomatoes
✨ Zinnias - not only are they pretty to look at, but they are great for attracting pollinators 

One of my favorite gardening tips is to never leave bare soil if you can help it. Filling in around your tomatoes makes the garden more productive AND prettier. 

Also, something I didn’t talk about is mulching my plants. I use grass clippings BEFORE my husband has done any kind of spraying on the lawn. This helps with moisture retention and controlling weeds! 

Now we wait for those summer tomato sandwiches 🍅

#garden #kitchengarden #kitchengardening #thefarmstyle


#ad | These Cowboy Burgers are a MUST this grillin
#ad | These Cowboy Burgers are a MUST this grilling season, and the ground beef I grabbed from my local @KrogerCo Family of Stores made them perfect for feeding a crowd.

Juicy, smoky, loaded with all the good stuff… aka the kind of burger that disappears the second it hits the table.

Save this for your next summertime cookout + drop “BURGER” 🍔  if you can’t wait to make these!

#KrogerPartner


Comment BBQ for all the recipe details.

This BBQ
Comment BBQ for all the recipe details. 

This BBQ Brisket Pizza with Sourdough Flatbread features smoky leftover brisket, melty cheese, barbecue sauce, and grilled sourdough flatbread for the ultimate @traegergrills pizza recipe.

Let me know, have you ever smoked a brisket?


Comment DINNER for all the recipe details.

(ad)
Comment DINNER for all the recipe details. 

(ad) Send this to your husband as a hint what you want for dinner. 

Simply toss everything into one pan, bake, and you’ve got a cozy, cheesy dinner that feels special without the stress

Made with @pomiusa chopped + strained tomatoes (the easiest way to get that rich, homemade flavor), tender chicken, and the BEST crispy, cheesy topping
Minimal effort with maximum flavor. Save this for sunday + tag your husband so he doesn’t miss the assignment.


Comment CHICKEN for full recipe details.

This ch
Comment CHICKEN for full recipe details. 

This chicken bacon ranch skillet is an easy go to dinner that my entire family loves! I love to cook it on my @blackstoneproducts griddle, but it can also be done in a skillet on the stove (you’ll just need to cook in batches). 

Let me know in the comments if you are ready for all of the outdoor cooking recipes for summer!


Comment COFFEE for all the recipes.

These coffee
Comment COFFEE for all the recipes. 

These coffees are worth it! But thankfully I’m not paying $7 for them at home! 

Which one are you making first?


Footer

On the Blog

  • Blog
  • Recipes

Info

  • About
  • Disclosure, Privacy Policy, and Terms

Copyright © 2026 · Theme by 17th Avenue

%d

    Rate This Recipe

    Your vote:


    A rating is required
    A name is required
    An email is required
    We use cookies to ensure that we give you the best experience on our website. If you continue to use this site we will assume that you are happy with it.