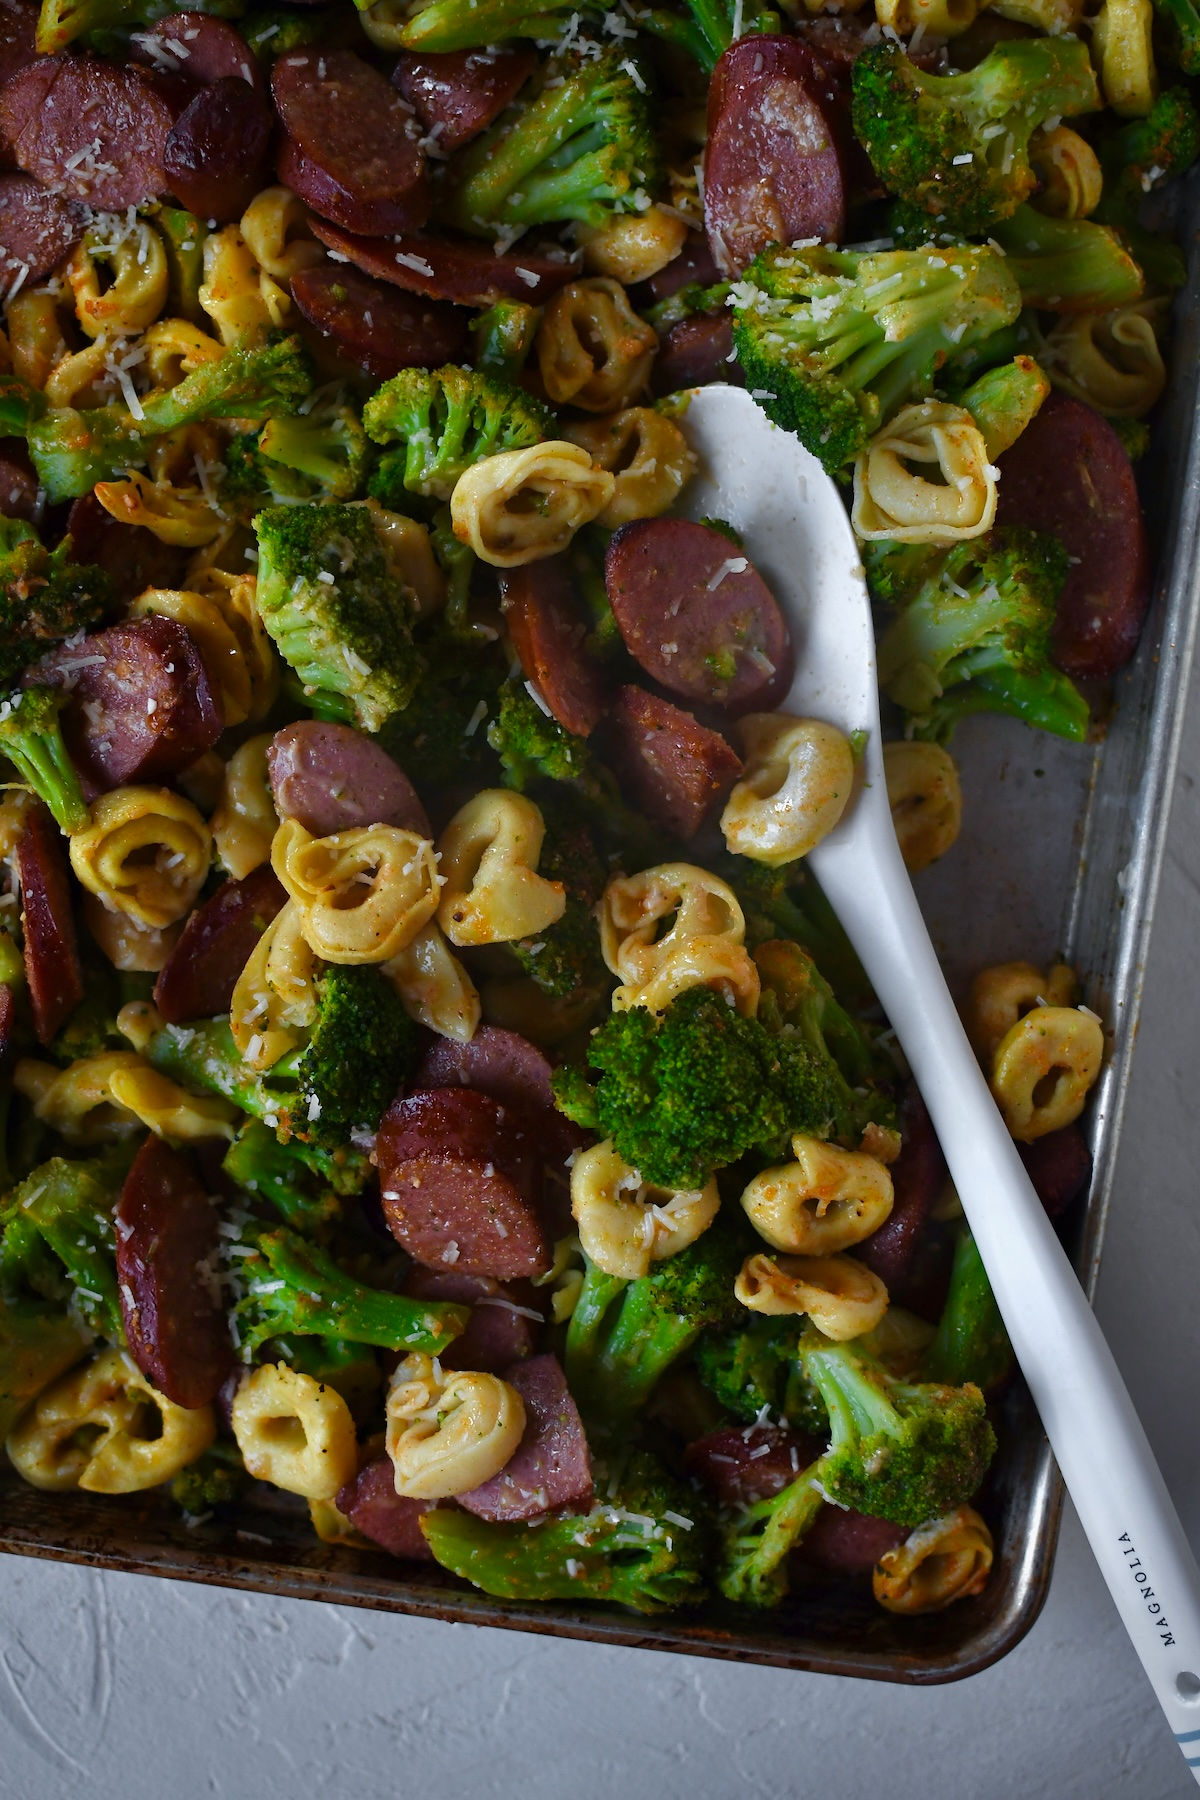
Easy Sheet Pan Kielbasa and Tortellini Dinner
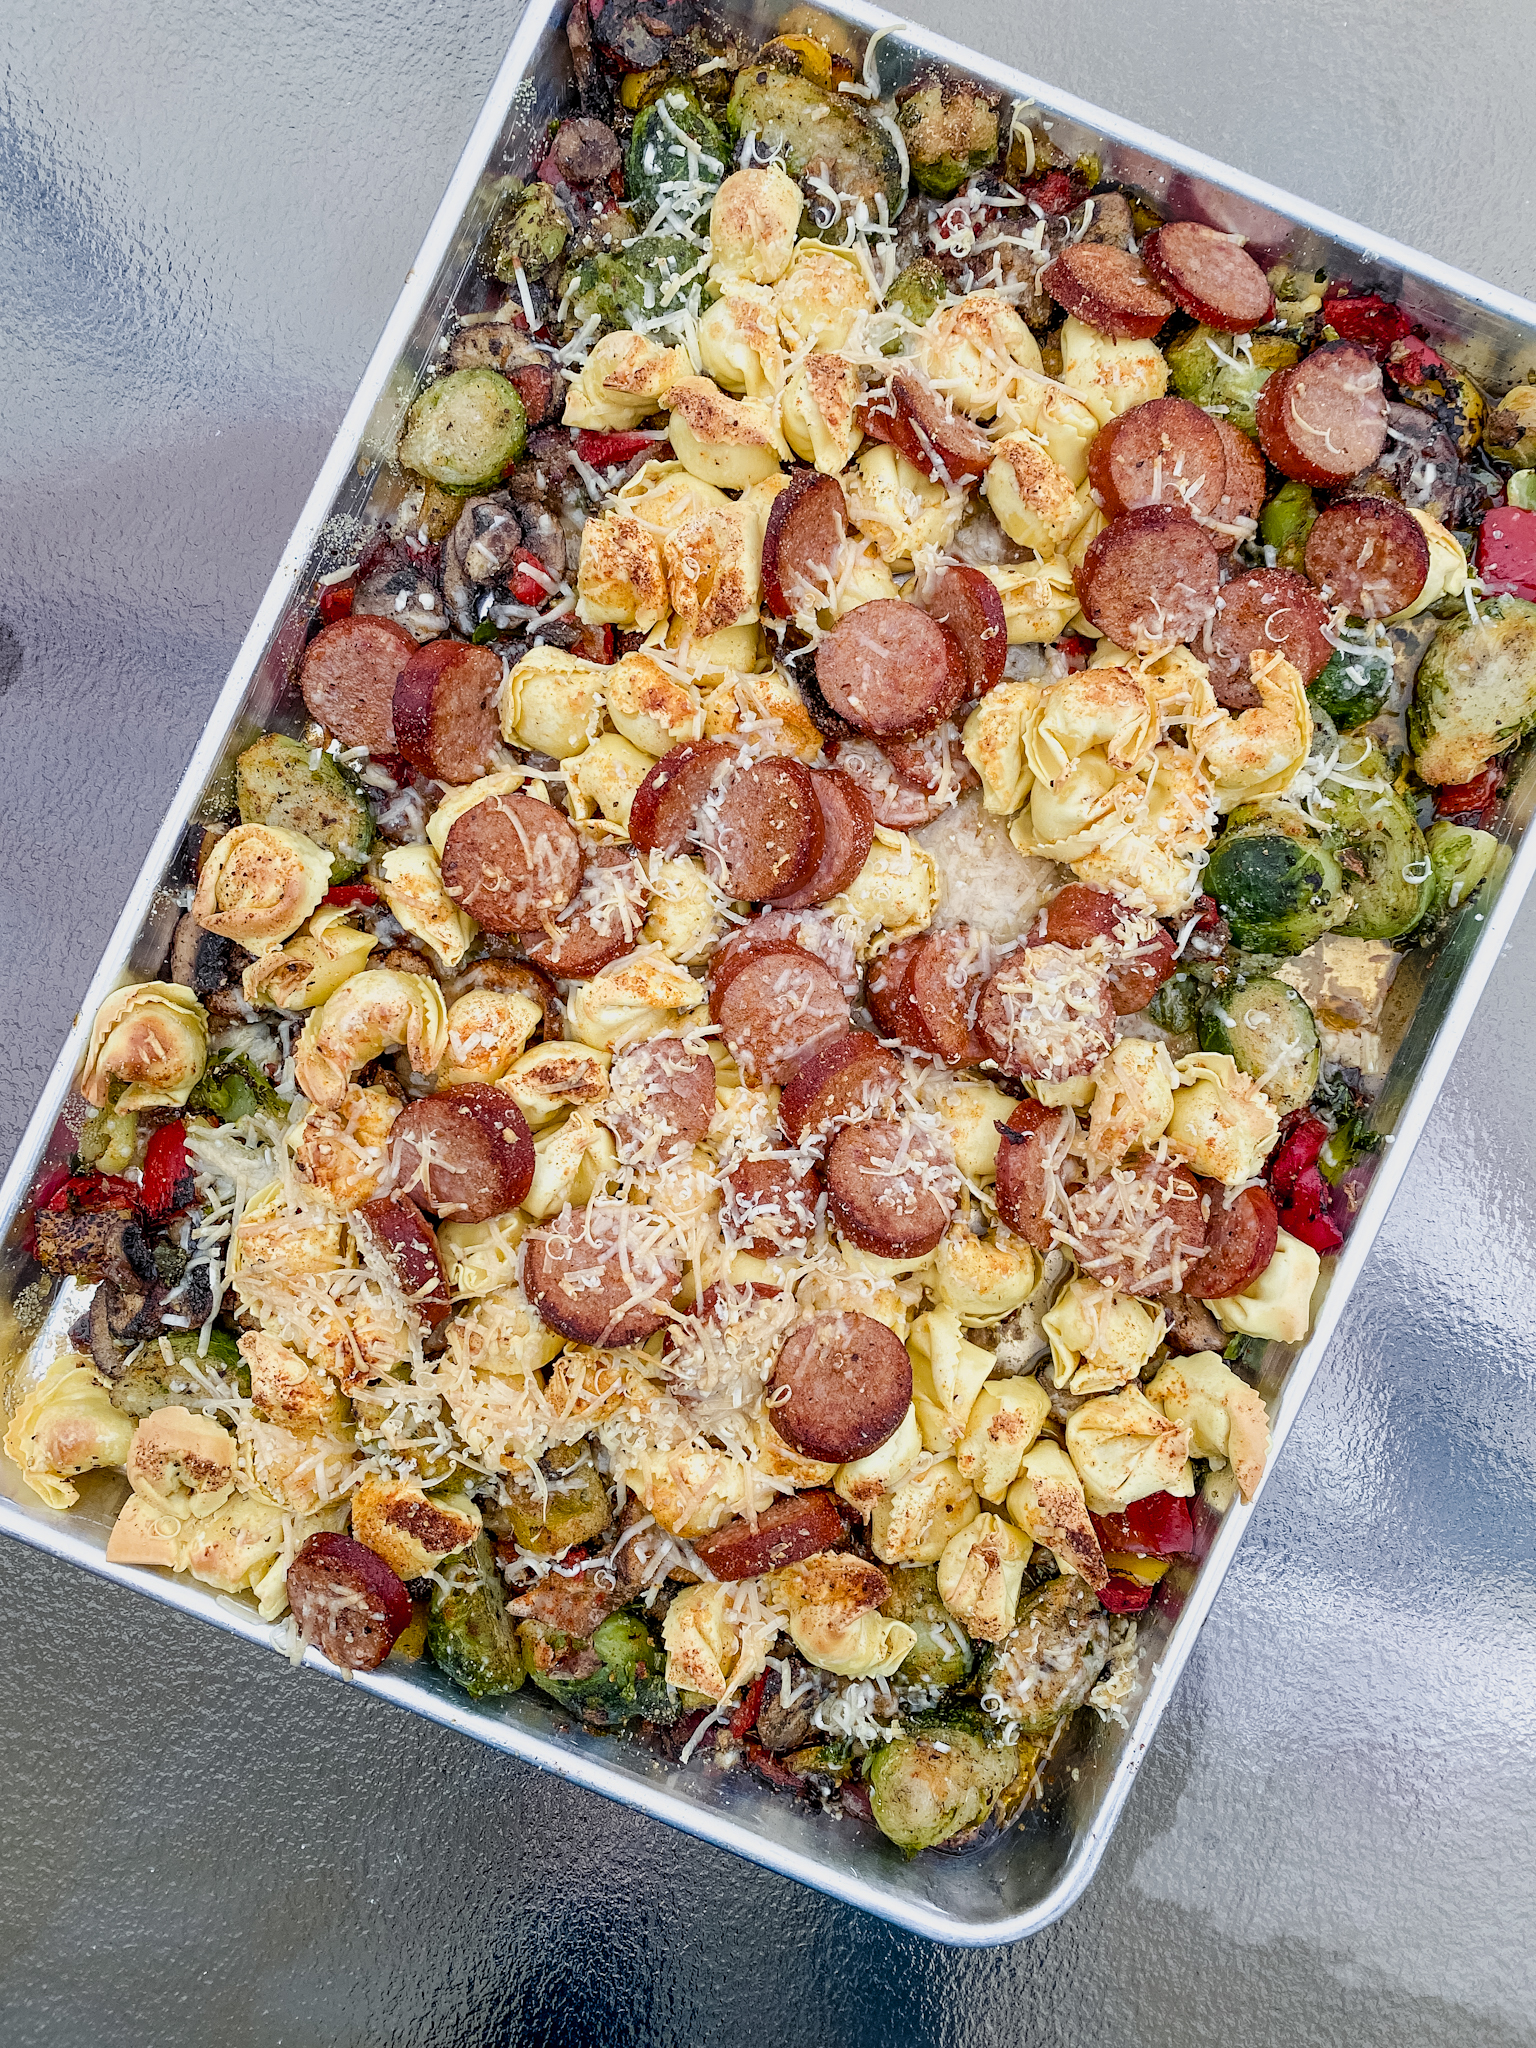
Sheet pan tortellini with kielbasa is the answer to those nights when you need dinner on the table fast but you still want something that feels homemade. We're talking cheesy pasta, smoky kielbasa, and tender veggies all roasted together on one pan. No fuss, no stress, and barely any cleanup. Anybody else?!
I love that I can toss everything on a pan, slide it in the oven, and have dinner ready in 30 minutes without thinking too hard about it. If you love easy dinners like this one, my Sheet Pan Greek Chicken Dinner is already a reader favorite - and it's proof that simple really can be delicious!
Recipe Overview: Mixed Berry Cobbler on the Traeger
⏱ Prep Time: 5 minutes
⏳ Total Time: 25 minutes
👥 Serving: 8 servings
🔥 Calories: ~690 kcal per serving
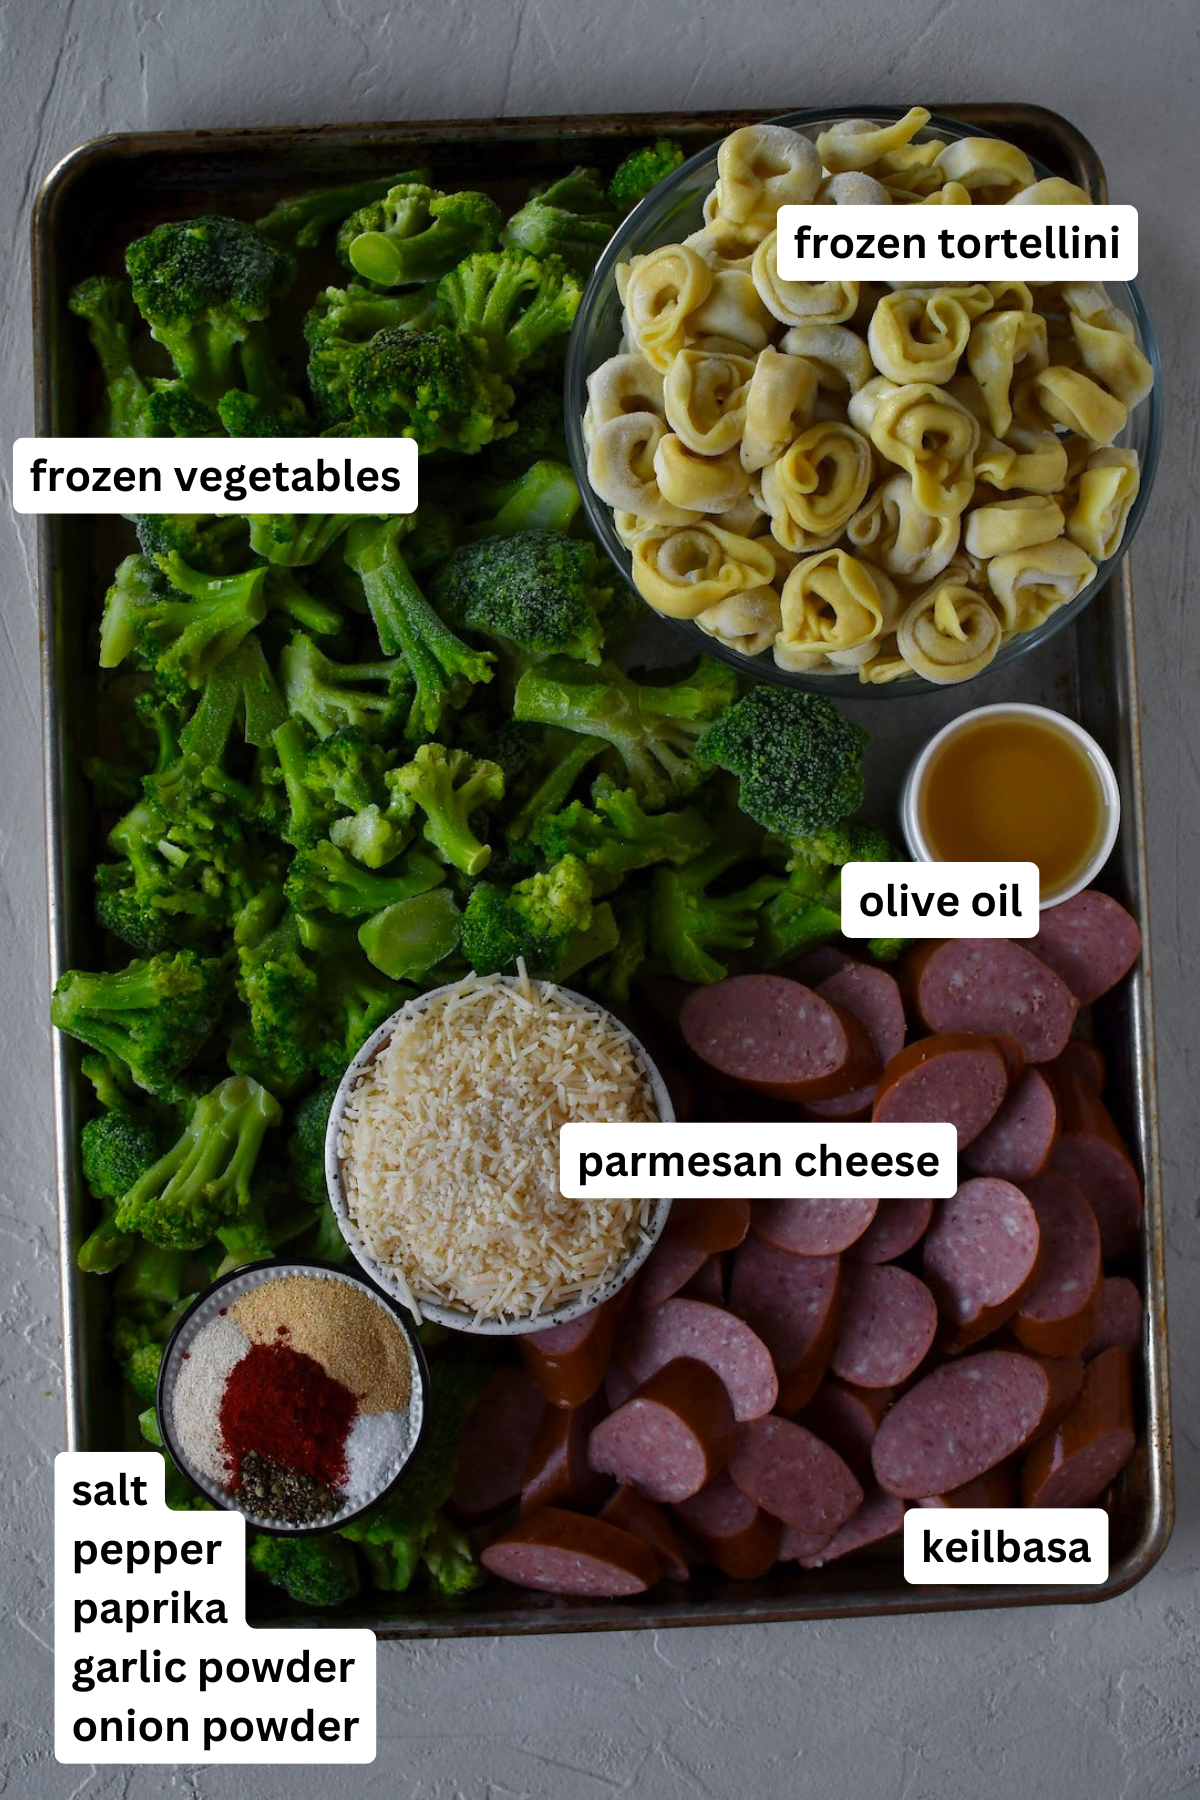
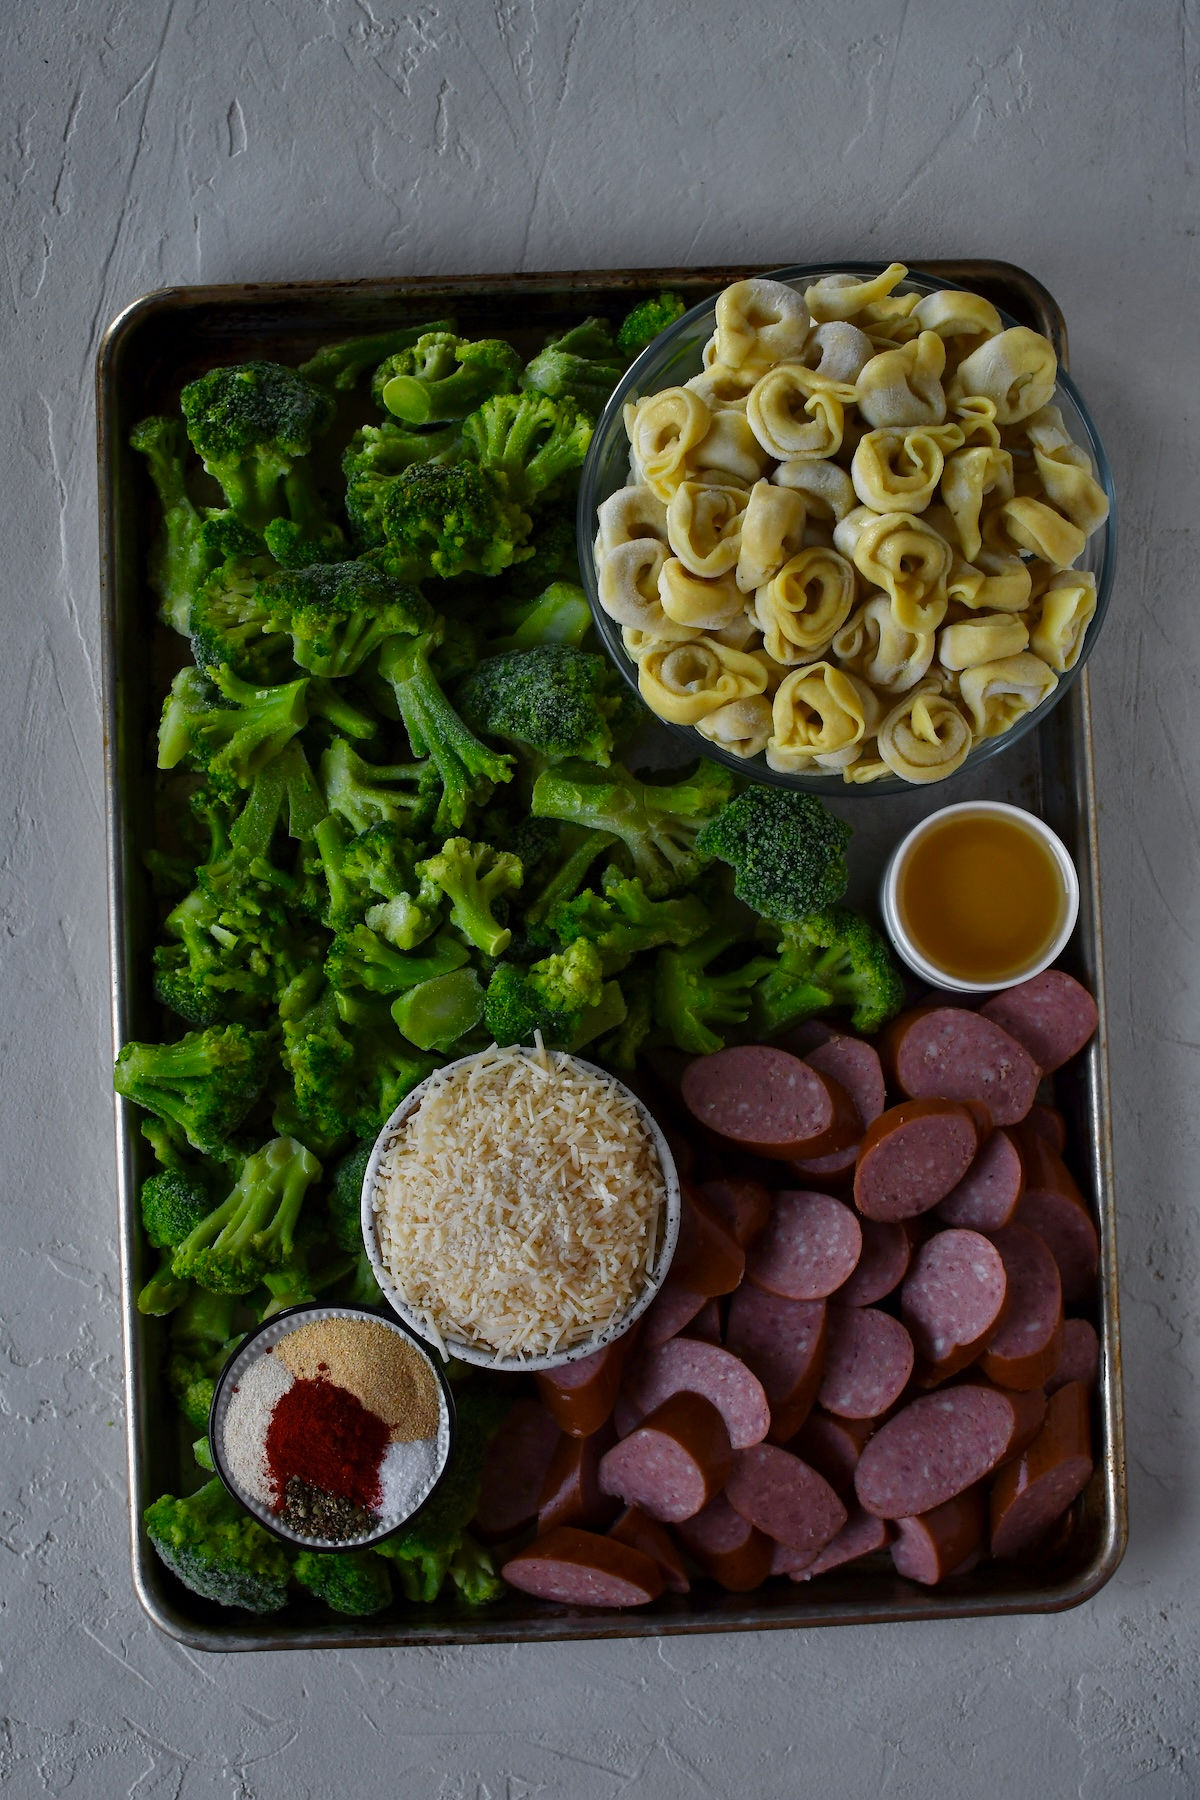
🥣 Main Ingredients: Kielbasa, cheese tortellini, frozen vegetables, parmesan cheese, olive oil, seasonings.
👌 Difficulty: Easy - dump everything on a sheet pan and let the oven do the work
⭐ Why You'll Love It: This sheet pan tortellini and kielbasa is the ultimate busy weeknight dinner. Smoky kielbasa, cheesy tortellini, and roasted vegetables come together on a single pan for a hearty meal that's ready in just 30 minutes with almost no prep and minimal cleanup. It's family-friendly, budget-friendly, and perfect for those nights when you need dinner on the table fast.
Summarize and Save this Content On
Table of Contents
Around here, the easier the dinner the better, especially mid-week when everyone is running in a hundred different directions. This one has become a go-to because I almost always have these ingredients on hand and it comes together with barely any effort. The kielbasa gets these caramelized, slightly crispy edges and the parmesan melts down into everything and it is just SO good. My Cowboy Casserole gives me the same "everyone cleaned their plate" energy if you want another easy one to add to the list!
key ingredients
You only need a handful of simple ingredients for this one. Here are a few worth noting:
Kielbasa - Pre-cooked and sliced, it goes straight on the pan. The heat caramelizes the edges and adds so much smoky flavor to the whole dish.
Frozen tortellini - This is the shortcut that makes everything so easy. No boiling required when you use frozen! If you have fresh or boxed tortellini on hand, just boil it according to the package first, then add it to the pan.
Frozen vegetables - A bag of broccoli or a sheet pan veggie mix both work great here. They roast right alongside everything else and come out tender with slightly crispy edges. So good!
Seasonings - Garlic powder, onion powder, paprika, salt, and pepper. Simple pantry staples that make everything taste amazing together.
Parmesan cheese - Sprinkle it right on top before it goes in the oven. It gets a little golden and nutty as it bakes. Yes please!
How to Make Sheet Pan Tortellini and Kielbasa
Step 1: Preheat your oven to 350 degrees.
If using boxed or fresh tortellini, boil it according to the package directions first. Then add it to the sheet pan after it is done cooking.
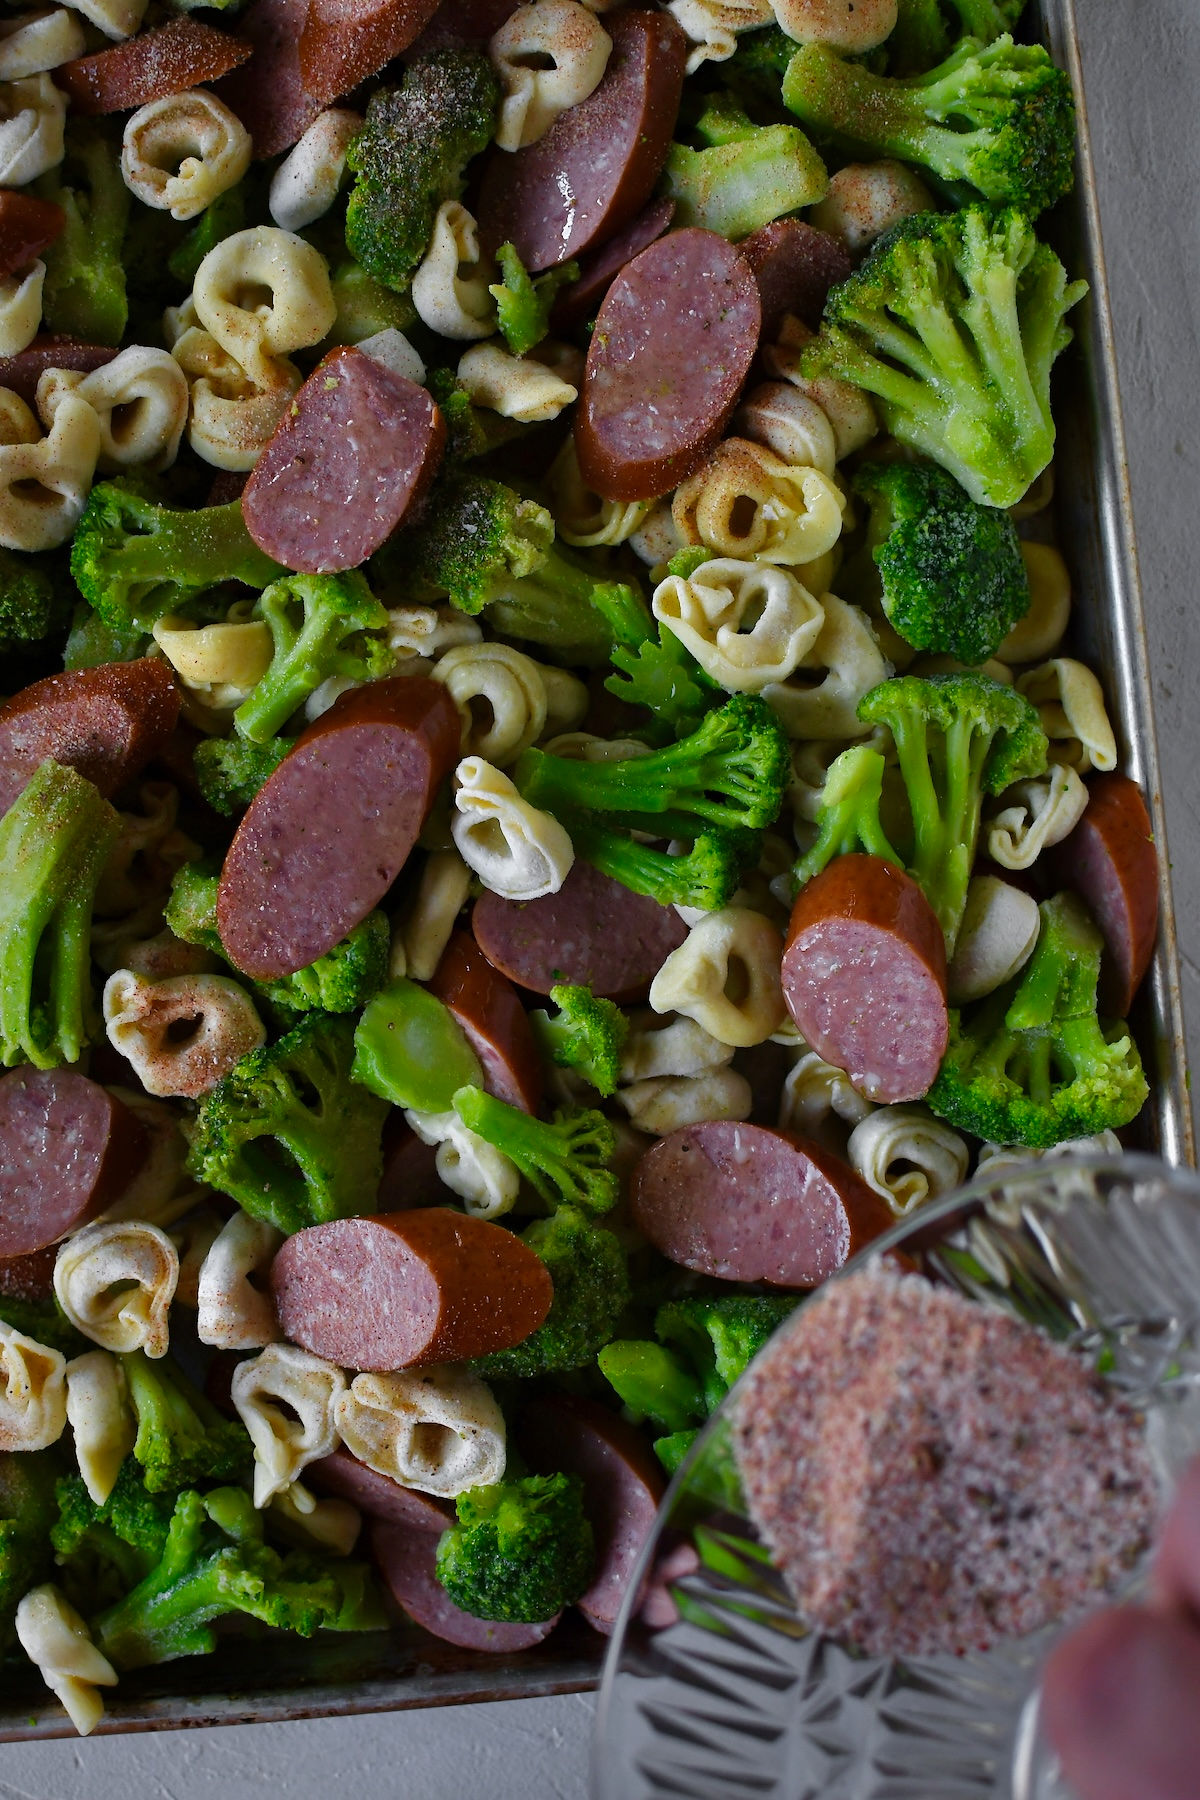
Step 2: Add the sliced kielbasa, frozen tortellini, and frozen vegetables to a large sheet pan.
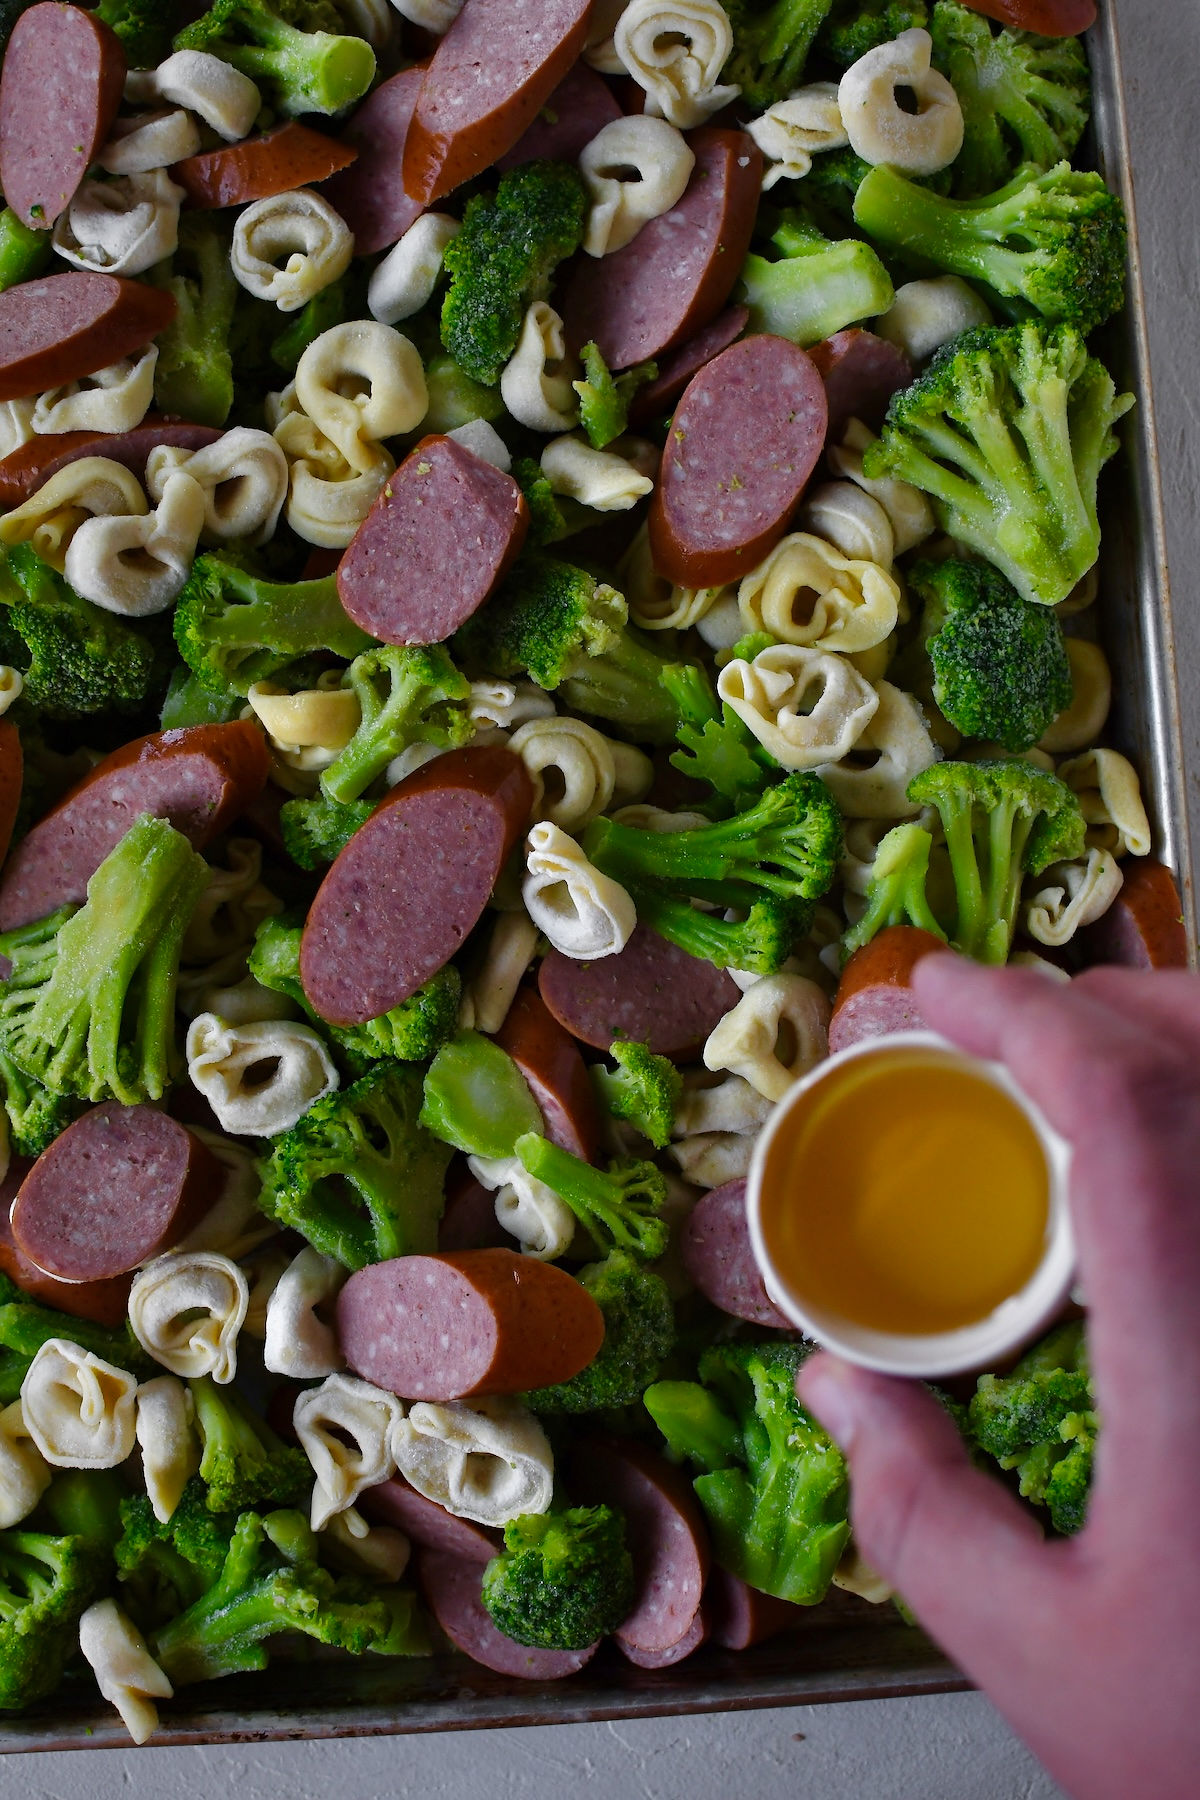
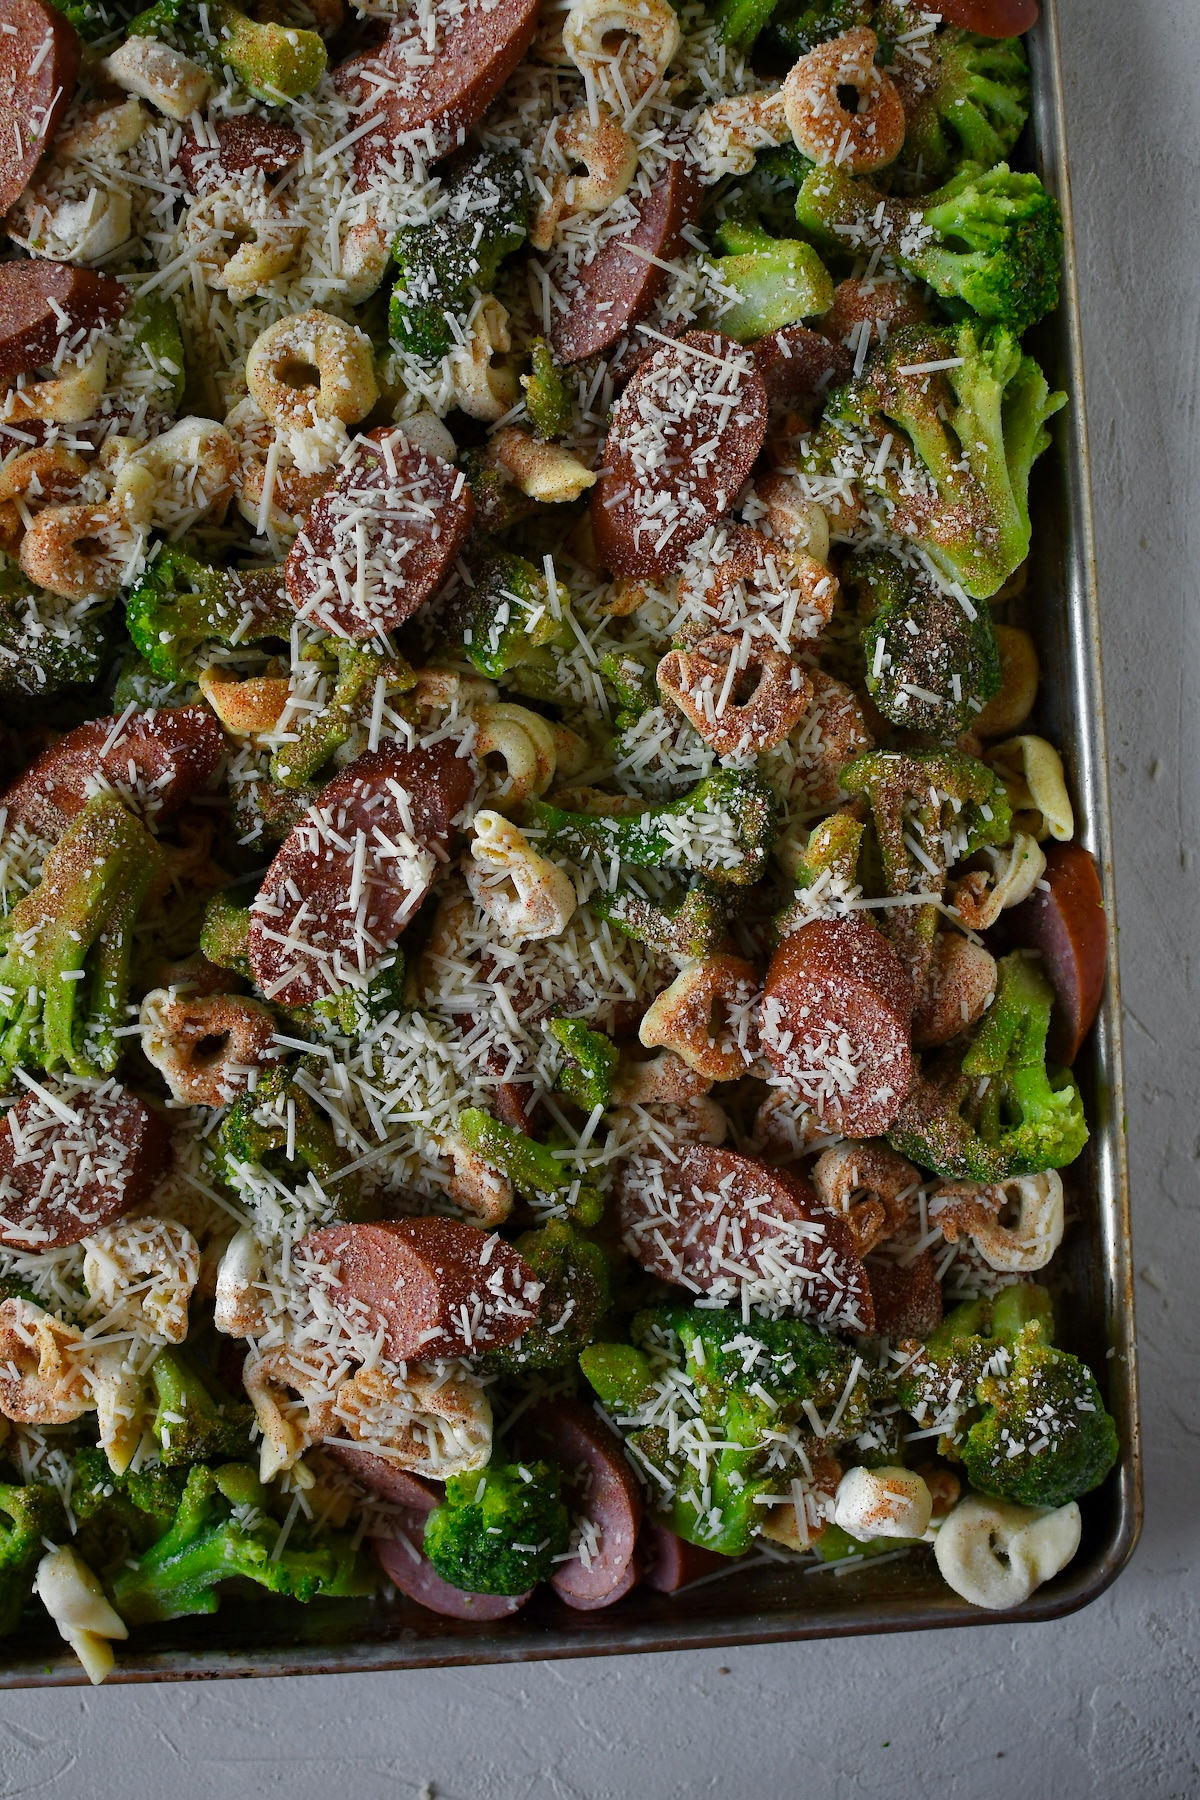
Step 3: Drizzle everything with oil and sprinkle on the garlic powder, onion powder, paprika, salt, and pepper.
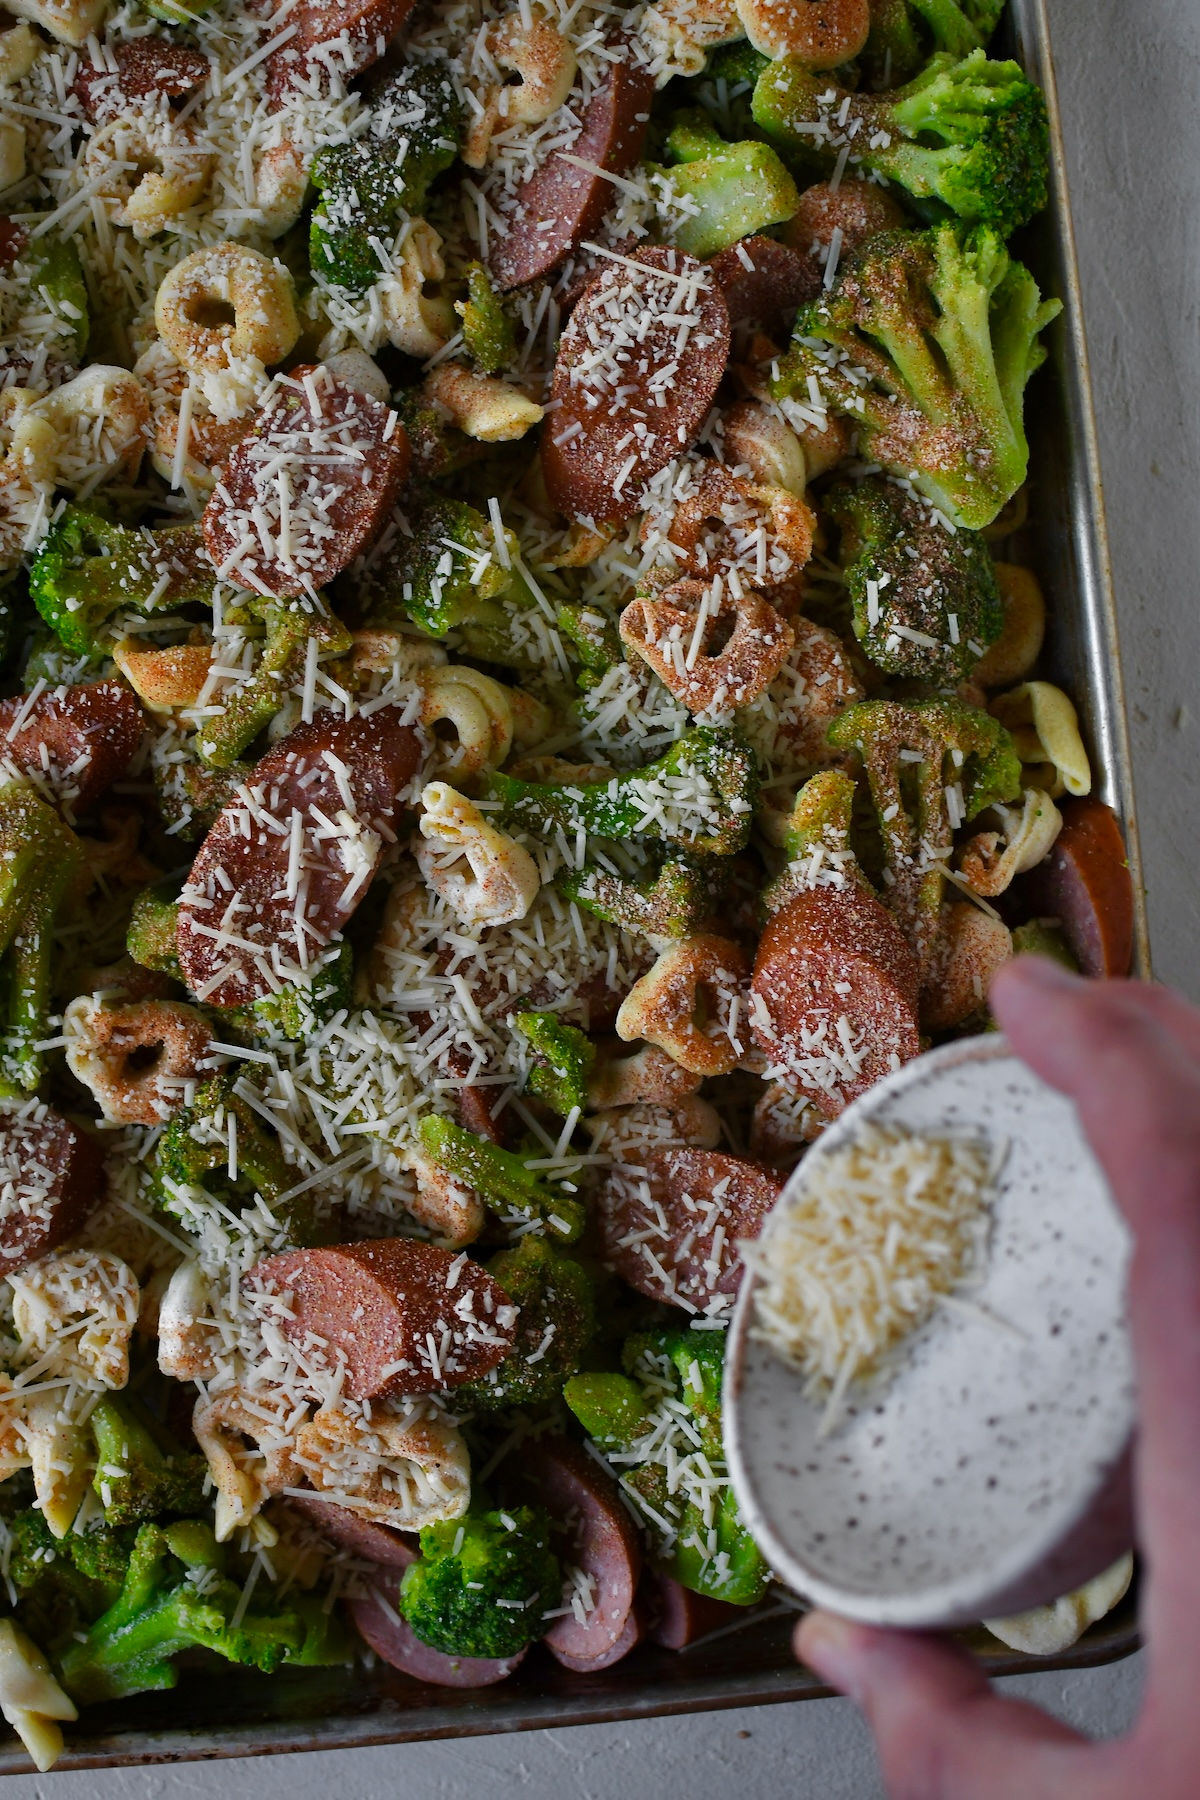
Step 4: Top with shredded parmesan cheese.
Step 5: Bake for 25-30 minutes, stirring every 10 minutes so everything cooks evenly.
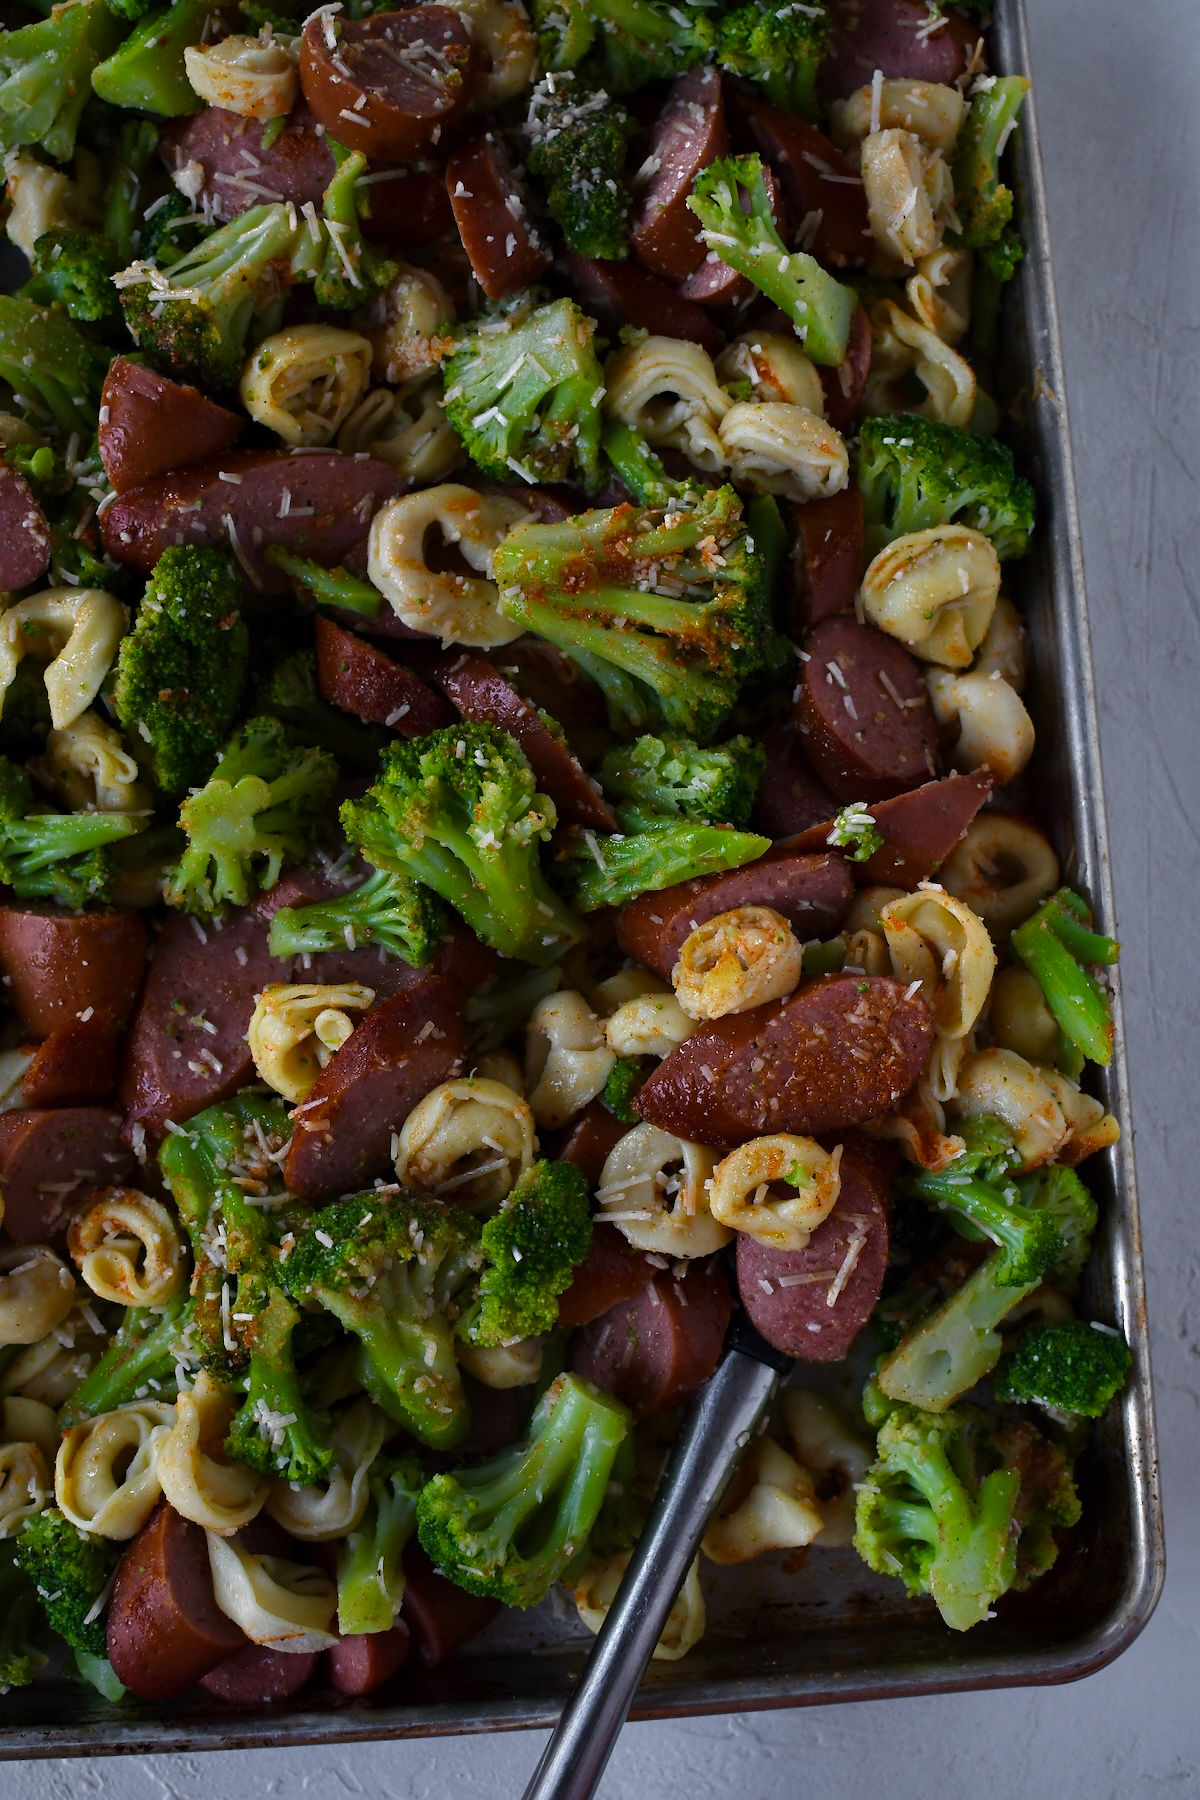
Step 6: Remove from the oven and enjoy!
That is seriously it. Five minutes of prep and the oven handles the rest. My kind of dinner!
Tips for the Best Sheet Pan Tortellini
Use a frozen tortellini. Frozen makes sure that the pasta doesn't brown too fast in the oven. If you only have fresh or boxed prepared per the box instruction and add to the sheet pan at the end.
Use a large sheet pan. You want everything spread out in a single layer so it roasts instead of steams. Crowding the pan is the one thing that will make this less crispy and delicious, so if you need to, use two pans.
Stir every 10 minutes. I know it feels like a small thing but it really makes a difference. It keeps the tortellini from sticking and helps everything get evenly coated in all those good seasonings.
Do not skip the parmesan. It melts down into the pasta and veggies and adds this salty, nutty flavor that really ties the whole dish together.
Customize your veggies. A broccoli bag is my go-to, but a frozen sheet pan mix with peppers, onions, and zucchini is amazing in this too. Use whatever your family will actually eat! My Sheet Pan Greek Chicken uses a similar roasted veggie approach and is a great one to try next if you love mixing it up.
Sheet Pan Tortellini FAQs
Yes! Just boil it according to the package directions before adding it to the sheet pan. Fresh tortellini cooks faster and can get mushy if you skip that step.
Frozen broccoli is my favorite, but a sheet pan vegetable mix with peppers, zucchini, and onions works really well too. Just about any frozen veggie you love will work here.
Absolutely! Smoked sausage or even Italian sausage would be delicious. I do the same swap in my creamy sausage and gnocchi skillet when I want to switch things up.
Storage Tips
Leftovers store great in an airtight container in the fridge for up to 3-4 days. To reheat, I recommend tossing it back in the oven at 350 for about 10 minutes or in the air fryer for a few minutes so the tortellini gets crispy again. The microwave works in a pinch but the texture will be softer.
You can also freeze leftovers in a freezer-safe container for up to 2 months. Thaw overnight in the fridge and reheat in the oven.
Looking for more easy weeknight dinner recipes to add to your rotation? I have got you covered!
Serve this with the follow:

If you tried this Sheet Pan Tortellini and Kielbasa or any other recipe on my blog, please leave a 🌟 star rating and let me know how it went in the comments below. I love hearing from you!
📖 Recipe
Easy Sheet Pan Tortellini and Kielbasa
Ingredients
Instructions
- If using boxed or fresh tortellini instead of frozen, boil according to package prior. Then add to sheet pan after it is done cooking.
- While the tortellini is boiling, place all ingredients on a sheet pan.
- Place all ingredients on a sheet pan, drizzle with oil and sprinkle with seasoning and parmesan cheese.
- Bake at 350 for 25-30 min, stirring mixture every 10 minutes.
- Enjoy


Love this! Family devoured this flavor packed meal!
My family loved the sheet pan kielbasa. I love that it was easy to throw together after work
14 ounce or 28 ounce for kielbasa? In your instagram post is says 14 ounces and here is says 28 ounces!
The first time I made it with 14 oz, but I wished that there was more protein in the dish so I added a second package of kielbasa.
Can I use refrigerated tortellini instead of frozen?
If using refrigerated I would add it to the sheet pan later. Maybe the last 5 minutes to prevent it from getting too toasty.
I recommend boiling it according to the refrigerated tortellini package instructions and then adding during the last 5 minutes
Hi there! Would you mind adding a note to the recipe card to cook the boxed, not frozen, tortellini before adding it to the recipe? I didn’t see that up in the post until after I had added it (my own fault) so it could be a helpful addition for others. It still turned out pretty good but I’m sure it would have been even better if I had seen that before I cooked it!
Yes! I will absolutely do that. Thank you for that feedback!
Made this tonight for my family. Super easy to prep. Tortellini wasnt cooked through so I ended up having to boil some tortellini. I didn't know I was supposed to give it a toss or stir halfway through until I watched the IG reel.
So sorry I didn’t include that in the written instructions. I’ll get that updates.
A few have sort of asked this already but what changes would I need to make if I use fresh veggies and tortellini instead of frozen? Do I need to cook separately and add later? Takes away from the ease of the dish but will do it if needed! Thanks -
Yes you can use fresh veggies and fresh tortellini. I would boil the tortellini separate and then shorten the bake time. The steam from the frozen veggies helps to keep the tortellini from getting too crunchy.
Such a simple, yet delicious dinner! Already becoming a family favorite even for picky toddlers!
Yay! So glad your family loves it as much as ours!
I know this is an older post but hoping for a reply. What frozen vegetable combination did you use? I’ve bought frozen tortellini already but debating on using fresh vegetables instead of frozen tho not sure how that would turn out
I love to use frozen broccoli or I will use Pura Vide Fire Roasted Vegetables. I get a big bag from Costco.