• About
  • Nav Social Icons

  • Skip to primary navigation
  • Skip to main content
  • Skip to primary sidebar
  • Skip to footer
  • Home
  • About
  • Blog
    • Mom Life
    • Farm Life
    • Recipes
      • Breakfast
      • Dessert
      • Dinner
      • Sides
      • Snacks
  • Shop
    • Shop – Digital Books
  • Cart
  • My account
  • Mobile Menu Widgets

    Connect

    Search

The Farmstyle

The Farmstyle

by Kayla Zenner

  • Home
  • About
  • Shop
    • Shop – Meal Plans
    • Shop My Favorites
  • Blog
    • Breakfast
    • Dessert
    • Dinner
    • Snacks
    • Sides
    • All Recipes
  • Cart

Bagel Bread | Breakfast Ideas

September 23, 2022 · In: Breakfast, Recipes

FacebookTweetPin
Jump to Recipe Print Recipe

This bagel bread gives all the feels of a bagel, but without the work of shaping the bagel.

bagel bread with everything but the bagel seasoning

I LOVE bagels so so much, I also love bread, so combining the two into bagel bread was a no brainer. There is something about the the chewy center of a bagel, but if I’m being honest I hated the process of shaping each individual bagel and then taking the time to boil each one. It was just time consuming.

So, as I was making my award winning sandwich loaf (I’m not kidding I actually one top loaf in the county fair), I thought why can’t I make my bagels into a loaf? So, I decided to give it a try! And guess what, it worked! I used the exact same recipe that I would for normal bagels, but after the first rise instead of shaping into 6 bagels, I shaped it into one loaf. (P.S. I love this loaf pan, it is wider than other loaf pans that I have found)

The key to chewy interior of a bagel is to boil it for a few minutes, so I couldn’t forget to do that. So I plopped the entire loaf into a pot of boiling water and let it boil on each side for a few minutes before putting it back into the loaf pan to bake. If the loaf gets a little bumpy while boiling, don’t worry it should all smooth out once it bakes!

I can’t wait for you to give the bagel bread a try! I think it is going to be in the rotation around here a lot more often than regular bagels, just because it is a little easier to make! Want more breakfast ideas? Check out my Breakfast Cookie or Savory Breakfast Monkey Bread recipes for more inspiration.

Bagel Bread

No ratings yet
This bagel bread gives all the feels of a bagel, but without the work of shaping the bagel.
Print Recipe Pin Recipe
Prep Time:2 hours hrs 30 minutes mins
Cook Time:45 minutes mins
Course: Breakfast
Keyword: bread
Servings: 1 loaf

Ingredients

  • 1 tsp sugar
  • 1 tsp yeast
  • 3 cups bread flour
  • 1 – 1 1/2 cup water
  • 1 tsp salt
  • everything but the bagel seasoning
US Customary – Metric

Instructions

  • In a small bowl combine sugar, yeast, and about 1/4 cup water. Set aside until foamy. .
  • In a large mixing bowl add bread flour and salt. Add in yeast mixture and about 1 cup of water. Mix together, slowly adding in more water as needed to get everything to form a dough.
  • Knead the dough for 8-10 minutes. You can either do this by hand or with the stand mixer.
  • After kneading, place the dough back into the bowl, cover with plastic wrap, and let rise for approximately an hour.
  • Punch down the dough and form into a loaf shape. Place into a loaf pan to rise for another 30 minutes.
  • Preheat the oven to 350.
  • Towards the end of the second rise bring a pan of water to a boil. The pan needs to be large enough to place the entire loaf into.
  • Gently pull the loaf out of the pan and place into the boiling water. Allow to boil on the first side for about 3 minutes, flip and boil for another 3 minutes.
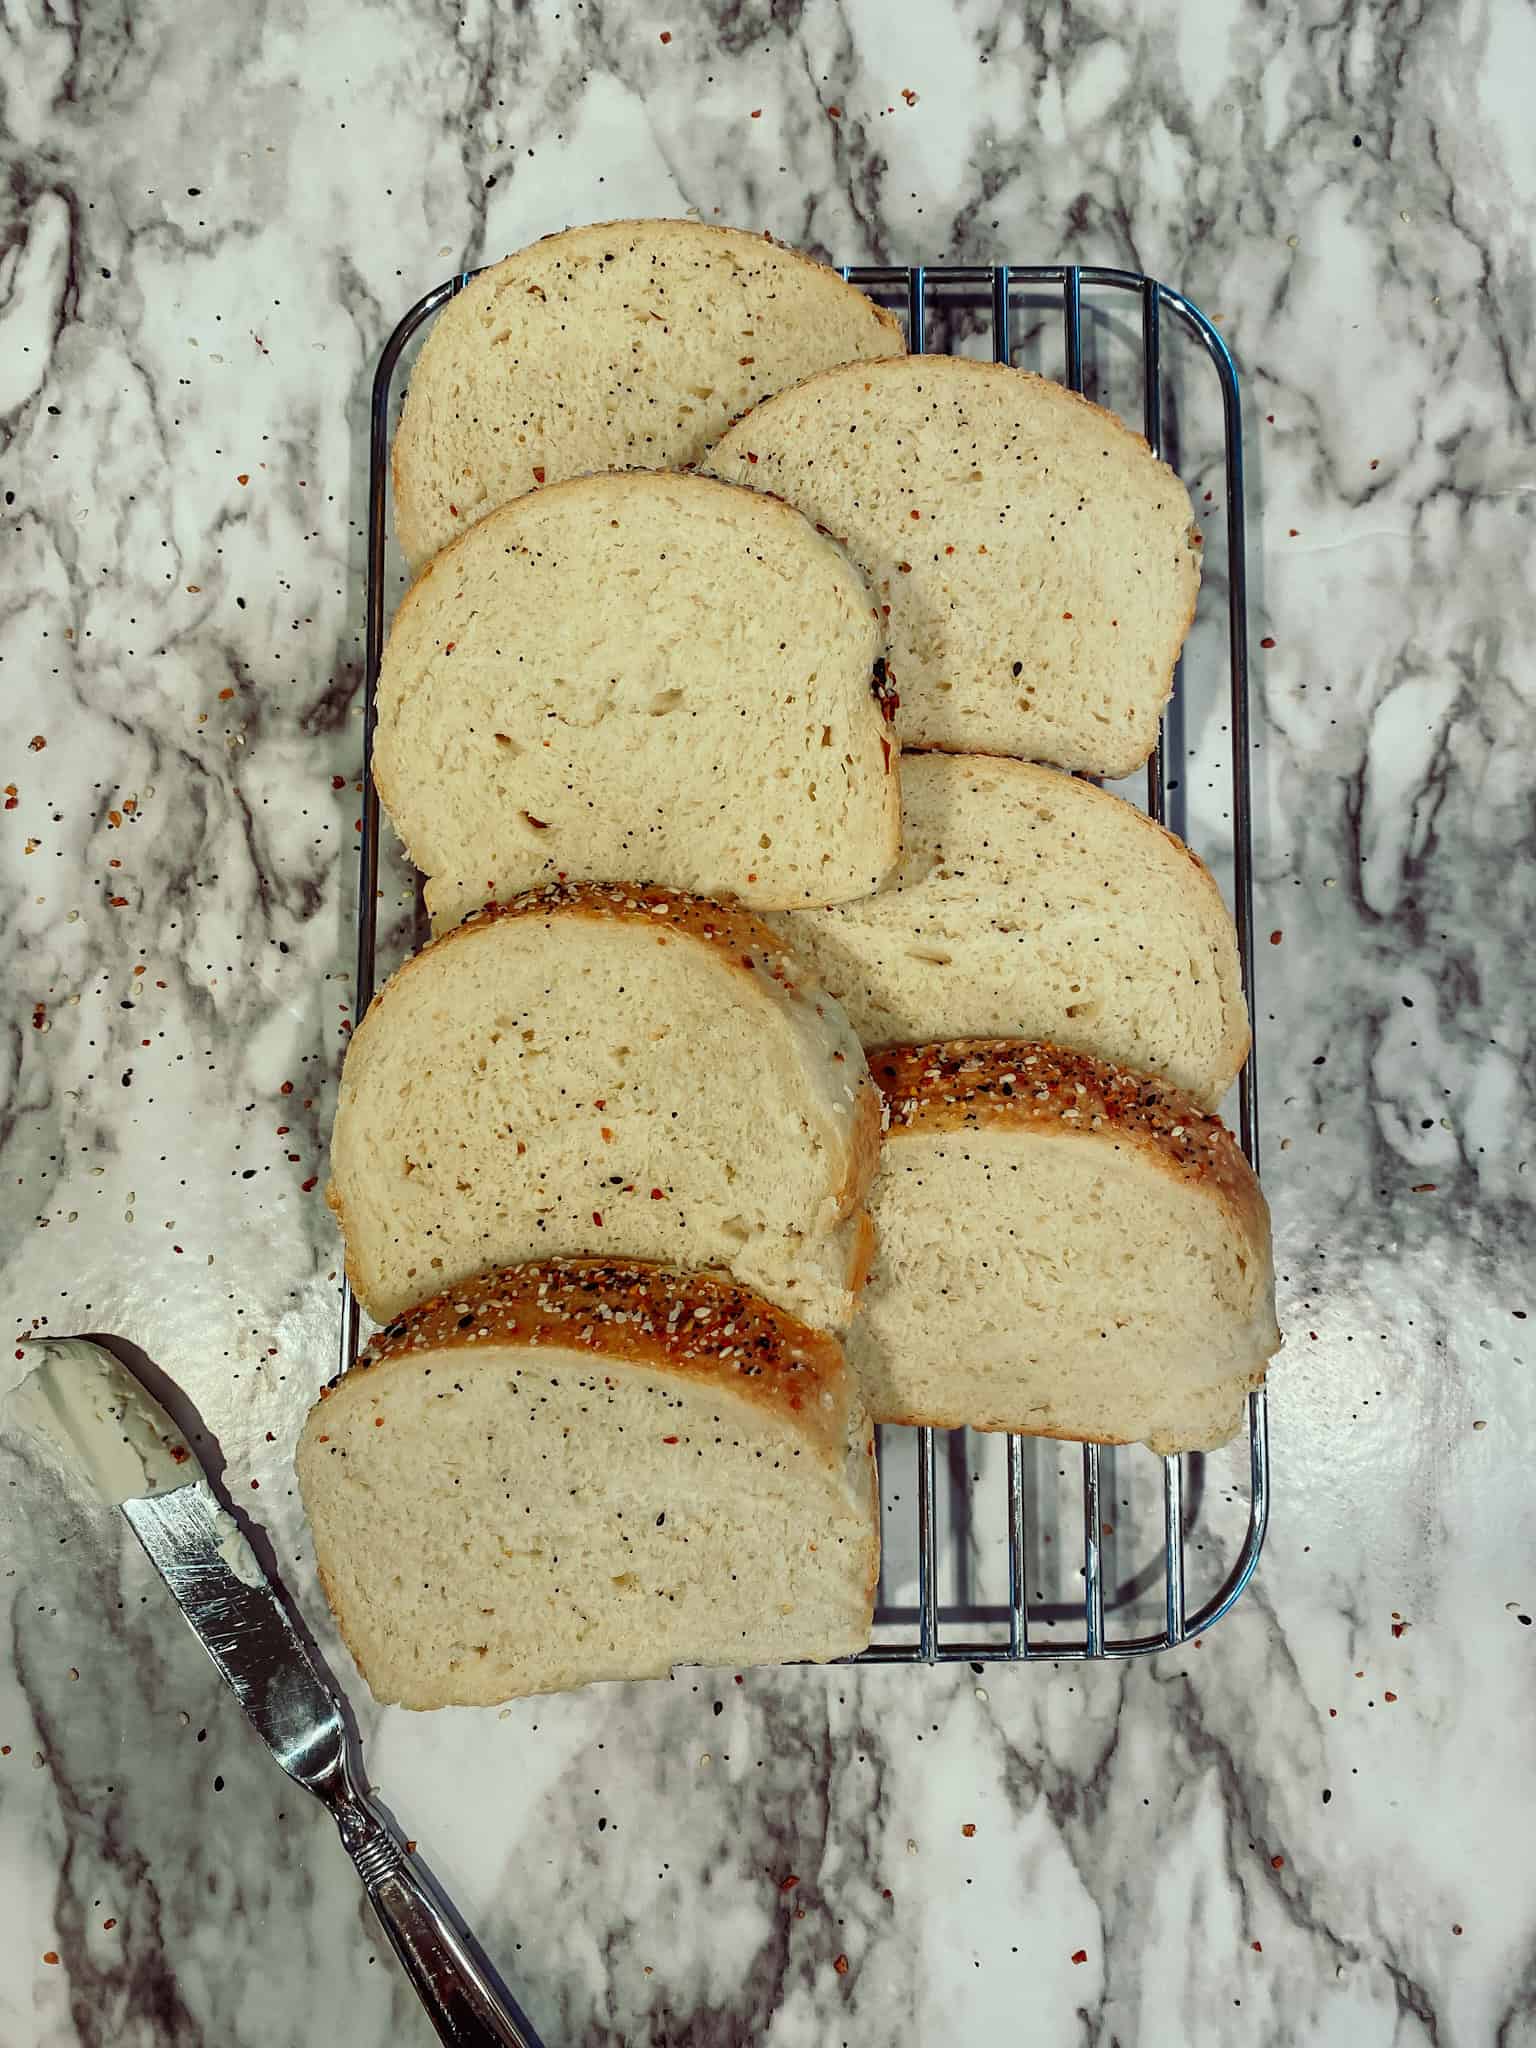
  • Place the loaf back into the loaf pan, sprinkle with everything seasoning and bake for 40-45 minutes. Once the removed from the over remove the loaf from the pan and place on a cooking rack. This helps prevent the bottom of the loaf getting soggy.
  • Wait for the loaf to cool at least 30 minutes prior to slicing (but if you really can’t wait it’s not the end of the world).

Share this:

  • Click to share on X (Opens in new window) X
  • Click to share on Facebook (Opens in new window) Facebook
  • Click to share on Pinterest (Opens in new window) Pinterest

Like this:

Like Loading...
FacebookTweetPin

By: Kayla · In: Breakfast, Recipes · Tagged: breakfast

About Kayla

Hi! I'm Kayla. I'm here to help inspire busy moms to get back in the kitchen and feel beautiful along the way! I'm married to my high school sweetheart and live on a farm with our two busy boys.

you’ll also love

Ham and Cheese Croissant Bake
No Yeast Lemon Blueberry Donut Holes
Overnight Blueberry French Toast Casserole

Reader Interactions

Leave a ReplyCancel reply

Next Post >

Savory Breakfast Monkey Bread

Primary Sidebar

Meet Kayla

Meet Kayla
hello!

LIVING OURFARM(LIFE)STYLE WHERE WE ​JUGGLE THE CHAOS OF MOTHERHOOD ONE ​KITCHEN ADVENTURE AT A TIME!

Read More

Connect

join the list

Categories

  • Blog
  • Recipes

Follow Along

@thefarmstyle


Help me get to my big goal before 2026.


Comment RECIPE for all the details sent to your in
Comment RECIPE for all the details sent to your inbox. 

These Individual Chicken Pot Pies are the ultimate cozy comfort food with a flaky homemade pie crust, creamy chicken filling, and perfectly portioned for easy serving.

Ingredients
Chicken Pot Pie Filling
3 cups rotisserie chicken shredded
1 onion diced
1/2 cup carrots diced
4 tbsp butter
1/4 cup flour
1/4 cup heavy cream
2 cups chicken broth
1 tsp onion powder
1 tsp garlic powder
1/2 tsp rosemary
Pie Crust
2 cups butter cold
4 cups all purpose flour
2 tsp salt
1/4 cup ice cold water

Instructions
Preheat oven to 425 F.

Make the Pie Crust
In a large bowl add cubed butter, salt and flour. Using a pastry cutter or two knives cut together the flour and butte until it resembles crumbly flour.
Slowly add in the ice cold water until the dough starts to come together. Once the dough starts to come together pour onto a counter and use your hands to combine the dough.
Split the dough in 12 section and place onto a floured surface and roll out half the pie crusts to fit your pie pan. If the dough starts to stick to the rolling pin, sprinkle a little flour on top.
Transfer the rolled-out crust to your pie pan, pressing it gently to fit the bottom and sides.

Make the Pot Pie Filling
Melt butter in a cast iron pan and add in onion and carrot. Cook over medium heat until soft. 
Add in flour. Cook for 1-2 minutes.
Add in chicken stock, seasonings, chicken, and heavy cream. Simmer for 5 minutes to thicken sauce. 
Top with biscuits and bake according to biscuit instructions.

Assemble the Pot Pies
Add about 1 cup of filling to each of the prepared pie pans.
Roll out remaining pie crust and place on top of filled pie pans.
Crimp the edges and bake pies for 25-30 minutes, or until crust is golden brown.

Make Ahead Option
After assembling the pit pies, place onto a sheet pan and freeze for 1-2 hours. Wrap each in plastic wrap and freeze for later. 
Bake from frozen at 400F for 45-55 minutes. Covering with foil if the tops brown too fast.


Comment BREAKFAST for all the recipe details.

Th
Comment BREAKFAST for all the recipe details. 

These viral sausage gravy bombs are perfect for Christmas morning! Combining the classic biscuit and gravy into a portable breakfast creation, they are a family favorite!

Ingredients
1 lb ground sausage
1/3 cup flour
2 cups milk
1 Tbsp Roasted Chicken Better than Bouillon
pepper to taste
1 pkg refrigerator biscuits

Instructions
In a large skillet cook the sausage.
Add in flour, stir to coat the sausage and cook for about 2 minutes. Add in milk boulion and pepper. Simmer until thickened.
Roll the biscuits into a small circle, then fill with about 1/4 cup gravy. Pinch up to middle to seal and place seam side down on a baking sheet. Repeat with remaining biscuits.
NOTE: if making these ahead of time you can place these in the refrigerator overnight. Then bake the next morning. 
Bake according to biscuit package.

TIP: I like to double this recipe and freeze the remaining. Pull out what I want the night before to thaw in the fridge, then place in oven on broil for a few minutes to crisp the biscuit up. BECAREFUL not to forget them in the oven and watch carefully.

#christmasbreak #makeaheadbreakfast #biscuitsandgravy


Nothing beats a room full of flour-dusted hands an
Nothing beats a room full of flour-dusted hands and people excited to learn.

Our pie and sugar cookie class with Wendy @thepeacefulhomestead gave 12 students the confidence (and the recipes) to bake treats everyone will be raving about.

These classes are always so much fun and I look forward to it every year.


(ad) A little peek into my everyday life:

School
(ad) A little peek into my everyday life:

School drop-off → recipe testing → editing → errands → cow chores and somewhere in between, I grab a @drinkolipop to keep things moving.

It’s not coffee. It’s not water. It’s just that happy moment in the middle of my day that feels like a treat and supports my wellness goals.

Today’s pick: Ginger Ale

Tomorrow? Who knows — the OLIPOP drawer stays stocked. 😉

Which flavor should I try next?

#OLIPOPpartner #DITL


So excited to get started with my new @breville Ba
So excited to get started with my new @breville Barista Touch! 

Not a perfect shot because I forgot to set the grind size to the correct spot, but stay tuned for tomorrow! 

#breville #espresso


Footer

On the Blog

  • Blog
  • Recipes

Info

  • About
  • Disclosure, Privacy Policy, and Terms

Copyright © 2025 · Theme by 17th Avenue

%d

    Rate This Recipe

    Your vote:


    A rating is required
    A name is required
    An email is required
    We use cookies to ensure that we give you the best experience on our website. If you continue to use this site we will assume that you are happy with it.