• About
  • Nav Social Icons

  • Skip to primary navigation
  • Skip to main content
  • Skip to primary sidebar
  • Skip to footer
  • Home
  • About
  • Blog
    • Mom Life
    • Farm Life
    • Recipes
      • Breakfast
      • Dessert
      • Dinner
      • Sides
      • Snacks
  • Shop
    • Shop – Digital Books
  • Cart
  • My account
  • Mobile Menu Widgets

    Connect

    Search

The Farmstyle

The Farmstyle

by Kayla Zenner

  • Home
  • About
  • Shop
    • Shop – Meal Plans
    • Shop My Favorites
  • Blog
    • Breakfast
    • Dessert
    • Dinner
    • Snacks
    • Sides
    • All Recipes
  • Cart

Easy Flatbread Pizza Dough – No Yeast

July 1, 2025 · In: Breads, Dinner, Recipes, Sides

FacebookTweetPin
Jump to Recipe Print Recipe

This easy flatbread pizza dough is made with no yeast and comes together in under 30 minutes. Soft, golden, and perfect for homemade pizza or wraps — no oven required!

If you’re craving pizza but don’t have hours to wait for dough to rise, this easy flatbread pizza dough is the answer. Made without yeast, this quick dough comes together in minutes and cooks up soft, golden, and ready to be topped with your favorite ingredients.

Whether you’re making flatbread pizzas for a weeknight dinner, hosting a backyard pizza night, or simply want a fun and easy homemade crust, this recipe is a must-have in your back pocket. No fancy equipment, no long rise time — just simple pantry staples and a hot skillet.

Why You’ll Love This Flatbread Dough

  • Quick and easy – ready in under 30 minutes
  • No yeast required – no waiting, no rising
  • Cooked in a skillet – no oven needed
  • Perfectly soft and golden with just the right amount of chew
  • Customizable – use as a base for pizza, wraps, gyros, or dips

Ingredients

  • All Purpose Flour
  • Baking Powder
  • Salt
  • Olive Oil
  • Cold Water

How to Make Flatbread Pizza Dough

Start by combining flour, baking powder, and salt in a large mixing bowl. Stir to combine the dry ingredients.

Add cold water and olive oil, mixing until a soft dough forms. You want the dough to be pliable but not sticky — adjust with a little more water or flour if needed.

Turn the dough out onto a floured surface and knead it for a few minutes until smooth and elastic.

Divide the dough into equal portions and use a rolling pin to flatten each piece into a thin round. Aim for about a quarter-inch thick for the perfect flatbread texture.

Heat a cast iron skillet or griddle over medium heat and add a touch of oil. Cook each flatbread for a few minutes on each side until puffed and golden brown.

Let the flatbreads cool slightly before adding your pizza toppings, or serve them as-is for dipping or wrapping.

Serving Ideas

This flatbread is incredibly versatile and makes a perfect base for a variety of meals:

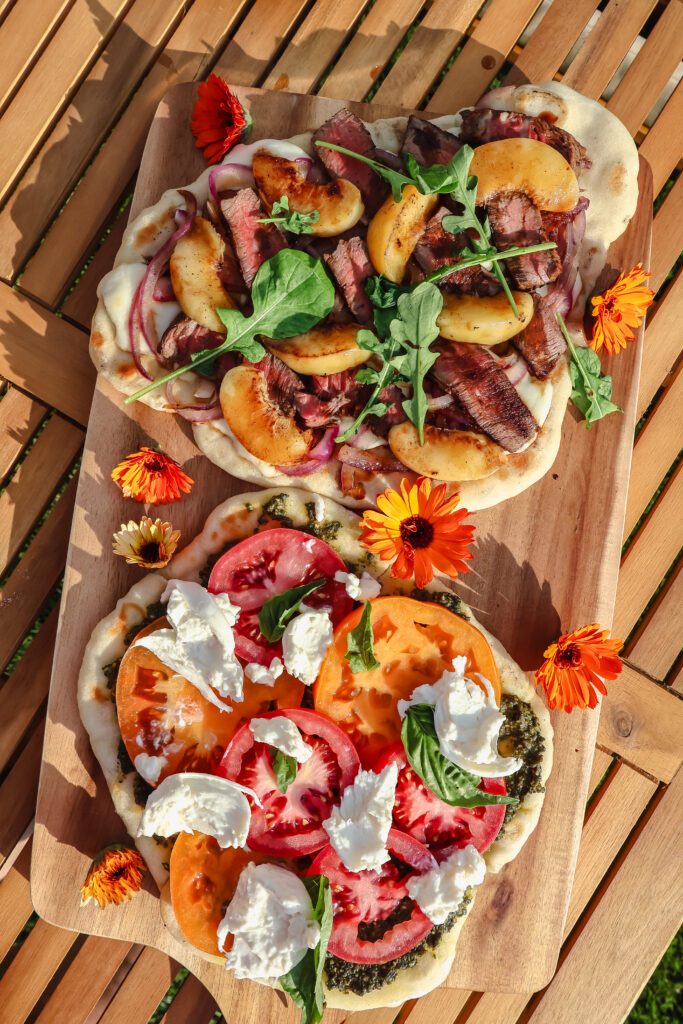
  • Flatbread pizzas: Top with marinara, cheese, veggies, or meats and broil until bubbly
  • Mediterranean wraps: Fill with grilled chicken, hummus, cucumbers, and tzatziki
  • Bruschetta bites: Slice into wedges and top with tomatoes, basil, and balsamic glaze
  • Dips and spreads: Serve warm with hummus, baba ganoush, or whipped feta

Tips for Success

  • Use cold water: It helps give the dough a slightly chewy, tender texture
  • Don’t overwork the dough: Knead just enough to make it smooth
  • Keep it thin: Rolling the dough to the right thickness ensures even cooking and the right bite
  • Use a hot skillet: Preheating the pan helps achieve a beautiful golden brown finish

Make-Ahead & Storage

Flatbread dough can be made ahead and stored in the fridge for a day or two. Simply wrap it tightly in plastic wrap and bring it to room temperature before rolling out.

Cooked flatbreads can also be frozen. Let them cool completely, stack with parchment paper between layers, and store in an airtight bag. Reheat on a skillet or in the oven when ready to serve.

Frequently Asked Questions

Can I bake this flatbread instead of using a skillet?
Yes! Bake on a hot pizza stone or baking sheet at 450°F until golden and puffed.

Can I make this gluten-free?
You can try a 1:1 gluten-free flour blend, though texture may vary. I have not tested this recipe with gluten free flour.

Do I need to rest the dough?
No rising or resting time required — it’s ready to use immediately! If you are having a hard time rolling out your dough you can allow it to rest for 10-15 minutes and then try to roll out again.

Share Your Experience

I would love to hear about your experience making and enjoying my Easy Flatbread Pizza Dough! Feel free to tag me on Instagram or leave a review below. Your feedback helps me improve our recipes and provides inspiration to fellow home cooks.

Save this recipe for later by simply using the pin button on the recipe card or any of the photos above. Happy cooking! 

Easy Flatbread Pizza Dough

No ratings yet
This easy flatbread pizza dough is made with no yeast and comes together in under 30 minutes. Soft, golden, and perfect for homemade pizza or wraps — no oven required!
Print Recipe Pin Recipe
Prep Time:15 minutes mins
Cook Time:10 minutes mins
Course: bread, Side Dish
Servings: 4 8″ pizzas
Calories: 435kcal

Ingredients

  • 3 cups all purpose flour
  • 2 tsp baking powder
  • 1 ½ tsp salt
  • 3 tbsp olive oil
  • 1 cup cold water

Instructions

  • In a large bowl, place the flour, baking powder and salt and stir to combine.
  • Add the ice water and oil and stir until the dough comes together. The dough should be soft, but not sticky. Add additional water or flour, if needed.
  • Sprinkle flour over your work area or kitchen counter and turn the dough onto the floured surface. Knead the dough for a few minutes to get a smooth dough.
  • Shape the dough into a ball and divide into 4 pieces. Using a rolling pin flatten each section to ¼ inch thick.
  • Heat a cast iron skillet (or griddle) to medium heat. Add about one tablespoon of oil.
  • Cook the flatbread for about 2-3 minutes or until golden brown. Flip and cook the other side for about 2 minutes or until golden brown
  • Remove from the skillet and place on a cooling rack. Allow to cool slightly before serving.
  • Add pizza toppings and enjoy.

Nutrition

Calories: 435kcal | Carbohydrates: 72g | Protein: 10g | Fat: 11g | Saturated Fat: 2g | Polyunsaturated Fat: 1g | Monounsaturated Fat: 8g | Sodium: 1089mg | Potassium: 101mg | Fiber: 3g | Sugar: 0.3g | Calcium: 134mg | Iron: 5mg

Share this:

  • Click to share on X (Opens in new window) X
  • Click to share on Facebook (Opens in new window) Facebook
  • Click to share on Pinterest (Opens in new window) Pinterest

Like this:

Like Loading...
FacebookTweetPin

By: Kayla · In: Breads, Dinner, Recipes, Sides

About Kayla

Hi! I'm Kayla. I'm here to help inspire busy moms to get back in the kitchen and feel beautiful along the way! I'm married to my high school sweetheart and live on a farm with our two busy boys.

you’ll also love

No Bake Strawberry Rhubarb Meringue Pie
Easy Peach Crisp for Two | Mini Date Night Dessert
Summer Fruit Salad with Honey Lime Dressing

Reader Interactions

Leave a ReplyCancel reply

Next Post >

Summer Fruit Salad with Honey Lime Dressing

Primary Sidebar

Meet Kayla

Meet Kayla
hello!

LIVING OURFARM(LIFE)STYLE WHERE WE ​JUGGLE THE CHAOS OF MOTHERHOOD ONE ​KITCHEN ADVENTURE AT A TIME!

Read More

Connect

join the list

Categories

  • Blog
  • Recipes

Follow Along

@thefarmstyle


Let’s get those goals!


Homemade maple marshmallows are super simple, deli
Homemade maple marshmallows are super simple, delicious, and made better for you with swapping regular sugar for maple syrup. 

Comment MARSHMALLOW for all the details sent to your inbox. 

INGREDIENTS
1 cup cold water
3 tbsp powdered gelatin
1 1/4 cup maple syrup
1/4 tsp salt
1 tsp vanilla extract or seeds from 1 vanilla bean
powdered sugar for dusting

INSTRUCTIONS
You will want to have everything prepped and ready to go ahead of time. Once the marshmallows are ready to pour you need to work fast as everything starts to set up quick. Make sure to have whisk attachment ready for your stand mixer or hand mixer as well.
Line an 8”x8” pan with parchment paper ensuring the paper goes up all sides of the pan. Dust with powdered sugar.
In a large bowl (I use my stand mixer) add 1/2 cup of cold water with gelatin. Mix to combine and let sit to bloom.
In a medium saucepan add 1/2 cup cold water, maple syrup and salt. Mix to combine then place over medium heat until the mixture comes to a boil. DO NOT STIR after this point as that will encourage crystallization.
Allow mixture to boil until it reaches 240F-245F, this takes 15-20 minutes so be patient. Keep an eye on the mixture during this time as it can quickly boil over and cause a mess.
Quickly pout the mixture in the same bowl as the gelatin and begin to whisk.
Once everything starts to come together add in your vanilla extract or vanilla beans.
Continue whisking until mixture has tripled in size, the bowl is cool to the touch, and when the whisk is removed the drizzle holds its shape in the bowl.
Quickly pour mixture into prepared pan. You have about 30 seconds before everything sets up too much.
Allow marshmallows to set up completely (about 4 hours).
Remove marshmallows from the pan and sprinkle with additional powdered sugar. This helps your knife from sticking too much when cutting.
Cut marshmallows into desired size with a sharp knife. Dipping each marshmallow in additional powdered sugar to prevent them all from sticking to each other.
Store in an air tight container for up to 2 weeks.


The easiest homemade english muffins.  

Comment M
The easiest homemade english muffins.  

Comment MUFFIN for all the details sent to your inbox. 

INGREDIENTS
3 cups all purpose flour
1 - 1 1/2 cups water warm
2 1/4 tsp yeast
1 tsp salt
2 tbsp sugar
cornmeal

INSTRUCTIONS
In a bowl combine warm water, yeast and sugar. Mix and allow to sit for about 5 minutes. The mixture should start to become foamy. This is how you know your yeast is activated!

Add in flour and salt. Mix until combined adding in an additional 1/2 cup water as needed to get the dough to come together. Cover and let rise for an hour or until mixture has doubled in size.

Pour some cornmeal onto a baking sheet. Set aside.

Once dough has risen pour onto a floured surface. They dough will be sticky. Gently press into a circle and divide into 8-12 segments.

Gently form each of the segments into a ball and place onto the prepared baking sheet (This helps prevent them from sticking). Repeat with each segment. Cover balls and allow to rise for an additional 25-30 minutes.

Preheat oven to 350.

Heat a skillet(or large griddle) to medium heat. Place balls into the skillet and cook for about 5 minutes per side, then place onto a clean baking sheet. Repeat with remaining balls.

Bake in oven for 10-15 minutes and enjoy!

NOTES
While baking the English muffins ins’t always necessary, I find it difficult to cook them entirely on the stove top without burning the exterior. Finishing them off in the oven has helped a ton!


Bring cozy fall flavors home with this Pecan Pie L
Bring cozy fall flavors home with this Pecan Pie Latte topped with maple cold foam. 

Comment COFFEE for all the details sent to your inbox. 

INGREDIENTS
PECAN PIE SYRUP
1 cup pecans
1 cup brown sugar
1 cup water
1 tsp cinnamon
1 tsp vanilla extract
2 tbsp salted butter

PECAN PIE LATTE
2 shots espresso
1-2 tbsp pecan pie syrup
8 oz milk

MAPLE COLD FOAM
3 tbsp heavy cream
2 tbsp milk
1 tbsp maple syrup
INSTRUCTIONS

MAKE THE PECAN PIE SYRUP
Preheat oven to 350 F.
Add pecans to a sheet pan and roast for 5-10 minutes. Watching to ensure they don’t burn.
In a sauce pan combine the roasted pecans, brown sugar, and cinnamon. Bring mixture to a boil and allow to simmer for 10-15 minutes.
Add in butter and vanilla extract, stirring to combine.
Use a fine mesh strainer to separate the pecans from the syrup and pour into an air tight container and store int the refrigerator for 2-3 weeks.
MAKE THE LATTE
In a small cup combine all the ingredients for the maple cold foam. Whisk together with a frother until mixture has thickened. Set Aside.
FOR ICED LATTE: In a large cup add ice, then pecan pie syrup, milk, and then espresso. Top with maple cold foam and enjoy!
FOR HOT LATTE: Steam milk to desired temperature. Then add pecan pie syrup and espresso to the steamed milk. Top with maple cold foam and enjoy!

Made with homemade pecan pie syrup, espresso, and creamy maple foam, this latte tastes like a slice of pecan pie, perfect hot or iced.


This BBQ Hawaiian Chicken on the Blackstone Griddl
This BBQ Hawaiian Chicken on the Blackstone Griddle is a quick and easy favorite. Juicy chicken, caramelized pineapple, and veggies tossed in sweet barbecue sauce make a meal everyone will love.

Comment RECIPE for all the details sent to your inbox. 

INGREDIENTS

1.5 lb chicken breasts cut into 1” pieces
2 bell peppers cut into 1” pieces
1 red onion cut into 1” pieces
15 oz can pineapple chunks
1/2 cup bbq sauce
salt+ pepper
INSTRUCTIONS

Preheat griddle to medium heat.
Season chicken with salt and pepper and place onto half of the griddle. Cook until no longer pink.
Add peppers, onions, and pineapple to the other half of the griddle. Cook until softened.
Pour barbecue sauce over chicken and mix to combine. Remove everything from the griddle.
Enjoy with rice or on a tortilla.

#griddlecrew #griddlenation #blackstonegriddle #thefarmstyle


ad | We don’t always get the time to go out for da
ad | We don’t always get the time to go out for date night, so lately we’ve been bringing date night home, and honestly, I think I might love it even more this way.

A grilled ribeye, crispy Japanese sweet potato fries, and a bottle of @cakebreadcellars Cabernet Sauvignon. Simple, cozy, and a little something to look forward to at the end of a long week. 

Cakebread Cellars has been crafting wines in Napa Valley for over 50 years, and you can taste that care in every sip. Their Cabernet Sauvignon is bold but beautifully balanced, the kind of wine that pairs perfectly with grilled steak and good conversation.

It’s those small rituals, setting the table, lighting a candle, pouring a glass of wine, that make home feel like the best place to be. 

Comment DINNER for all the recipe details, and don’t forget to pour a glass of Cakebread Cabernet Sauvignon alongside.


Footer

On the Blog

  • Blog
  • Recipes

Info

  • About
  • Disclosure, Privacy Policy, and Terms

Copyright © 2025 · Theme by 17th Avenue

%d

    Rate This Recipe

    Your vote:


    A rating is required
    A name is required
    An email is required
    We use cookies to ensure that we give you the best experience on our website. If you continue to use this site we will assume that you are happy with it.