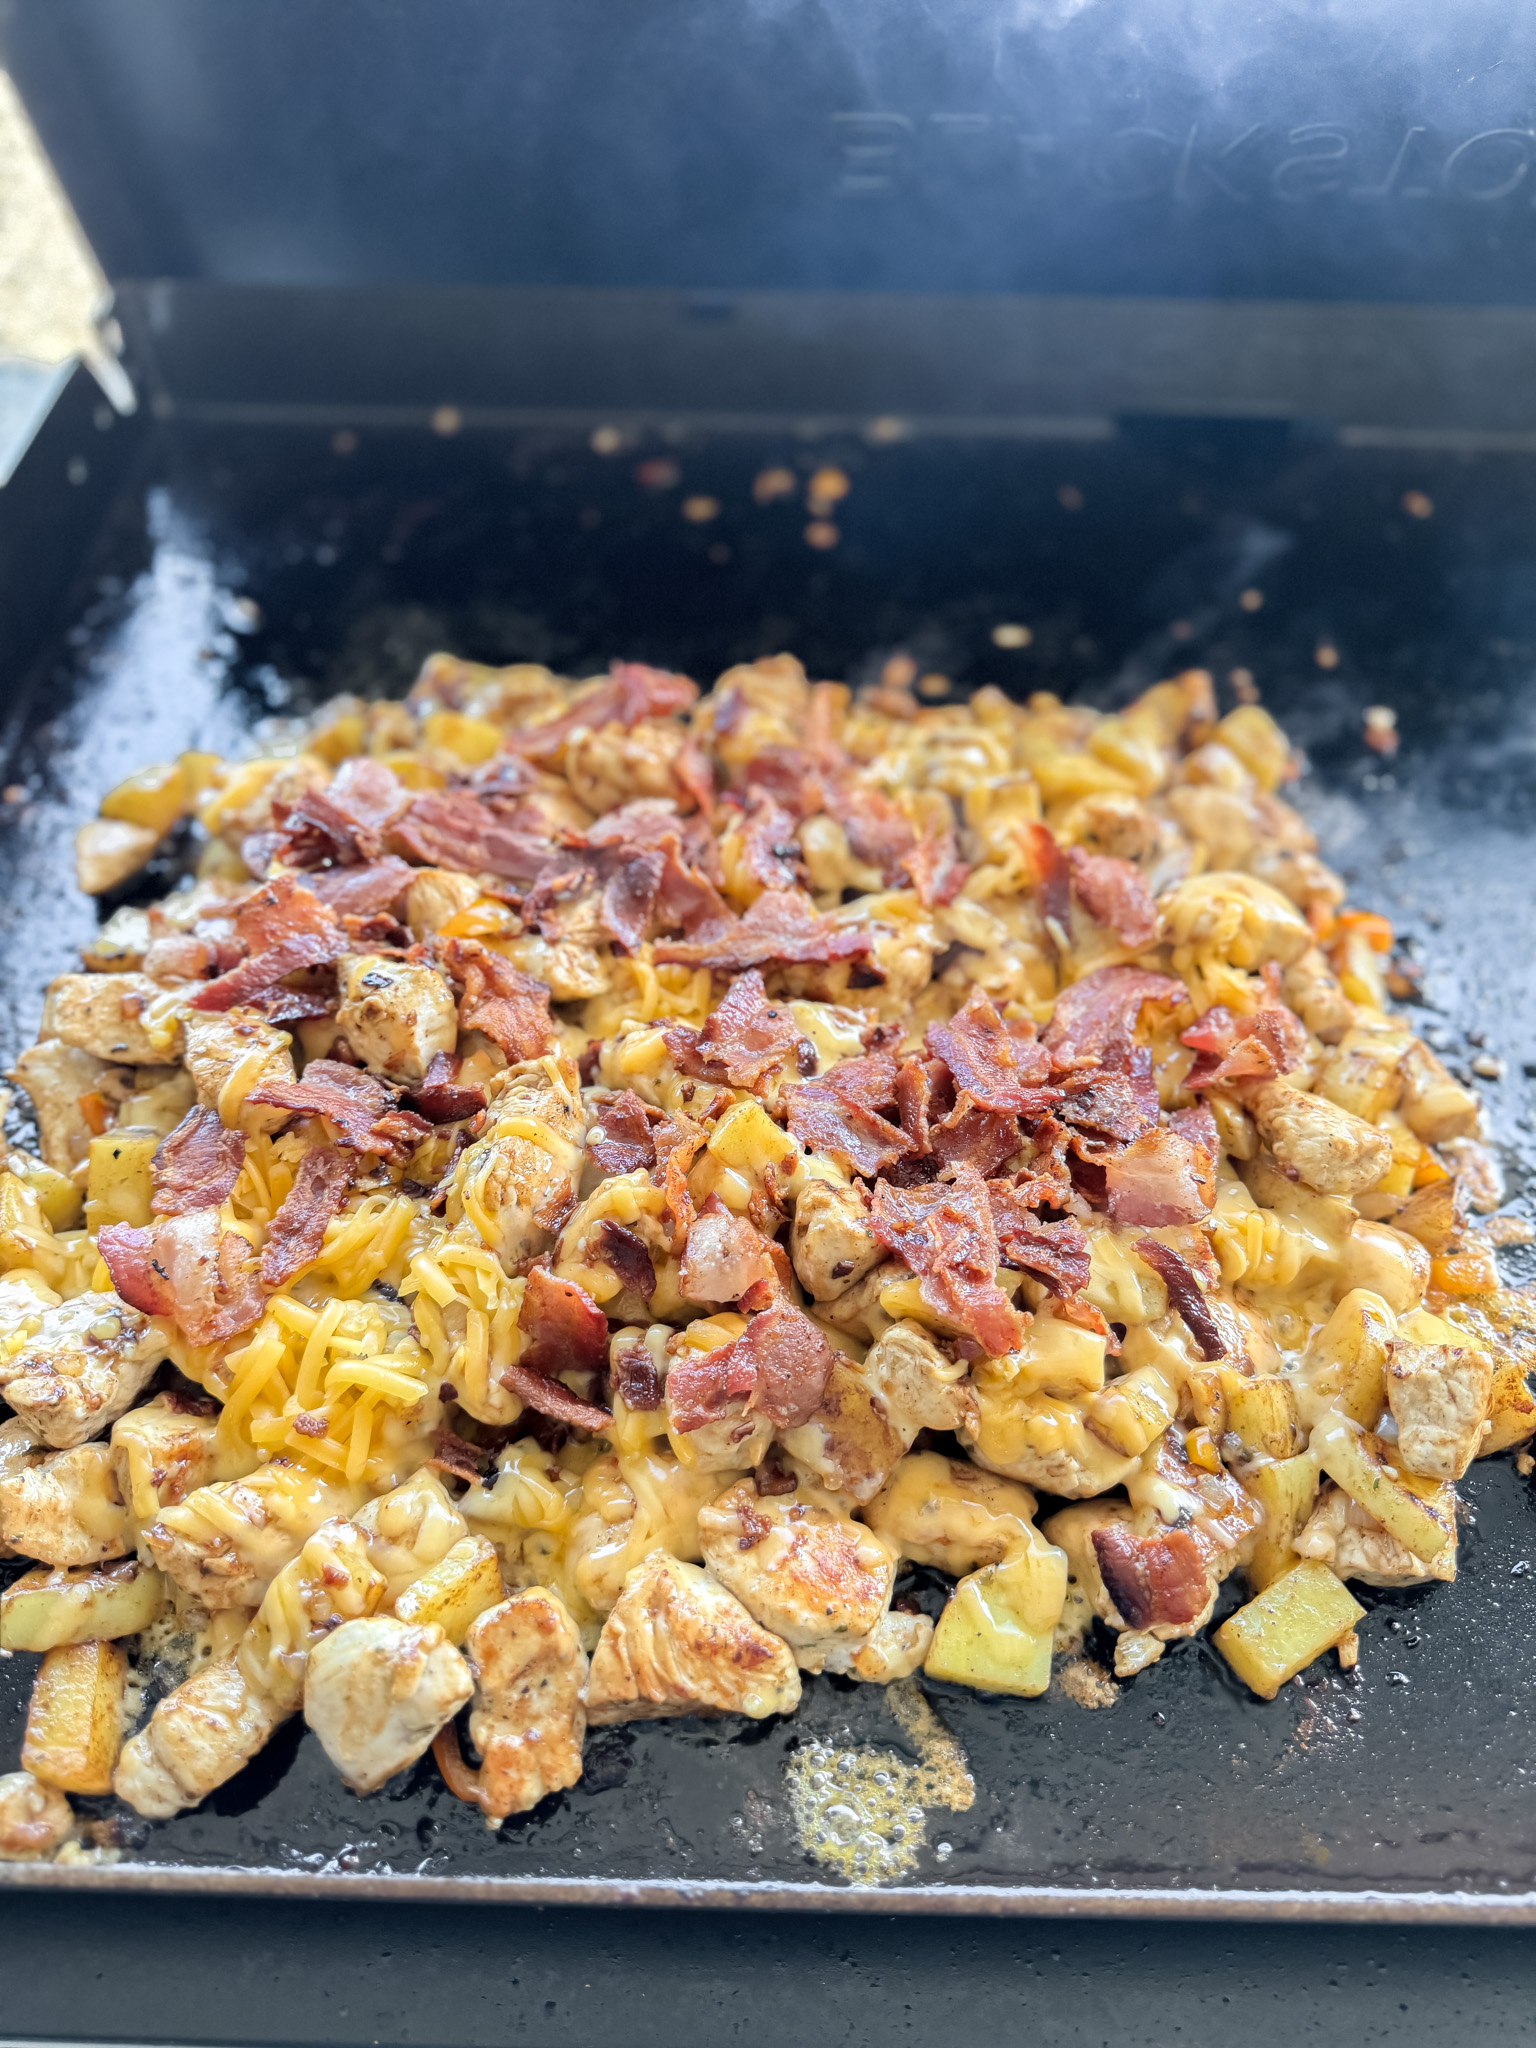
Chicken Bacon Ranch Skillet on the Blackstone
This chicken bacon ranch skillet is one of those recipes that looks way more impressive than it actually is to make. Crispy bacon, juicy chicken, golden potatoes, and colorful peppers all cooked together on the Blackstone and smothered in cheddar cheese. It comes together so fast and tastes SO good that my family asks for it on repeat.

I got my Blackstone a little while back and I am LOVING it. It has honestly changed the way I cook dinner during the week. The cleanup alone is worth it - the only dishes I have to wash are the plates we eat off of and the bowls I use to bring food outside. Less dishes = happier mom, and that is always a win in this house! 😄
If you love easy Blackstone dinners, you have to check out my Garlic Butter Chicken Skillet on the Blackstone too. It has that same easy weeknight energy and my family goes absolutely crazy for it.
Key Ingredients
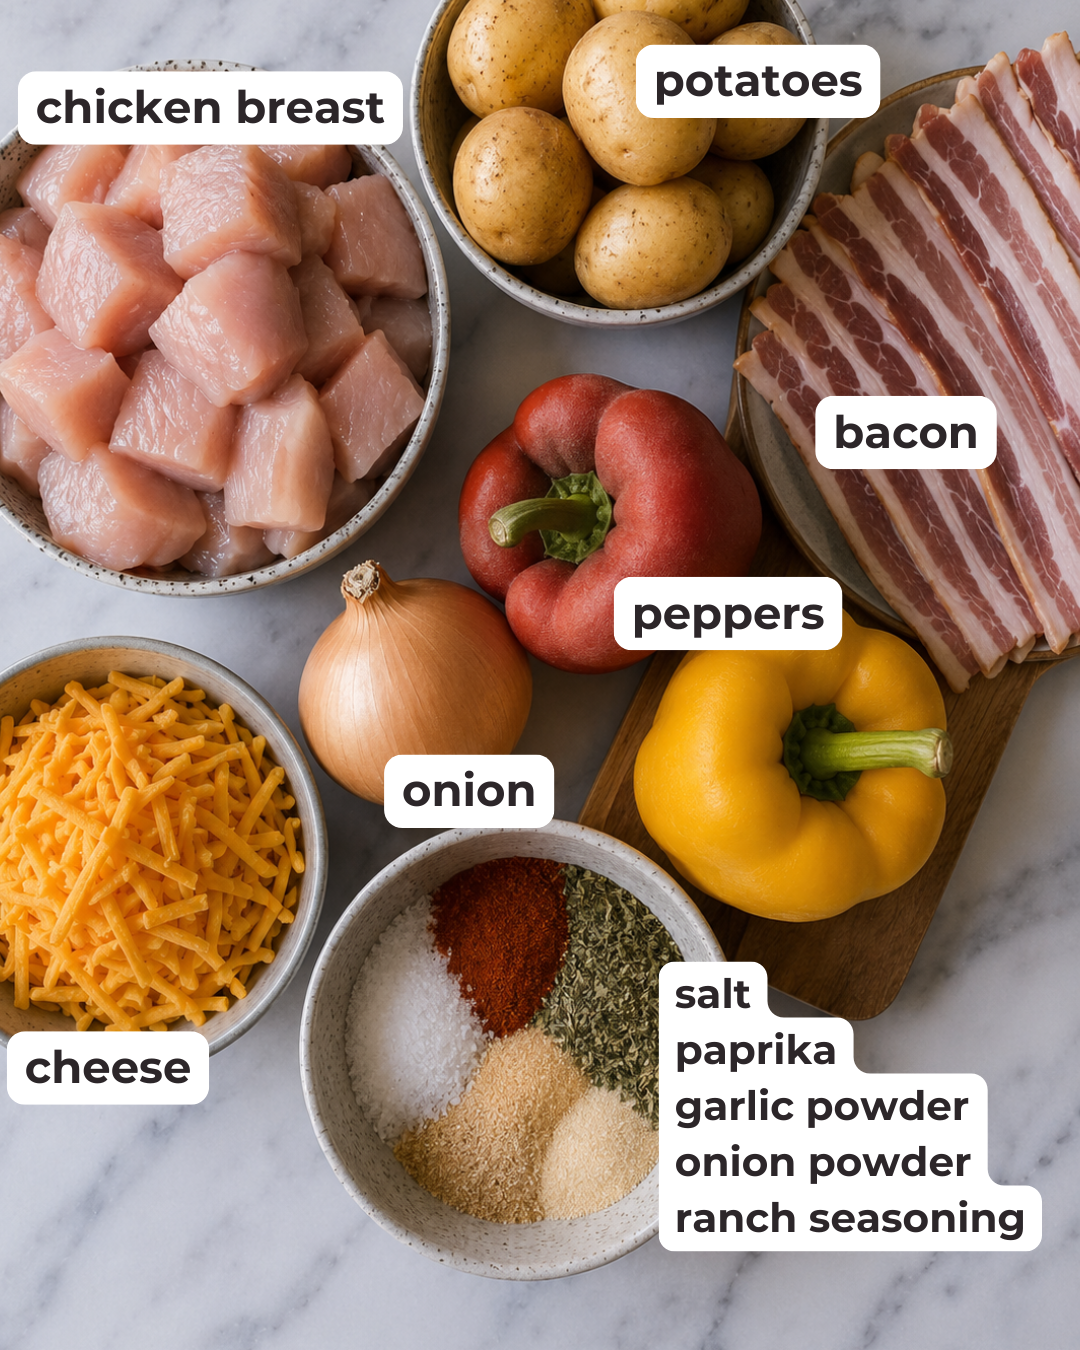
There are just a few things worth noting here before you get started:
- Chicken - I use cubed chicken breast, but you can also use chicken tenders or boneless chicken thighs. Both work great here.
- Bacon - Thick cut is our favorite. It gets nice and crispy on the Blackstone and holds up well when you layer it on top at the end.
- Potatoes - Yukon gold potatoes are my go-to. They get a beautiful golden crust on the outside and stay soft on the inside. Your favorite potato works here though!
- Bell Peppers + Onion - These add so much color and a little sweetness to balance out all that savory bacon and ranch flavor.
- Ranch Seasoning - This is doing the heavy lifting on flavor. I use 2-3 tablespoons depending on how ranchy we are feeling that night. 😄
How to Make Chicken Bacon Ranch on the Blackstone
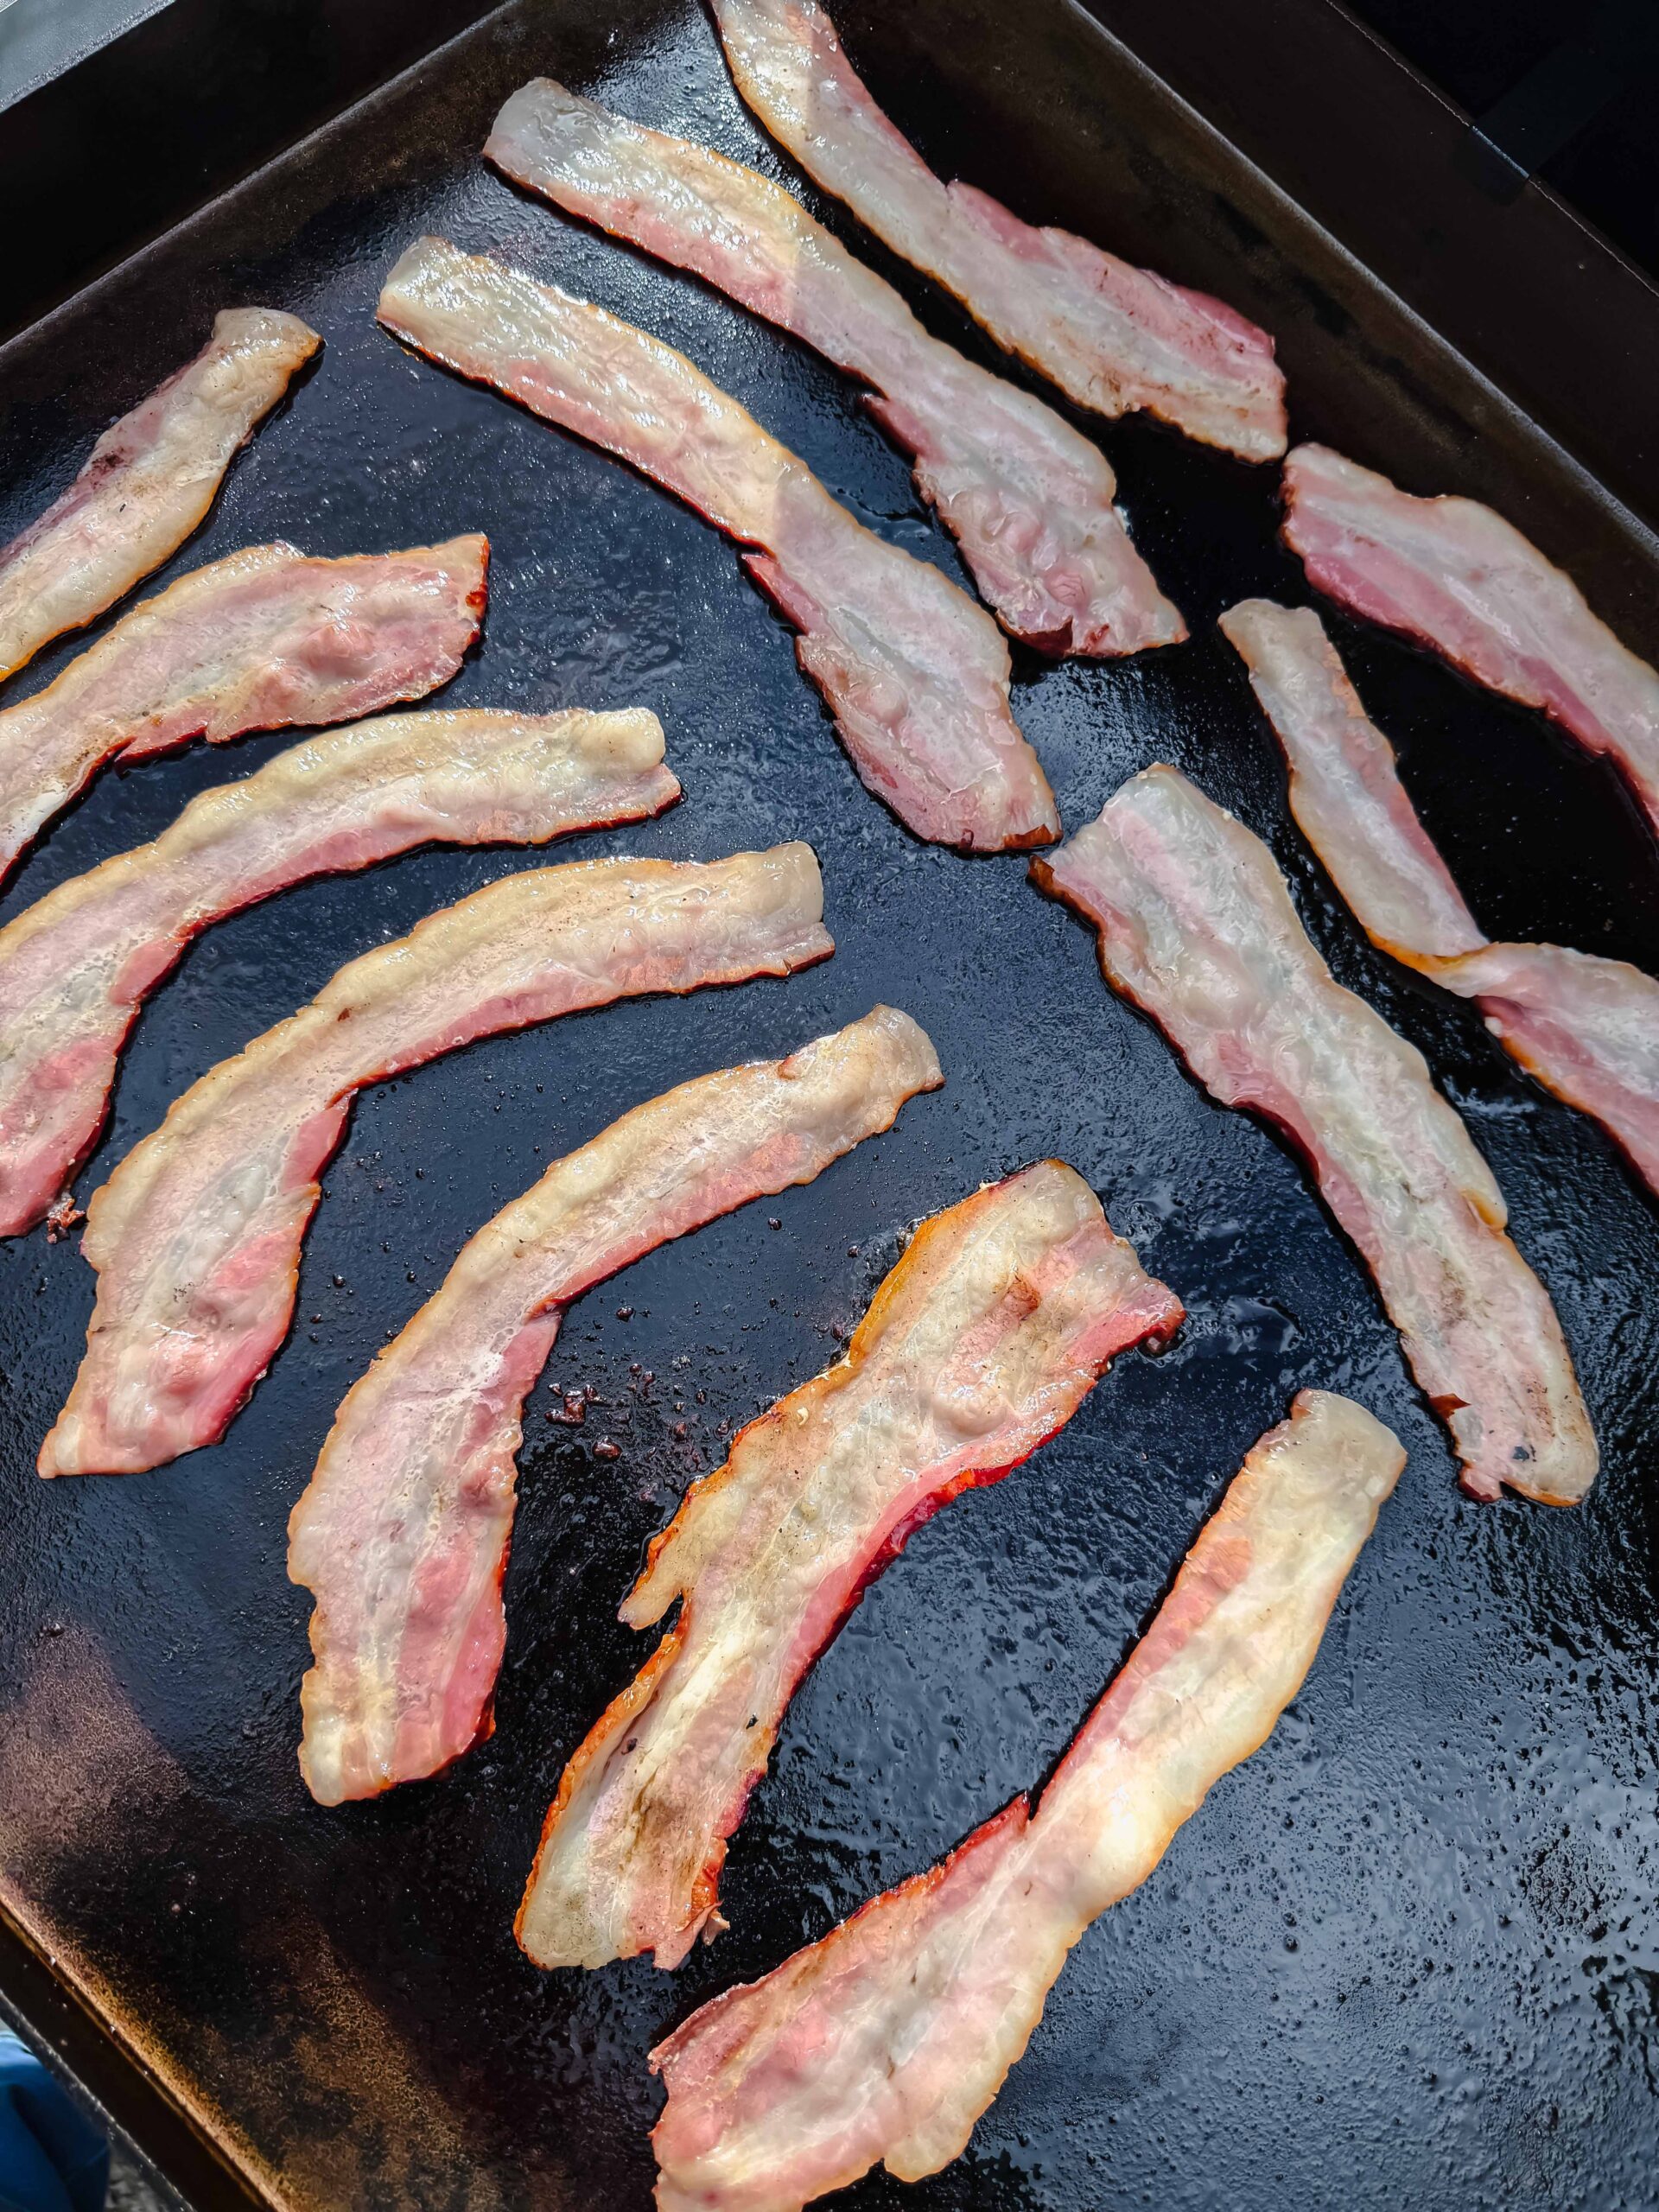
Step 1: Over medium heat add the bacon to one side of the grill. Cook for about 5 minutes per side or until crispy. Remove, cut into small pieces, and set aside.
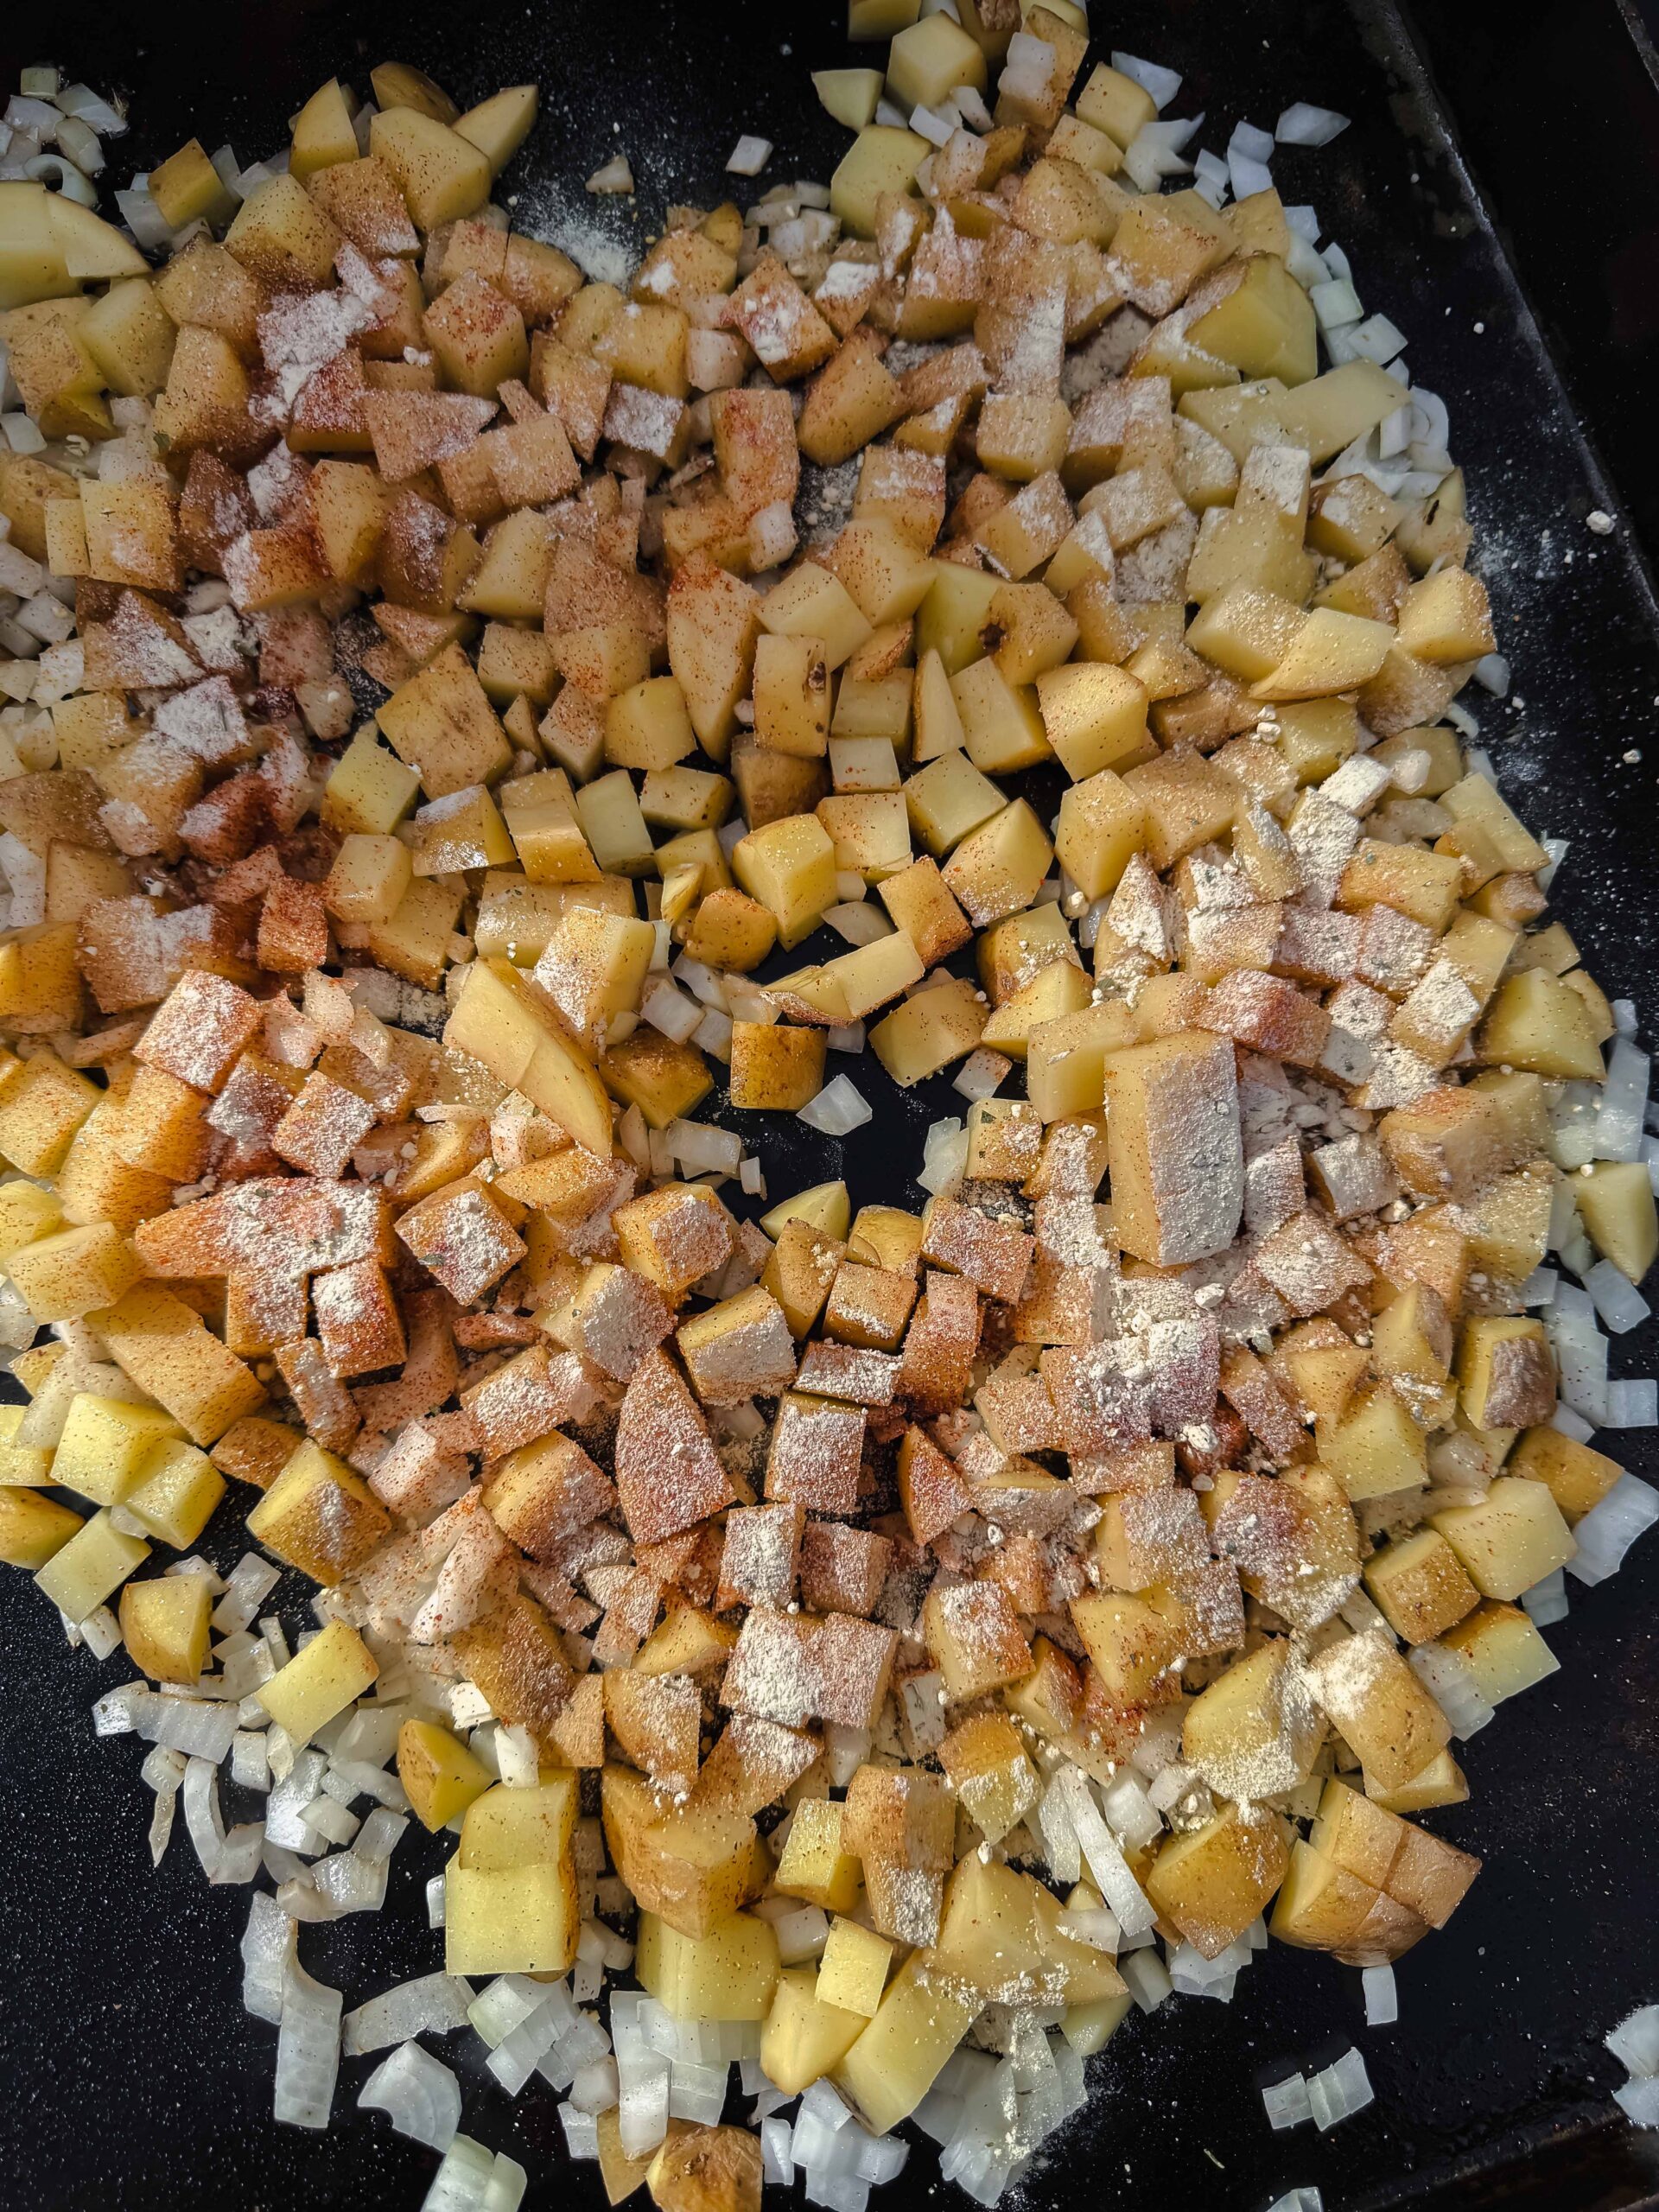
Step 2: Add the diced potatoes and onions to the other side of the grill. Cook for about 15 minutes before flipping.
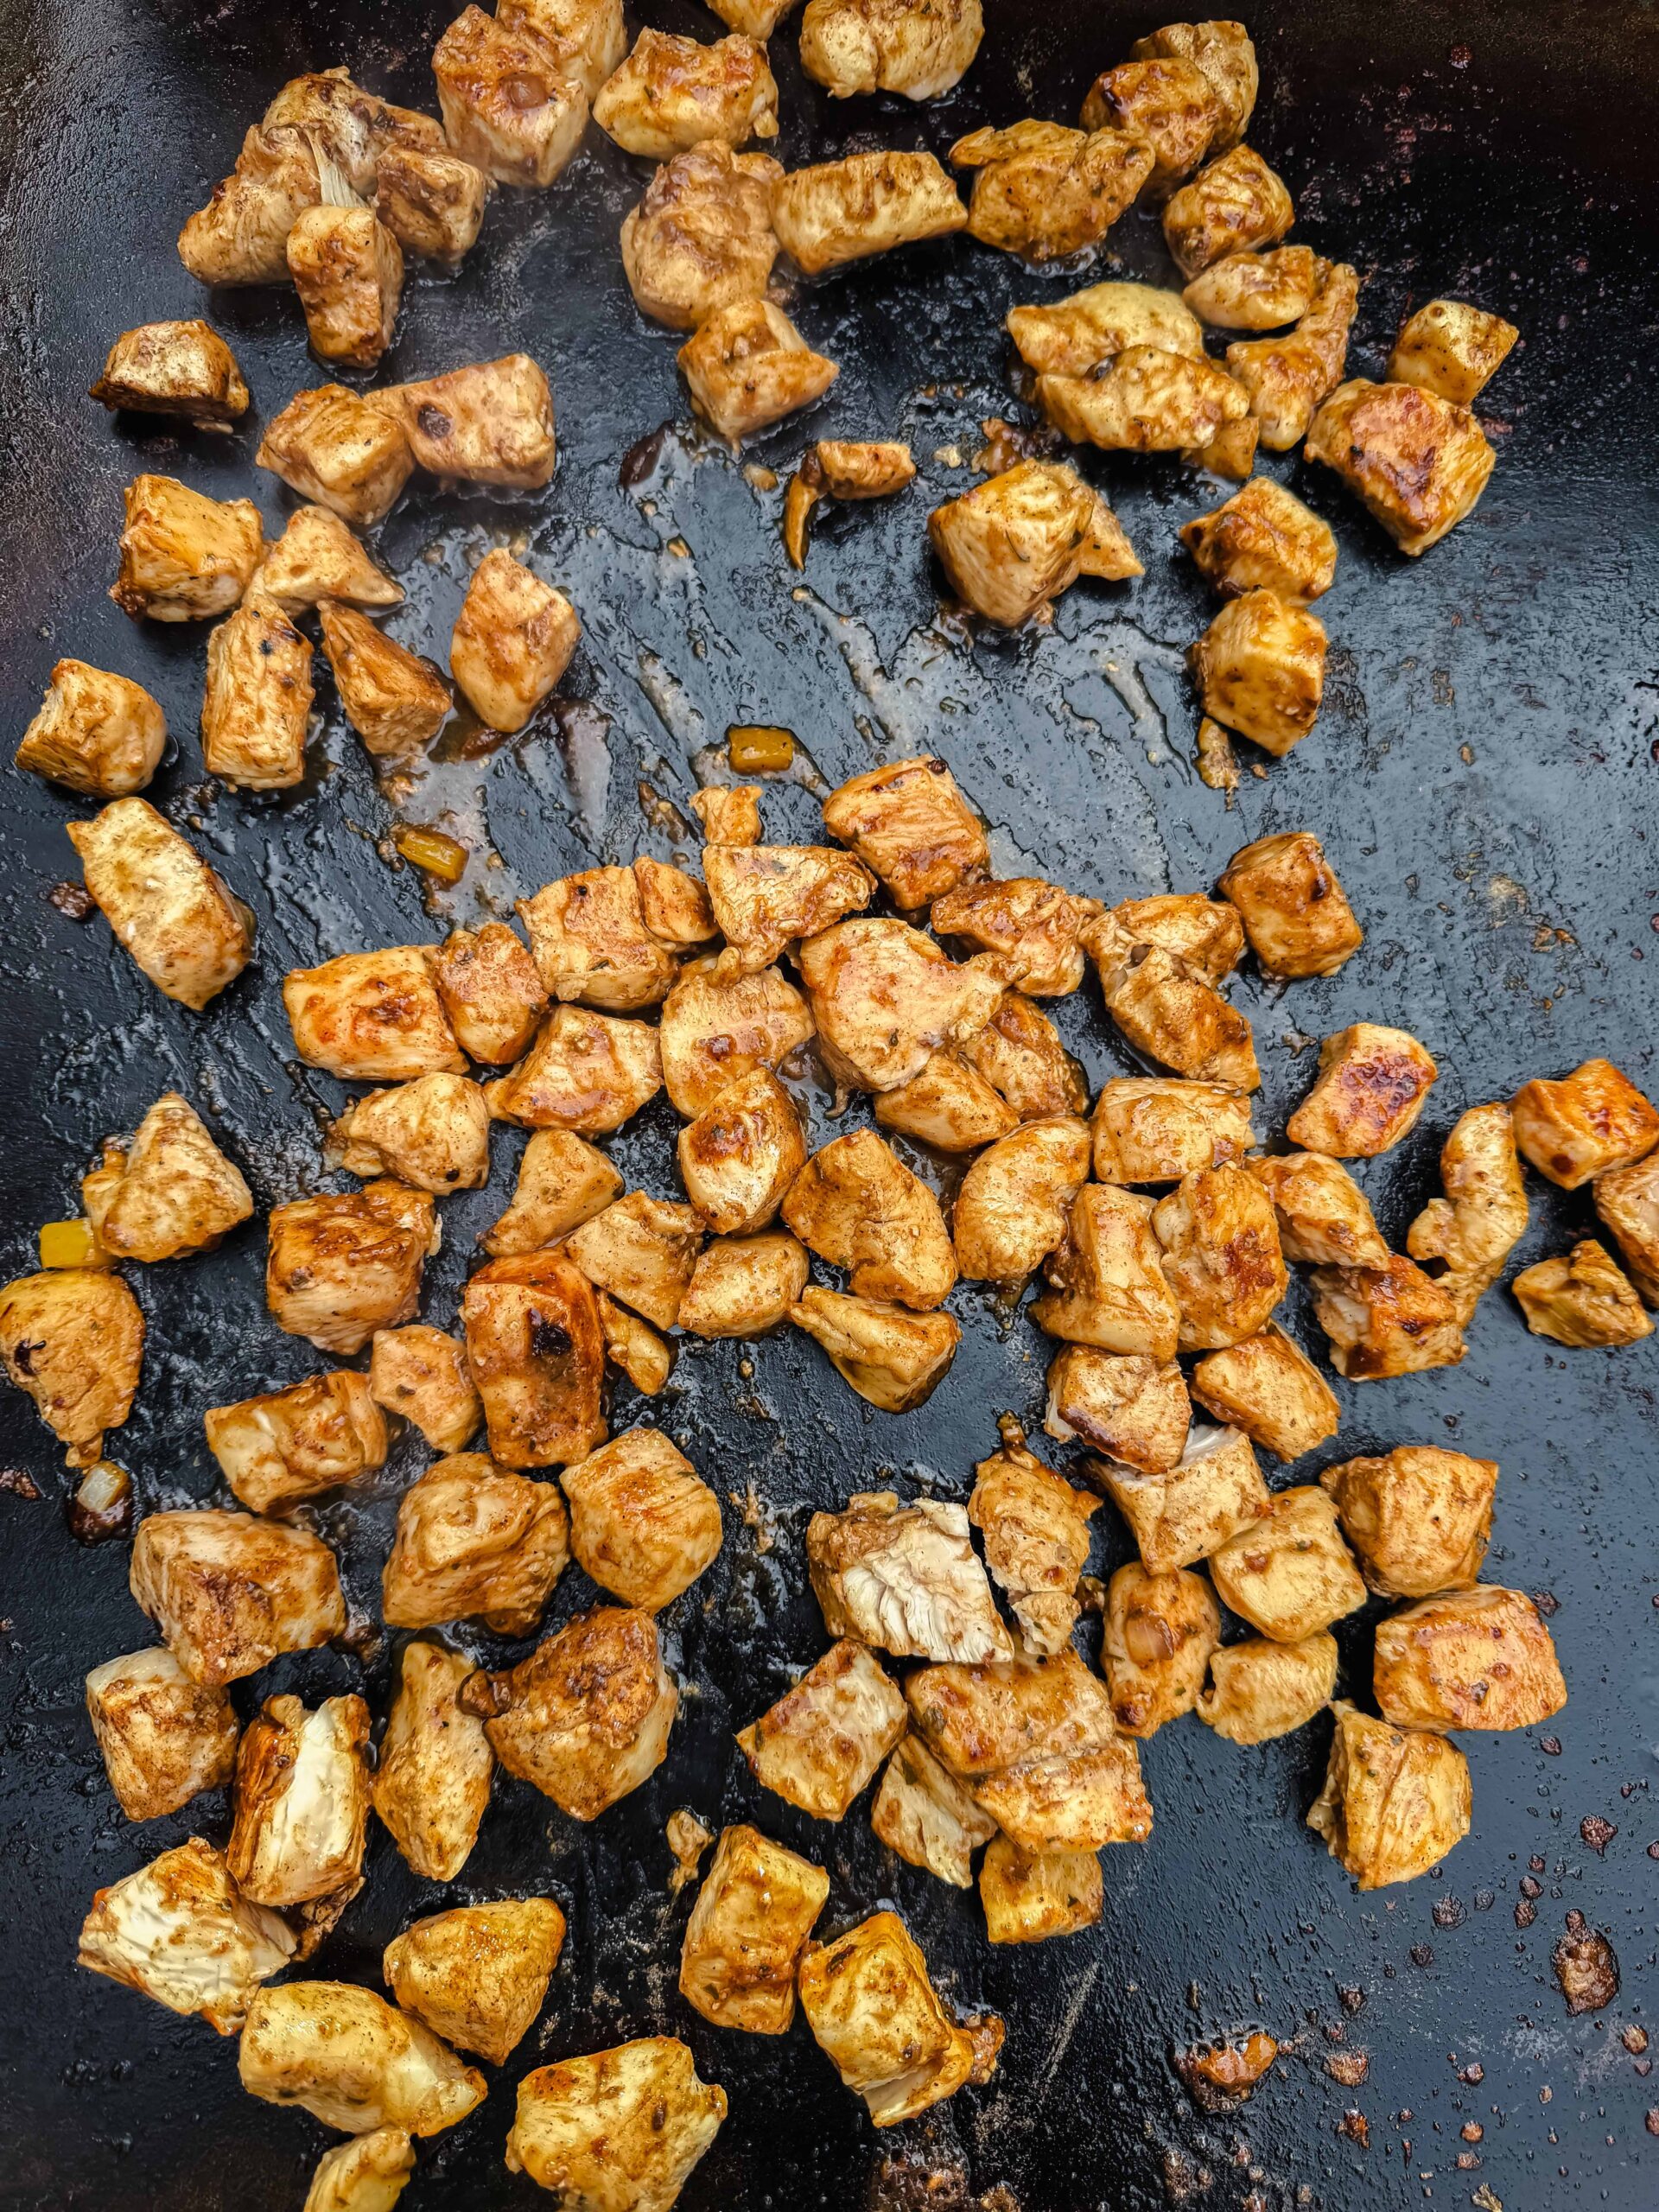
Step 3: After removing the bacon, go ahead and add the cubed chicken to the grill and let it cook in that bacon grease with half of the seasoning - this is where so much flavor comes from!
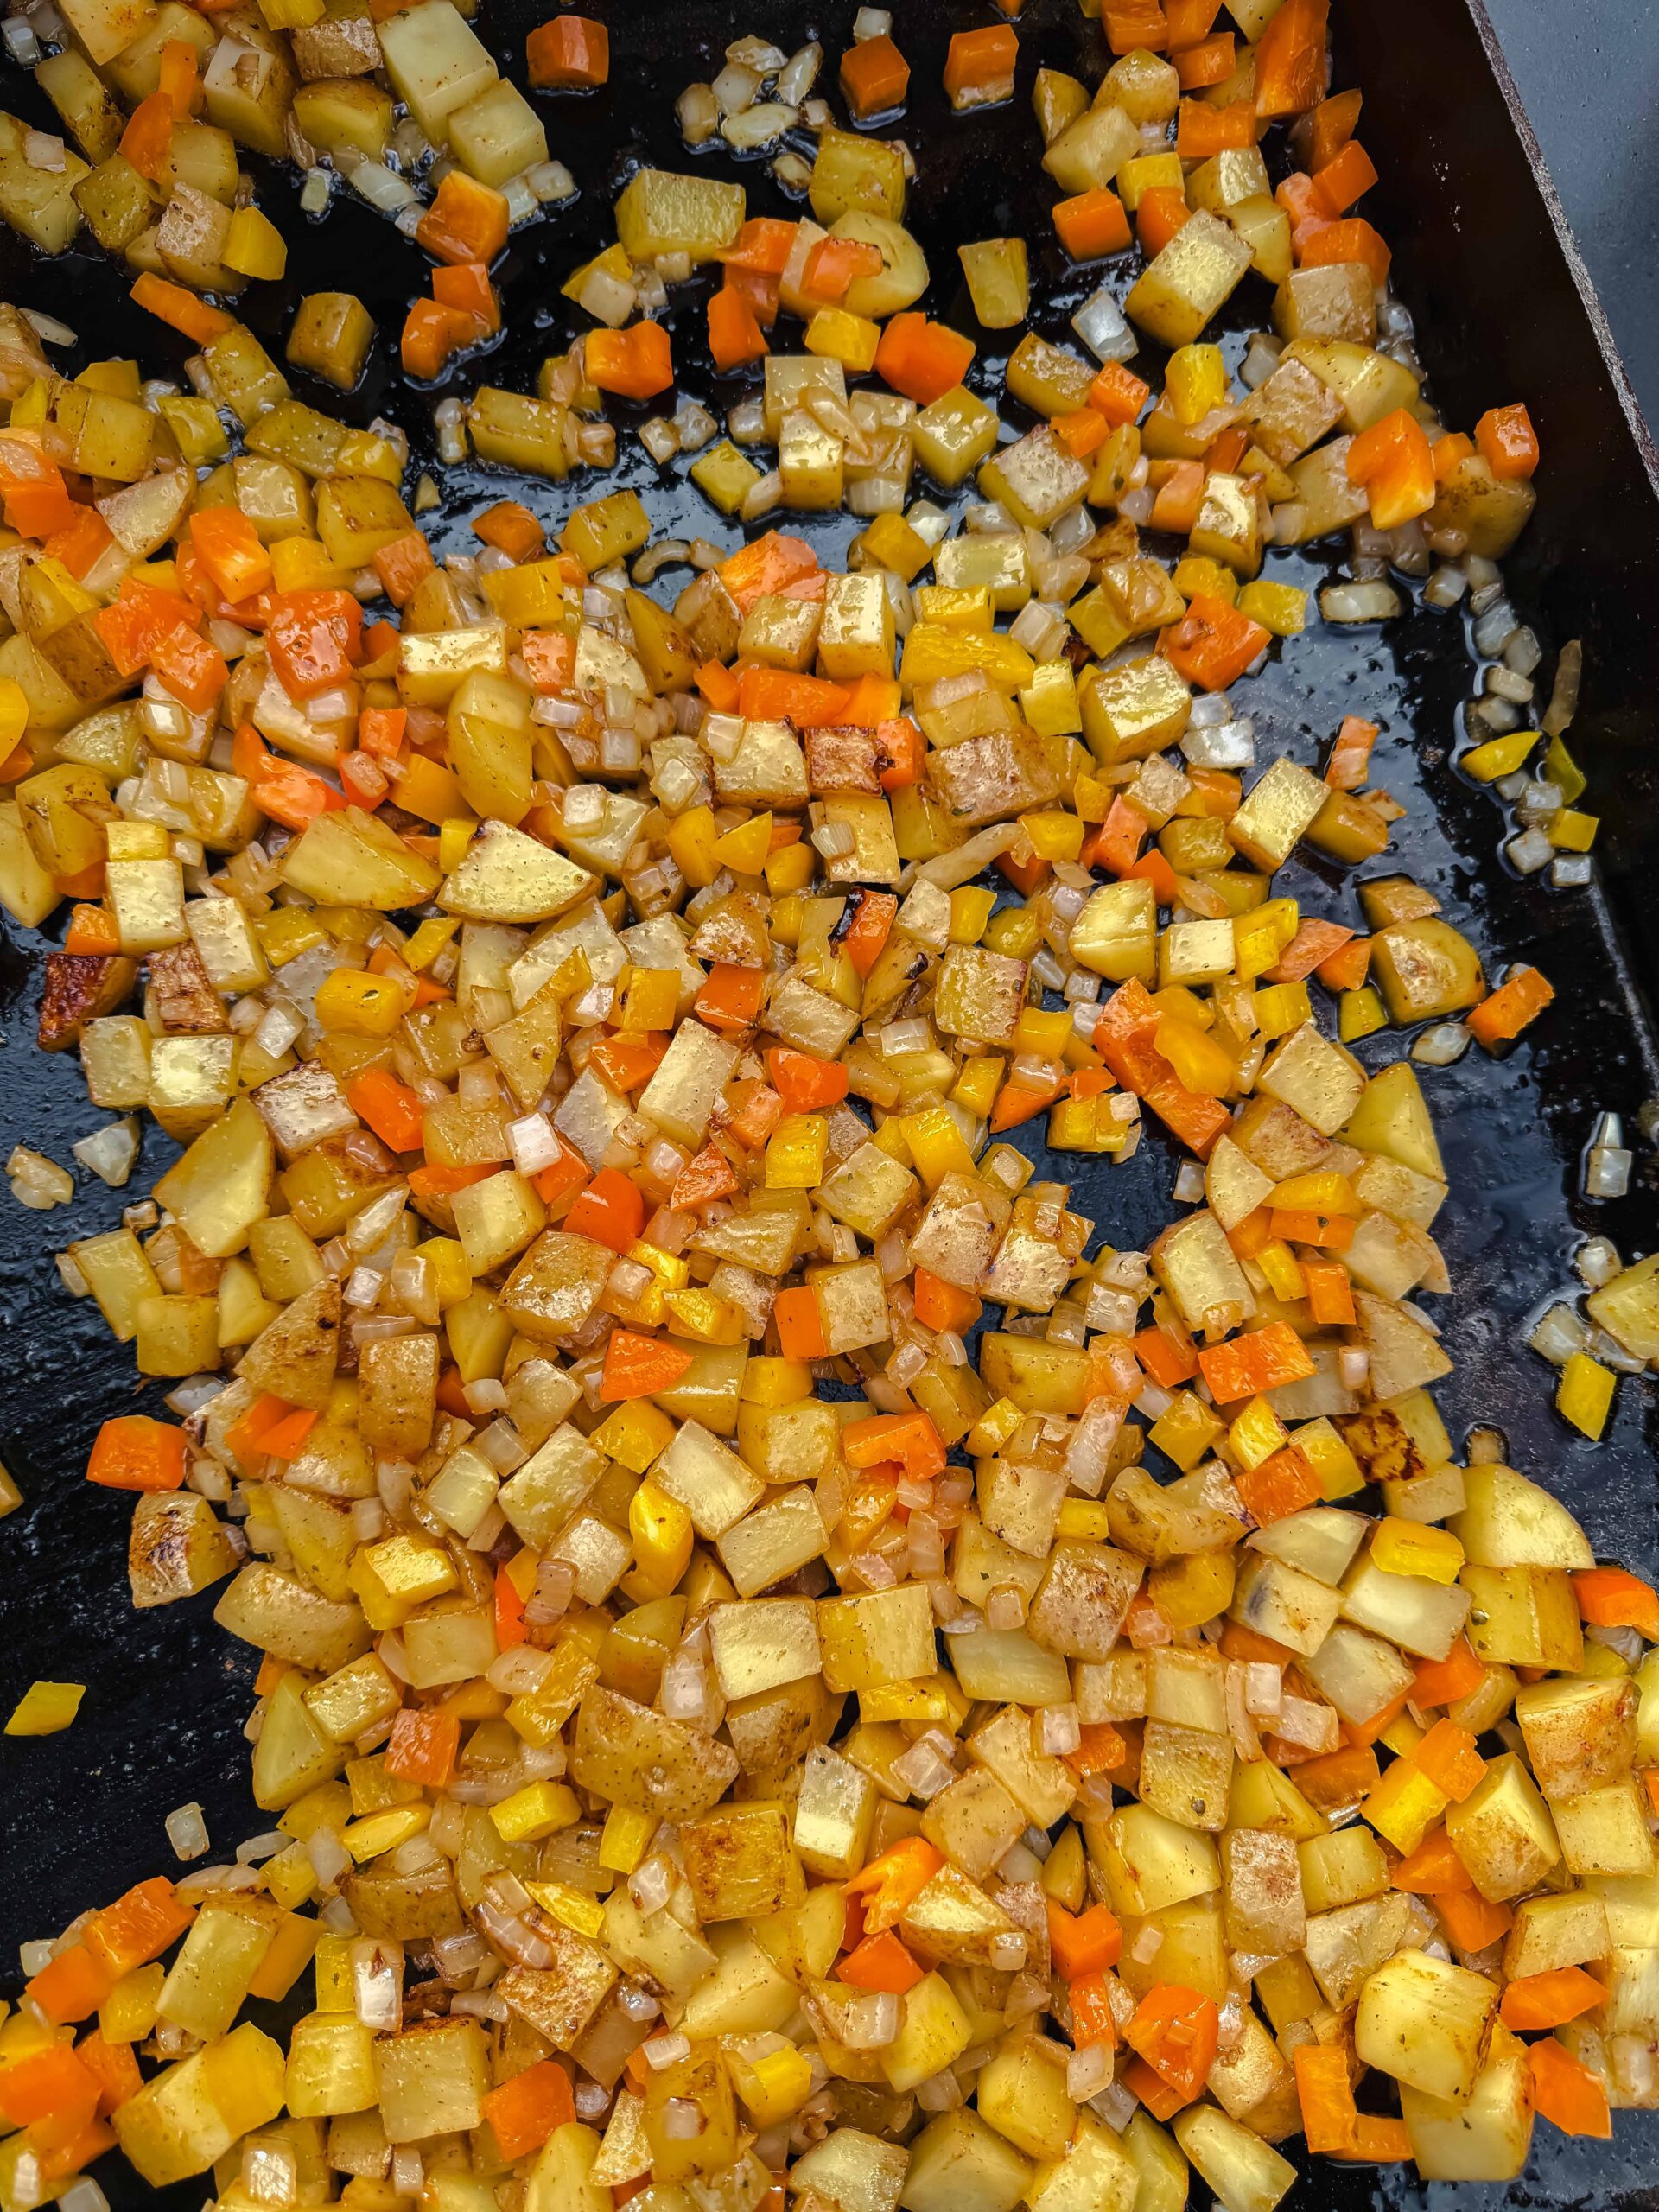
Step 4: Flip the potatoes, add diced peppers and the other half of seasoning. Add a little more oil if needed.
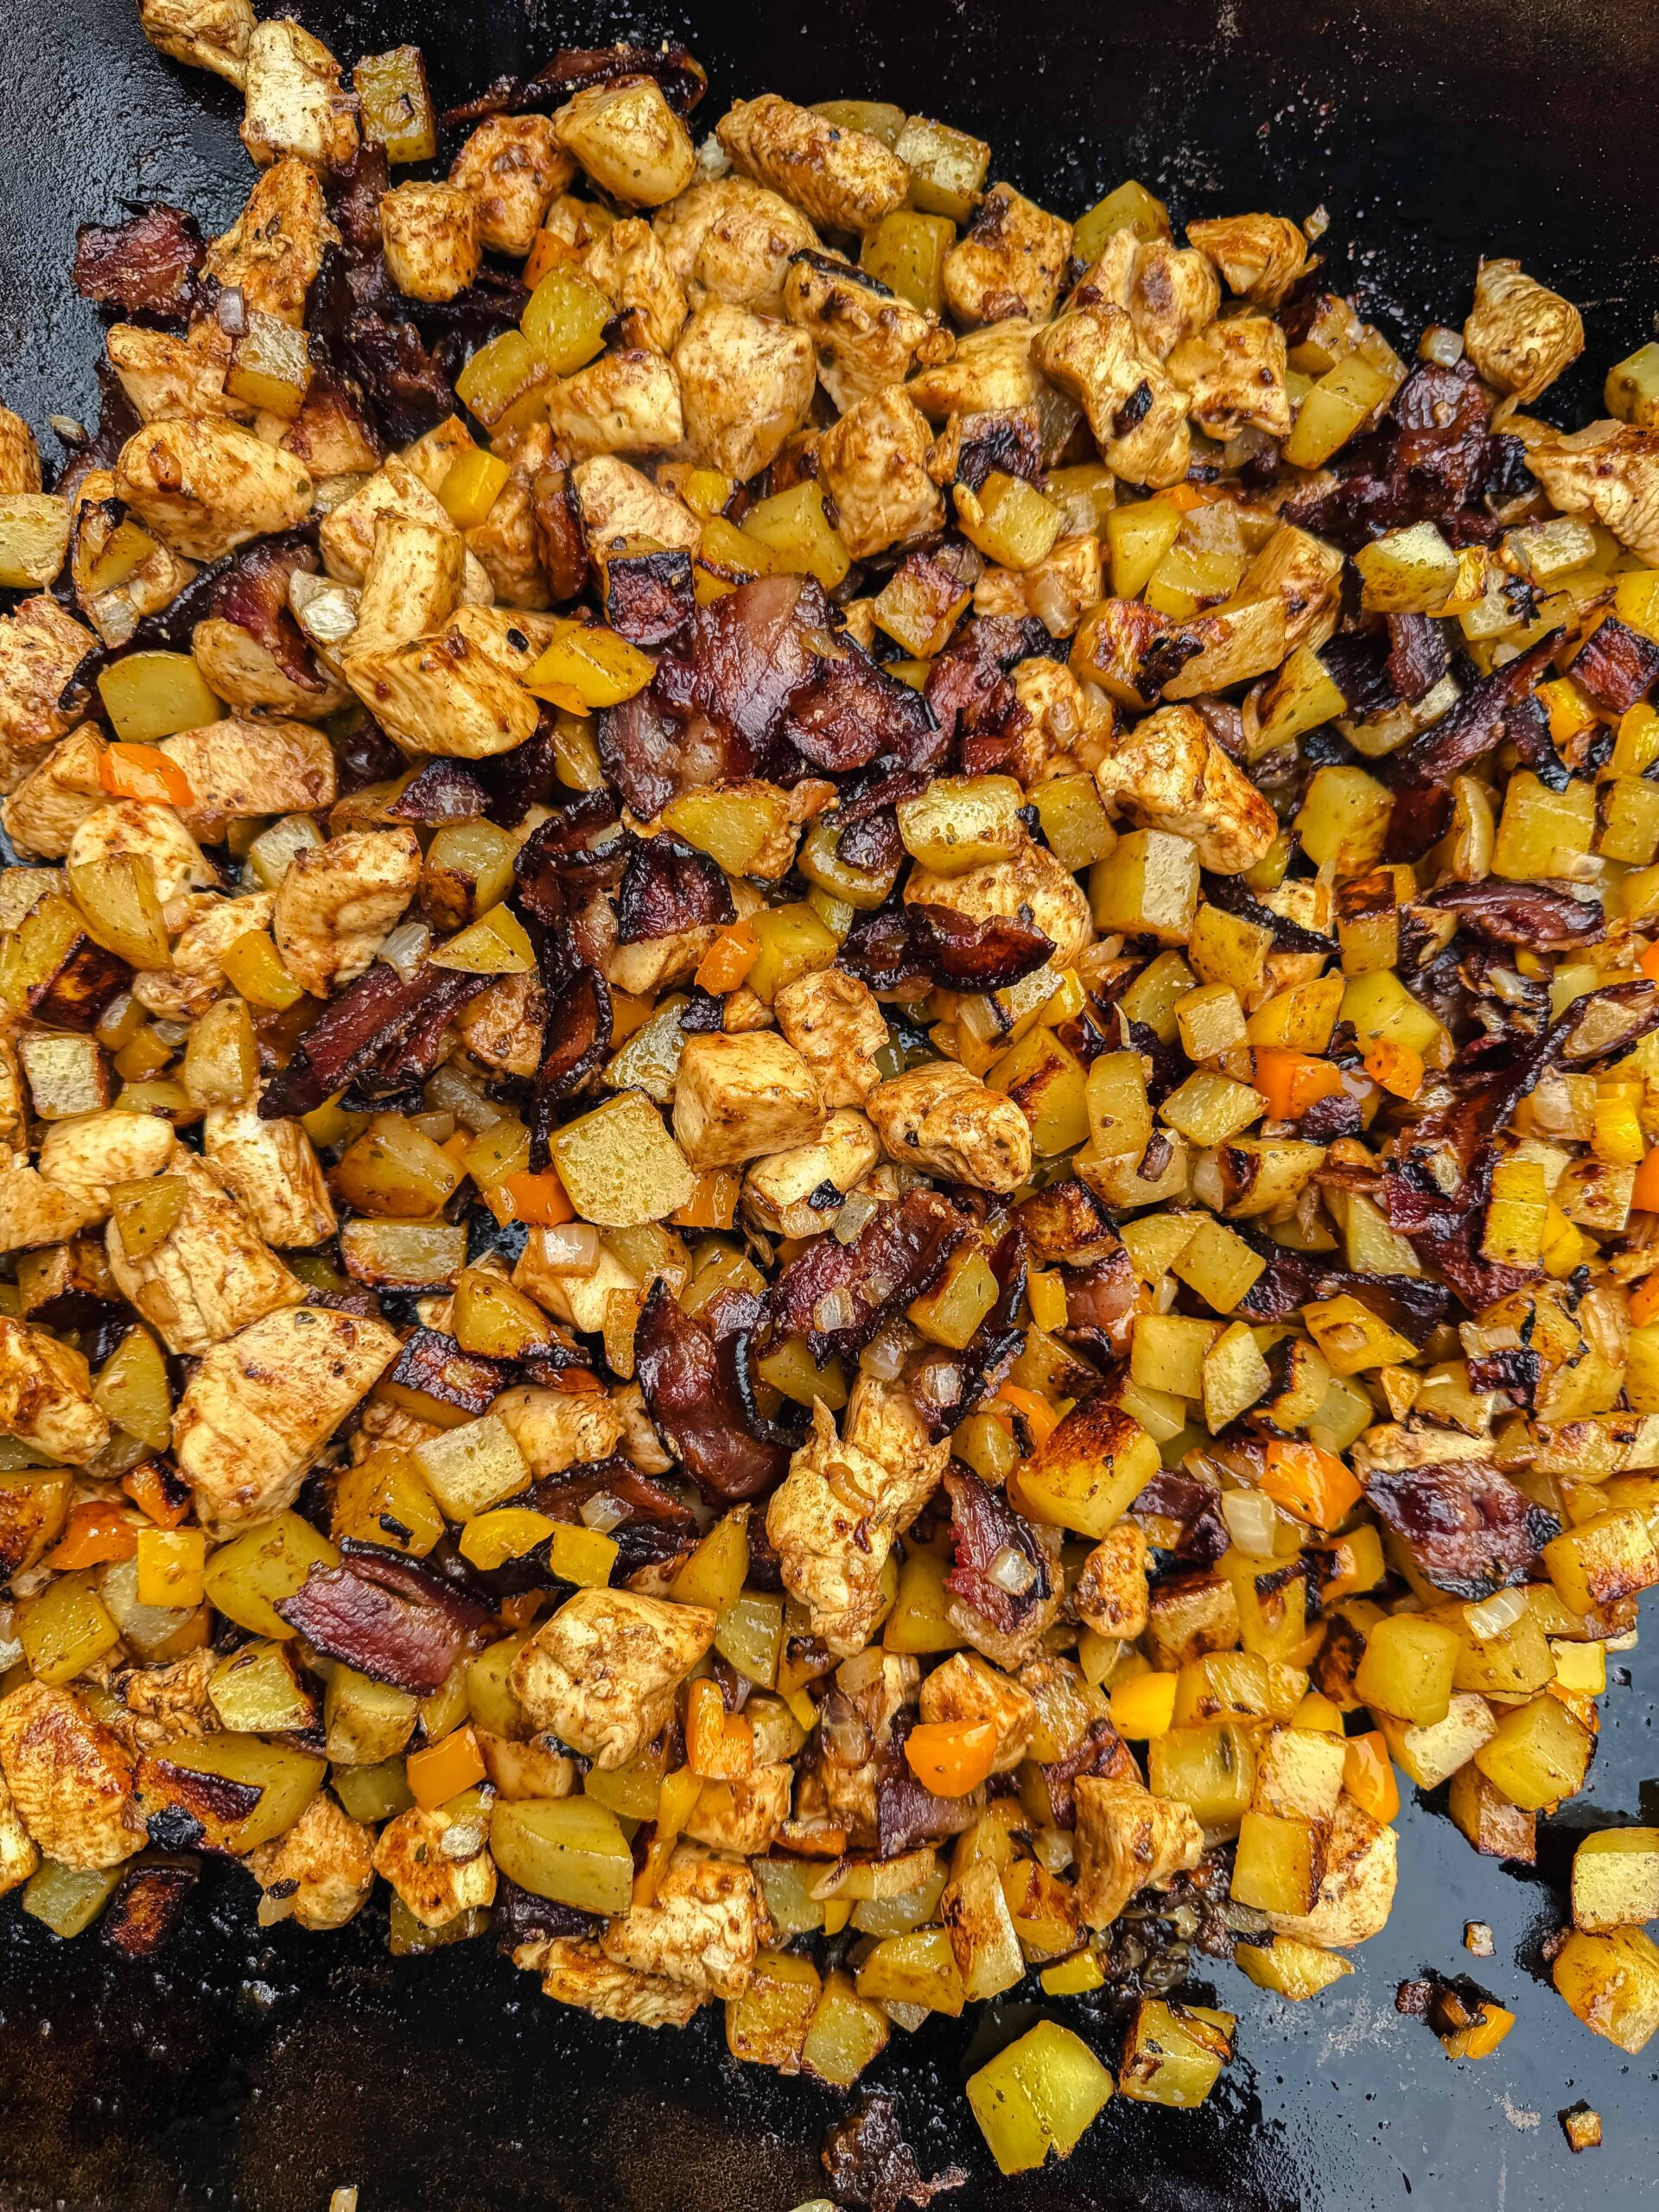
Step 5: Once the chicken is fully cooked, combine everything together on the grill. Layer on the shredded cheddar cheese and crumbled bacon on top.
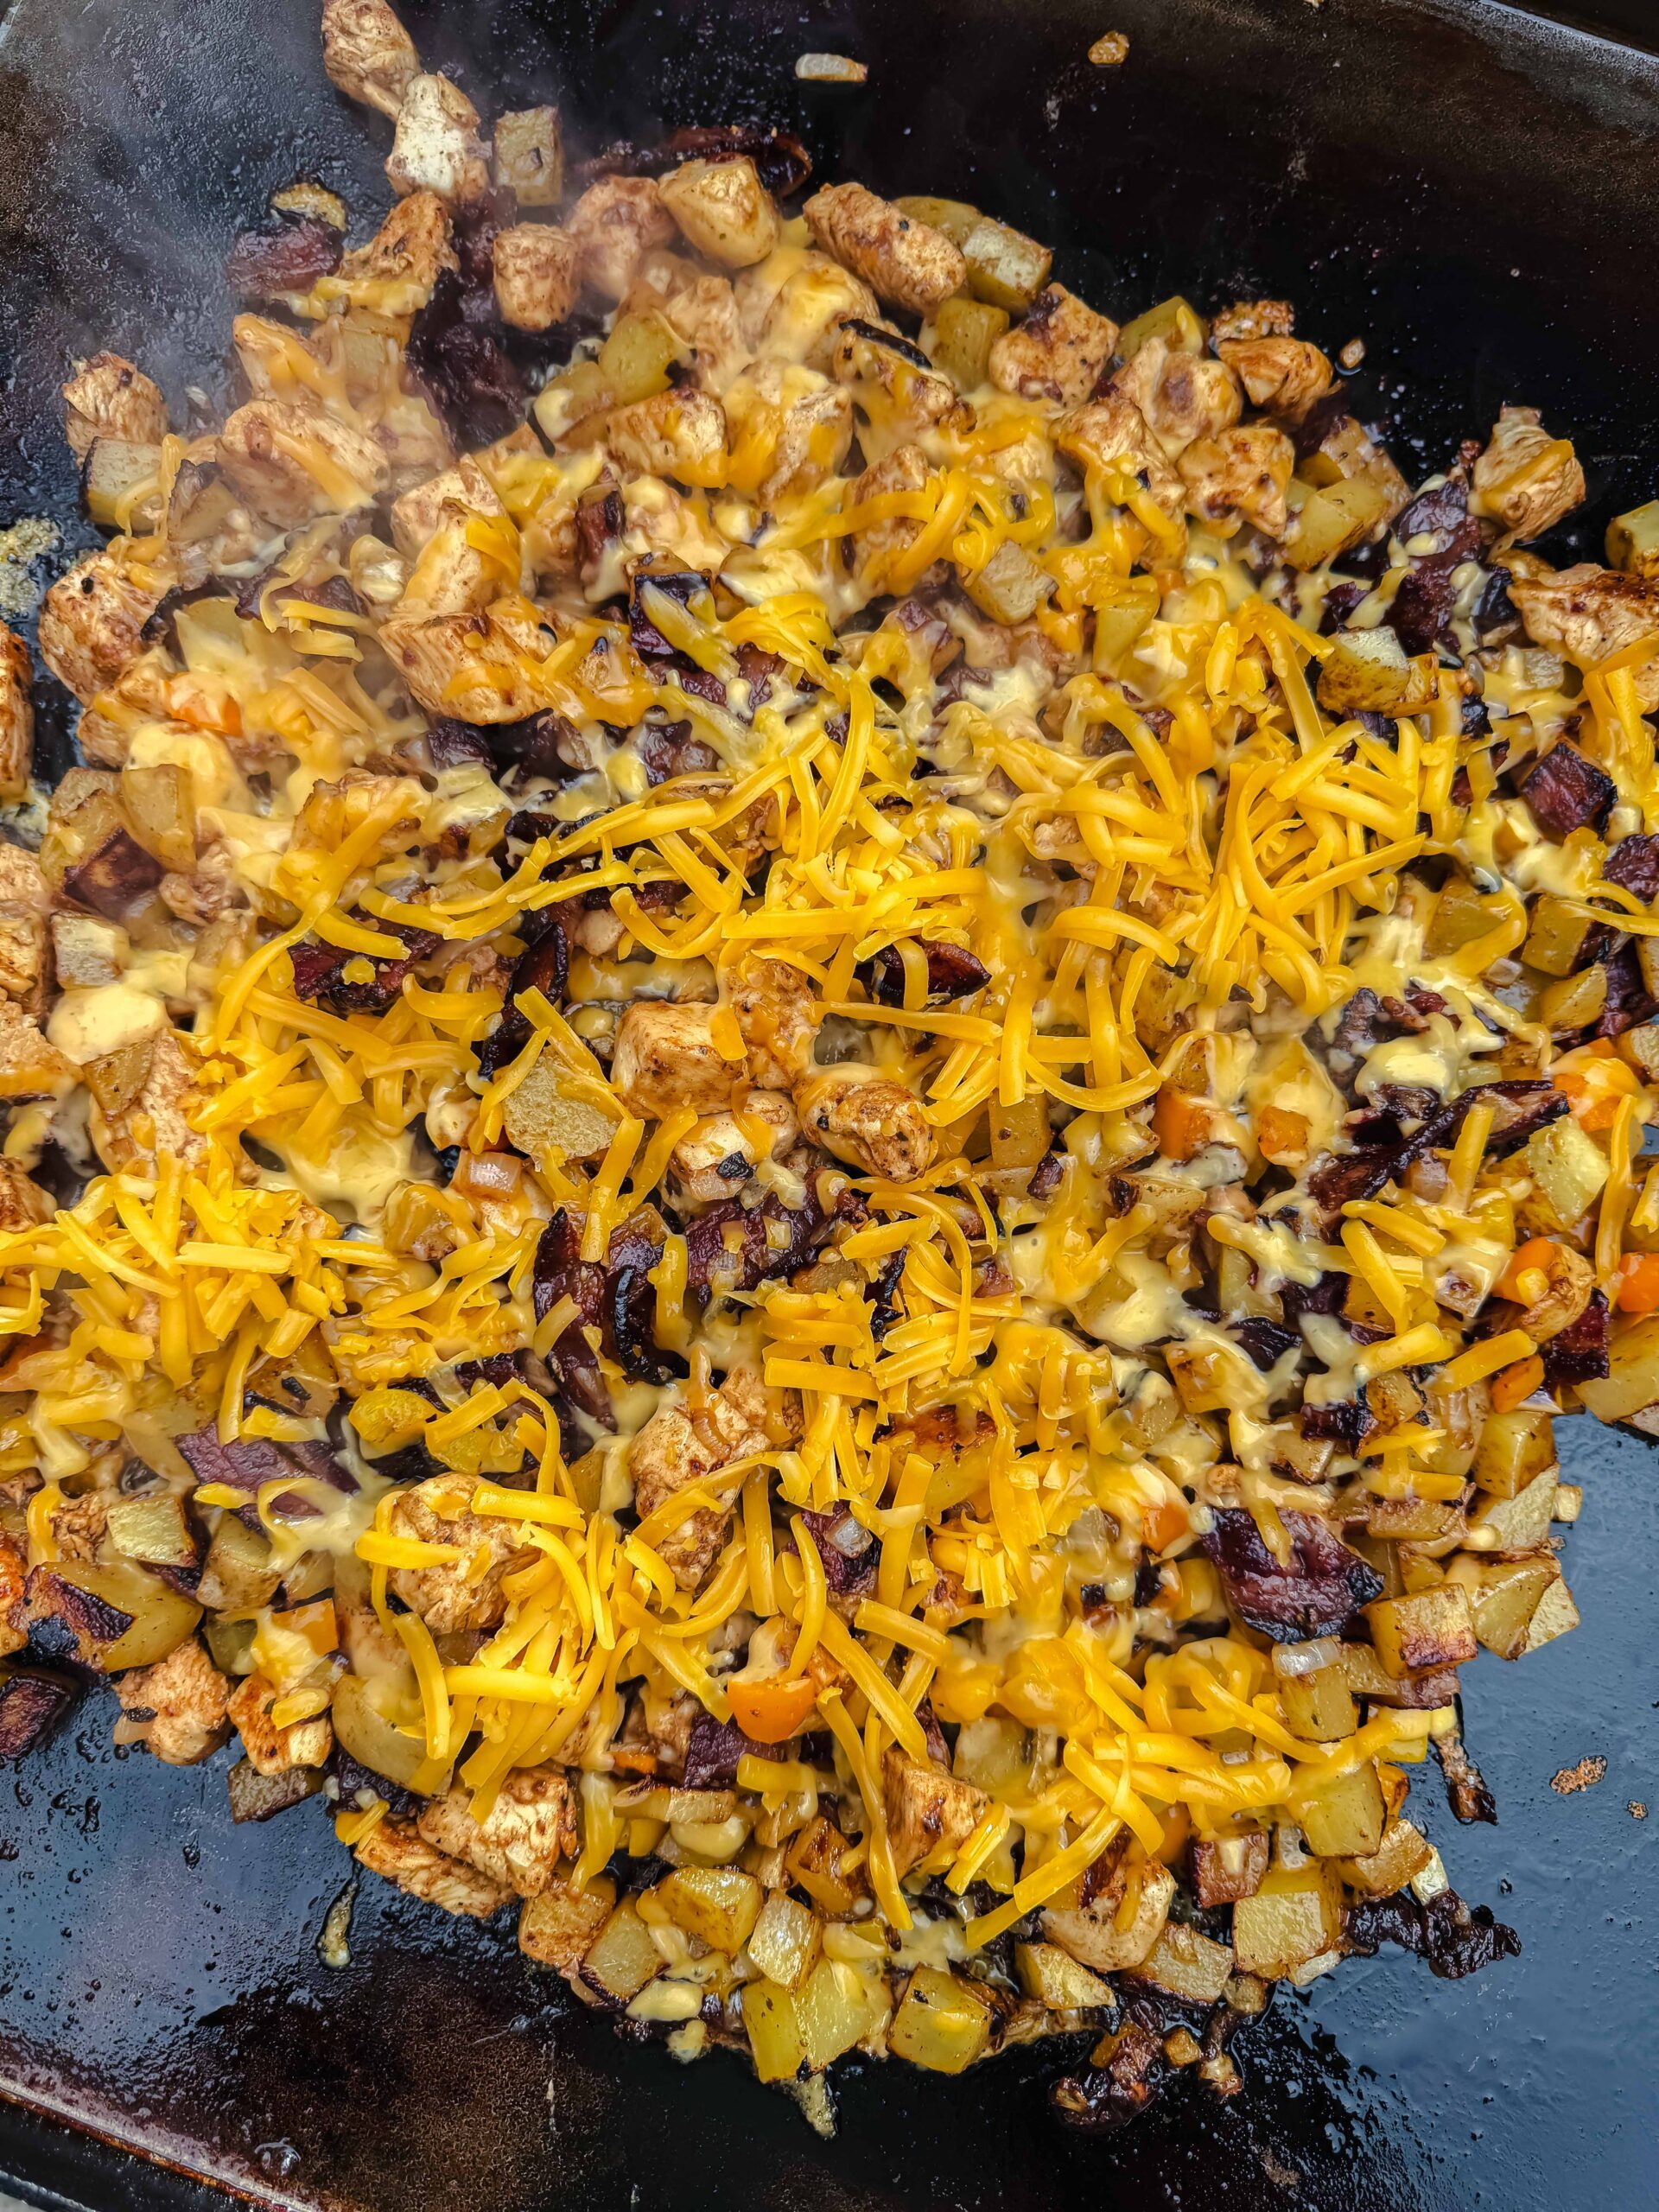
Step 6: Cook until the cheese is fully melted, then remove and enjoy!
The peppers and onion cook up fast on the Blackstone, so keep an eye on them. You want them soft and slightly charred on the edges - so good! If you love easy Blackstone meals with simple ingredients, my Chicken Stir Fry on the Blackstone uses that same idea and is another family favorite around here.
Can I make this if I don't have a Blackstone?
Absolutely! Here is how to make it in a skillet:
- In a large skillet over medium heat, cook the bacon until crispy and remove. Chop it up and set aside.
- In a small bowl, combine the ranch seasoning, salt, garlic powder, onion powder, and paprika.
- Add the potatoes to the skillet, season with half the seasoning mix, and cook for about 20 minutes until fork tender and crispy on the outside. Remove and set aside.
- Add the chicken, bell peppers, and onion to the skillet. Season with the remaining spice mix and cook for about 5-8 minutes per side until the chicken is fully cooked through.
- Once everything is cooked, add the potatoes back in. Top with shredded cheddar and bacon and cook until the cheese melts. Enjoy!
This works just as well on a regular weeknight when firing up the Blackstone isn't in the cards. I do the same skillet swap for my Chicken Bacon Ranch Pasta too - same great flavors, just a different format!

Tips for the Best Chicken Bacon Ranch Skillet
- Don't skip cooking the chicken in the bacon grease. That step adds so much flavor. It is one of those little things that makes a big difference.
- Cut everything in similar sizes. Uniform cubes on the chicken and potatoes means everything finishes cooking around the same time.
- Add the bell peppers and onion after you flip the chicken. They cook faster than the potatoes and chicken, so adding them a little later keeps them from getting too soft.
- Keep the cheese covered for a minute. If your Blackstone has a dome lid, use it when the cheese goes on. It melts SO much faster. No lid? Just tent some foil over the top.
- Taste before you add extra ranch. Start with 2 tablespoons and go from there. Ranch seasoning can vary by brand and some are saltier than others.
Looking for more quick and easy Blackstone recipes? There are so many good ones to try!
Blackstone Chicken Bacon Ranch Skillet FAQs
You can! Frozen diced potatoes or even frozen hash browns work here. Just know they may release a little more moisture on the grill, so give them extra time to crisp up and make sure your Blackstone is hot enough.
I typically use the Hidden Valley ranch seasoning packets, but any brand works. You can also use my Homemade Lipton Onion Soup Mix as inspo and make your own ranch blend if you want to go the from-scratch route!
The safest way is to use a meat thermometer. Chicken is done when it reaches 165°F internally. No thermometer? Cut into the thickest piece - it should be white all the way through with no pink.
Yes! Zucchini, corn, or mushrooms all work great here. Just keep in mind that softer veggies cook faster so add them toward the end.
Storage
Leftovers store really well! Here is what to do:
Freezer - This one freezes okay but the potatoes can get a little soft after thawing. If you do freeze it, store in a freezer-safe container for up to 2 months and reheat on the stovetop.
Fridge - Store in an airtight container for up to 3-4 days. Reheat in a skillet over medium heat for best results. The microwave works too but the potatoes won't be as crispy.
Recipes to Pair with Blackstone Chicken Bacon Ranch Skillet

If you tried this Blackstone Chicken Bacon Ranch Skillet or any other recipe on my blog, please leave a 🌟 star rating and let me know how it went in the comments below. I love hearing from you!
📖 Recipe
Blackstone Chicken Bacon Ranch Skillet
Ingredients
Equipment
Instructions
- Preheat Blackstone to medium heat adding a thin coat of oil to the surface.
- Add diced potatoes and onions to one side of the grill. Cook for about 15 minutes before flipping.
- While the potatoes are cooking add the bacon to the other half of the grill. Cook for about 5 minutes per side or until the bacon is crispy. Remove from grill, cut into pieces and set aside for later.
- After removing the bacon this is a good time to flip the potatoes and add the diced peppers. Add more oil to the potatoes if needed.
- Add chicken to the grill and cook in the bacon grease. Season the chicken and potatoes with the salt, paprika, onion powder, garlic powder, and ranch seasoning. Cook chicken for about 6-8 minutes per side.
- Once the chicken is fully cooked combine the potatoes and chicken. Layer on shredded cheese and bacon. Cook on the grill until the cheese is fully melted then remove and enjoy!
Nutrition
Notes
- Don't skip cooking the chicken in the bacon grease. That step adds so much flavor. It is one of those little things that makes a big difference.
- Cut everything in similar sizes. Uniform cubes on the chicken and potatoes means everything finishes cooking around the same time.
- Add the bell peppers and onion after you flip the chicken. They cook faster than the potatoes and chicken, so adding them a little later keeps them from getting too soft.
- Keep the cheese covered for a minute. If your Blackstone has a dome lid, use it when the cheese goes on. It melts SO much faster. No lid? Just tent some foil over the top.
- Taste before you add extra ranch. Start with 2 tablespoons and go from there. Ranch seasoning can vary by brand and some are saltier than others.


Easy to make and sooo good! I added some jalapeño to it for a little kick.
Oh I bet the jalapeño was a great addition!!!
This recipe is incredibly flavorful and filling. My family loved it.
So glad your family enjoyed it!
So good. Easy to put together and clean up was a breeze. I added mushrooms, just because I had some that needed using.
Yay! So glad you enjoyed it!
A family favorite!