Sourdough Brown Bread | Cheesecake Factory
Sweet and delicious, this is the best sourdough brown bread recipe that tastes just like the Cheesecake Factory bread. Made with 100% sourdough, whole wheat and bread flour, you will love this copycat bread.
This brown bread is just like the Cheesecake Factory brown bread, but made with sourdough starter instead of yeast!
Ingredients
- Water - I use whatever type of water I use for drinking water. If you use your tap water for drinking water, then use that. If you use filtered water, then use that.
- Sourdough Starter - Make sure to use fully active, bubbly starter in this recipe for best results
- Honey and Molasses - for added sweetness and flavor.
- Flour - a mixture of bread flour and whole wheat flour to get the perfect flavor and texture.
- Cocoa Powder - this is what gives the brown bread the brown color.
- Salt - this helps the flavor and texture of your bread.
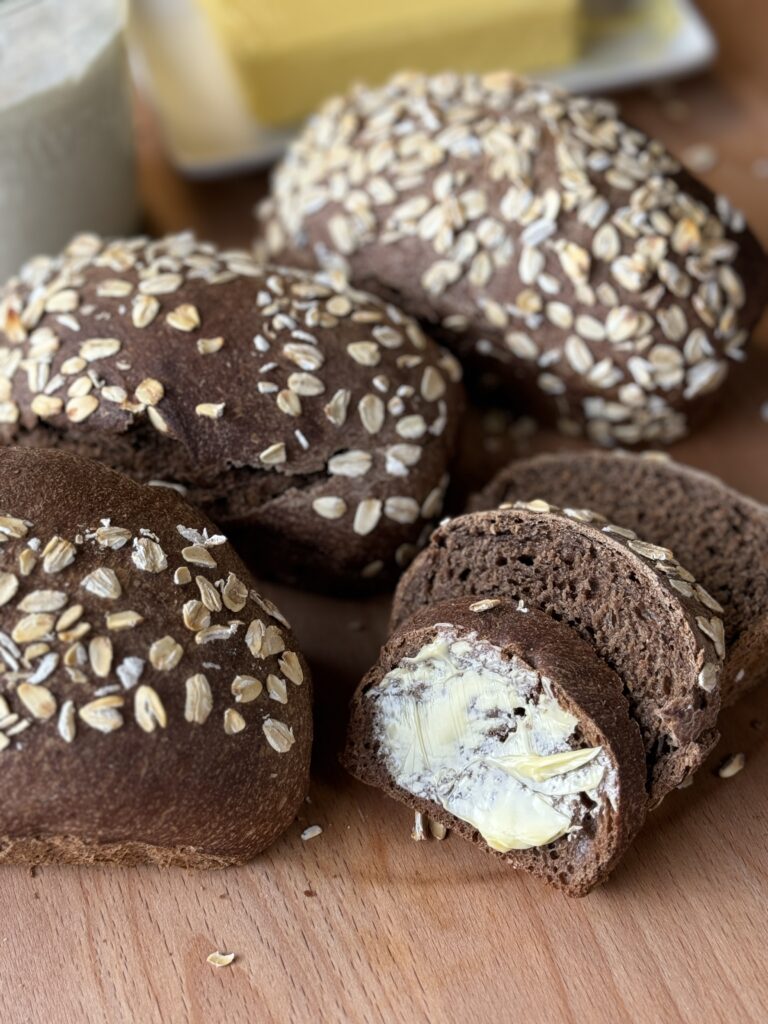
- Butter - adds softness and flavor to the bread.
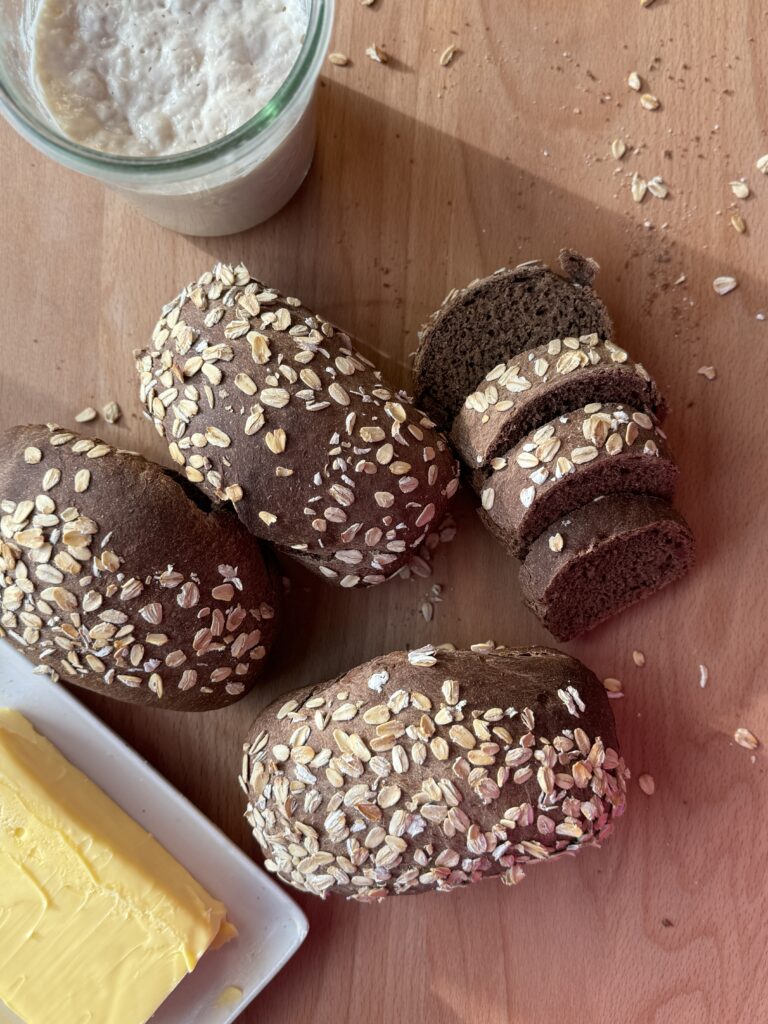
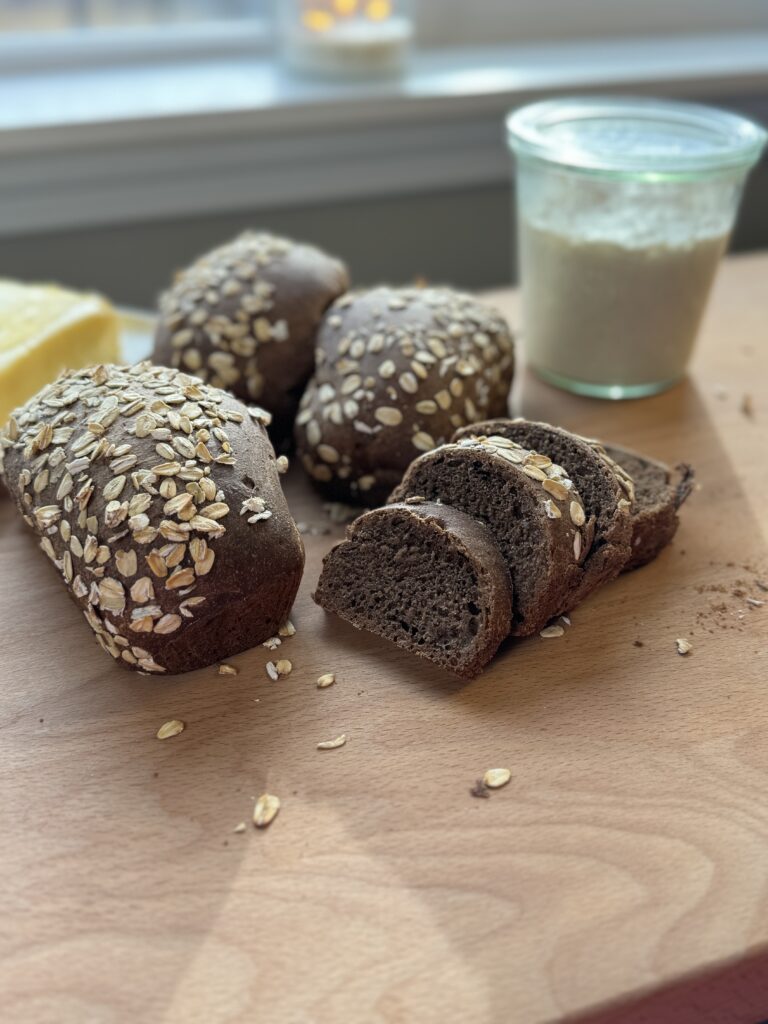
- Oats - for dusting top
How to Make Sourdough Brown Bread
- In a medium bowl, mix water, honey, molasses, melted butter and sourdough starter.
- Add in bread flour, whole wheat flour, salt, and cocoa powder. Mix until a smooth dough has formed.
- Transfer dough to a clean bowl, cover it and let it rise until it doubles. It will take from 8 to 10 hours. Remember to leave in a warm spot.
- After the first rise divide dough into 4 pieces. Using your hands or a rolling pin, open each piece in a rectangle. Roll into a cylinder and pinch to close. Roll the tops of the loaves in oats.
- Place in a lined baking sheet or in a mini loaf pan, cover and let rise for 2 more hours or until loaves almost double, and look puffy and light.
- Preheat oven to 350°F. Uncover loaves and bake them for 30 to 35 minutes.
- Let loaves cool for 15 minutes before slicing.
Share Your Experience
I would love to hear about your experience making and enjoying my RECIPE! Feel free to tag me on Instagram or leave a review below. Your feedback helps me improve our recipes and provides inspiration to fellow home cooks.
Save this recipe for later by simply using the pin button on the recipe card or any of the photos above. Happy cooking!
📖 Recipe

Sourdough Brown Bread
Sweet and delicious, this is the best sourdough brown bread recipe that tastes just like the Cheesecake Factory bread. Made with 100% sourdough, whole wheat and bread flour, you will love this copycat bread.
Ingredients
Instructions
- In a medium bowl, mix water, honey, molasses, melted butter and sourdough starter.
- Add in bread flour, whole wheat flour, salt, and cocoa powder. Mix until a smooth dough has formed.
- Transfer dough to a clean bowl, cover it and let it rise until it doubles. It will take from 8 to 10 hours. Remember to leave in a warm spot.
- After the first rise divide dough into 4 pieces. Using your hands or a rolling pin, open each piece in a rectangle. Roll into a cylinder and pinch to close. Roll the tops of the loaves in oats.
- Place in a lined baking sheet or in a mini loaf pan, cover and let rise for 2 more hours or until loaves almost double, and look puffy and light.
- Preheat oven to 350°F. Uncover loaves and bake them for 30 to 35 minutes.
- Let loaves cool for 15 minutes before slicing.


I made this bread today because I was scouring the internet for a cheesecake factory like bread recipe. It was SO good! I ate 3 slices with butter while still warm! Have you frozen these? Do they freeze well?
Yes! They freeze great!
Feels like a silly question but when would be the best time to freeze? After the final rise but before bake or after baking?
Normally I freeze the fully baked loaf. I have never frozen the unbaked loaf, but if I were to try I would freeze it before the final rise.
I've just started my sourdough journey but tired quickly of "regular" sourdough and was looking for something different. These loaves are AMAZING. I was kind of hoping they wouldn't be because I wanted to eat a whole dang loaf as soon as I tasted the first bite (still warm out of the oven). So so good!!
Any advice for making a regular loaf instead of minis?
Same instructions, just shape into one loaf and bake for 35-40 minutes. You can always use a meat thermometer to test the internal temperature of your loaf. You want the temperature to be at least 190-200F.
Is this supposed to be a stiff dough? I made ot this morning and it was a stoff ball when i was done mixing it. It has been sitting all day and not risen at all. Wondering what happened.
The dough is a little stiffer, but not super stiff. How was your sourdough starter? Nice and bubbly?
How am I the first rating? This recipe is so good! Thanks for having this available. Highly recommend!
So so happy you enjoyed it!!
Hi wondering if I can put them in fridge overnight after the second 2hr rise, then bake in morning? Also would like to make buns instead do you have a temp for those or size thanks😊
Put in the fridge right after shaping and then you can bake from cold in the morning. I don't have a temp for rolls, but I would start at 350F for 30 minutes.
So do you put in the fridge before it rises the second time? Do you need to let them rise after refrigeration, before baking?
Correct, I just put it into the fridge overnight without a second rise. It will complete a slow rise in the fridge.
Can you substitute the bread flour with all purpose flour?
Yes!
Made this and it is so good! My dough was very stiff when I mixed it and a little dry. I’m at a very high altitude so that could cause it. I’m wondering if you could add your recipe in grams for measurements also? That might help me get the right ratio of flour/water! Thanks for posting such a yummy bread!
Hi! There are metric measurements already in the recipe card. I find that many people measure too much flour for their bread recipes.
I’ve made this bread several times, and it’s sooooo good!!! I make full loaves and bake for about 40 minutes. Definitely worth making again and again!
Wonder if swap rye flour with wheat flour ! Will dough react differently? And also would it be need some changes Like water?
I have not tested using rye flour, you likely can, but you would have to play with the dough to see if it needs additional water.
Is this supposed to rise like other bread mine didn’t seem to rise and I can’t figure out why I’m gonna try again but I make bread all the time and have never had it not rise at all
The dough should rise. You may need to find a warmer spot in your home this time of year.
I want to make this but really wish ingredients are by weight.
Hey! If you go to the recipe card and click metric it will convert all the ingredients to weight ❤️
I made these and I seemed to mess up the shaping part. I have mini loaf containers. You say roll each piece into a rectangle and then what, roll it up like a taquito? And just place it in the mini loaf container? I rolled it up kinda strange last time (folded the sides in and then rolled it) and the center didn’t cook well/the shape was off. Thank you 🙂
Shaping can take a little practice to get correct. I flatten into a rectangle and then roll up into a log.
I am so excited about trying this bread. We used to buy the Cheesecake Factory Bread at the grocery store, but it became too expensive! After looking at some recipes on Pinterest, many of which are in metric, I decided on this one. I didn't have bread flour, but I couldn't wait. I used Bob's Red Mill app and whole wheat pastry flour. I also didn't calculate that I was starting too late. So, here's what I am going to do. Let it ferment for four hours which is when I go to bed. Then, I will put it in a loaf pan and stick it in the fridge to long ferment. I'll take it out in the morning and let it second ferment. I'll let you know how it turns out.
I have never baked my SD uncovered the entire time at a low temperature; want to confirm it's best not to use my dutch oven with high heat I usually use?
I have baked these uncovered everytime.