Breakfast Quesadillas on the Blackstone Griddle
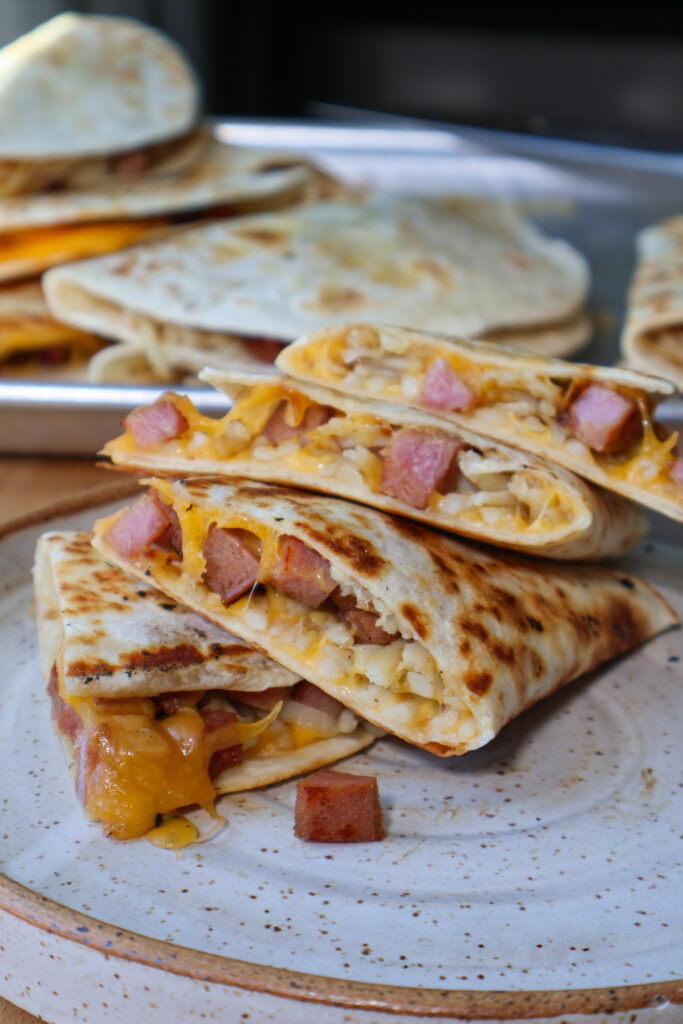
Crispy breakfast quesadillas on the Blackstone, loaded with hash browns, eggs, cheese, and ham. Easy, customizable, and freezer-friendly for busy mornings.
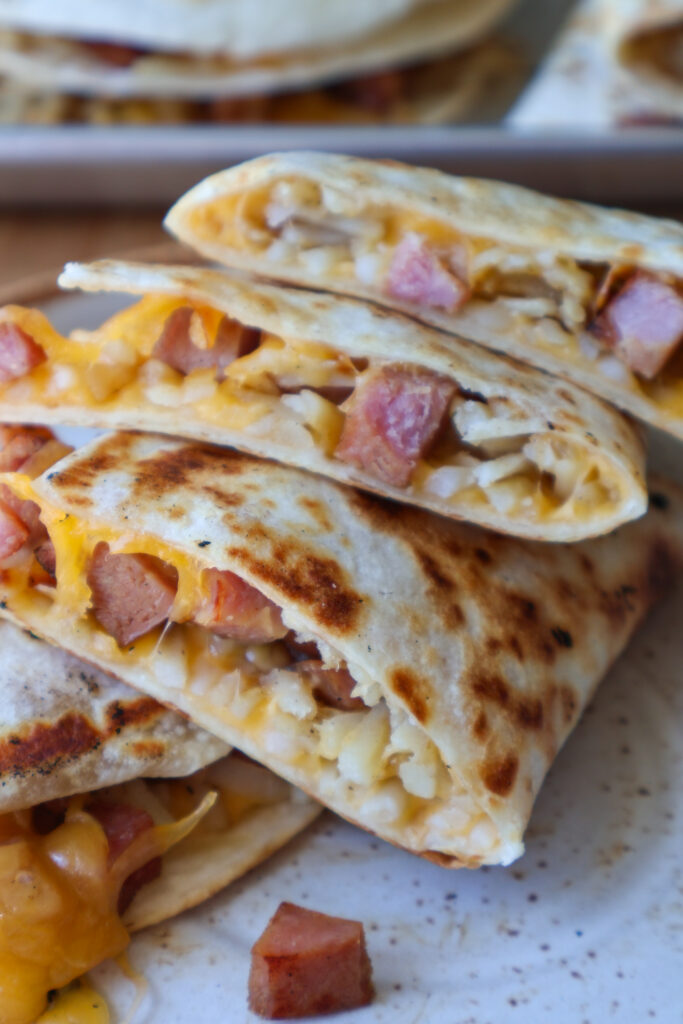
If you're looking for the ultimate breakfast to make on your Blackstone griddle, these Breakfast Quesadillas are a game-changer. Crispy tortillas, melty cheese, golden hash browns, savory breakfast meat, and fluffy scrambled eggs all come together for a hearty, satisfying morning meal. They're quick to make, easy to customize, and perfect for serving a crowd-or freezing for busy mornings.
Why You'll Love This Blackstone Breakfast Recipe
- Perfectly crispy - The Blackstone's even heat gives your tortillas that golden, crunchy texture.
- Hearty & filling - Packed with protein, carbs, and cheese for a complete breakfast.
- Make-ahead friendly - These quesadillas freeze and reheat beautifully.
- Totally customizable - Swap in your favorite meats, cheeses, or veggies.

Ingredients & Substitution Ideas
- Tortillas - I use medium flour tortillas for a perfect fold, but you can use whole wheat, low-carb, or gluten-free tortillas.
- Breakfast Meat - Diced ham adds salty flavor, but sausage, bacon, or even leftover taco meat.
- Hash Browns - Shredded hash browns get crispy on the griddle and add great texture. You can use fresh or frozen.
- Cheese - Cheddar melts beautifully, but Monterey Jack, pepper jack, or a Mexican blend will work just as well.
- Eggs (optional) - Scrambled eggs add extra protein and make the quesadillas more filling. My husband and kids don't like the texture of eggs, so I usually leave them off of our quesadillas.
- Salt & Pepper - Simple seasoning that brings everything together.

How to Make Breakfast Quesadillas on the Blackstone
- Preheat the griddle - Set your Blackstone to medium heat.
- Cook the hash browns - Add a light layer of oil, then spread hash browns on one side of the griddle. Season well with salt and pepper. Cook for 7-8 minutes per side, until crispy and golden. Remove from griddle.
- Prepare the meat and eggs - On the other side of the griddle, cook your breakfast meat and scramble the eggs. Remove from griddle when done.
- Assemble the quesadillas - Lower the heat to low. Place tortillas on the griddle, sprinkle cheese over half the tortilla, then layer hash browns, breakfast meat, scrambled eggs, and more cheese.
- Cook until crispy - Fold the tortilla over the filling and cook until golden brown, then flip and cook for 1-2 more minutes.
- Serve & enjoy - Cut into wedges and serve immediately with salsa, sour cream, or hot sauce.

Tips for the Best Blackstone Breakfast Quesadillas
- Control your heat - Low heat ensures the cheese melts without burning the tortilla.
- Go heavy on the cheese - It acts as "glue" to hold your quesadillas together.
- Batch cook for the freezer - Make extras, wrap in foil, and freeze. Reheat in the air fryer for a quick breakfast.
Serving Ideas
Pair your breakfast quesadillas with fresh fruit, a side of salsa, or a drizzle of chipotle aioli for an extra kick.
Meal Prepping Breakfast Quesadillas
One of the best things about these Blackstone breakfast quesadillas is how well they work for meal prep. Simply double or triple the recipe, allow the cooked quesadillas to cool completely, then wrap each one tightly in foil or parchment paper and store them in a freezer-safe bag. They'll keep in the freezer for up to 2 months. When you're ready to eat, thaw overnight in the fridge and reheat in the air fryer or on a skillet until hot and crispy. It's the perfect grab-and-go breakfast for busy mornings, camping trips, or feeding a hungry crowd without the morning rush.
📖 Recipe

Breakfast Quesadillas on the Blackstone Griddle
Ingredients
Equipment
Instructions
- Preheat your Blackstone Griddle to medium heat.
- Add a light layer of oil to the surface and add the hash browns to one side of the griddle. Season liberally with salt and pepper. Allow the hash browns to cook for 7-8 minutes before flipping and cooking for an additional 7-8 minutes. Once fully cooked remove from the griddle.
- On the second half of the griddle cook your breakfast meat of choice and scrambled eggs. Once fully cooked remove from the griddle.
- Lower griddle temperature to low. Add tortillas and add shredded cheese to half the tortilla. Top with hash browns, breakfast meat, scrambled eggs, and an additional sprinkle of cheese.
- Fold the other half of the tortilla over the top the fillings and allow to cook until the tortilla is golden brown. Flip and cook an addition 1-2 minutes.
- Remove from griddle and enjoy immediately.
- NOTE: I love to double the recipe and freeze these for later! I thaw overnight in the fridge and they reheat amazing in the air fryer.


