• About
  • Nav Social Icons

  • Skip to primary navigation
  • Skip to main content
  • Skip to primary sidebar
  • Skip to footer
  • Home
  • About
  • Blog
    • Mom Life
    • Farm Life
    • Recipes
      • Breakfast
      • Dessert
      • Dinner
      • Sides
      • Snacks
  • Shop
    • Shop – Digital Books
  • Cart
  • My account
  • Mobile Menu Widgets

    Connect

    Search

The Farmstyle

The Farmstyle

by Kayla Zenner

  • Home
  • About
  • Shop
    • Shop – Meal Plans
    • Shop My Favorites
  • Blog
    • Breakfast
    • Dessert
    • Dinner
    • Snacks
    • Sides
    • All Recipes
  • Cart

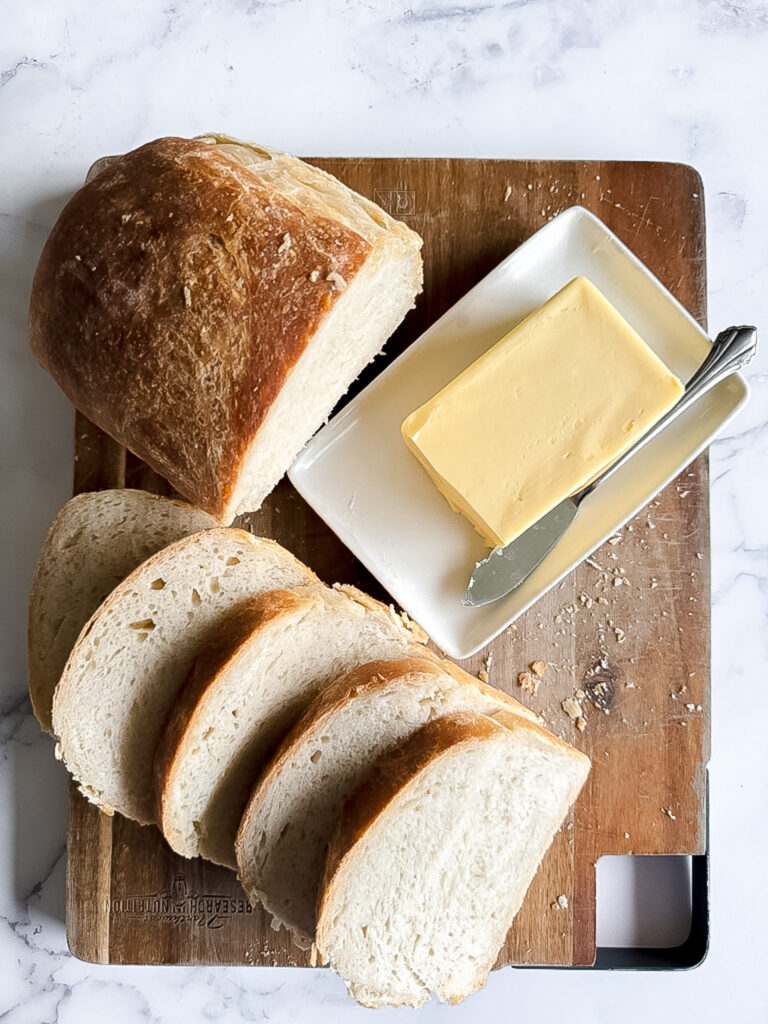
Easy Sourdough Sandwich Loaf

March 2, 2024 · In: Recipes, Sides

FacebookTweetPin
Jump to Recipe Print Recipe

A simple and easy recipe for homemade sourdough sandwich bread. This dough can be mixed at night so you have fresh bread in the morning.

Ingredients for Soft Sourdough Sandwich Loaf

  • All Purpose Flour – I always use unbleached flour when working with sourdough. Bread flour works also!
  • Honey – adds a touch of sweetness and softness to the loaf
  • Salt – adds flavor and structure
  • Sourdough Starter – this is what is making our bread rise vs dried yeast.
  • Water – room temp is great

How to Make Soft Sourdough Sandwich Loaf

  • In a large bowl combine 1 cup water, starter, and honey. Mix to combine.
  • Add in flour and salt. Mix to combine and knead dough for about 5 minutes. If dough is too dry add up to an additional 1/2 cup water.
  • Place back into large mixing bowl, cover, and let rise for 8-10 hours (70F).
  • After the bulk rise place dough onto the counter and gently shape into a rectangle to roll into a loaf. Place into a loaf pan, cover and let rise for another 2 hours.
  • Bake at 375 for 45-50 minutes. Remove from oven and place a tea towel on top. This helps the crust soften up a bit.
  • Enjoy!

Share Your Experience

I would love to hear about your experience making and enjoying my Sourdough Sandwich Loaf! Feel free to tag me on Instagram or leave a review below. Your feedback helps me improve our recipes and provides inspiration to fellow home cooks.

Save this recipe for later by simply using the pin button on the recipe card or any of the photos above. Happy cooking!

Sourdough Sandwich Loaf

5 from 4 votes
A simple and easy recipe for homemade sourdough sandwich bread. This dough can be mixed at night so you have fresh bread in the morning.
Print Recipe Pin Recipe
Prep Time:20 minutes mins
Cook Time:45 minutes mins
Rise Time:10 hours hrs
Course: Side Dish
Keyword: bread, sourdough
Servings: 1 loaf
Calories: 1998kcal

Ingredients

  • 4 cups all purpose flour
  • 1 tbsp honey
  • 1 tsp salt
  • 1/2 cup bubbly active sourdough starter
  • 1 – 1 1/2 cup warm water
US Customary – Metric

Instructions

  • In a large bowl combine 1 cup water, starter, and honey. Mix to combine.
  • Add in flour and salt. Mix to combine and knead dough for about 5 minutes. If dough is too dry add up to an additional 1/2 cup water.
  • Place back into large mixing bowl, cover, and let rise for 8-10 hours (70F).
  • After the bulk rise place dough onto the counter and gently shape into a rectangle to roll into a loaf. Place into a loaf pan, cover and let rise for another 2 hours.
  • Bake at 375 for 45-50 minutes. Remove from oven and place a tea towel on top. This helps the crust soften up a bit.
  • Enjoy!

Nutrition

Calories: 1998kcal | Carbohydrates: 423g | Protein: 55g | Fat: 5g | Saturated Fat: 1g | Polyunsaturated Fat: 2g | Monounsaturated Fat: 0.4g | Sodium: 2350mg | Potassium: 546mg | Fiber: 14g | Sugar: 19g | Vitamin C: 0.1mg | Calcium: 85mg | Iron: 23mg

Share this:

  • Click to share on X (Opens in new window) X
  • Click to share on Facebook (Opens in new window) Facebook
  • Click to share on Pinterest (Opens in new window) Pinterest

Like this:

Like Loading...
FacebookTweetPin

By: Kayla · In: Recipes, Sides

About Kayla

Hi! I'm Kayla. I'm here to help inspire busy moms to get back in the kitchen and feel beautiful along the way! I'm married to my high school sweetheart and live on a farm with our two busy boys.

you’ll also love

Breakfast Quesadillas on the Blackstone Griddle
Sourdough Discard Banana Bread with Chocolate Chips
No Yeast Donut Holes with Orange and Ricotta

Reader Interactions

Comments

  1. Jenny says

    June 7, 2024 at 12:31 pm

    Can you use your starter right out of the refrigerator or does it need to be room temperature?

    Loading...
    Reply
    • Kayla says

      June 7, 2024 at 5:07 pm

      I always take my starter out and feed it and wait for it to double in size prior to using in a recipe.

      Loading...
      Reply
  2. Madi says

    July 4, 2024 at 11:06 am

    5 stars
    I have been making this for months now and absolutely love it. I get the traditional sourdough taste but in an easy loaf form, and so it’s so easy. Be sure so grease your bread pan generously 🙂

    Loading...
    Reply
    • Kayla says

      July 4, 2024 at 1:14 pm

      So glad you enjoy it!

      Loading...
      Reply
  3. Tiina says

    July 31, 2024 at 9:25 am

    Do you cover it in the oven?

    Loading...
    Reply
    • Kayla says

      August 3, 2024 at 9:10 pm

      No I don’t.

      Loading...
      Reply
  4. Deb says

    October 30, 2024 at 12:22 pm

    Excited to try my hand at sandwich bread! Just to clarify, there are no stretch-and-folds and no time in the fridge to cold ferment?

    Loading...
    Reply
    • Kayla says

      October 30, 2024 at 12:23 pm

      Correct!

      Loading...
      Reply
      • Deb says

        December 6, 2024 at 7:37 am

        Thanks! It’s in the oven now. How do you store your bread? Would it last the week without drying out if I sliced it up and put it in a plastic bread bag?

        Loading...
        Reply
        • Kayla says

          December 7, 2024 at 5:47 pm

          5 stars
          It doesn’t quite last a week before getting crumbly. I like to cut and freeze the slices that we won’t eat within 3 days.

          Loading...
          Reply
  5. Keiki says

    November 1, 2024 at 9:22 pm

    Can you leave the dough in the bowl for more than 10hrs? ( overnight )

    Loading...
    Reply
    • Kayla says

      November 2, 2024 at 5:48 am

      Depends on the temp on your house. If it’s less than 70F then it should be fine. More than that could be iffy.

      If you know ahead of time that you need to leave it longer you can add less starter to the dough.

      Loading...
      Reply
  6. Mary says

    December 5, 2024 at 6:21 am

    Could you add olive oil to the recipe ?

    Loading...
    Reply
    • Kayla says

      December 5, 2024 at 11:30 am

      Yes! Swap out a few tablespoons of water for the olive oil.

      Loading...
      Reply
  7. Kristina Allen says

    January 8, 2025 at 5:37 pm

    I make this weekly and it seems to get better each time. I am a newbie to Sourdough and I should venture out but this is so delish and easy. My family loves it.

    Loading...
    Reply
    • Kayla says

      January 10, 2025 at 10:32 am

      So glad you enjoyed it!

      Loading...
      Reply
  8. Winnie says

    January 9, 2025 at 9:42 am

    5 stars
    Super simple and delicious! Have made it 3 times and great results each time. Adding extra honey this time around for a sweeter taste.

    Loading...
    Reply
    • Kayla says

      January 10, 2025 at 10:33 am

      So so glad you enjoyed it!

      Loading...
      Reply
  9. Chelsea says

    January 10, 2025 at 7:58 pm

    Hi! This is for just one loaf? New to sourdough but my normal white bread recipe is 5 ish cups for two loaves. This seems like once proofed it could make two? Mine is currently in its bowl for the 10 hr rise. Thank you!

    Loading...
    Reply
    • Kayla says

      January 11, 2025 at 7:24 am

      This is just one loaf.

      Loading...
      Reply
  10. Sammie says

    January 18, 2025 at 5:36 pm

    I doubled the recipe, and just realized it’s going to be like 1 am before putting into my pans. Any suggestions

    Loading...
    Reply
    • Kayla says

      January 18, 2025 at 5:37 pm

      Put it in the fridge before bed tonight then bring to room temp the next morning before proceeding.

      Loading...
      Reply
  11. Beverly Coleman says

    January 20, 2025 at 12:06 pm

    Love this easy recipe! So delicious. Thanks…

    Loading...
    Reply
  12. Jasmin Ripoll says

    January 25, 2025 at 6:13 am

    Can you bake this recipe in a Dutch oven?

    Loading...
    Reply
    • Kayla says

      January 29, 2025 at 12:58 pm

      I haven’t personally, but I am sure it would be fine!

      Loading...
      Reply
  13. Paige says

    January 29, 2025 at 6:48 pm

    Just curious what size loaf pan is best for this?

    Loading...
    Reply
    • Kayla says

      January 31, 2025 at 2:42 pm

      I use a 9″x5″ pan

      Loading...
      Reply
  14. dmyduck says

    February 4, 2025 at 9:27 am

    I’m new to Sourdough and am confused about the starter…do I feed my whole container of sourdough or take some out and feed that? And how much would it feed either one?? Thank you!

    Loading...
    Reply
    • Kayla says

      February 5, 2025 at 1:20 pm

      I like to feed 10 g starter, 50 g flour, and 50g water. Then I have a starter that is ready in 10-12 hours.

      Loading...
      Reply
  15. Jessica Sommar says

    February 4, 2025 at 4:50 pm

    If I realized I won’t be awake when 10 hours of proofing is up, can I proof it in the fridge instead? Or proof it some on the counter and proof it in the fridge for the rest of the time and then some?

    Loading...
    Reply
    • Kayla says

      February 4, 2025 at 4:51 pm

      Proof on the counter as long as you can then put in the fridge.

      Loading...
      Reply
  16. Marie Ansbro says

    February 27, 2025 at 11:07 am

    Hi! I’m putting mine in the oven shortly and have a question. Most recipes for sourdough bread require putting a pan with water in the oven. Im guessing not for this recipe?
    Also, Thank you for this recipe! I can’t wait to see how it comes out!!!!

    Loading...
    Reply
    • Kayla says

      February 27, 2025 at 11:08 am

      Nope! I just put the loaf pan in the oven without any steam.

      Loading...
      Reply
  17. Karen says

    February 27, 2025 at 11:34 am

    I am so glad I found your recipe. This is the first recipe that I’ve tried that came out perfect the first time! I was a little worried because the top was really hard when I took it out if the oven but I put a little butter on it and covered it with a towel to cool and it softened up nicely. I will definitely be using your recipe in the future. Thinking of adding cinnamon and raisins to it.

    Loading...
    Reply
    • Kayla says

      March 6, 2025 at 12:48 pm

      So glad that you enjoyed the recipe! The butter and towel trick works for so many other bread recipes too!

      Loading...
      Reply
  18. Karen Kissinger says

    March 3, 2025 at 8:25 pm

    I am so thankful that I came across your recipe. It was the first sourdough bread recipe that came out perfectly the first time I tried it. This will be my go to sandwich bread recipe for sure !

    Loading...
    Reply
    • Kayla says

      March 6, 2025 at 12:46 pm

      Yay! This makes me so happy to hear!!

      Loading...
      Reply
  19. Carla says

    March 7, 2025 at 9:54 am

    Can I omit the honey or is it necessary? I’ve tried a few recipes and don’t particularly like the sweet taste for sandwich bread.

    Loading...
    Reply
    • Kayla says

      March 8, 2025 at 11:41 am

      The honey is there to help soften up the bread. If you want to skip the honey you can add in 2 tbsp of butter to help soften the texture of the dough.

      Loading...
      Reply
  20. Rachel Lewis says

    March 23, 2025 at 2:42 pm

    Just to make sure, all purpose flour for this recipe instead of bread flour?

    Loading...
    Reply
    • Kayla says

      March 23, 2025 at 2:43 pm

      I use all purpose, but have also used bread flour! Use either one.

      Loading...
      Reply
  21. Marelyn says

    June 24, 2025 at 8:46 am

    5 stars
    Thank you for this recipe. Is very simple to make and delicious.

    Loading...
    Reply
    • Kayla says

      June 24, 2025 at 10:06 am

      So glad you enjoyed it!

      Loading...
      Reply

Trackbacks

  1. How to Make Sourdough Bread | A Beginner's Guide - The Farmstyle says:
    April 15, 2024 at 9:52 am

    […] Sourdough Sandwich Bread […]

    Loading...
    Reply

Leave a ReplyCancel reply

Next Post >

Big Mac Skillet

Primary Sidebar

Meet Kayla

Meet Kayla
hello!

LIVING OURFARM(LIFE)STYLE WHERE WE ​JUGGLE THE CHAOS OF MOTHERHOOD ONE ​KITCHEN ADVENTURE AT A TIME!

Read More

Connect

join the list

Categories

  • Blog
  • Recipes

Follow Along

@thefarmstyle


Let’s get those goals!


Homemade maple marshmallows are super simple, deli
Homemade maple marshmallows are super simple, delicious, and made better for you with swapping regular sugar for maple syrup. 

Comment MARSHMALLOW for all the details sent to your inbox. 

INGREDIENTS
1 cup cold water
3 tbsp powdered gelatin
1 1/4 cup maple syrup
1/4 tsp salt
1 tsp vanilla extract or seeds from 1 vanilla bean
powdered sugar for dusting

INSTRUCTIONS
You will want to have everything prepped and ready to go ahead of time. Once the marshmallows are ready to pour you need to work fast as everything starts to set up quick. Make sure to have whisk attachment ready for your stand mixer or hand mixer as well.
Line an 8”x8” pan with parchment paper ensuring the paper goes up all sides of the pan. Dust with powdered sugar.
In a large bowl (I use my stand mixer) add 1/2 cup of cold water with gelatin. Mix to combine and let sit to bloom.
In a medium saucepan add 1/2 cup cold water, maple syrup and salt. Mix to combine then place over medium heat until the mixture comes to a boil. DO NOT STIR after this point as that will encourage crystallization.
Allow mixture to boil until it reaches 240F-245F, this takes 15-20 minutes so be patient. Keep an eye on the mixture during this time as it can quickly boil over and cause a mess.
Quickly pout the mixture in the same bowl as the gelatin and begin to whisk.
Once everything starts to come together add in your vanilla extract or vanilla beans.
Continue whisking until mixture has tripled in size, the bowl is cool to the touch, and when the whisk is removed the drizzle holds its shape in the bowl.
Quickly pour mixture into prepared pan. You have about 30 seconds before everything sets up too much.
Allow marshmallows to set up completely (about 4 hours).
Remove marshmallows from the pan and sprinkle with additional powdered sugar. This helps your knife from sticking too much when cutting.
Cut marshmallows into desired size with a sharp knife. Dipping each marshmallow in additional powdered sugar to prevent them all from sticking to each other.
Store in an air tight container for up to 2 weeks.


The easiest homemade english muffins.  

Comment M
The easiest homemade english muffins.  

Comment MUFFIN for all the details sent to your inbox. 

INGREDIENTS
3 cups all purpose flour
1 - 1 1/2 cups water warm
2 1/4 tsp yeast
1 tsp salt
2 tbsp sugar
cornmeal

INSTRUCTIONS
In a bowl combine warm water, yeast and sugar. Mix and allow to sit for about 5 minutes. The mixture should start to become foamy. This is how you know your yeast is activated!

Add in flour and salt. Mix until combined adding in an additional 1/2 cup water as needed to get the dough to come together. Cover and let rise for an hour or until mixture has doubled in size.

Pour some cornmeal onto a baking sheet. Set aside.

Once dough has risen pour onto a floured surface. They dough will be sticky. Gently press into a circle and divide into 8-12 segments.

Gently form each of the segments into a ball and place onto the prepared baking sheet (This helps prevent them from sticking). Repeat with each segment. Cover balls and allow to rise for an additional 25-30 minutes.

Preheat oven to 350.

Heat a skillet(or large griddle) to medium heat. Place balls into the skillet and cook for about 5 minutes per side, then place onto a clean baking sheet. Repeat with remaining balls.

Bake in oven for 10-15 minutes and enjoy!

NOTES
While baking the English muffins ins’t always necessary, I find it difficult to cook them entirely on the stove top without burning the exterior. Finishing them off in the oven has helped a ton!


Bring cozy fall flavors home with this Pecan Pie L
Bring cozy fall flavors home with this Pecan Pie Latte topped with maple cold foam. 

Comment COFFEE for all the details sent to your inbox. 

INGREDIENTS
PECAN PIE SYRUP
1 cup pecans
1 cup brown sugar
1 cup water
1 tsp cinnamon
1 tsp vanilla extract
2 tbsp salted butter

PECAN PIE LATTE
2 shots espresso
1-2 tbsp pecan pie syrup
8 oz milk

MAPLE COLD FOAM
3 tbsp heavy cream
2 tbsp milk
1 tbsp maple syrup
INSTRUCTIONS

MAKE THE PECAN PIE SYRUP
Preheat oven to 350 F.
Add pecans to a sheet pan and roast for 5-10 minutes. Watching to ensure they don’t burn.
In a sauce pan combine the roasted pecans, brown sugar, and cinnamon. Bring mixture to a boil and allow to simmer for 10-15 minutes.
Add in butter and vanilla extract, stirring to combine.
Use a fine mesh strainer to separate the pecans from the syrup and pour into an air tight container and store int the refrigerator for 2-3 weeks.
MAKE THE LATTE
In a small cup combine all the ingredients for the maple cold foam. Whisk together with a frother until mixture has thickened. Set Aside.
FOR ICED LATTE: In a large cup add ice, then pecan pie syrup, milk, and then espresso. Top with maple cold foam and enjoy!
FOR HOT LATTE: Steam milk to desired temperature. Then add pecan pie syrup and espresso to the steamed milk. Top with maple cold foam and enjoy!

Made with homemade pecan pie syrup, espresso, and creamy maple foam, this latte tastes like a slice of pecan pie, perfect hot or iced.


This BBQ Hawaiian Chicken on the Blackstone Griddl
This BBQ Hawaiian Chicken on the Blackstone Griddle is a quick and easy favorite. Juicy chicken, caramelized pineapple, and veggies tossed in sweet barbecue sauce make a meal everyone will love.

Comment RECIPE for all the details sent to your inbox. 

INGREDIENTS

1.5 lb chicken breasts cut into 1” pieces
2 bell peppers cut into 1” pieces
1 red onion cut into 1” pieces
15 oz can pineapple chunks
1/2 cup bbq sauce
salt+ pepper
INSTRUCTIONS

Preheat griddle to medium heat.
Season chicken with salt and pepper and place onto half of the griddle. Cook until no longer pink.
Add peppers, onions, and pineapple to the other half of the griddle. Cook until softened.
Pour barbecue sauce over chicken and mix to combine. Remove everything from the griddle.
Enjoy with rice or on a tortilla.

#griddlecrew #griddlenation #blackstonegriddle #thefarmstyle


ad | We don’t always get the time to go out for da
ad | We don’t always get the time to go out for date night, so lately we’ve been bringing date night home, and honestly, I think I might love it even more this way.

A grilled ribeye, crispy Japanese sweet potato fries, and a bottle of @cakebreadcellars Cabernet Sauvignon. Simple, cozy, and a little something to look forward to at the end of a long week. 

Cakebread Cellars has been crafting wines in Napa Valley for over 50 years, and you can taste that care in every sip. Their Cabernet Sauvignon is bold but beautifully balanced, the kind of wine that pairs perfectly with grilled steak and good conversation.

It’s those small rituals, setting the table, lighting a candle, pouring a glass of wine, that make home feel like the best place to be. 

Comment DINNER for all the recipe details, and don’t forget to pour a glass of Cakebread Cabernet Sauvignon alongside.


Footer

On the Blog

  • Blog
  • Recipes

Info

  • About
  • Disclosure, Privacy Policy, and Terms

Copyright © 2025 · Theme by 17th Avenue

%d

    Rate This Recipe

    Your vote:


    A rating is required
    A name is required
    An email is required
    We use cookies to ensure that we give you the best experience on our website. If you continue to use this site we will assume that you are happy with it.