Pesto Pull Apart Bread
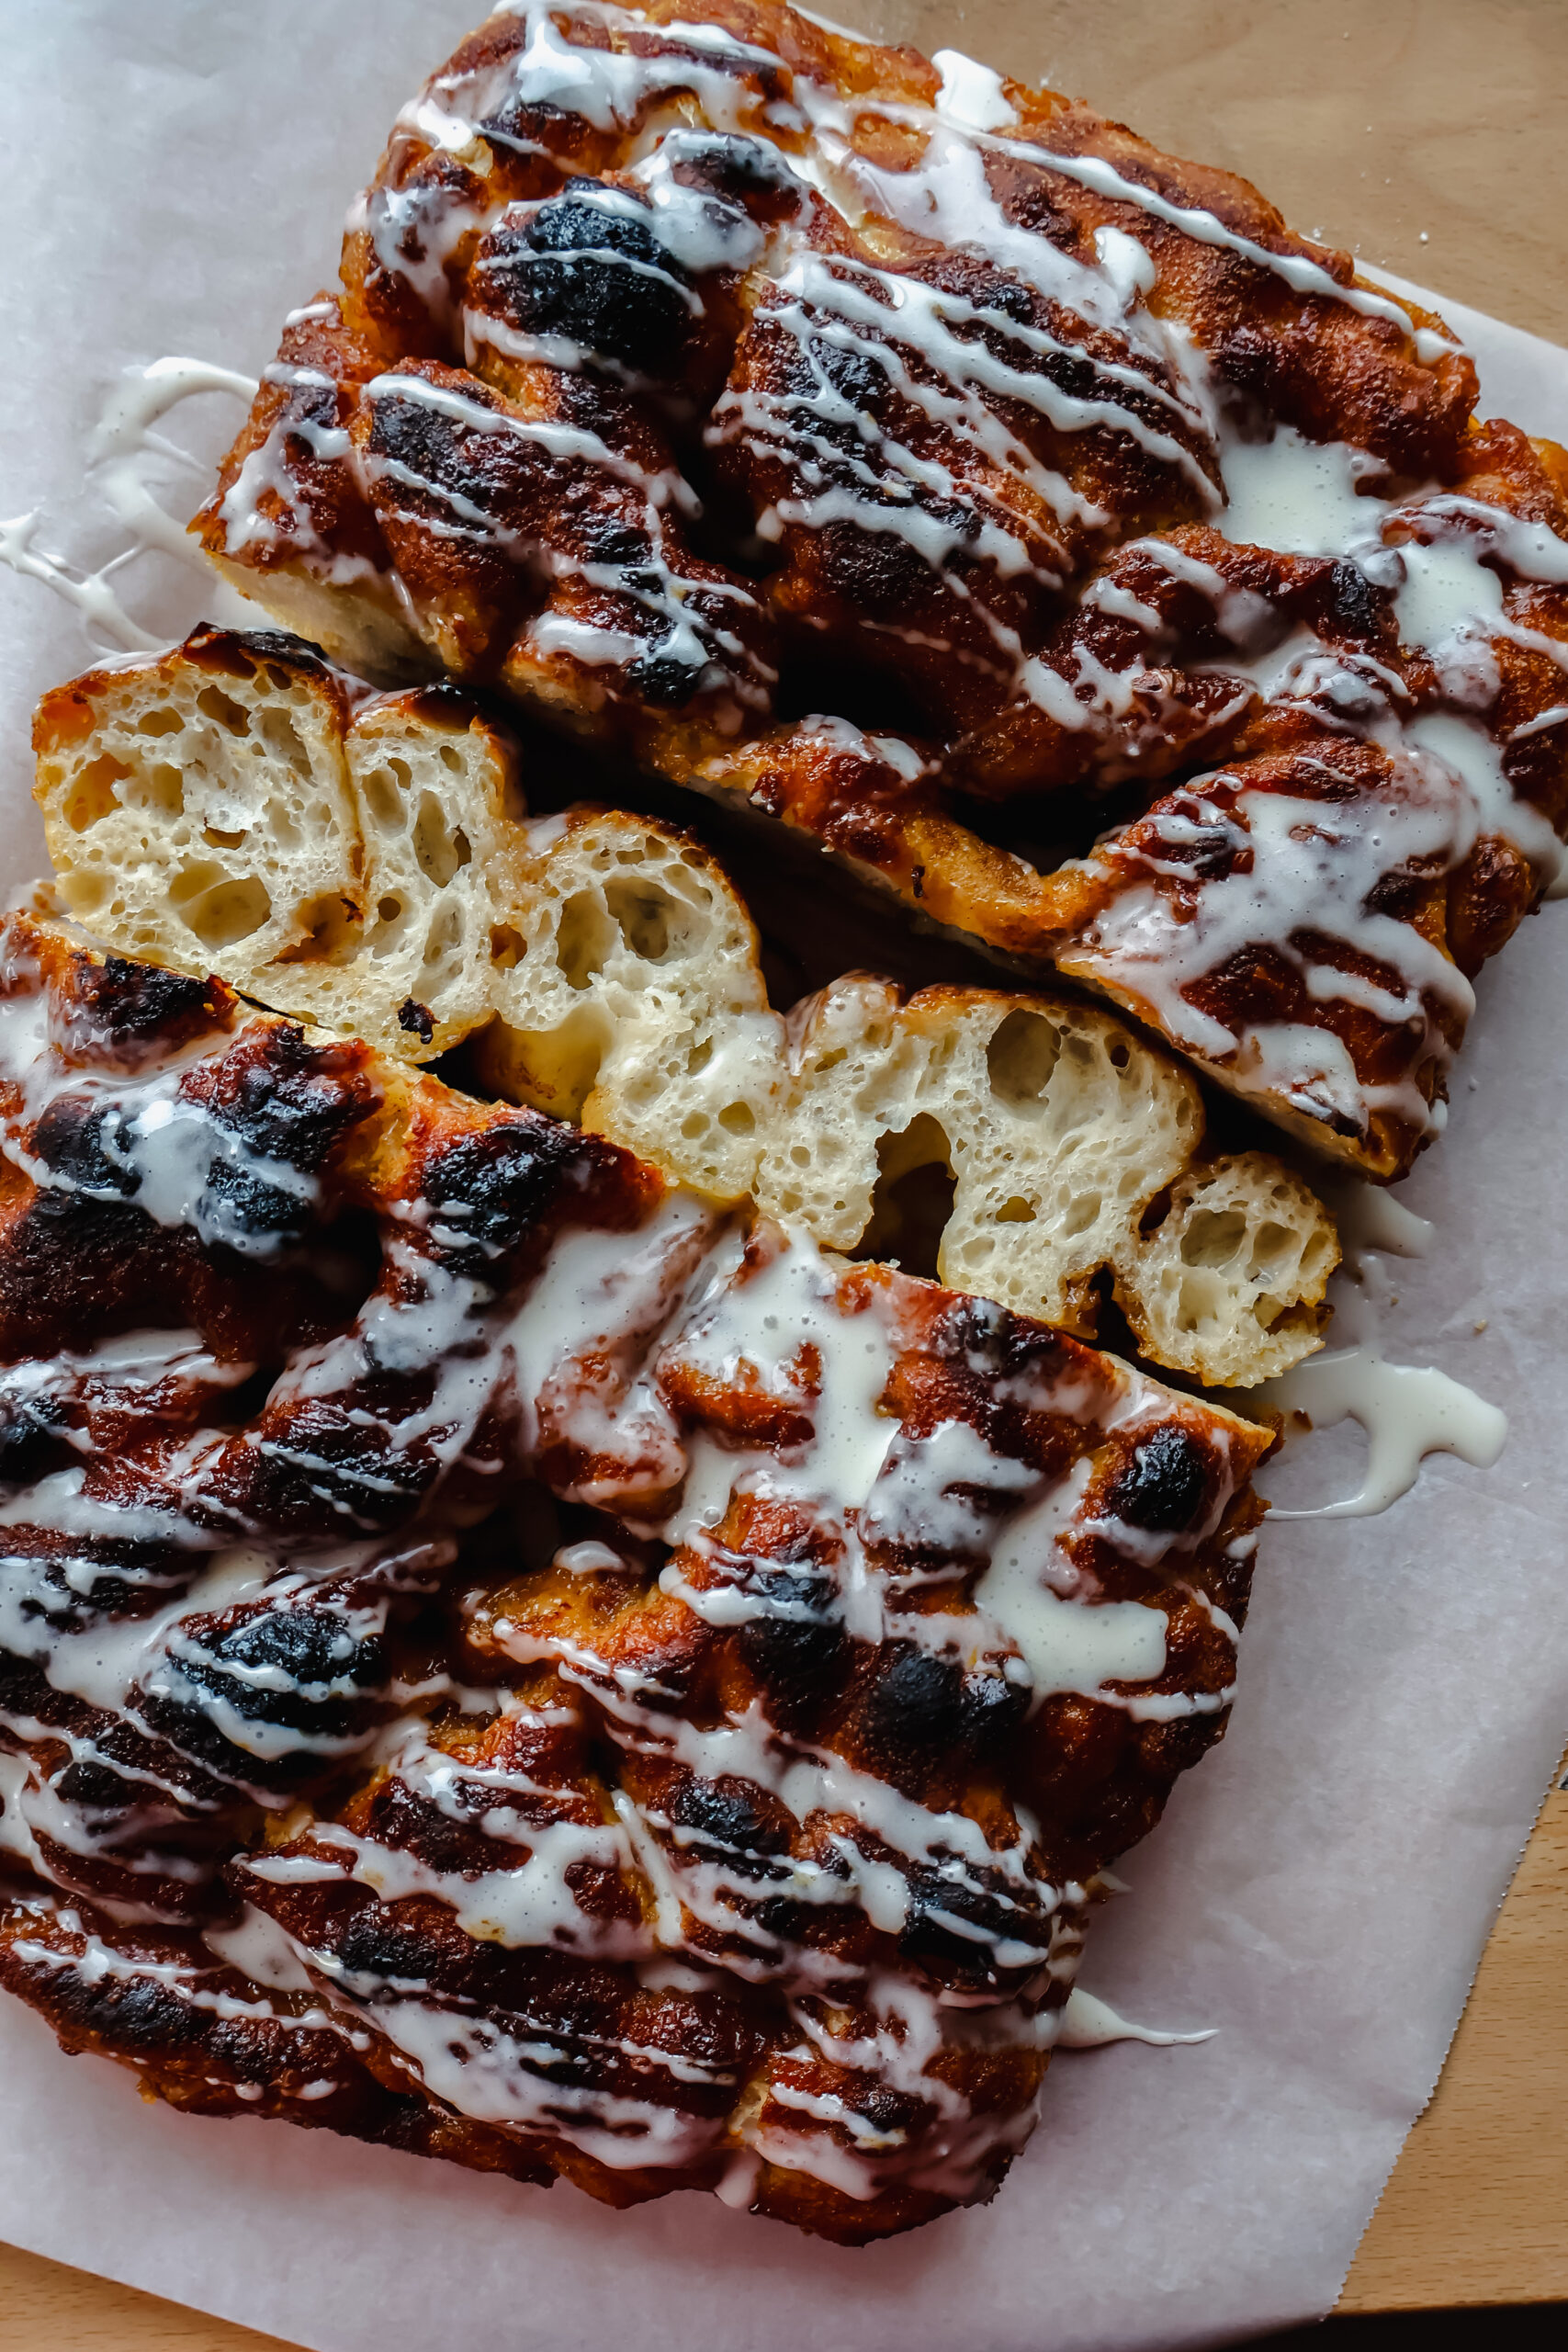
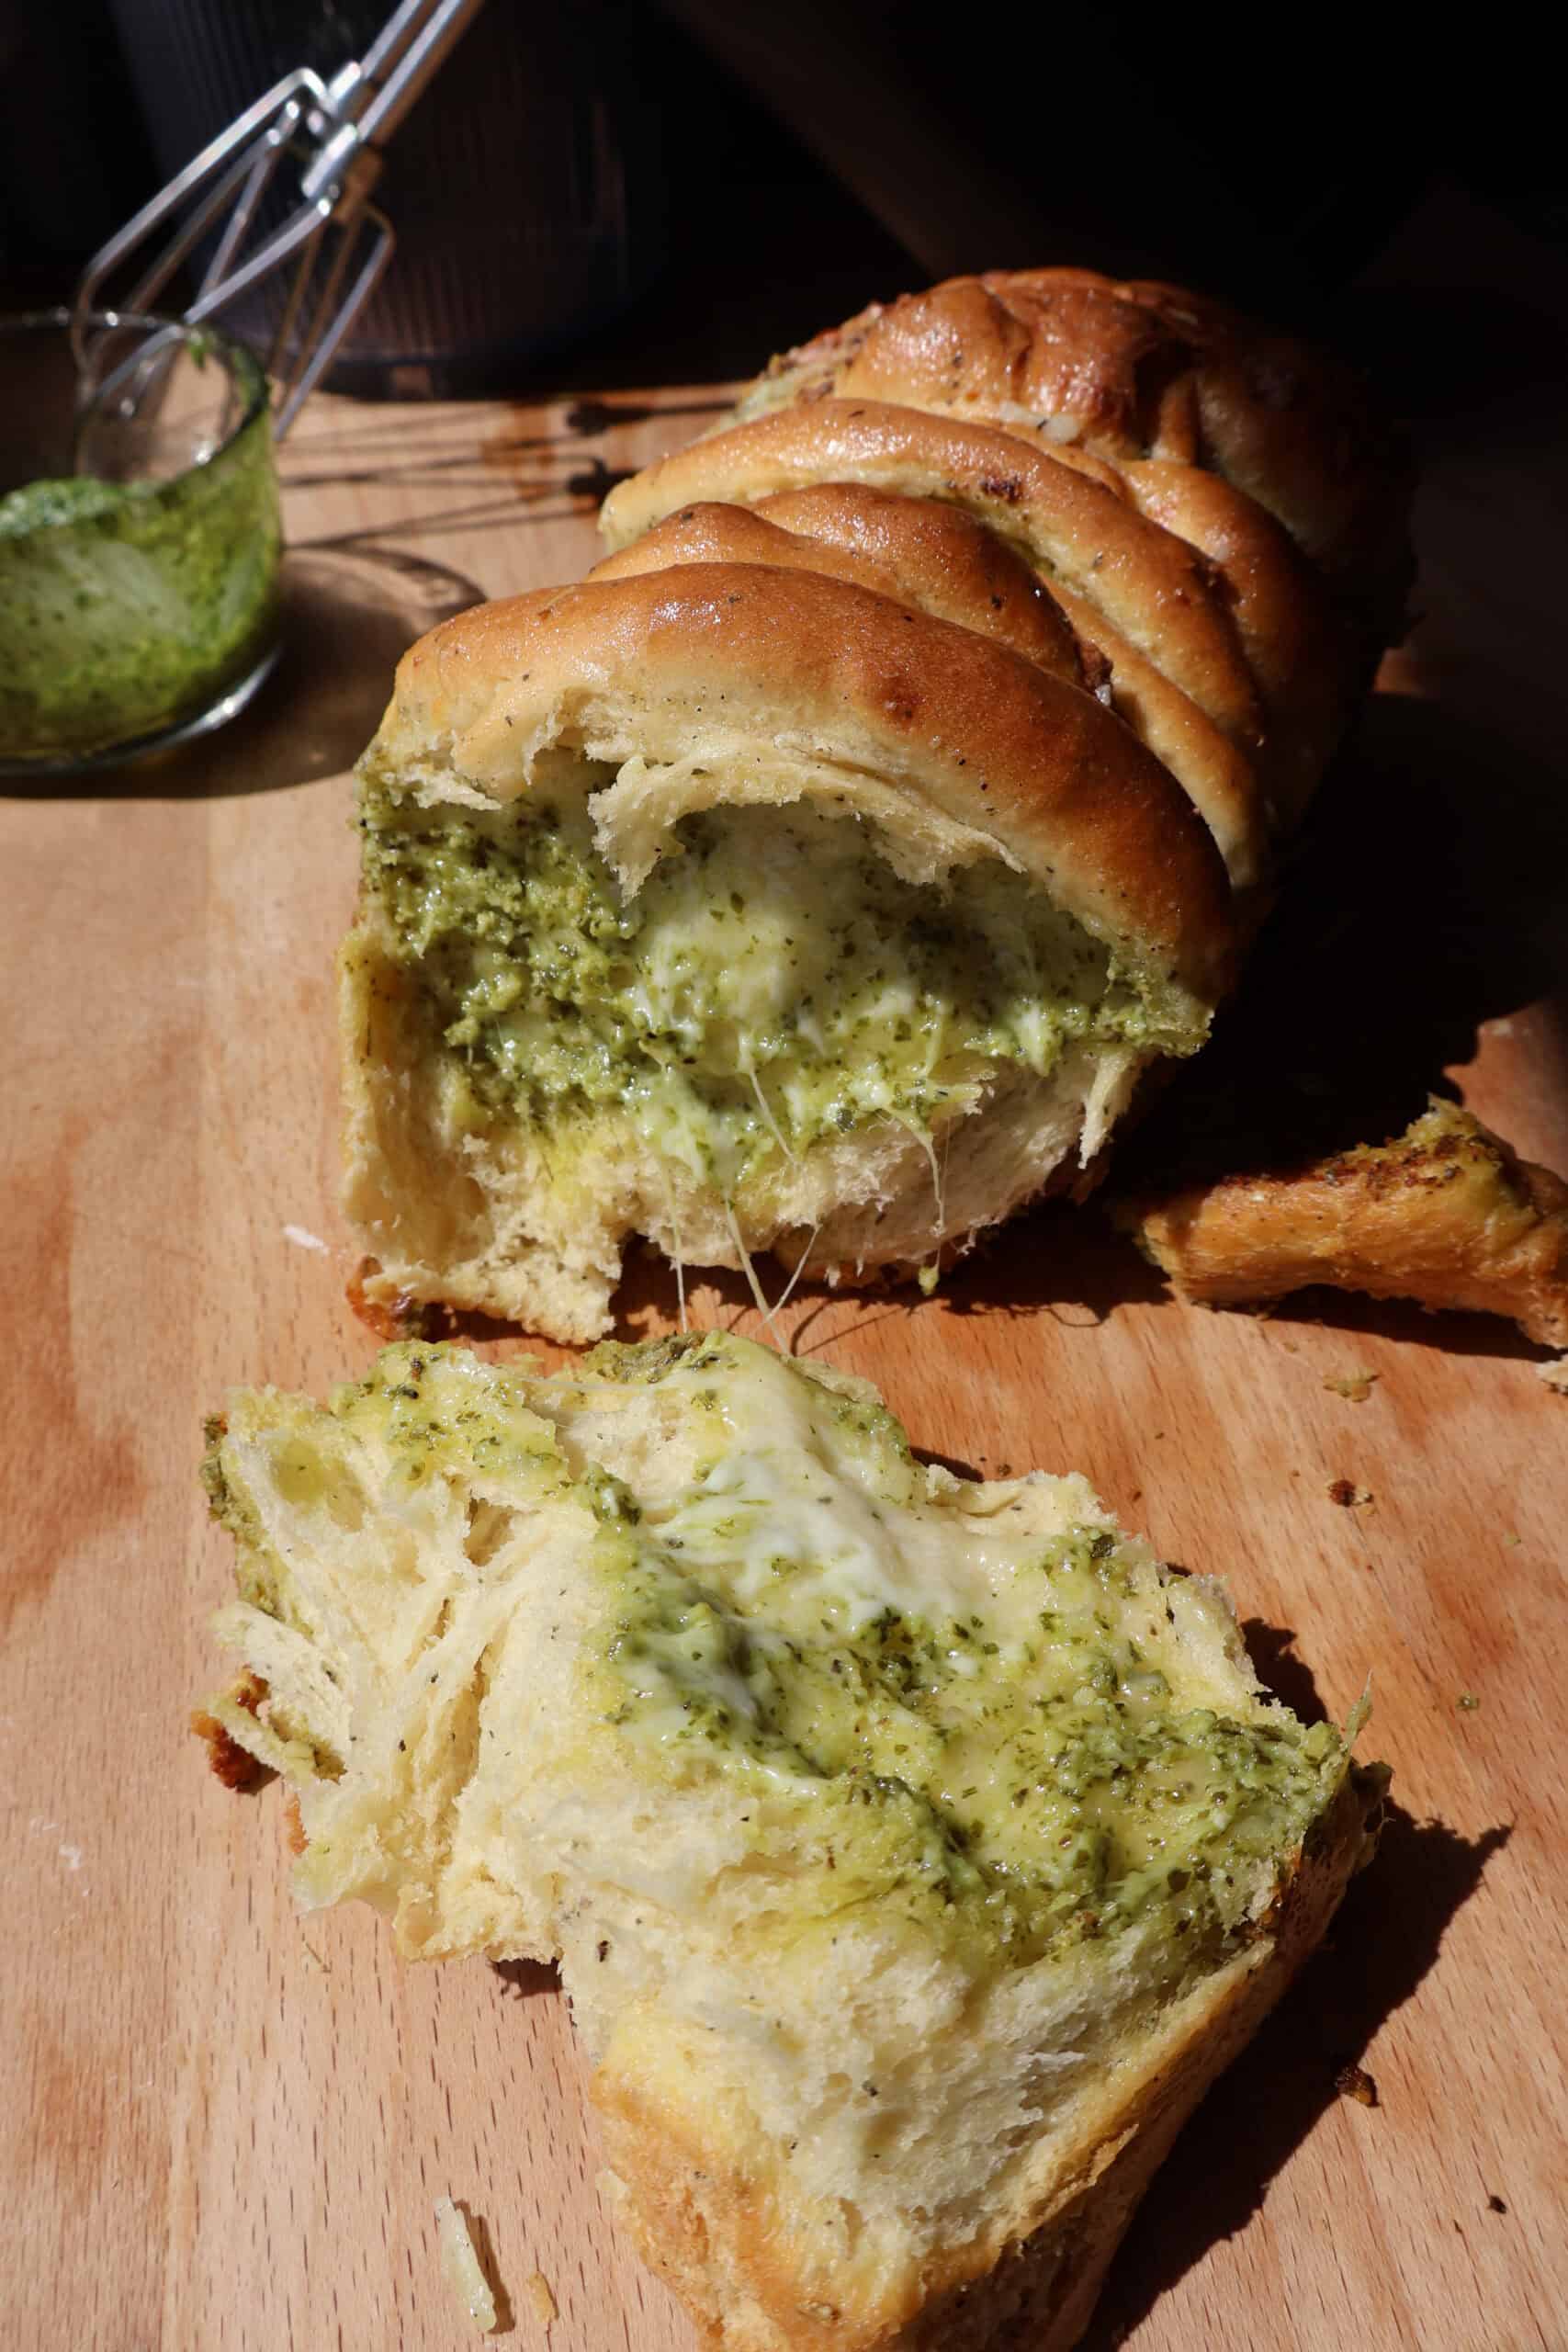
Soft and flaky, this pesto pull-apart bread has all the summer flavors. Layers of homemade pesto with mozzarella cheese is delicious straight from the oven.

This cheesy pesto pull apart bread has all the summer flavors infused between the cheesy flakey layers of dough. I love making this when I have extra basil from the the garden.
Ingredients
- Fresh Basil - fresh basil leaves
- Pine Nuts - this can be swapped for cashews, walnuts, pecans, or any nuts
- Garlic - fresh garlic for the pesto
- Olive Oil - for the pesto
- Lemon - juice for the pesto
- Yeast - I prefer to use dry active yeast
- Sugar - to help activate the yeast
- Butter - adds the perfect amount of flavor and softeness to the bread dough
- Egg - adds structure to the bread dough.
- Milk - whole milk is what I use, you can swap this for water or your favorite milk alternative as well.
- Flour - I use all purpose flour, but bread flour works as well.
- Cheese - I love the combo of mozzarella with pesto, but you can swap for your favorite cheese
- Seasonings - salt and pepper for the pesto along with italian seasoning and garlic powder for the bread dough

How to Make the Perfect Pesto Pull Apart Bread
Make the Pesto
- In a food processor pulse all pesto ingredients until everything is blended together and relatively smooth. Add a drizzle more olive oil to thin out, if desired. Taste and add pepper (and/or more salt) if desired. Set aside for later.
Make the Bread
- In a large bowl combine warmed milk with yeast and sugar. Set aside until foamy. If your yeast does not foam up, do not proceed to the next step. This means your yeast is not active.
- Once the yeast mixture is foamy add melted butter, egg, salt, Italian seasoning, garlic powder and 2.5 cups of flour. Mix to combine and knead until smooth, adding in additional flour as needed.
- Knead mixture for 7-10 minutes, or until the dough is smooth. Shape into a ball, place back into bowl, cover, and let rise for an hour, until doubled.
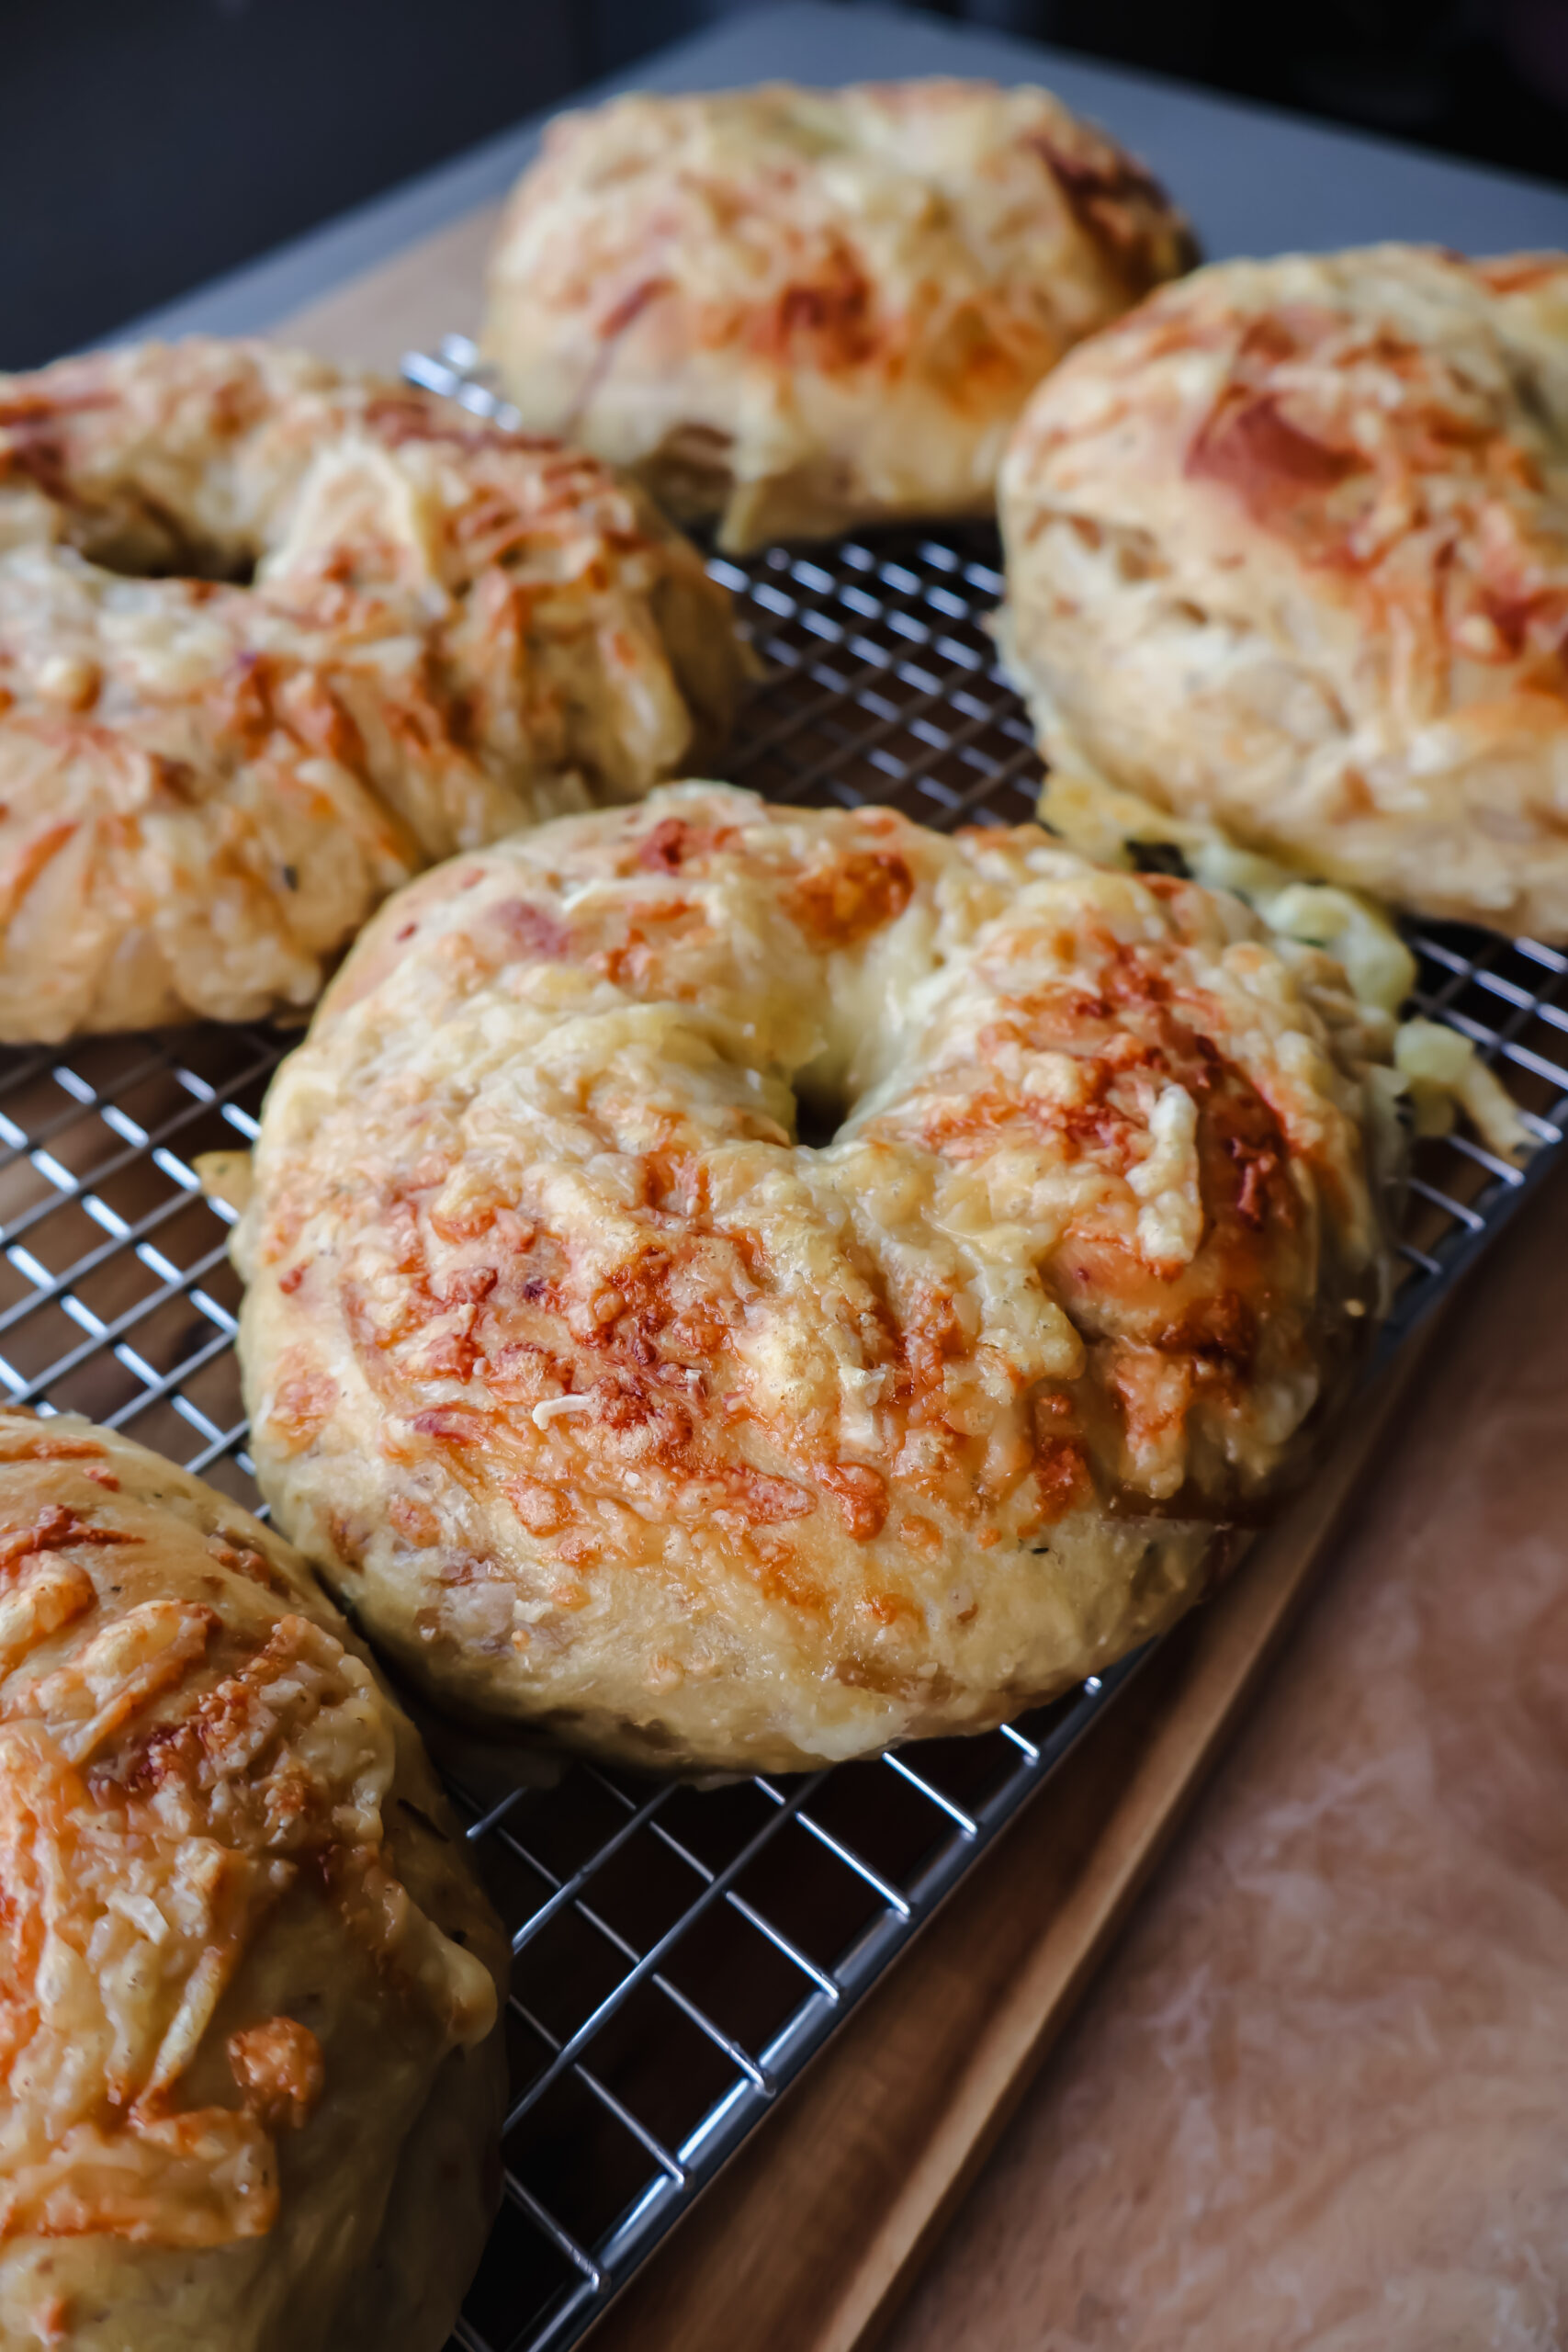
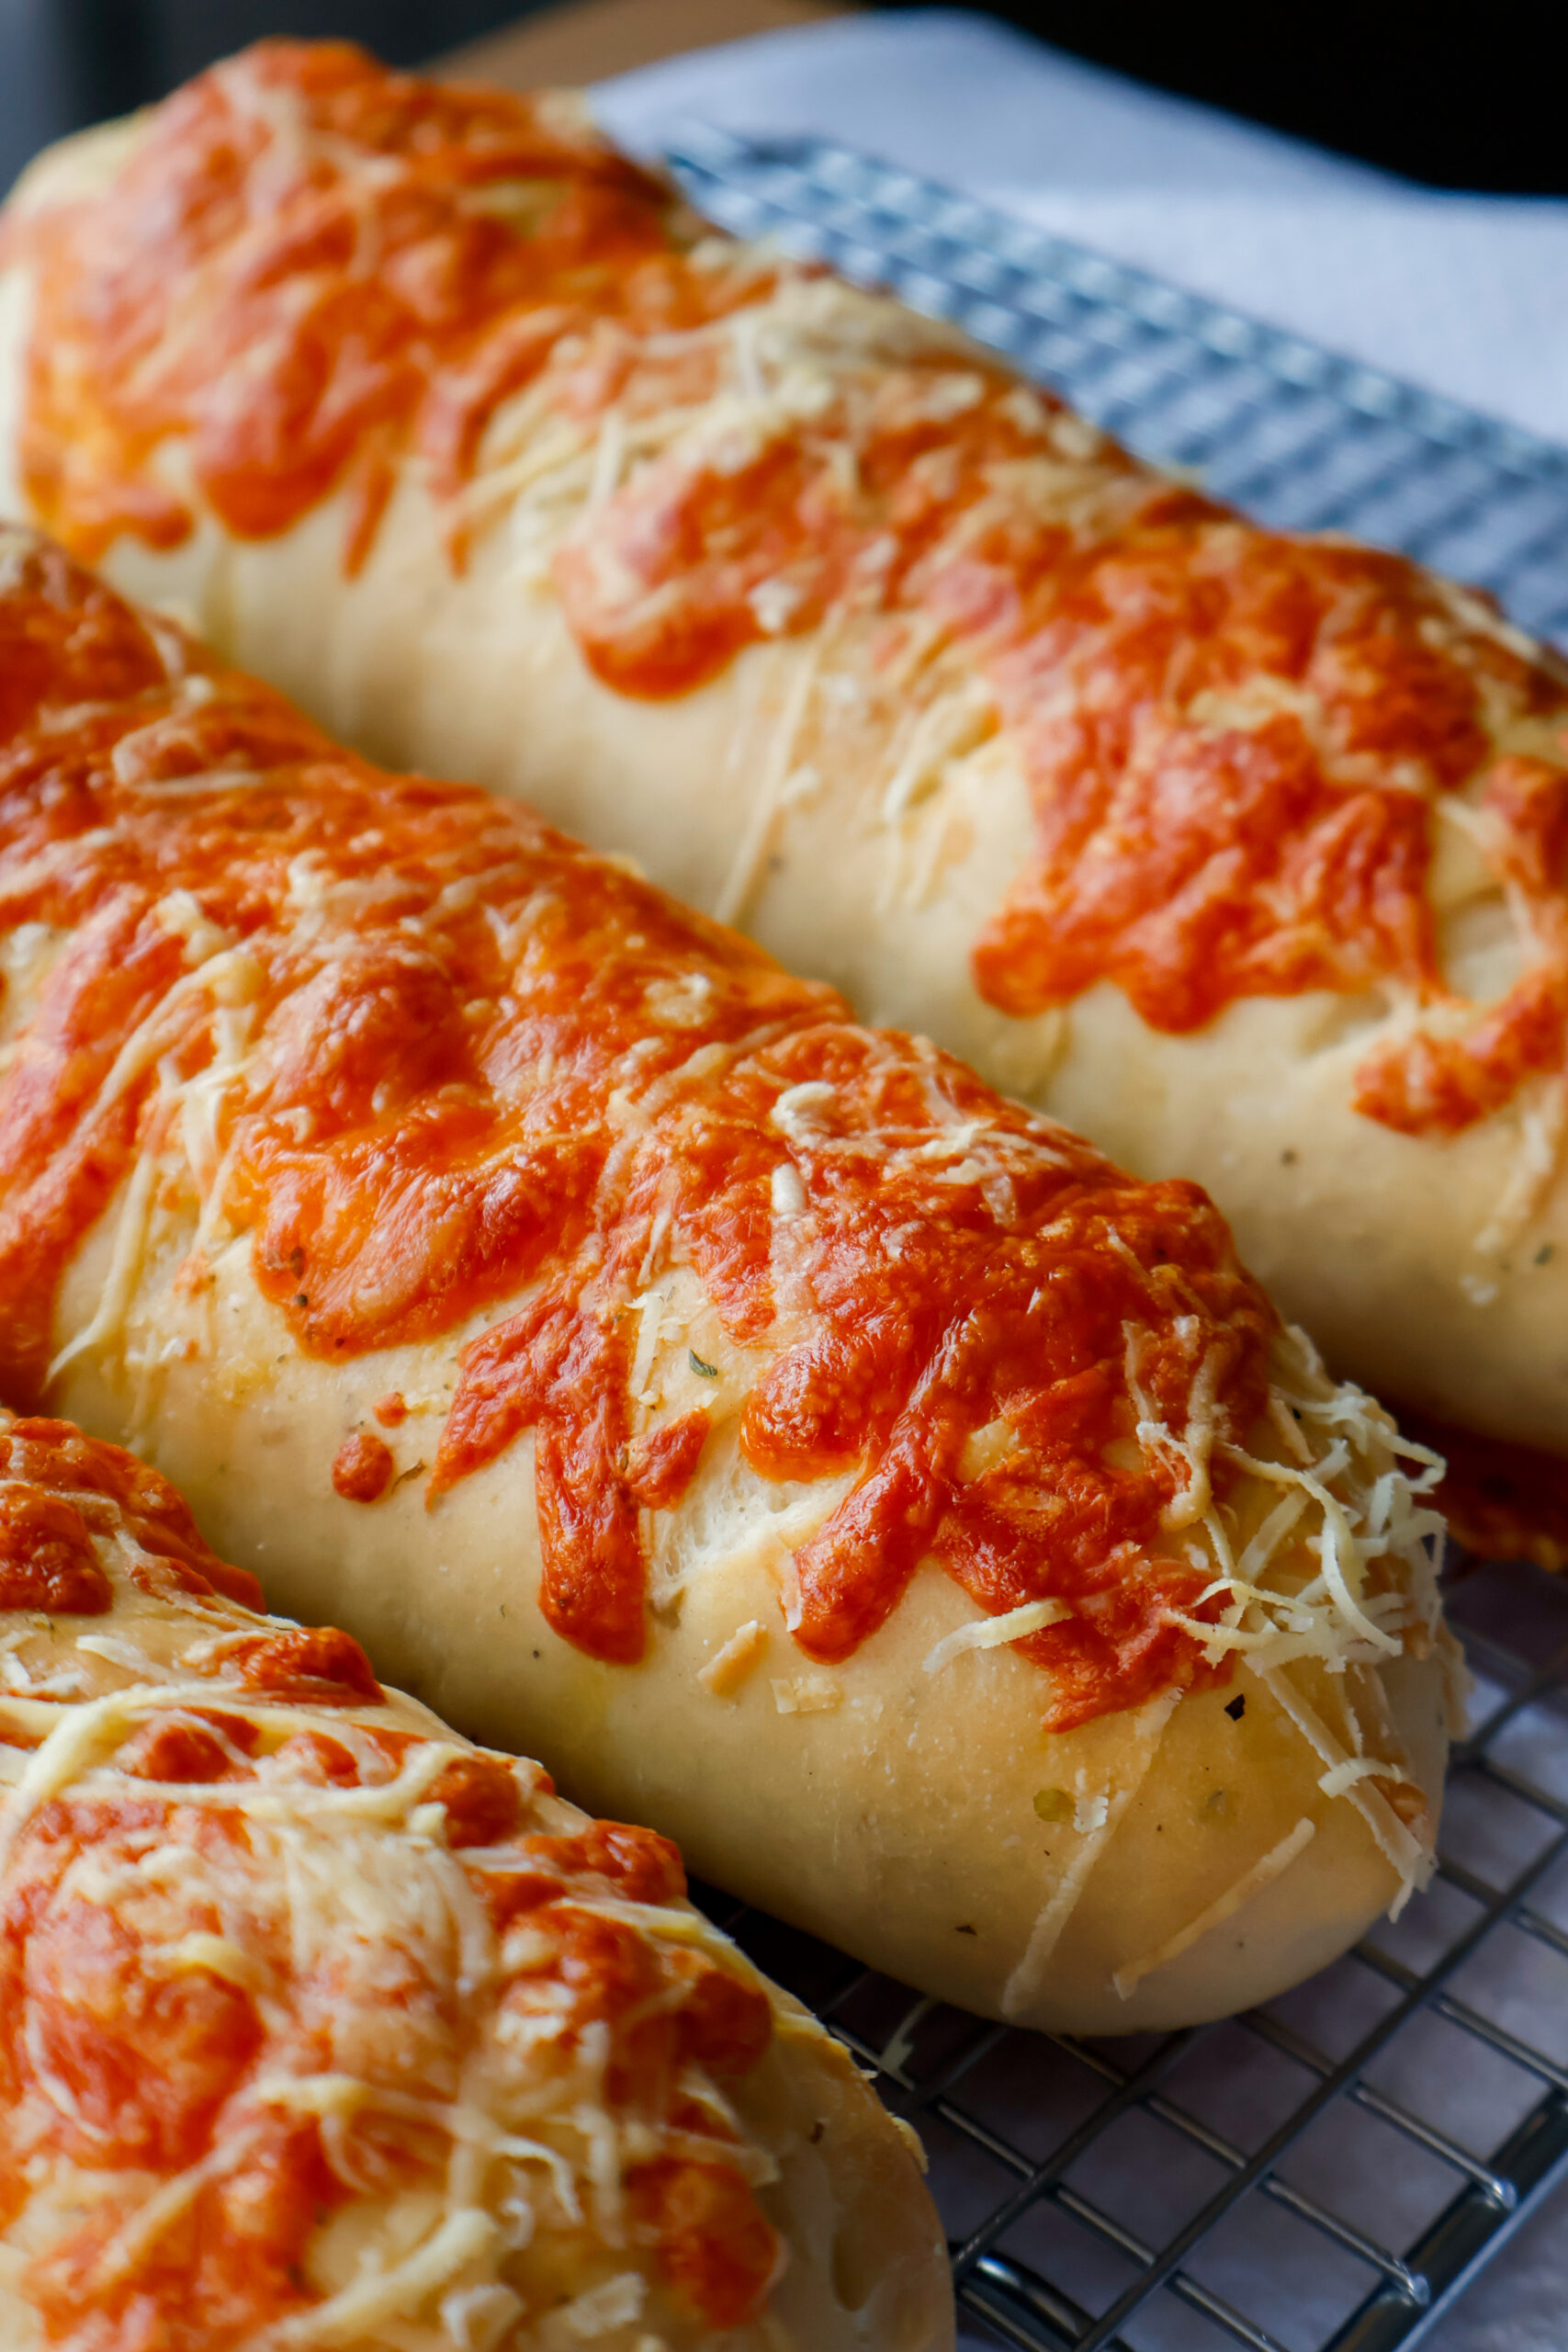
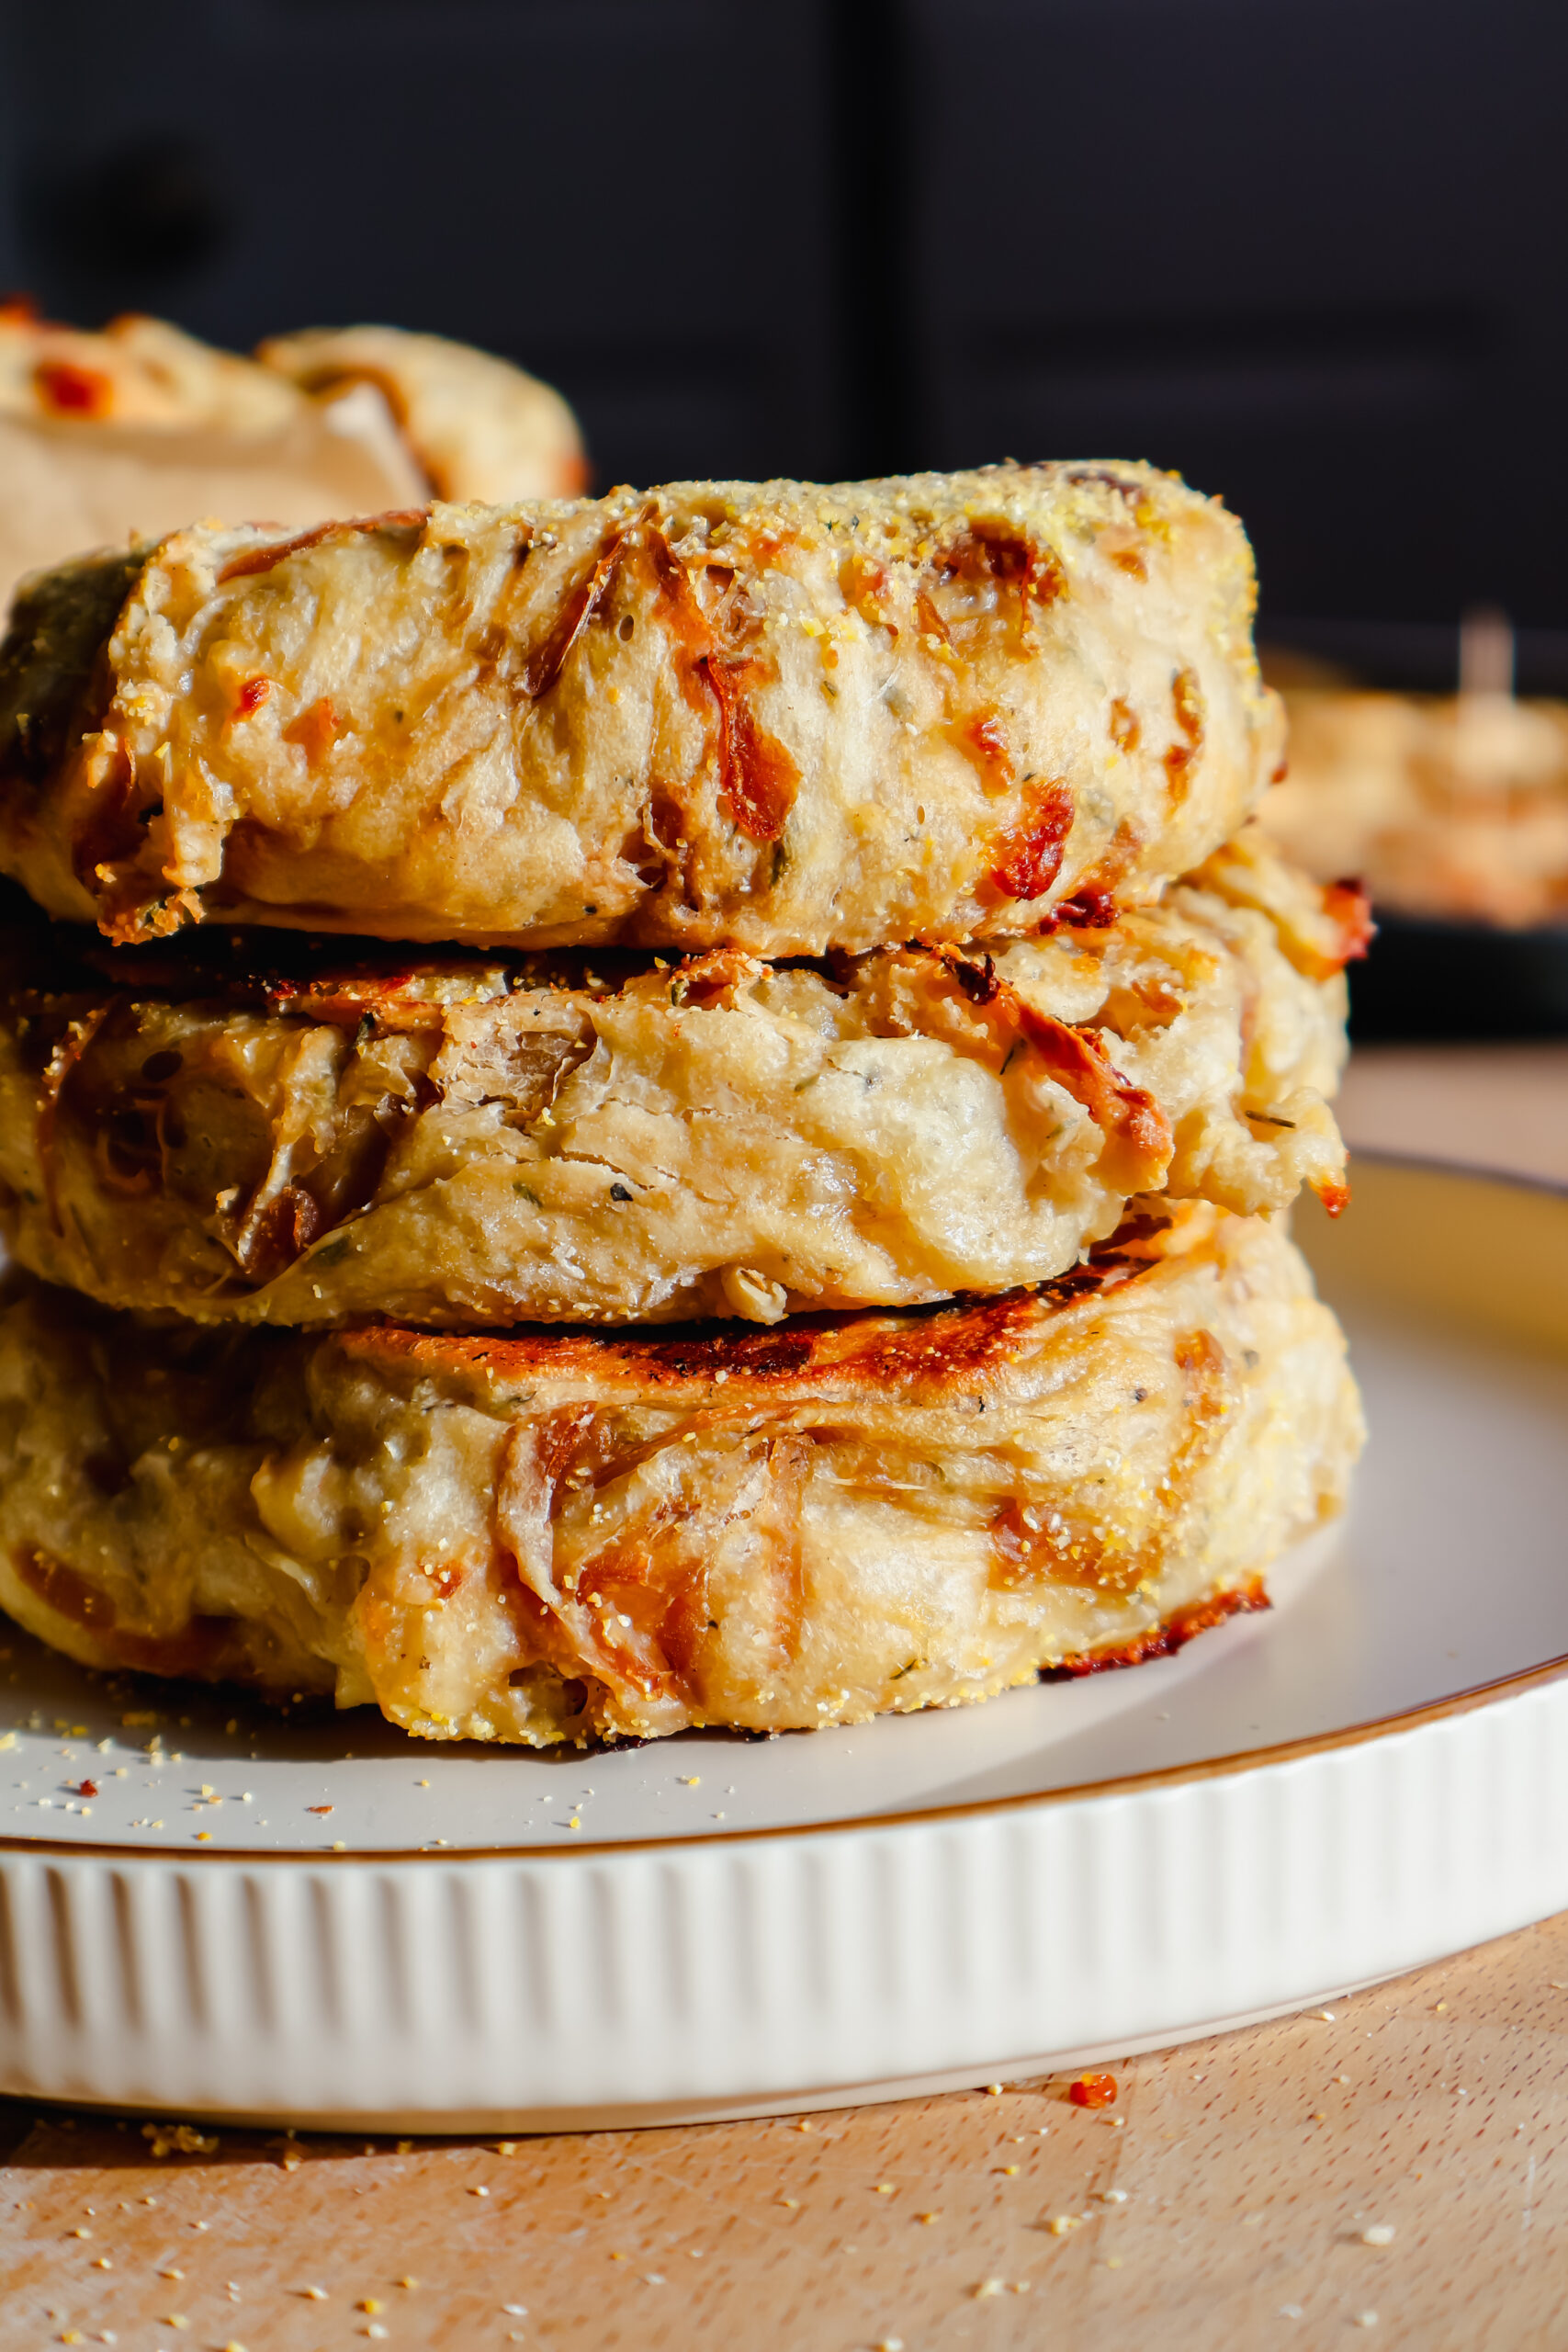
- Place dough onto counter and divide into 8 sections. Flatten each section into a circular shape and spread with pesto and shredded cheese then fold in half. Place seam side down into a greased loaf pan and repeat with remaining sections. Allow to rise for an additional 30-60 minutes.
- Bake at 350 for 35-40 minutes. Top with melted butter if desired.

Share Your Experience
I would love to hear about your experience making and enjoying my Pesto Pull Apart Bread! Feel free to tag me on Instagram or leave a review below. Your feedback helps me improve our recipes and provides inspiration to fellow home cooks.
Save this recipe for later by simply using the pin button on the recipe card or any of the photos above. Happy cooking!
📖 Recipe
Pesto Pull Apart Bread
Soft and flaky, this pesto pull-apart bread has all the summer flavors. Layers of homemade pesto with mozzarella cheese is delicious straight from the oven.
Ingredients
Instructions
Make the Pesto
- In a food processor pulse all pesto ingredients until everything is blended together and relatively smooth. Add a drizzle more olive oil to thin out, if desired. Taste and add pepper (and/or more salt) if desired. Set aside for later.
Make the Bread
- In a large bowl combine warmed milk with yeast and sugar. Set aside until foamy. If your yeast does not foam up, do not proceed to the next step. This means your yeast is not active.
- Once the yeast mixture is foamy add melted butter, egg, salt, Italian seasoning, garlic powder and 2.5 cups of flour. Mix to combine and knead until smooth, adding in additional flour as needed.
- Knead mixture for 7-10 minutes, or until the dough is smooth. Shape into a ball, place back into bowl, cover, and let rise for an hour, until doubled.
- Place dough onto counter and divide into 8 sections. Flatten each section into a circular shape and spread with pesto and shredded cheese then fold in half. Place seam side down into a greased loaf pan and repeat with remaining sections. Allow to rise for an additional 30-60 minutes.
- Bake at 350 for 35-40 minutes. Top with melted butter if desired.