Biscuit and Gravy Breakfast Casserole | Easy Make Ahead Breakfast
This biscuit and gravy breakfast casserole combines fluffy biscuits, creamy sausage gravy, and scrambled eggs for the perfectly easy breakfast that can be made ahead of time if needed!

Starting your morning with a hearty and satisfying breakfast can set the tone for the entire day. Biscuits and gravy are a favorite hearty breakfast, but spending the time on busy mornings to make them doesn't always happen! Enter the make-ahead biscuit and gravy casserole: a delicious, easy-to-prepare breakfast that can be assembled the day before and baked in the oven while you hit snooze a few extra times.
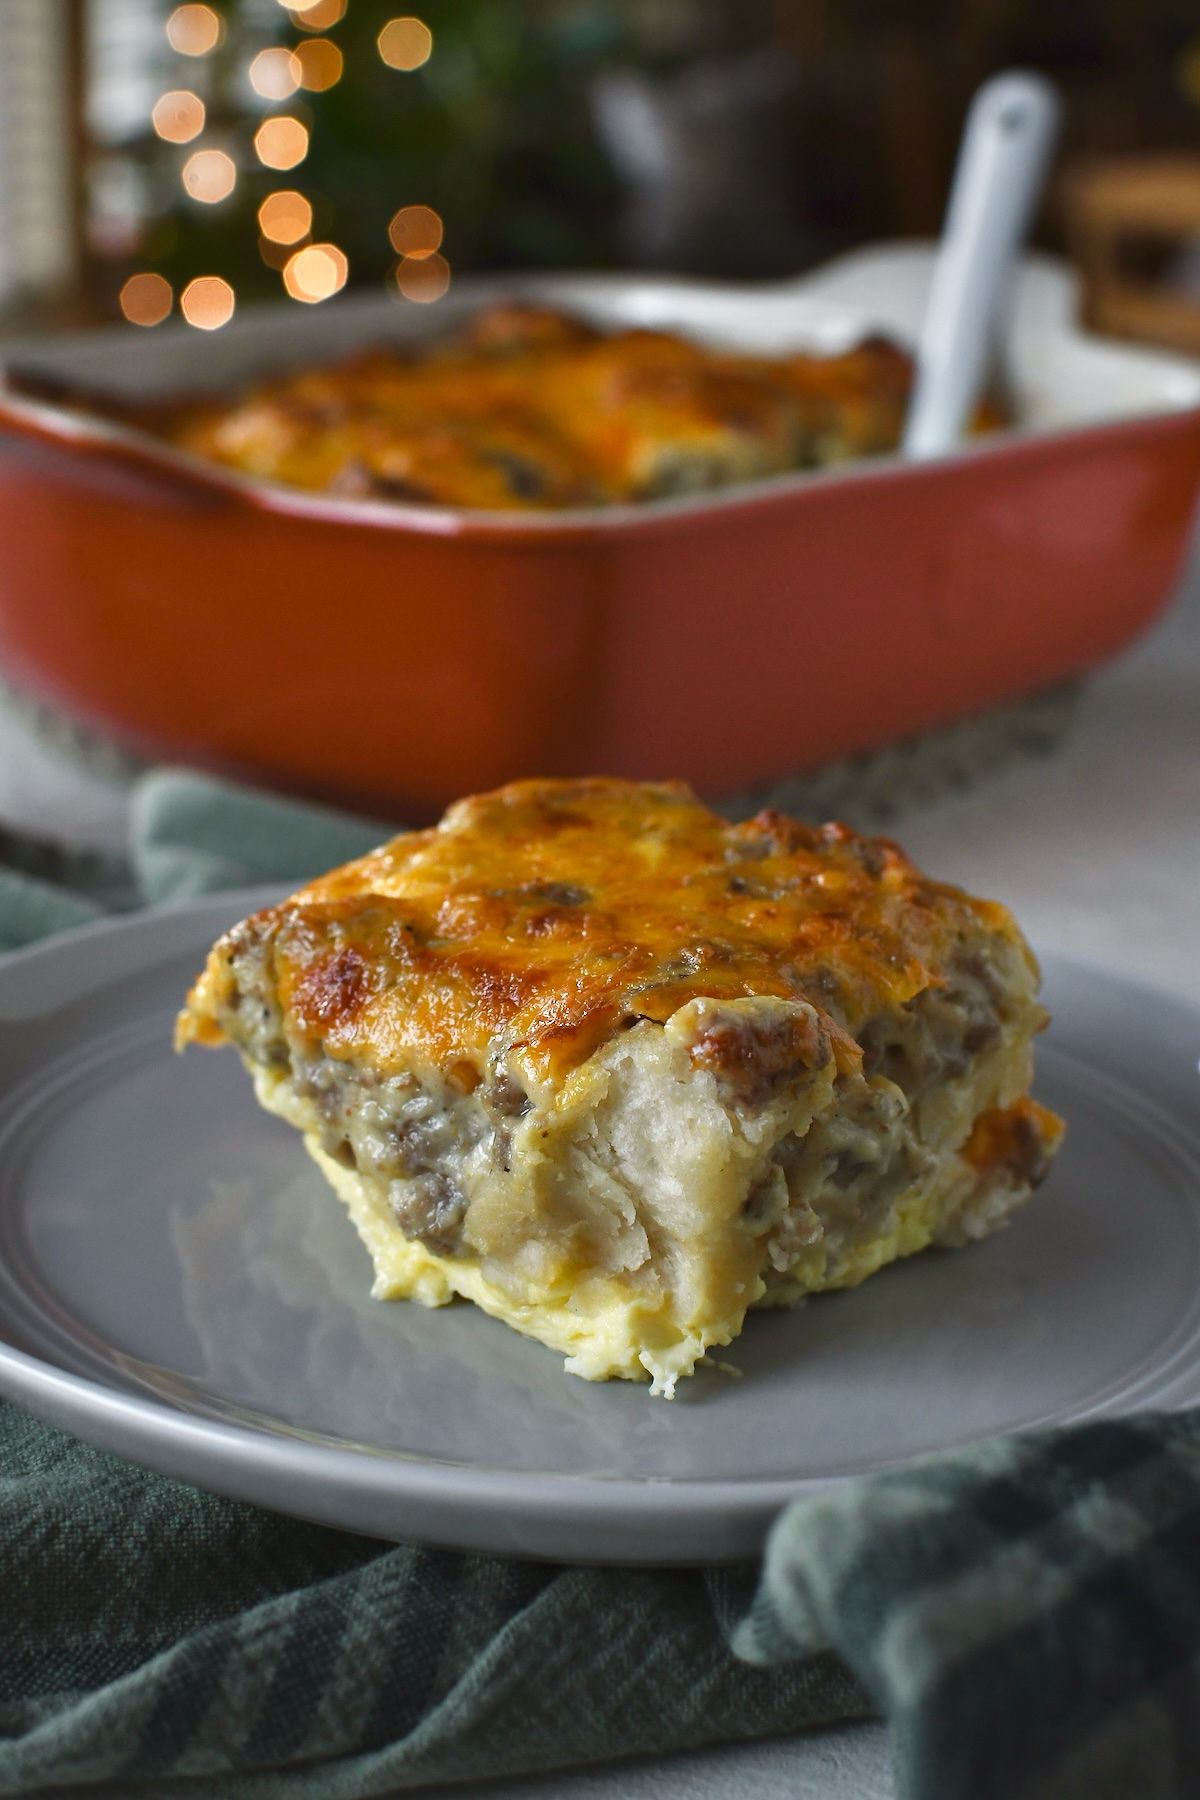
This casserole combines biscuits with creamy sausage gravy and melty cheese, creating a comforting and flavorful dish that everyone will love. Plus, it's incredibly easy to customize with your favorite toppings and ingredients.
What makes this recipe different?
Most of the biscuit and gravy casserole I see use packaged gravy mix (which there is nothing wrong with that!), but this recipe calls for homemade sausage gravy. Before you back away with your hands up that you don't know how to make gravy, I promise you can! Check out the video with the recipe and I'll show you just how easy homemade gravy can be!
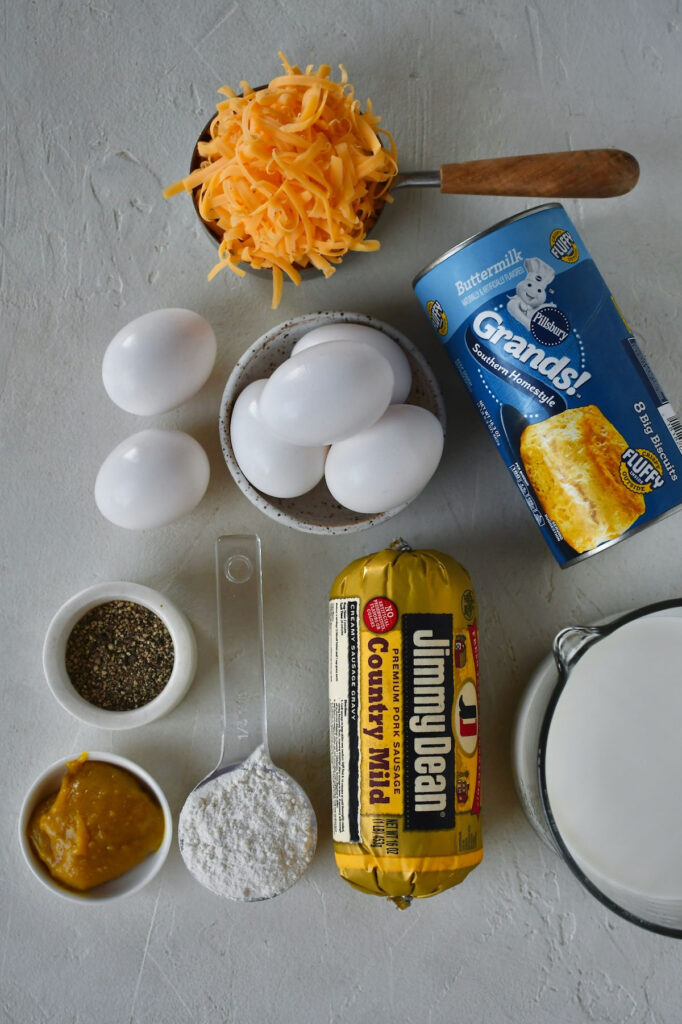
Biscuit and Gravy Casserole Ingredients
- Biscuits - I used refrigerator biscuits, but homemade would also be delicious!
- Eggs and Milk - serves as the binding agent for the entire casserole
- Cheese - I used shredded cheddar, but others would be just as yummy!
- Sausage - I use bulk breakfast sausage
- Flour - helps to thicken the gravy
- Bouillon - I love to add a scoop of Roasted Chicken Better than Bouillon to my gravy. It helps to add such great flavor to your gravy! I swear this is my secret to making the best homemade gravy.

How to Make Biscuit and Gravy Breakfast Casserole
SAUSAGE GRAVY
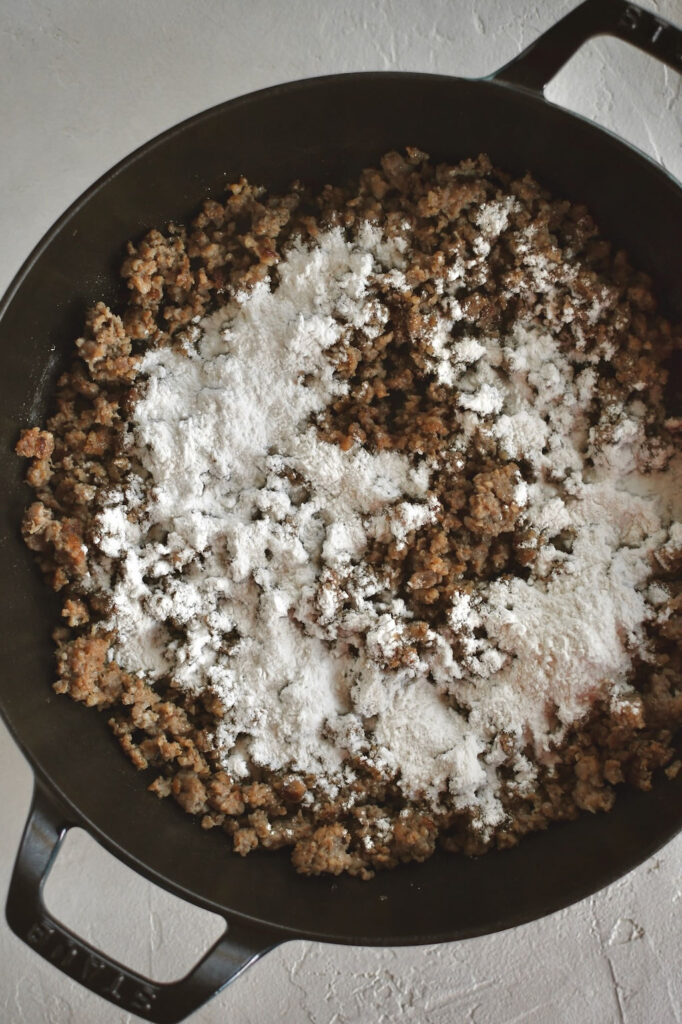
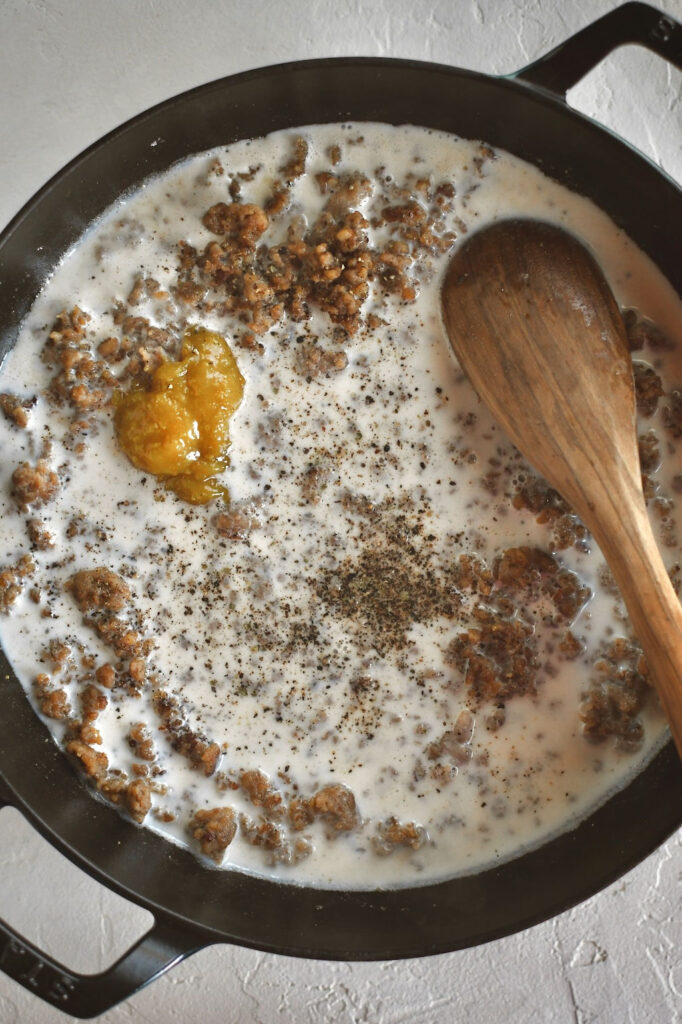
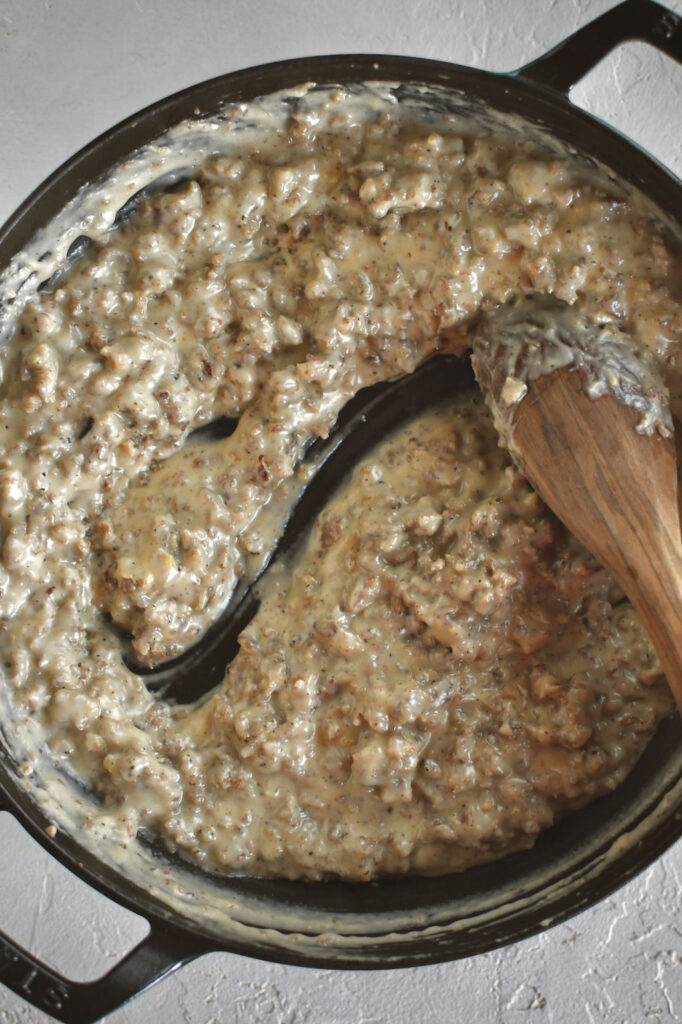
- In a large skillet cook the sausage.
- Add in flour, stir to coat the sausage and cook for about 2 minutes. Add in milk bouillon and pepper. Simmer until thickened.
ASSEMBLE CASSEROLE
- Preheat oven to 350.
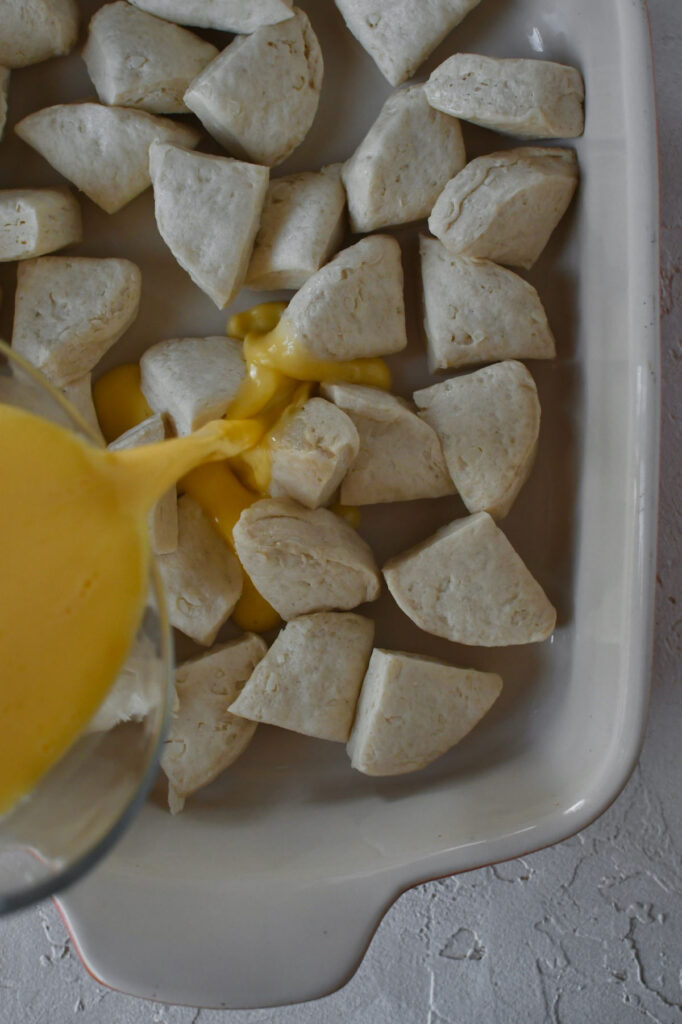
- In a medium sized bowl combine eggs and milk. Mix to combine.
- Open refrigerator biscuits and cut each biscuit into quarters.
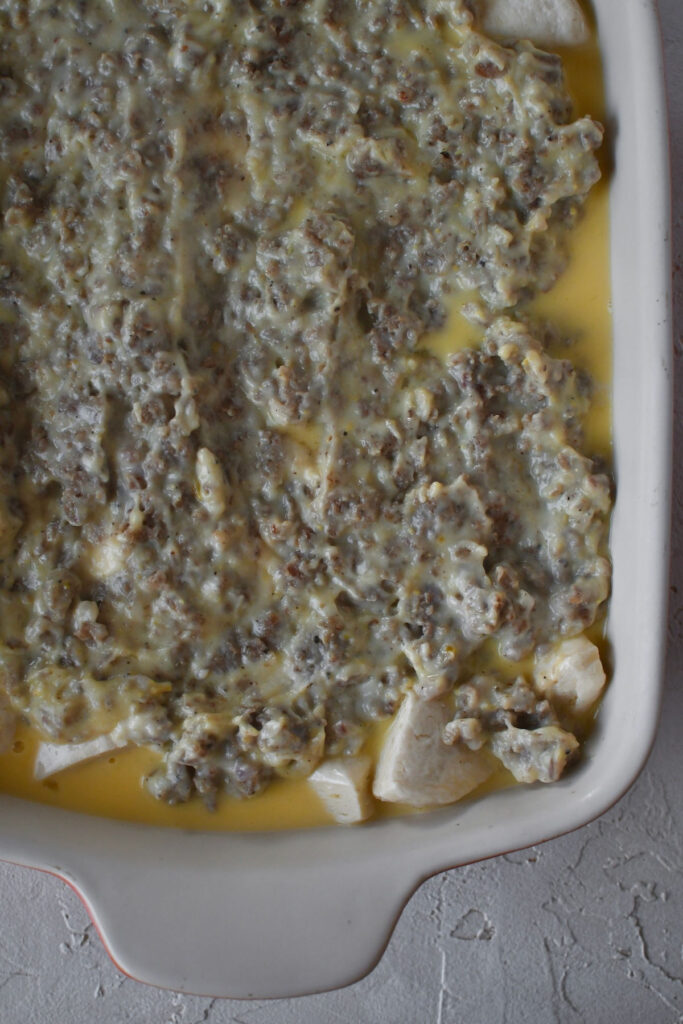
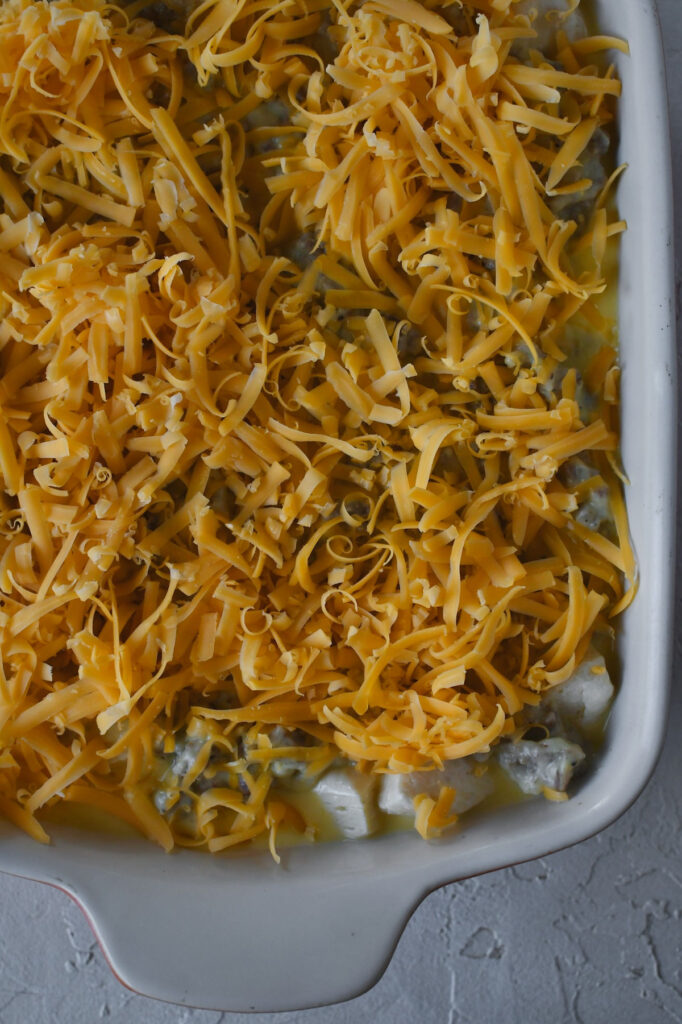
- In a 9x13 sized casserole dish. Add cut up biscuits, top with scrambled eggs, then prepared gravy, and top with shredded cheese.
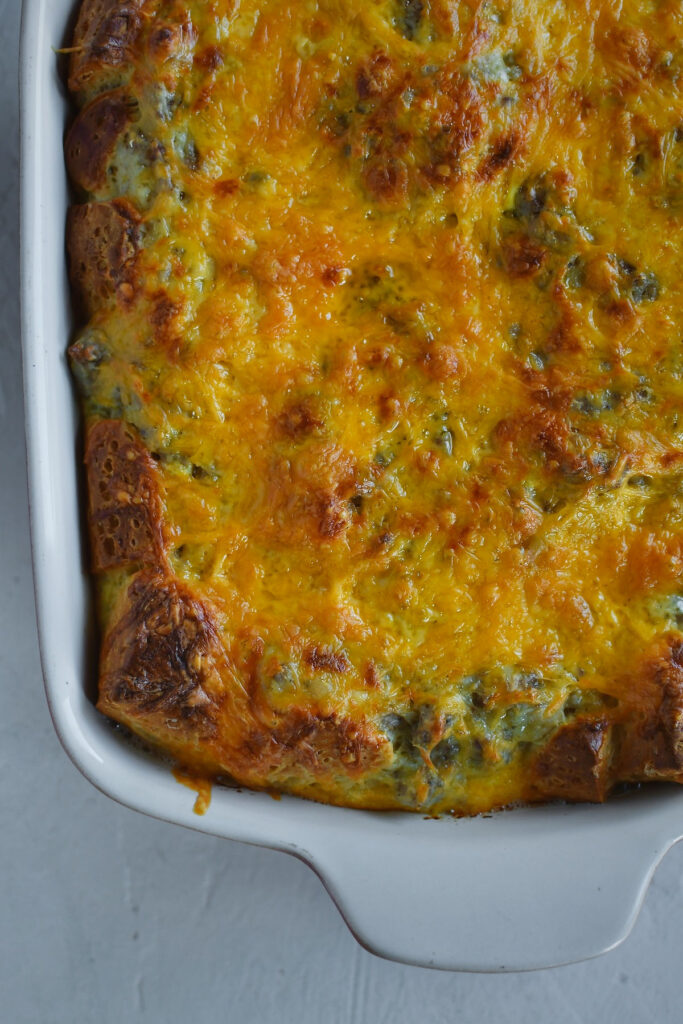
- Bake for 30 minutes until eggs are throughly cooked.
MAKE AHEAD VERSION
- After assembling the casserole, cover and place into refrigerator until ready to bake.
- Preheat oven to 350 and bake for 35-40 minutes.
Customization ideas:
- Add chopped vegetables to the sausage, such as onions, peppers, or mushrooms.
- Use different types of cheese, such as Monterey Jack, Swiss, or pepper jack.
- Drizzle with hot sauce for a spicy kick.
This make-ahead biscuit and gravy casserole is a lifesaver on busy mornings. It's easy to prepare, incredibly delicious, and sure to become a family favorite. So go ahead, give it a try and start your day off right!

Share Your Experience
I would love to hear about your experience making and enjoying my Biscuit and Gravy Casserole! Feel free to tag me on Instagram or leave a review below. Your feedback helps me improve our recipes and provides inspiration to fellow home cooks.
Save this recipe for later by simply using the pin button on the recipe card or any of the photos above. Happy cooking!
📖 Recipe
Biscuit and Gravy Casserole
Ingredients
Instructions
- In a large skillet cook the sausage.
- Add in flour, stir to coat the sausage and cook for about 2 minutes. Add in milk bouillon and pepper. Simmer until thickened.
- Preheat oven to 350.
- In a medium sized bowl combine eggs and milk. Mix to combine.
- Open refrigerator biscuits and cut each biscuit into quarters.
- In a 9x13 sized casserole dish. Add cut up biscuits, top with eggs, then prepared gravy, and top with shredded cheese.
- Bake for 30 minutes until eggs are throughly cooked.
- After assembling the casserole, cover and place into refrigerator until ready to bake.
- Preheat oven to 350 and bake for 35-40 minutes.


Can you clarify what flavor of bouillon to use
Absolutely! I'm updating the blog post right now also! But I used the chicken better than bouillon.
My daughter made this and we all thought we had died & gone to heaven. Clean plates all around. I can’t figure out why it is so good!
It's the homemade gravy! Seriously makes everything better. So so glad that you all enjoyed it!
Making this tonight had to read the recipe a few times cause u didn't clarify to scramble the eggs before assembling casserole thank u for the recipe
Sorry for the confusion in my wording. You did not need to cook the eggs before assembling. Pour the egg and milk mixture directly over the biscuits.
Can we use Mary B's frozen biscuits? If so, what would you suggest? They typically bake up in 10-12 minutes completely frozen.
While I haven't tested with this specific brand, I would assume that they would work since the bake time is similar to other premade biscuits.