• About
  • Nav Social Icons

  • Skip to primary navigation
  • Skip to main content
  • Skip to primary sidebar
  • Skip to footer
  • Home
  • About
  • Recipes
    • Blackstone
    • Breads
    • Breakfast
    • Drinks
    • Dessert
    • Dinner
    • Sides
    • Snacks
  • Shop
  • Cart
  • My account
  • Mobile Menu Widgets

    Connect

    Search

The Farmstyle

The Farmstyle

by Kayla Zenner

  • Home
  • About
  • Shop
  • Recipes
    • Blackstone
    • Breads
    • Breakfast
    • Drinks
    • Dessert
    • Dinner
    • Snacks
    • Sides
    • All Recipes
  • Cart

Eggnog Cinnamon Rolls | Perfect Holiday Breakfast

December 13, 2023 · In: Breakfast, Dessert, Recipes

FacebookTweetPin
Jump to Recipe Jump to Video Print Recipe

All the eggnog flavors with the ooey gooey goodness of a cinnamon roll. Topped with a creamy eggnog buttercream these are the perfect holiday treat.

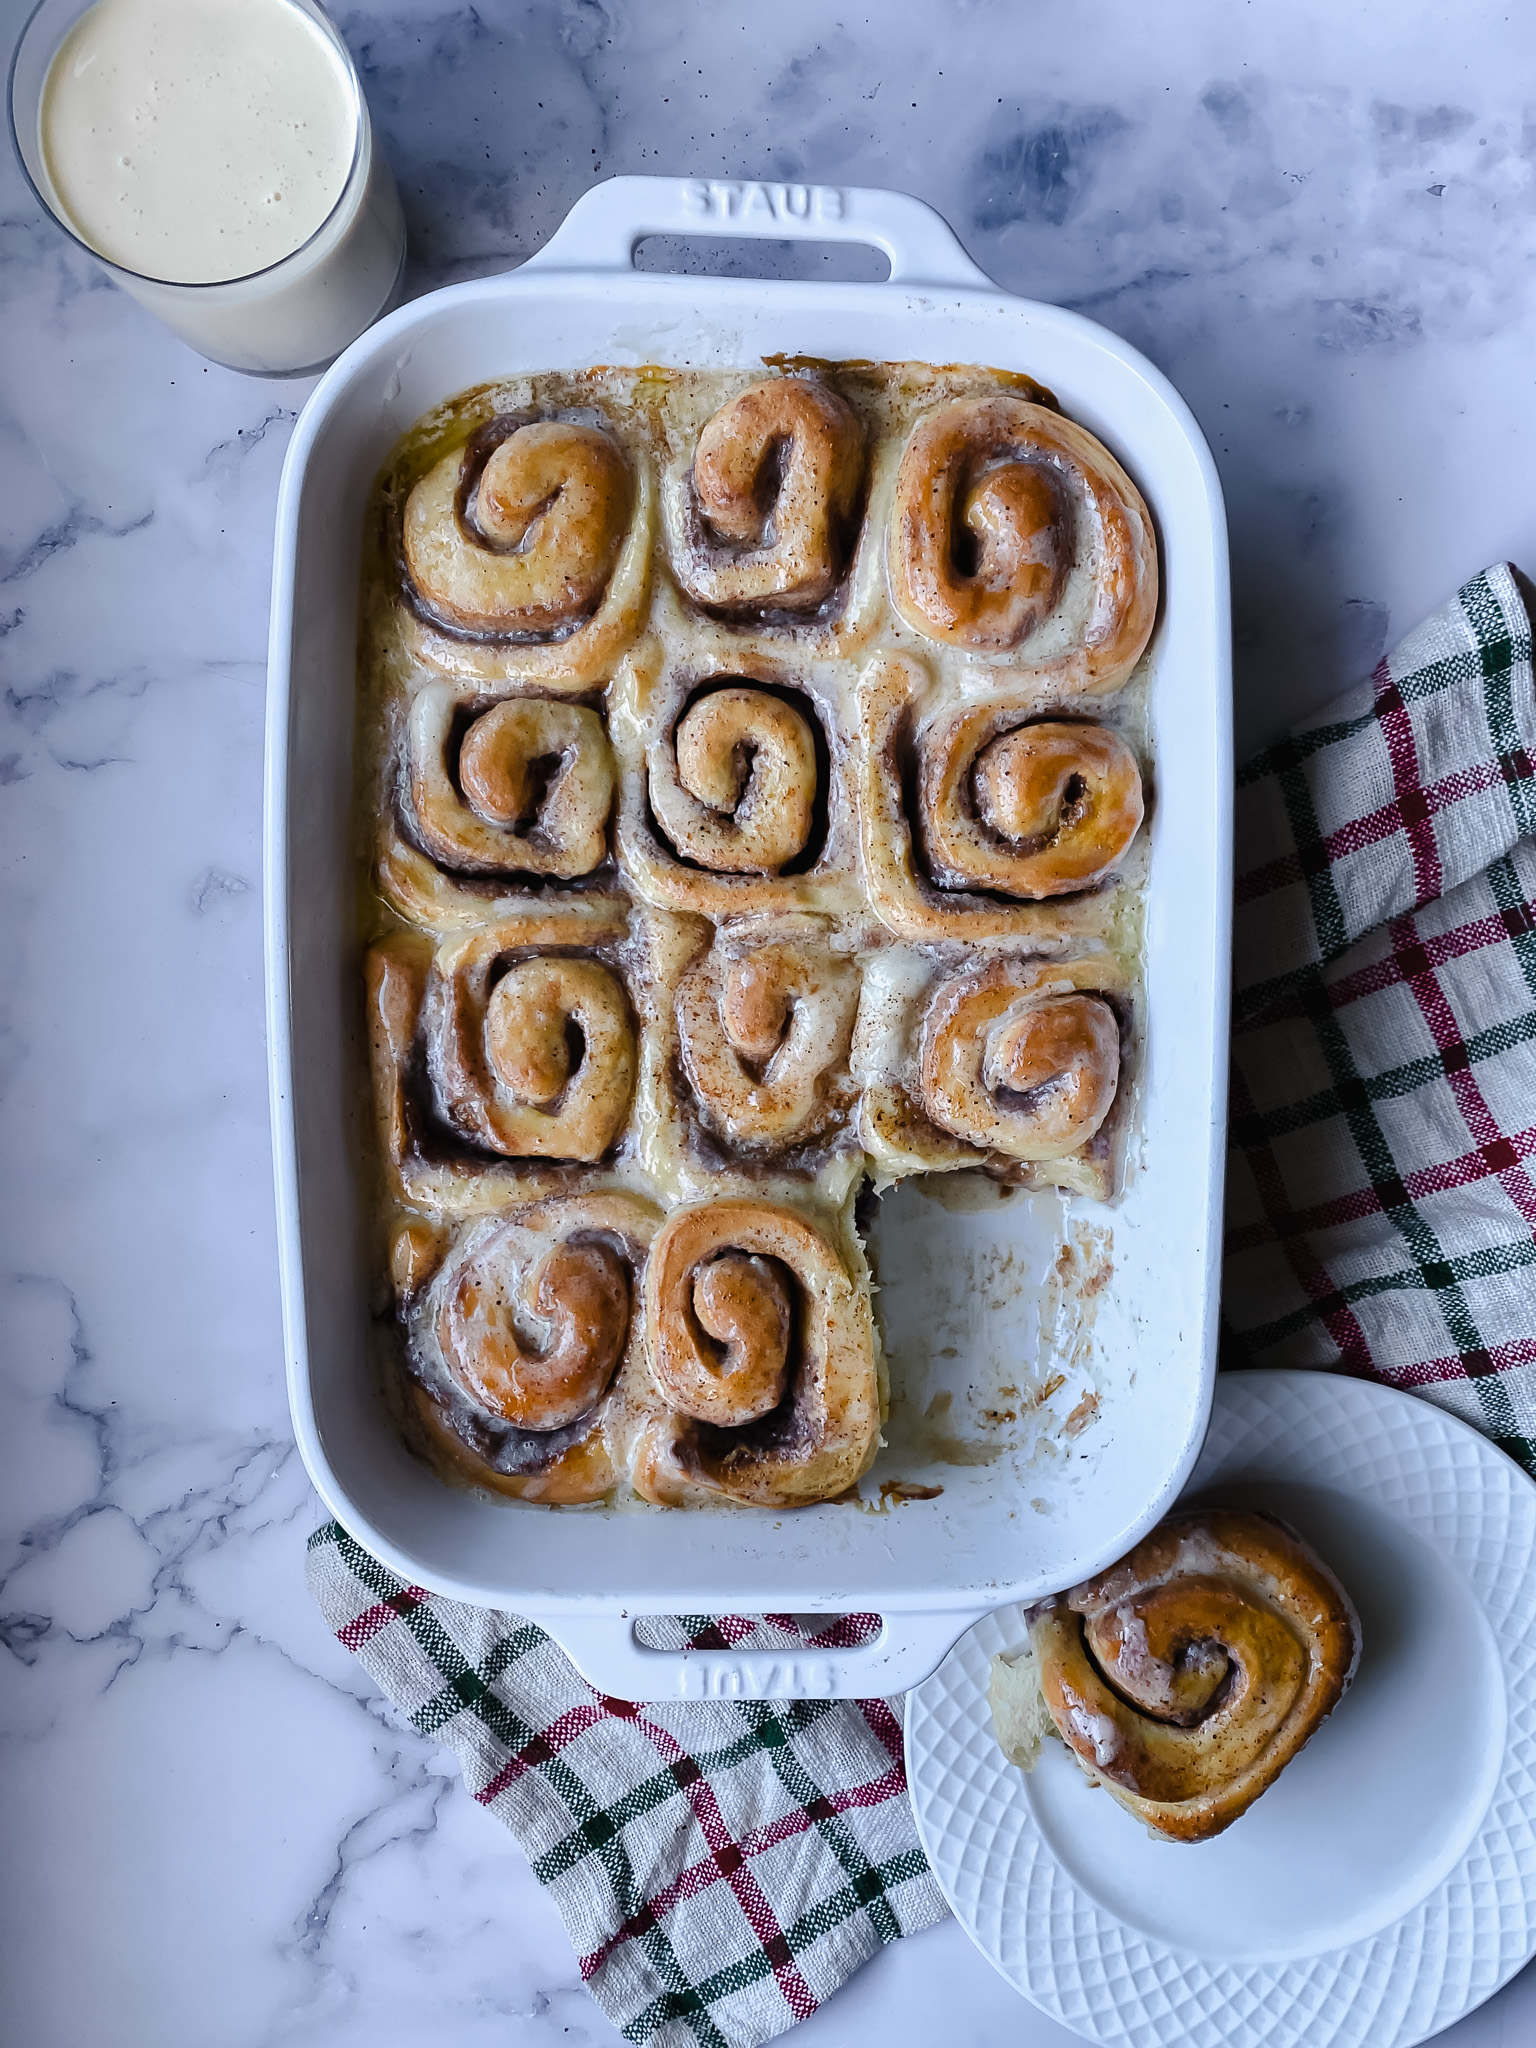
Eggnog Cinnamon Rolls are the perfect flavor combination for Christmas. These would be the perfect Christmas morning treat or even a great holiday inspired treat for your neighbors! With the perfect combination of the eggnog flavors with the gooey goodness of a cinnamon roll I don’t think there is a better match.

Eggnog Cinnamon Roll Ingredients

Cinnamon rolls have a few simple ingredients that I typically have on hand. 

  • All Purpose Flour: I like the lightness that all purpose flour gives my rolls. You can also use bread flour for a chewier roll. 
  • Eggnog: swapped for the milk I typically use in cinnamon rolls, this gives a delightful richness and flavor. 
  • Egg: The egg really helps to give a softness and richness to your dough. 
  • Nutmeg: the ginger flavor of a gingerbread. 
  • Butter: In the roll itself and in the frosting. Unsalted or salted works! 
  • Sugar: We just use a little bit to help activate the yeast. I prefer a not so sweet dough in my cinnamon roll and keep the sweetness in the filling and frosting. 
  • Yeast: I typically use regular active yeast, however you can use rapid rise yeast and half each of the rise times. 
  • Brown Sugar: I really don’t think that cinnamon rolls taste the same with anything other than the caramel flavor that brown sugar gives to your roll filling. 
  • Cinnamon: Is it a cinnamon roll without cinnamon?
  • Powdered Sugar: Adds sweetness to your frosting. 

Tools for Making Cinnamon Rolls

  • Stand Mixer: I really love using my kitchen aid stand mixer for kneading the dough. It takes some of the hard work out of knead. However, you don’t NEED one to make cinnamon rolls. You can totally knead by hand. 
  • Large Mixing Bowl: I love my large Mason Cash bowl for mixing my bowl and letting the dough rise if I’m not using my stand mixer. Plus it is so pretty. 
  • Rolling Pin: I love my marble rolling pin. 

How to Make Cinnamon Rolls

Cinnamon rolls can be a little daunting if you have never made them before. However, don’t let the process scare you! Once you do it once, then twice, then you become addicted and just can’t stop!

We can break down the process into three main parts. Making the dough, filling and rolling, and the delicious frosting. All in time is about 3 hours, BUT you will not be hands on working with the rolls for 3 hours. There is a lot of wait time when it comes to making cinnamon rolls, which is why I love to make my cinnamon rolls overnight. 

FOR THE ROLLS

  • In a small bowl, combine yeast, sugar, and 1/4 cup warm water. Let sit for 5-10 minutes.
  • In a large bowl (or your stand mixer) combine flour, salt, egg, yeast mixture, and 3/4 cup eggnog. Begin mixing adding in additional eggnog as needed. You want your dough to be able to pull away from the bowl. If you do add too much eggnog, add a little bit of flour.
  • Knead the dough four 5-10 minutes, until the dough passes the windowpane test.
  • Place dough in an oiled bowl, cover, and let rise for about an hour (or until doubled in size).
  • Pour dough onto a lightly floured counter and roll into an 18″ long rectangle.
  • In a bowl combine all of the filling ingredients. Mix to combine. Spread onto rectangle.
  • Roll the dough into a log and cut into 1.5″ slices, place onto a baking sheet.
  • Cover the dough lightly with a clean cloth and let rise for an additional hour.
  • Preheat oven to 350.
  • Remove cloth and bake the cinnamon rolls for 20-25 minutes.

FROSTING

  • While the rolls are baking add butter, vanilla, and powdered sugar to a bowl and mix until well combined.
  • Let rolls cool slightly, then spread the frosting onto the warm cinnamon rolls.
  • Dive in and enjoy!

How to Make Overnight Cinnamon Rolls

After you roll and cut the dough cover the rolls in plastic wrap and place in the refrigerator. Remove from the fridge and allow to rise for an hour before baking per the original instructions. Alternatively, you can place in the freezer and allow to rise overnight before baking. 

Share Your Experience

I would love to hear about your experience making and enjoying my Eggnog Cinnamon Rolls! Feel free to tag me on Instagram or leave a review below. Your feedback helps me improve our recipes and provides inspiration to fellow bakers.

Save this recipe for later by simply using the pin button on the recipe card or any of the photos above. Happy cooking!

Eggnog Cinnamon Rolls

No ratings yet
All the eggnog flavors with the ooey gooey goodness of a cinnamon roll. Topped with a creamy eggnog buttercream these are the perfect holiday treat.
Print Recipe Pin Recipe
Prep Time:2 hours hrs
Cook Time:30 minutes mins
Course: Breakfast, Dessert
Keyword: christmas, cinnamon roll
Servings: 12 rolls

Ingredients

FOR THE DOUGH

  • 2 1/4 tsp dry yeast
  • 2 tbsp sugar
  • 1/4 cup water warmed
  • 1 1/2 tsp salt
  • 1 egg
  • 4 cups flour
  • 1 cups eggnog

FOR THE FILLING

  • 1/2 cup butter
  • 3/4 cup brown sugar
  • 1 tbsp cinnamon
  • 1 tsp ground nutmeg

FOR THE FROSTING

  • 1/2 cup butter
  • 3 cups powdered sugar
  • 1 tsp vanilla extract
  • 1/2 cup eggnog

Instructions

FOR THE ROLLS

  • In a small bowl, combine yeast, sugar, and 1/4 cup warm water. Let sit for 5-10 minutes.
  • In a large bowl (or your stand mixer) combine flour, salt, egg, yeast mixture, and 3/4 cup eggnog. Begin mixing adding in additional eggnog as needed. You want your dough to be able to pull away from the bowl. If you do add too much eggnog, add a little bit of flour.
  • Knead the dough four 5-10 minutes, until the dough passes the windowpane test.
  • Place dough in an oiled bowl, cover, and let rise for about an hour (or until doubled in size).
  • Pour dough onto a lightly floured counter and roll into an 18″ long rectangle.
  • In a bowl combine all of the filling ingredients. Mix to combine. Spread onto rectangle.
  • Roll the dough into a log and cut into 1.5″ slices, place onto a baking sheet.
  • Cover the dough lightly with a clean cloth and let rise for an additional hour.
  • Preheat oven to 350.
  • Remove cloth and bake the cinnamon rolls for 20-25 minutes.

FROSTING

  • While the rolls are baking add butter, vanilla, and powdered sugar to a bowl and mix until well combined.
  • Add in enough eggnog to get the desired frosting consistency. I prefer a thick glaze consistency on these.
  • Let rolls cool slightly, then spread the frosting onto the warm cinnamon rolls.
  • Dive in and enjoy!

Video

View this post on Instagram

A post shared by Kayla Zenner | family friendly meals from the farm (@thefarmstyle)

Share this:

  • Share on X (Opens in new window) X
  • Share on Facebook (Opens in new window) Facebook
  • Share on Pinterest (Opens in new window) Pinterest

Like this:

Like Loading...
FacebookTweetPin

By: Kayla · In: Breakfast, Dessert, Recipes

About Kayla

Hi! I'm Kayla. I'm here to help inspire busy moms to get back in the kitchen and feel beautiful along the way! I'm married to my high school sweetheart and live on a farm with our two busy boys.

you’ll also love

savory ham and cheese monkey bread in bundt panSavory Breakfast Monkey Bread
Olive Oil Toffee Chocolate Chip Cookies
Homemade Red Beet Pasta

Reader Interactions

Leave a ReplyCancel reply

Next Post >

Biscuit and Gravy Breakfast Casserole | Easy Make Ahead Breakfast

Primary Sidebar

Meet Kayla

Meet Kayla
hello!

LIVING OURFARM(LIFE)STYLE WHERE WE ​JUGGLE THE CHAOS OF MOTHERHOOD ONE ​KITCHEN ADVENTURE AT A TIME!

Read More

Connect

join the list

Categories

  • Blog
  • Recipes

Follow Along

@thefarmstyle


100,000 of you. I’m honestly still trying to wrap
100,000 of you. I’m honestly still trying to wrap my head around that.

What started as me just sharing what I was making for my family, little moments, and pieces of my life has turned into this incredible community, and that’s because of YOU. 

The comments, the messages, the times you’ve made my recipes in your own kitchens… it all means more than I can put into words.

Thank you for being here, for supporting me, and for growing alongside me. I don’t take a single one of you for granted.

We’re just getting started 🤍


Comment GARDEN and I’ll send you all the details t
Comment GARDEN and I’ll send you all the details to your inbox. 

The best thing about these garden beds is that they can be made to any dimension that you want! I created four 4x8 beds, two 3x8 beds, and two 2x3 beds using the exact same method each time!

Materials (for ONE 4x8 bed)
* (4) 2x8 boards, cut to 8 ft long
* (4) 2x8 boards, cut to 4 ft long 
* (24) 3” exterior wood screws 
* (4) 2x4 boards, cut to 14” long

Instructions
1. Cut Your Boards (if needed)
Cut your boards to length before assembling. We had (4) 12’ boards, we cut into an 8’ board and 4’ board. However, you can also buy (6) 8’ boards and then cut 2 of them in half. 

2. Drill Pilot Holes (optional)
On each 8’ board measure ¾” in from each end and Drill 2 pilot holes per end, spaced about 2–3” from the top and bottom
This helps prevent the wood from splitting when you add screws.

3. Build the First Layer (Bottom Frame)
Lay out:
 * (2) 8 ft boards (long sides)
 * (2) 4 ft boards (short sides)
Form a rectangle with the short boards sitting inside the long boards. Then attach the boards using 3” screws into the pilot holes you created in the previous step. 

4. Stack the Second Layer
Repeat process by placing the second set of boards directly on top of the first frame, lining up edges carefully

5. Add Corner Supports 
Place the 2x4 board inside each corner
These should sit flush with the bottom and sit an inch below the top. 
Screw through the outside boards into the 2x4 board once in the top 2x8 board and once in the bottom 2x8 board. 

 Pro Tips
Use untreated cedar for best longevity, however I used fir for a more cost effective version. These may only last me 5 years, BUT the cost of cedar deterred me from going that route. 

Avoid pressure-treated wood unless it’s labeled safe for gardens

Use a garden safe stain on the interior before filling to help with board longevity.


Comment SALAD for all the recipe details.

Spring
Comment SALAD for all the recipe details. 

Spring salads > everything else right now 🥗🌸

Fresh, colorful, and actually satisfying… these are the kind of salads you crave (not just eat because you feel like you should).

Save this for your weekly menu + tell me which one you’re making first.

Strawberry Balsamic Salad
Blueberry Summer Salad
Streak Harvest Salad
Citrus Kale Salad
Summer Fruit Salad
Greek Pasta Salad
Rainbow Pasta Salad


Comment SMOOTHIE for all the recipe details.

Thi
Comment SMOOTHIE for all the recipe details. 

This Blackberry Coconut Smoothie is creamy, refreshing, and dairy-free, made with coconut milk, frozen blackberries, and coconut yogurt. A quick and easy smoothie recipe ready in just 5 minutes.


Comment RECIPE for all the details!

These cheese
Comment RECIPE for all the details! 

These cheesesteak quesadillas scored ⭐️⭐️⭐️⭐️⭐️ from my kids! BONUS: they are so easy to make on the @blackstoneproducts griddle.


Help me restore my @blackstoneproducts griddle aft
Help me restore my @blackstoneproducts griddle after being a tiny bit neglectful the past few months. 
#blackstonegriddle #griddlenation


Footer

On the Blog

  • Blog
  • Recipes

Info

  • About
  • Disclosure, Privacy Policy, and Terms

Copyright © 2026 · Theme by 17th Avenue

%d

    Rate This Recipe

    Your vote:


    A rating is required
    A name is required
    An email is required
    We use cookies to ensure that we give you the best experience on our website. If you continue to use this site we will assume that you are happy with it.