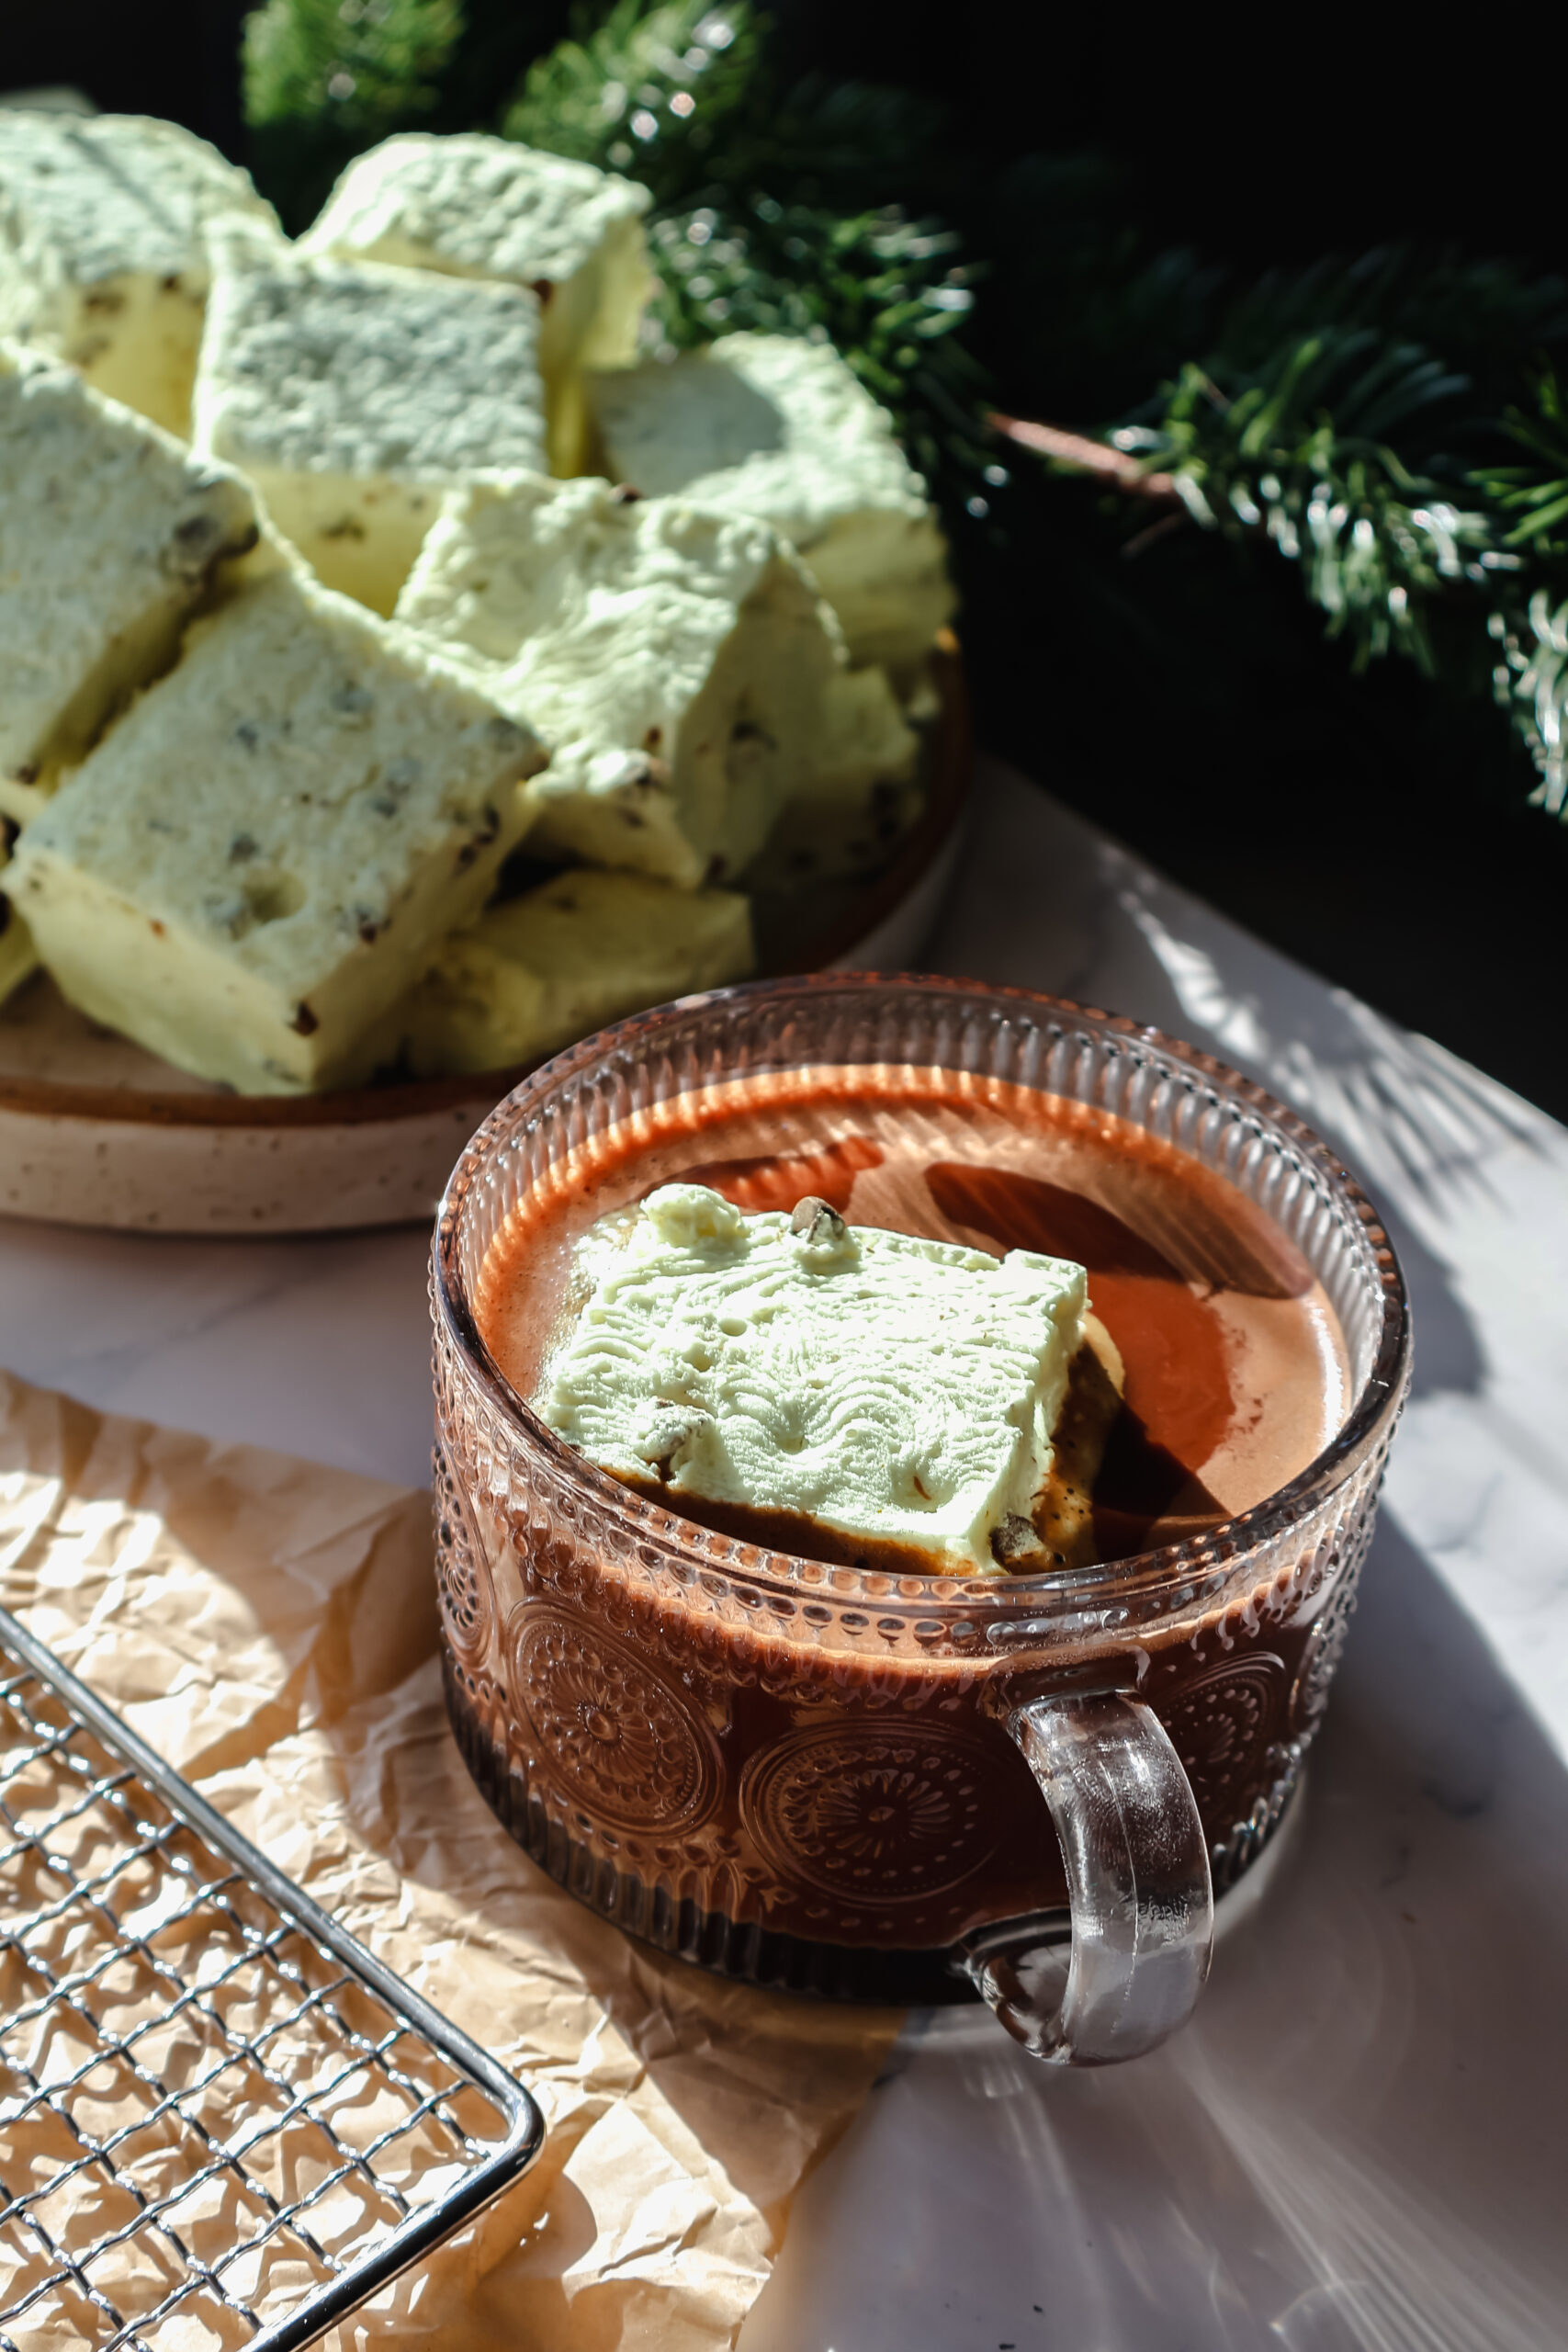
Homemade Mint Chocolate Chip Marshmallows
Homemade Mint Chocolate Chip Marshmallows are soft, fluffy, and easy to make. A perfect homemade candy for gifts, cocoa toppers, or sweet treats.

If you've never made homemade marshmallows from scratch, you're in for a treat. These fluffy, pillowy Mint Chocolate Chip Marshmallows are soft, airy, and packed with refreshing mint flavor and mini chocolate chips in every bite. They're the perfect homemade candy for gifting, hot cocoa toppers, dessert boards, or simply enjoying on their own.
This easy marshmallow recipe walks you through every step so you can confidently make bakery-style marshmallows at home. Once you try homemade, you'll never go back to store-bought again.
Why You'll Love This Recipe
- Ultra fluffy, melt-in-your-mouth texture
- Cool mint flavor with chocolate in every bite
- Perfect for holidays, gifts, or desserts
- Stores well for up to 2 weeks
- Surprisingly simple once prepped

Ingredient Breakdown & Substitutions
Gelatin Powder
This is what gives marshmallows their signature bounce and structure. Use unflavored gelatin for best results.
Granulated Sugar
Creates the glossy syrup base that whips into that classic fluffy texture.
Water
Used in two stages: first to bloom the gelatin and second to create the sugar syrup.
Vanilla Extract
Adds warmth and balances the mint flavor.
Mint Extract
Gives these marshmallows their signature cool flavor. You can substitute peppermint extract for a slightly stronger mint profile.
Mini Chocolate Chips
Folded in at the end so they don't melt into the mixture. Mini size distributes best.
Powdered Sugar
Prevents sticking when cutting and storing.

How to Make Mint Chocolate Chip Marshmallows
Start by prepping everything before turning on the heat. Marshmallow mixture sets quickly, so having tools ready is essential.
Line a 9×13 pan with parchment paper and set aside.
Bloom the gelatin by adding it to a mixing bowl with ½ cup cold water. Let it sit while you prepare the syrup.
In a saucepan, combine sugar and 1½ cups water over low heat, stirring until dissolved. Increase heat and bring to a boil. Once boiling, stop stirring and allow it to cook until the mixture reaches 240°F.
Remove from heat and carefully pour into the bowl with gelatin. Immediately begin whisking on high speed. Add vanilla and mint extracts and continue whipping until the mixture triples in volume, becomes thick, and the bowl feels cool to the touch. When you lift the whisk, the mixture should drizzle and hold its shape.
Fold in mini chocolate chips.
Quickly spread the marshmallow mixture into your prepared pan and let set for about 2 hours.
Dust with powdered sugar, remove from pan, cut into squares, and coat each piece lightly in powdered sugar to prevent sticking.
Store in an airtight container for up to 2 weeks.

Pro Tips for Perfect Marshmallows
- Use a candy thermometer for accurate temperature
- Stop stirring once syrup boils to avoid crystallization
- Work quickly once whipping is finished
- Lightly grease tools if sticking occurs
Flavor Variations
You can easily customize this recipe:
- Swap mint for almond or orange extract
- Add crushed candy canes instead of chocolate chips
- Dip finished marshmallows in melted chocolate
- Roll cut marshmallows in cocoa powder or sprinkles

Frequently Asked Questions
Why didn't my marshmallows set?
The sugar syrup likely didn't reach 240°F or the mixture wasn't whipped long enough.
Can I make marshmallows without a stand mixer?
Yes, but a hand mixer is strongly recommended because whipping takes several minutes.
Can I freeze marshmallows?
It's not recommended - freezing changes their texture.
Why do I need to bloom gelatin?
Blooming hydrates the gelatin so it dissolves smoothly and sets properly.
How do I cut marshmallows cleanly?
Use a sharp knife dusted with powdered sugar between cuts.
Storage Tips
Keep marshmallows in an airtight container at room temperature for up to 2 weeks. Avoid humidity, which can make them sticky.
📖 Recipe
Homemade Mint Chip Marshmallows
Ingredients
Equipment
Instructions
- You will want to have everything prepped and ready to go ahead of time. Once the marshmallows are ready to pour you need to work fast as everything starts to set up quick. Make sure to have whisk attachment ready for your stand mixer or hand mixer as well.
- Line a 9x13 pan with parchment paper. Set aside for later.
- Soak the gelatin in ½ cup of cold water in the bowl of a stand mixer or large bowl with your whisk attachment ready.
- In a large saucepan dissolve the sugar in 1 ½ C of water over low heat, stirring constantly.
- Raise the temperature and bring to a boil - once it comes to a boil don't stir anymore.
- Boil steadily until the mixture hits 240. It should take 7-15 mins.
- Remove from the heat and pour into bowl with gelatin. Begin whisking and add in your vanilla extract, mint extract, and green food coloring (if using), start with a little bit of food coloring adding in more if you desire a more vibrant color.
- Continue whisking until mixture has tripled in size, the bowl is cool to the touch, and when the whisk is removed the drizzle holds its shape in the bowl. Fold in the mini chocolate chips at this point.
- Pour mixture into your prepared pan and let set completely - about 2 hours.
- Remove marshmallows from the pan and sprinkle with additional powdered sugar. This helps your knife from sticking too much when cutting.
- Cut marshmallows into desired size with a sharp knife. Dipping each marshmallow in powdered sugar to prevent them all from sticking to each other.
- Store in an air tight container for up to 2 weeks.