• About
  • Nav Social Icons

  • Skip to primary navigation
  • Skip to main content
  • Skip to primary sidebar
  • Skip to footer
  • Home
  • About
  • Blog
    • Mom Life
    • Farm Life
    • Recipes
      • Breakfast
      • Dessert
      • Dinner
      • Sides
      • Snacks
  • Shop
    • Shop – Digital Books
  • Cart
  • My account
  • Mobile Menu Widgets

    Connect

    Search

The Farmstyle

The Farmstyle

by Kayla Zenner

  • Home
  • About
  • Shop
    • Shop – Meal Plans
    • Shop My Favorites
  • Blog
    • Breakfast
    • Dessert
    • Dinner
    • Snacks
    • Sides
    • All Recipes
  • Cart

Homemade Peppermint Mocha

November 16, 2025 · In: Drinks, Recipes

FacebookTweetPin
Jump to Recipe Print Recipe

Rich and creamy Homemade Peppermint Mocha made easy with a homemade peppermint mocha syrup. Perfect hot or iced, this festive holiday coffee drink is better than Starbucks and ready in minutes.

Read more: Homemade Peppermint Mocha

There’s nothing more festive than a cozy Homemade Peppermint Mocha during the holiday season. This rich and creamy drink blends chocolate, espresso, and refreshing peppermint into the perfect Christmas coffee. Whether you love your peppermint mocha hot and steamy or iced and creamy, this simple recipe brings your favorite café treat right into your own kitchen.

The best part? You’ll be making your own peppermint mocha syrup from scratch, no preservatives, no artificial flavors, and no mystery ingredients. Just pure holiday magic in a cup.

Why You’ll Love This Homemade Peppermint Mocha

  • Better than store-bought with richer chocolate flavor and balanced mint
  • Customize sweetness with your homemade syrup
  • Perfect for the holidays or any time you’re craving a cool, refreshing mocha
  • Budget-friendly compared to coffee shop prices
  • Ready in minutes with ingredients you probably already have

Whether you’re decorating the tree or need a sweet afternoon pick-me-up, this peppermint mocha recipe is a must-try.

Ingredients You Need

Peppermint Mocha Syrup

A simple stovetop syrup that gives the drink its signature flavor.

  • Cocoa powder for deep, chocolate richness
  • Sugar for that classic mocha sweetness
  • Water to create the syrup base
  • Peppermint extract for bright, refreshing mint flavor
  • Salt (optional) to balance the sweetness

Peppermint Mocha Drink

  • Espresso shots for bold coffee flavor
  • Milk of choice (whole milk for creamy, oat milk for dairy free)
  • Peppermint mocha syrup to sweeten and flavor your drink
  • Whipped cream for a festive finish

How to Make Peppermint Mocha Syrup

  1. In a saucepan, combine cocoa powder, sugar, and a pinch of salt.
  2. Stir in water until smooth.
  3. Simmer over medium heat for 5–10 minutes, until the syrup thickens slightly.
  4. Remove from heat and stir in peppermint extract.
  5. Transfer to a jar and store in the refrigerator.

This homemade peppermint mocha syrup stays fresh for up to 2 weeks, making it perfect for holiday coffee all season long.

How to Make a Peppermint Mocha

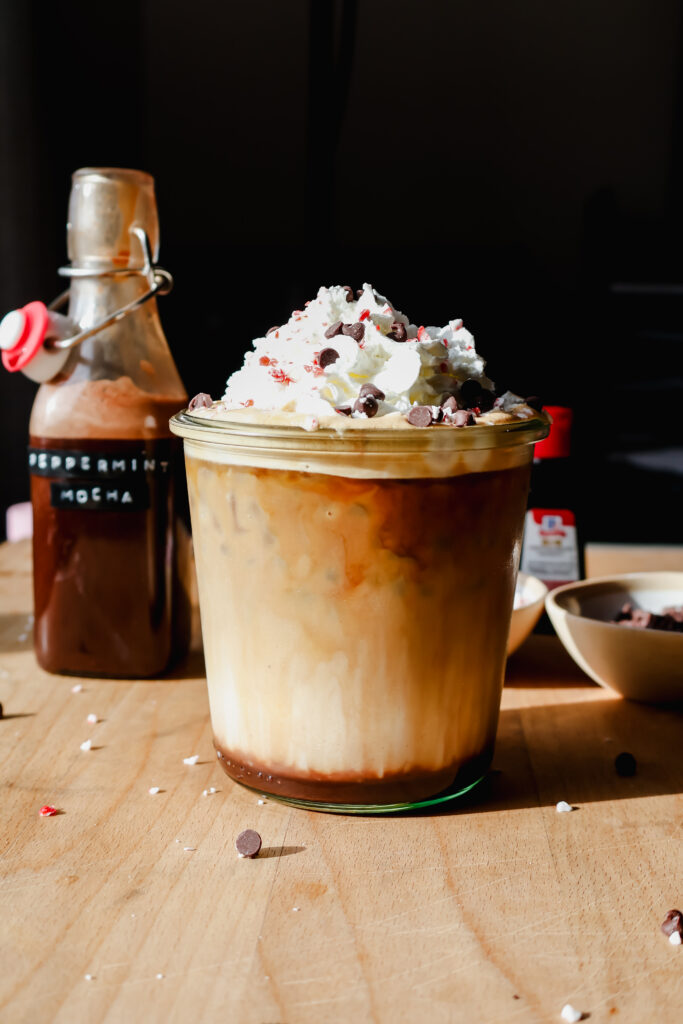
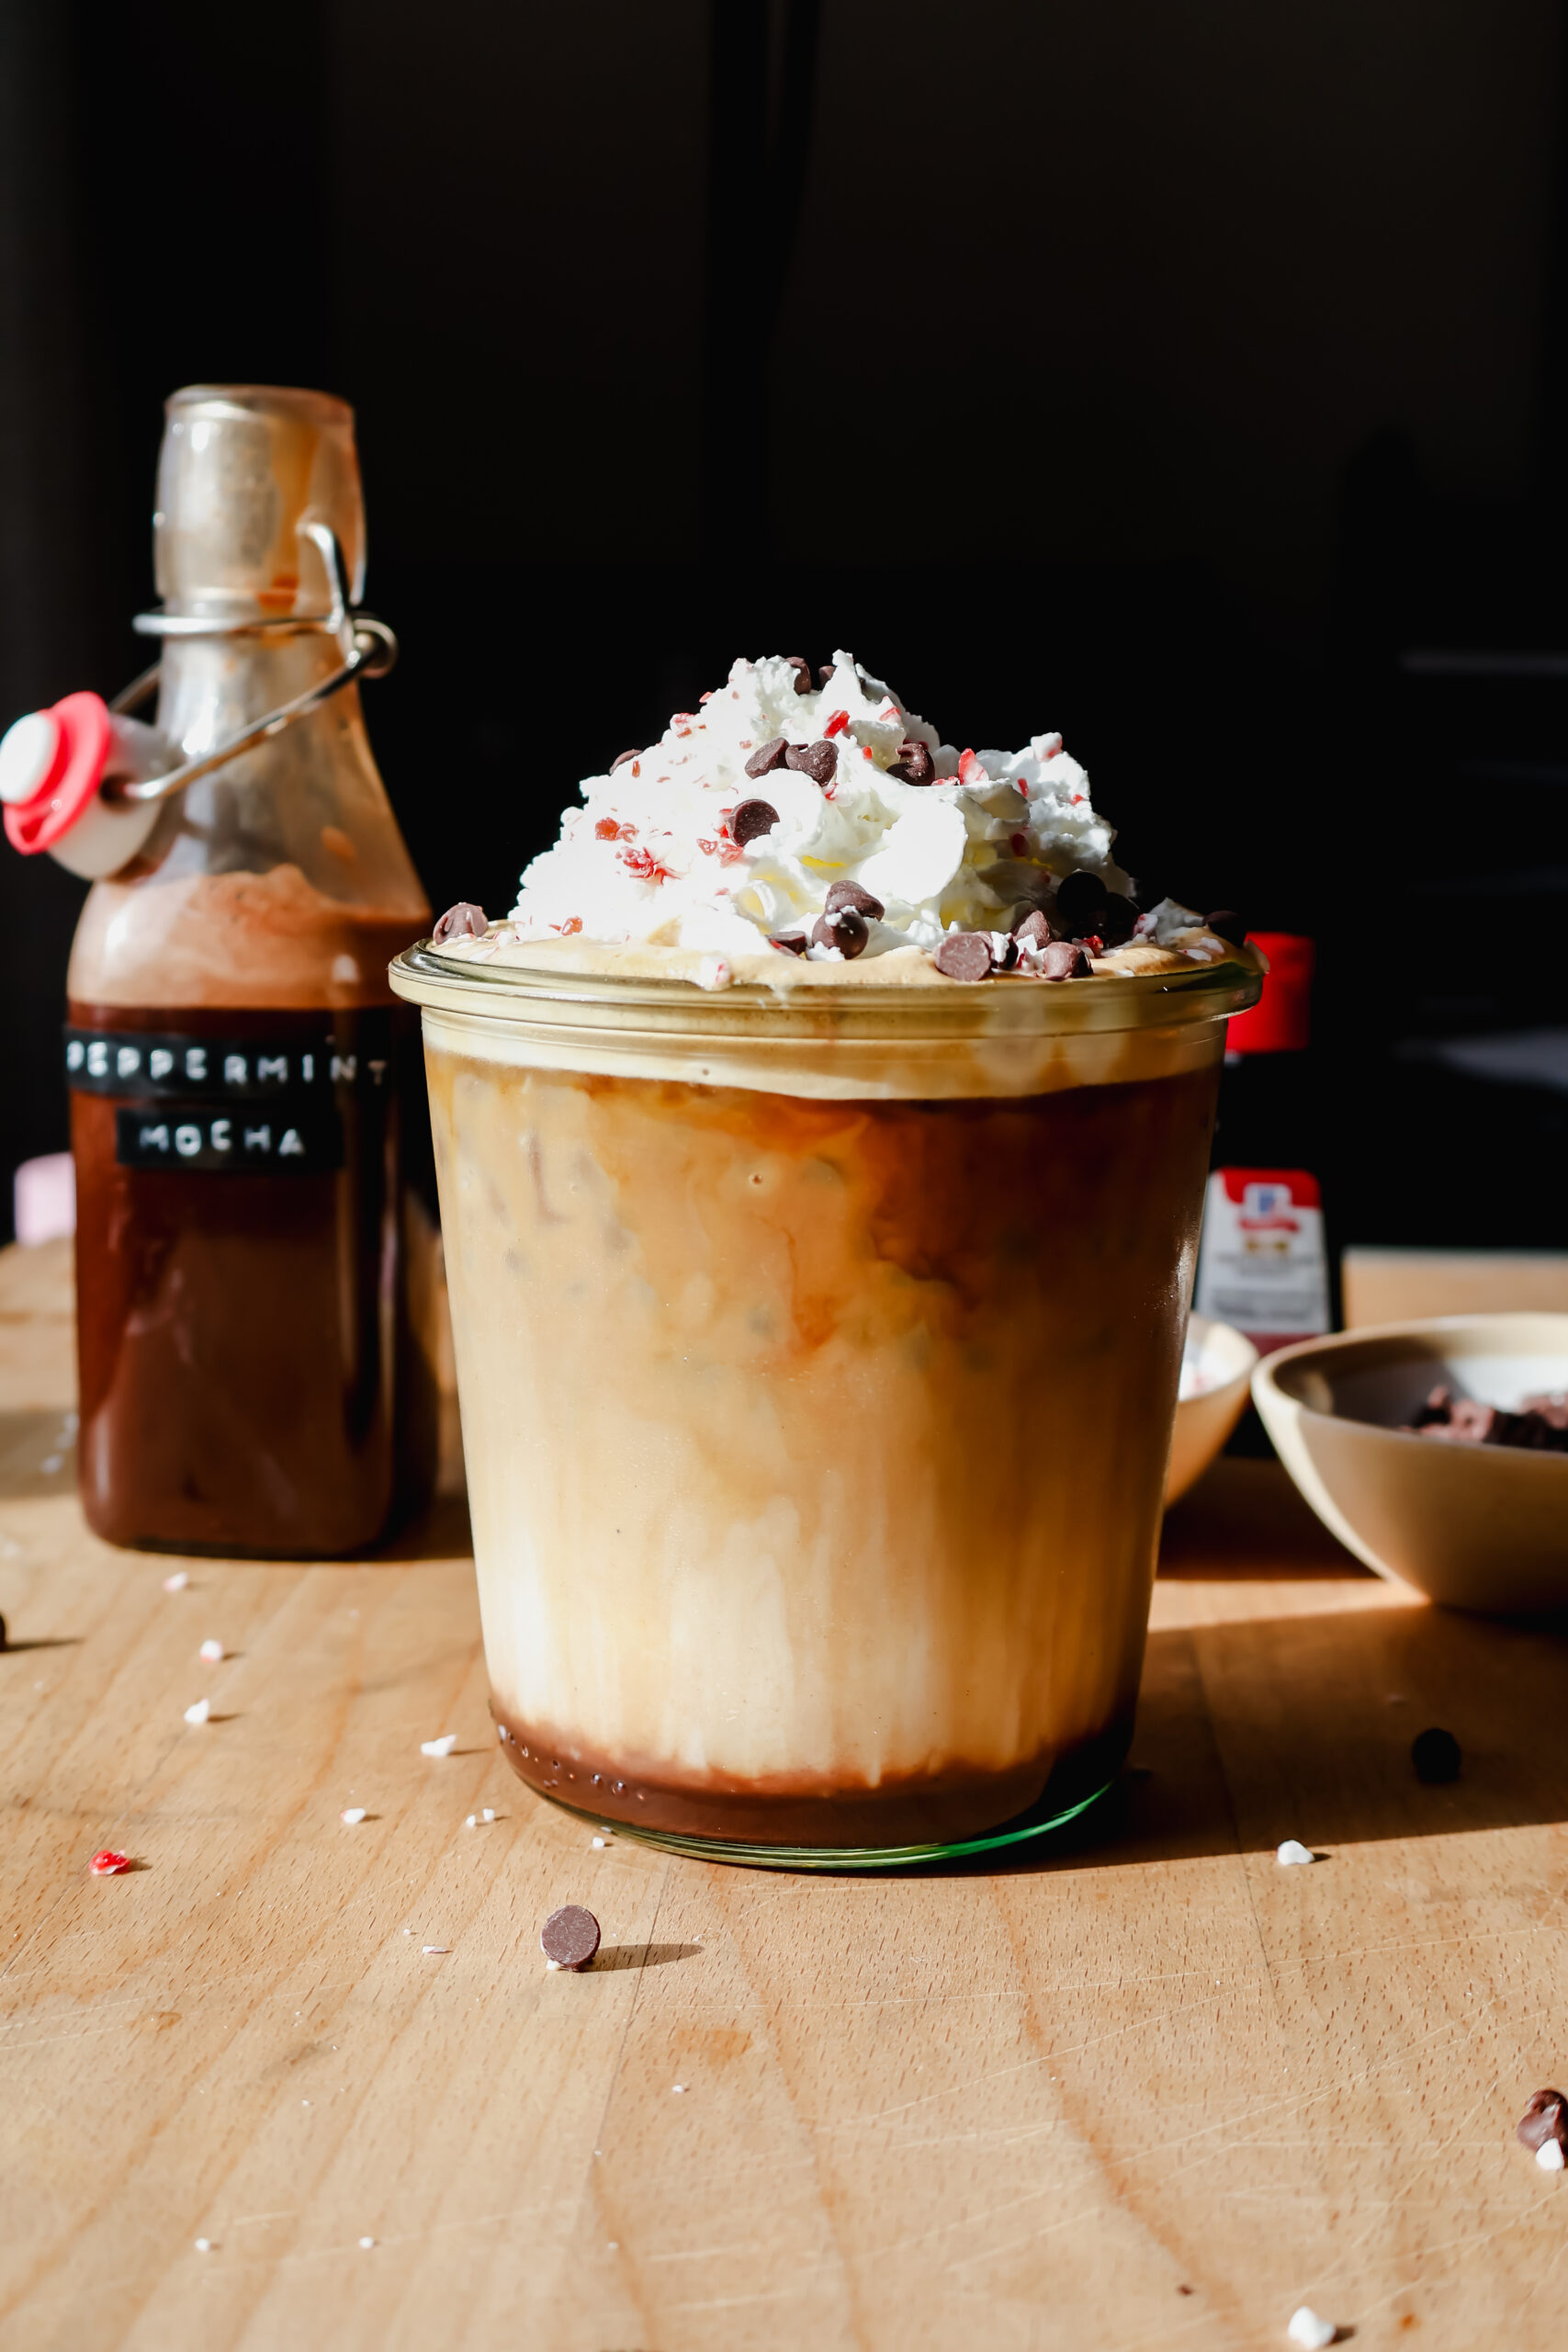
Iced Peppermint Mocha

  1. Add peppermint mocha syrup, milk, and espresso to a glass.
  2. Stir well, then add ice.
  3. Top with whipped cream and enjoy the perfect holiday iced coffee.

Hot Peppermint Mocha

  1. Steam or heat the milk to your desired temperature.
  2. Stir in peppermint mocha syrup and espresso.
  3. Finish with whipped cream for the coziest winter drink.

Tips for the Best Peppermint Mocha

  • Adjust the mint: Add more or less peppermint extract depending on how strong you like it.
  • Use high-quality cocoa powder for the richest flavor.
  • Froth your milk for a creamier hot version.
  • Add chocolate chips for an extra indulgent twist.
  • Make it dairy-free with almond, oat, or coconut milk.

Serving Suggestions

This peppermint mocha pairs beautifully with:

  • Christmas cookies
  • Cinnamon rolls
  • Chocolate pastries
  • Holiday brunch spreads

Or enjoy it as a sweet treat all on its own.

Homemade Peppermint Mocha

No ratings yet
Rich and creamy Homemade Peppermint Mocha made easy with a homemade peppermint mocha syrup. Perfect hot or iced, this festive holiday coffee drink is better than Starbucks and ready in minutes.
Print Recipe Pin Recipe
Prep Time:15 minutes mins
Cook Time:15 minutes mins
Course: Dessert, Drinks

Ingredients

Peppermint Mocha Syrup

  • 1/2 cup cocoa
  • 1 cups sugar
  • 3/4 cups water
  • 2 tsp peppermint extract
  • 1 pinch salt optional

Peppermint Mocha

  • 2 shots espresso
  • 6 oz milk
  • 2-3 tbsp peppermint mocha syrup
  • whipped cream for topping

Instructions

Peppermint Mocha Sauce

  • In a saucepan combine cocoa, sugar and salt. Mix to combine.
  • Add in water and mix to combine.
  • Simmer over medium heat for 5-10 minutes or until the desired thickness has occurred. Stir in peppermint extract.
  • Pour into a jar and store in the refrigerator .

Peppermint Mocha

  • ICED: Add in peppermint mocha syrup, milk, and espresso to a glass. Mix to combine then fill with ice. Top with whipped cream and enjoy.
  • HOT: Steam milk to desired temperature then mix in peppermint mocha syrup and espresso. Top with whipped cream and enjoy!

Share this:

  • Click to share on X (Opens in new window) X
  • Click to share on Facebook (Opens in new window) Facebook
  • Click to share on Pinterest (Opens in new window) Pinterest

Like this:

Like Loading...
FacebookTweetPin

By: Kayla · In: Drinks, Recipes

About Kayla

Hi! I'm Kayla. I'm here to help inspire busy moms to get back in the kitchen and feel beautiful along the way! I'm married to my high school sweetheart and live on a farm with our two busy boys.

you’ll also love

French Onion Meatball Bake
Bakery Style Hot Chocolate Cookies
Mini Cadbury Egg Easter Cookie Bar with Browned Butter

Reader Interactions

Leave a ReplyCancel reply

Next Post >

Brownies on the Blackstone Griddle

Primary Sidebar

Meet Kayla

Meet Kayla
hello!

LIVING OURFARM(LIFE)STYLE WHERE WE ​JUGGLE THE CHAOS OF MOTHERHOOD ONE ​KITCHEN ADVENTURE AT A TIME!

Read More

Connect

join the list

Categories

  • Blog
  • Recipes

Follow Along

@thefarmstyle


Help me get to my big goal before 2026.


Comment RECIPE for all the details sent to your in
Comment RECIPE for all the details sent to your inbox. 

These Individual Chicken Pot Pies are the ultimate cozy comfort food with a flaky homemade pie crust, creamy chicken filling, and perfectly portioned for easy serving.

Ingredients
Chicken Pot Pie Filling
3 cups rotisserie chicken shredded
1 onion diced
1/2 cup carrots diced
4 tbsp butter
1/4 cup flour
1/4 cup heavy cream
2 cups chicken broth
1 tsp onion powder
1 tsp garlic powder
1/2 tsp rosemary
Pie Crust
2 cups butter cold
4 cups all purpose flour
2 tsp salt
1/4 cup ice cold water

Instructions
Preheat oven to 425 F.

Make the Pie Crust
In a large bowl add cubed butter, salt and flour. Using a pastry cutter or two knives cut together the flour and butte until it resembles crumbly flour.
Slowly add in the ice cold water until the dough starts to come together. Once the dough starts to come together pour onto a counter and use your hands to combine the dough.
Split the dough in 12 section and place onto a floured surface and roll out half the pie crusts to fit your pie pan. If the dough starts to stick to the rolling pin, sprinkle a little flour on top.
Transfer the rolled-out crust to your pie pan, pressing it gently to fit the bottom and sides.

Make the Pot Pie Filling
Melt butter in a cast iron pan and add in onion and carrot. Cook over medium heat until soft. 
Add in flour. Cook for 1-2 minutes.
Add in chicken stock, seasonings, chicken, and heavy cream. Simmer for 5 minutes to thicken sauce. 
Top with biscuits and bake according to biscuit instructions.

Assemble the Pot Pies
Add about 1 cup of filling to each of the prepared pie pans.
Roll out remaining pie crust and place on top of filled pie pans.
Crimp the edges and bake pies for 25-30 minutes, or until crust is golden brown.

Make Ahead Option
After assembling the pit pies, place onto a sheet pan and freeze for 1-2 hours. Wrap each in plastic wrap and freeze for later. 
Bake from frozen at 400F for 45-55 minutes. Covering with foil if the tops brown too fast.


Comment BREAKFAST for all the recipe details.

Th
Comment BREAKFAST for all the recipe details. 

These viral sausage gravy bombs are perfect for Christmas morning! Combining the classic biscuit and gravy into a portable breakfast creation, they are a family favorite!

Ingredients
1 lb ground sausage
1/3 cup flour
2 cups milk
1 Tbsp Roasted Chicken Better than Bouillon
pepper to taste
1 pkg refrigerator biscuits

Instructions
In a large skillet cook the sausage.
Add in flour, stir to coat the sausage and cook for about 2 minutes. Add in milk boulion and pepper. Simmer until thickened.
Roll the biscuits into a small circle, then fill with about 1/4 cup gravy. Pinch up to middle to seal and place seam side down on a baking sheet. Repeat with remaining biscuits.
NOTE: if making these ahead of time you can place these in the refrigerator overnight. Then bake the next morning. 
Bake according to biscuit package.

TIP: I like to double this recipe and freeze the remaining. Pull out what I want the night before to thaw in the fridge, then place in oven on broil for a few minutes to crisp the biscuit up. BECAREFUL not to forget them in the oven and watch carefully.

#christmasbreak #makeaheadbreakfast #biscuitsandgravy


Nothing beats a room full of flour-dusted hands an
Nothing beats a room full of flour-dusted hands and people excited to learn.

Our pie and sugar cookie class with Wendy @thepeacefulhomestead gave 12 students the confidence (and the recipes) to bake treats everyone will be raving about.

These classes are always so much fun and I look forward to it every year.


(ad) A little peek into my everyday life:

School
(ad) A little peek into my everyday life:

School drop-off → recipe testing → editing → errands → cow chores and somewhere in between, I grab a @drinkolipop to keep things moving.

It’s not coffee. It’s not water. It’s just that happy moment in the middle of my day that feels like a treat and supports my wellness goals.

Today’s pick: Ginger Ale

Tomorrow? Who knows — the OLIPOP drawer stays stocked. 😉

Which flavor should I try next?

#OLIPOPpartner #DITL


So excited to get started with my new @breville Ba
So excited to get started with my new @breville Barista Touch! 

Not a perfect shot because I forgot to set the grind size to the correct spot, but stay tuned for tomorrow! 

#breville #espresso


Footer

On the Blog

  • Blog
  • Recipes

Info

  • About
  • Disclosure, Privacy Policy, and Terms

Copyright © 2025 · Theme by 17th Avenue

%d

    Rate This Recipe

    Your vote:


    A rating is required
    A name is required
    An email is required
    We use cookies to ensure that we give you the best experience on our website. If you continue to use this site we will assume that you are happy with it.