Individual Chicken Pot Pies
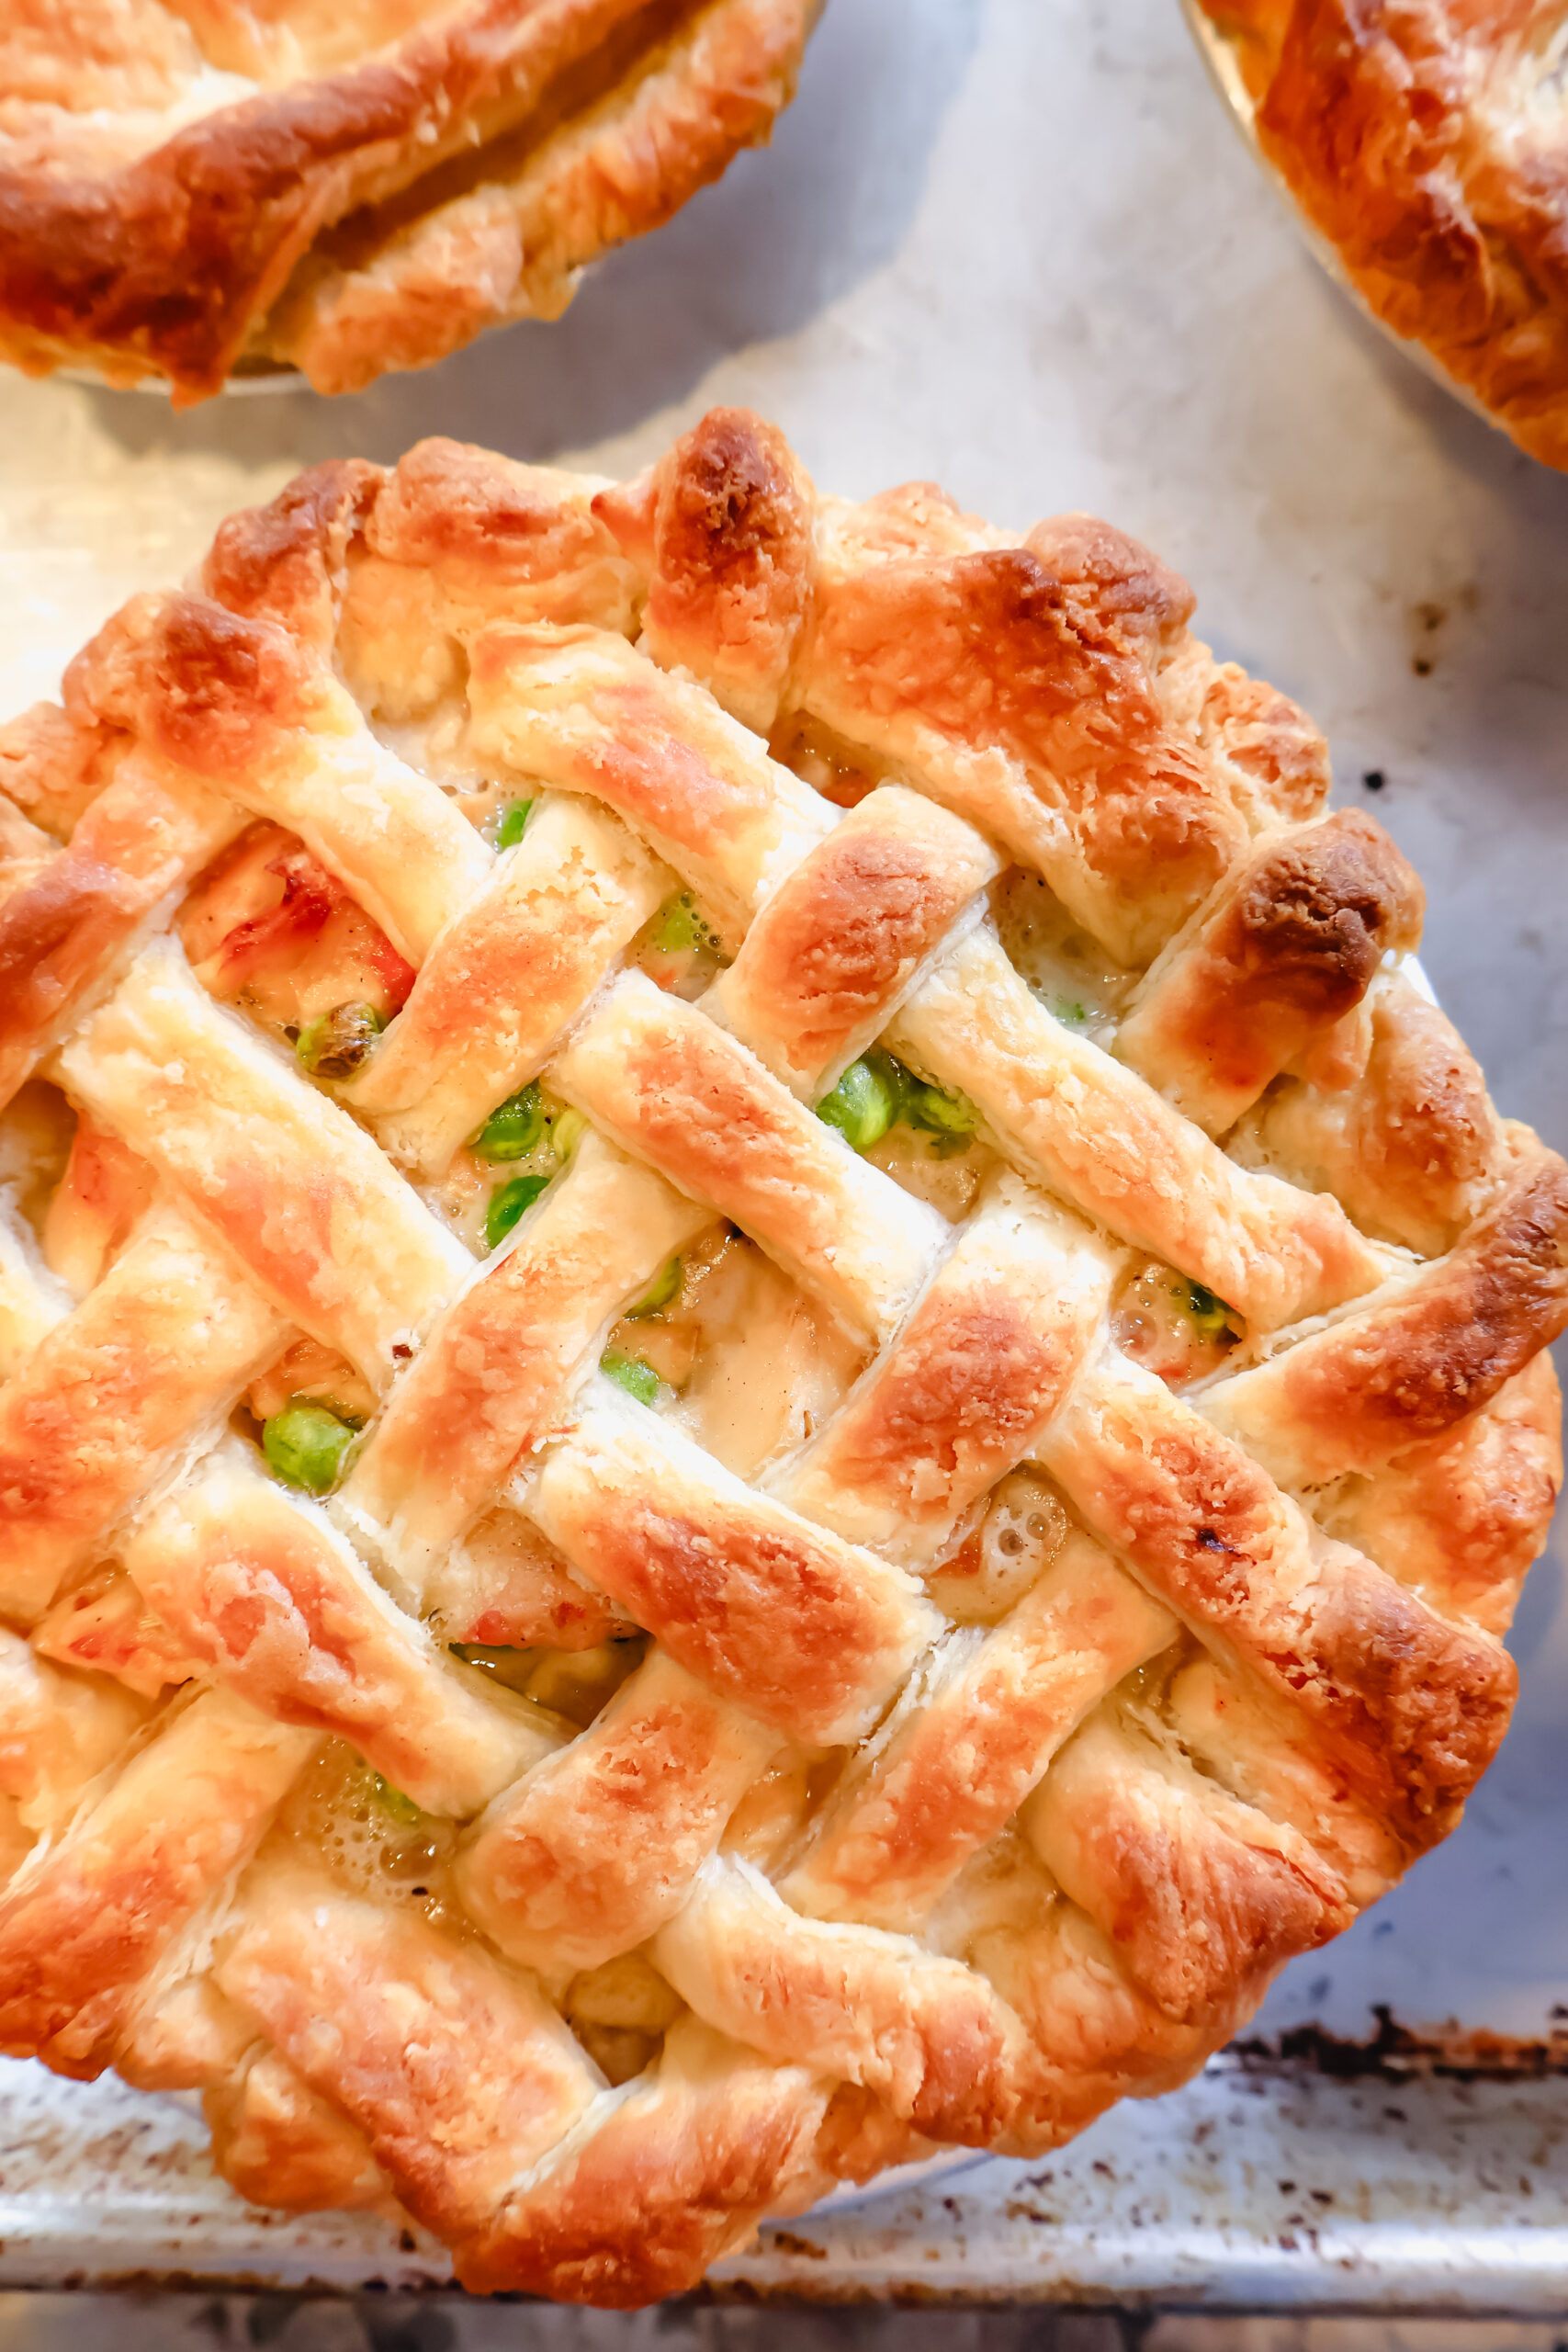
These Individual Chicken Pot Pies are the ultimate cozy comfort food with a flaky homemade pie crust, creamy chicken filling, and perfectly portioned for easy serving. This simple from-scratch recipe can even be made ahead of time for an easy dinner.

There's something undeniably special about classic chicken pot pie-creamy filling, tender veggies, and a golden, buttery crust that brings all the cozy vibes. These Individual Chicken Pot Pies take everything you love about the traditional version and turn it into perfectly portioned mini pies that are just as delicious as they are adorable.
Whether you're cooking for your family, hosting friends, or prepping comforting meals for the week, these mini pot pies bake up beautifully with flaky homemade crust and a rich, savory chicken filling. They're easier to make than you think, and the flavor payoff is incredible.

Why You'll Love These Homemade Chicken Pot Pies
- Perfectly portioned - No scooping or slicing required. Everyone gets their own mini pie.
- Flaky from-scratch crust - A simple, buttery pie dough you can make with just a few ingredients.
- Creamy savory filling - Rotisserie chicken makes it easy, while a homemade gravy brings slow-cooked flavor.
- Freezer-friendly - Assemble ahead and bake later for the easiest comfort meal.

Chicken Pot Pie Ingredients
For the Creamy Chicken Filling
- Shredded Rotisserie Chicken: The fastest way to build flavor. You can use leftover baked or boiled chicken as a substitution.
- Onion & Carrots: Classic pot-pie veggies that soften into the creamy filling. Celery can be added or swapped in.
- Butter & Flour: The base of the roux that thickens the creamy sauce. Gluten-free flour works if needed.
- Chicken Broth: Adds savory depth. Use low-sodium broth or homemade if preferred.
- Heavy Cream: Gives the filling its rich, silky texture. Half-and-half works as a lighter option.
- Seasonings (Onion Powder, Garlic Powder & Rosemary): Warm, cozy flavors that make the filling taste like homemade comfort.
For the Pie Crust
- Cold Butter: The secret to flaky layers. European-style butter gives even richer flavor, but any unsalted butter works.
- All-Purpose Flour: Creates a tender, workable dough. A 1:1 gluten-free flour blend can be substituted.
- Salt: Enhances the flavor of the crust.
- Ice-Cold Water: Helps bring the dough together without melting the butter, ensuring flakiness.

How to Make Individual Chicken Pot Pies
1. Prepare the Pie Crust
Cut cold butter into flour and salt until the texture resembles coarse crumbs. Add ice water until the dough comes together, then turn out onto a floured surface. Divide the dough into 12 portions and roll out the bottom crusts for six pie pans.
2. Make the Pot Pie Filling
Sauté onions and carrots in melted butter until softened. Stir in flour and cook briefly, then add chicken broth, shredded chicken, spices, and heavy cream. Simmer until the sauce thickens.
3. Assemble the Mini Pot Pies
Fill each pie pan with about one cup of the creamy chicken mixture. Roll out the remaining dough for the top crust, cover each pie, and crimp the edges to seal.
4. Bake to Golden Perfection
Bake at 425°F for 25-30 minutes, or until the crust is golden and crisp. Let cool slightly before serving.
Make-Ahead & Freezer Instructions
One of the best things about these Individual Chicken Pot Pies is that they freeze beautifully-making them the perfect make-ahead dinner for busy weeknights, new baby meal trains, or cozy, no-fuss evenings when you want something homemade without the effort.
How to Freeze the Pot Pies (Unbaked)
- Assemble the pot pies fully, including the top crust and crimped edges.
- Place the pie pans on a baking sheet and freeze uncovered for 1-2 hours, or until the pies are solid.
- Wrap each pie tightly in plastic wrap, then in foil to prevent freezer burn.
- Label and freeze for up to 3 months.
How to Bake From Frozen
No need to thaw-bake straight from frozen!
- Preheat oven to 400°F.
- Remove any plastic wrap or foil and place the frozen pot pie on a baking sheet.
- Brush the top crust lightly with an egg wash (optional, but makes it golden).
- Bake for 45-55 minutes, or until the crust is golden brown and the filling is bubbling around the edges.
- If the edges begin to brown too quickly, tent with foil during the last 10-15 minutes.
These convenient freezer-friendly pies make it incredibly easy to stock your freezer with homemade comfort food that tastes just as delicious weeks later.

Tips for Perfect Chicken Pot Pies
- Keep your butter very cold for the flakiest crust.
- Don't skip the simmer time-the filling will thicken as it cooks.
- Place pie pans on a baking sheet to catch any bubbling over.
- Brush the top crust with egg wash for extra shine and color.
Serving Suggestions
These individual pot pies are hearty enough to stand alone, but they pair beautifully with:
- A crisp green salad
- Roasted vegetables
- Cranberry sauce
- Fresh fruit
Storage & Reheating
- Refrigerator: Store baked pot pies for 3-4 days.
- Freezer: Freeze assembled pies before baking for up to 3 months.
- Reheat: Warm in a 350°F oven until heated through and crust is crisp.
Closing Thoughts
These Individual Chicken Pot Pies are everything homemade comfort food should be, rich, cozy, flaky, and full of flavor. If you make them, I'd love to hear how they turned out! Leave a comment below and let me know your thoughts, or tag me on Instagram so I can share your delicious creations.
📖 Recipe
Individual Chicken Pot Pies
Ingredients
Equipment
Instructions
- Preheat oven to 425 F.
- In a large bowl add cubed butter, salt and flour. Using a pastry cutter or two knives cut together the flour and butte until it resembles crumbly flour.
- Slowly add in the ice cold water until the dough starts to come together. Once the dough starts to come together pour onto a counter and use your hands to combine the dough.
- Split the dough in 12 section and place onto a floured surface and roll out half the pie crusts to fit your pie pan. If the dough starts to stick to the rolling pin, sprinkle a little flour on top.
- Transfer the rolled-out crust to your pie pan, pressing it gently to fit the bottom and sides.
- Melt butter in a cast iron pan and add in onion and carrot. Cook over medium heat until soft.
- Add in flour. Cook for 1-2 minutes.
- Add in chicken stock, seasonings, chicken, and heavy cream. Simmer for 5 minutes to thicken sauce.
- Top with biscuits and bake according to biscuit instructions.
- Add about 1 cup of filling to each of the prepared pie pans.
- Roll out remaining pie crust and place on top of filled pie pans.
- Crimp the edges and bake pies for 25-30 minutes, or until crust is golden brown.
- Assemble the pot pies fully, including the top crust and crimped edges. Place the pie pans on a baking sheet and freeze uncovered for 1-2 hours, or until the pies are solid. Wrap each pie tightly in plastic wrap, then in foil to prevent freezer burn.
- HOW TO BAKE FROM FROZEN: Preheat oven to 400°F. Remove any plastic wrap or foil and place the frozen pot pie on a baking sheet. Bake for 45-55 minutes, or until the crust is golden brown and the filling is bubbling around the edges. If the edges begin to brown too quickly, tent with foil during the last 10-15 minutes.