• About
  • Nav Social Icons

  • Skip to primary navigation
  • Skip to main content
  • Skip to primary sidebar
  • Skip to footer
  • Home
  • About
  • Blog
    • Mom Life
    • Farm Life
    • Recipes
      • Breakfast
      • Dessert
      • Dinner
      • Sides
      • Snacks
  • Shop
    • Shop – Digital Books
  • Cart
  • My account
  • Mobile Menu Widgets

    Connect

    Search

The Farmstyle

The Farmstyle

by Kayla Zenner

  • Home
  • About
  • Shop
    • Shop – Meal Plans
    • Shop My Favorites
  • Blog
    • Breakfast
    • Dessert
    • Dinner
    • Snacks
    • Sides
    • All Recipes
  • Cart

Lemon Blueberry Olive Oil Cake

July 2, 2025 · In: Dessert, Recipes

FacebookTweetPin
Jump to Recipe Print Recipe

This moist and flavorful Lemon Blueberry Olive Oil Cake is the perfect summer dessert. Made with lemon zest, olive oil, and whipped cream topping—easy, bright, and delicious!

Looking for the perfect summer dessert that’s bursting with fresh citrus flavor and rich, moist texture? This Lemon Blueberry Olive Oil Cake is a sunny slice of heaven, combining the bold brightness of lemon with the lush richness of olive oil. It’s light yet decadent, easy to make, and topped with a dreamy homemade whipped cream.

Whether you’re baking for a weekend brunch, a Fourth of July cookout, or simply treating yourself, this lemon olive oil cake delivers on flavor, texture, and presentation. Plus, olive oil not only keeps the cake moist for days but also adds a subtle depth that sets it apart from traditional butter-based cakes.

Why You’ll Love This Lemon Olive Oil Cake

  • Moist & tender from extra-virgin olive oil
  • Fresh citrus flavor from real lemon zest and juice
  • Naturally simple ingredients—no butter needed
  • Perfect for summer parties, showers, and picnics
  • Topped with lightly sweetened whipped cream for a fresh finish

Lemon Blueberry Olive Oil Cake Recipe

Ingredients:

For the Cake:

  • Flour – all purpose flour holds up to the weight of the olive oil
  • Salt – balances the sweetness
  • Baking Powder and Baking Soda – to leaven the cake
  • Sugar – I used granulated sugar
  • Lemon – juice and zest for extra lemony flavor
  • Eggs – adds great structure to the cake
  • Olive Oil – keeps the cake super moist
  • Milk – I use whole milk, but can be swapped for your favorite milk
  • Blueberries – fresh or frozen.

For the Whipped Cream Topping:

  • Heavy Cream – light and fluffy when whipped
  • Powdered Sugar – just a touch of sweetness
  • Vanilla Extract – if you want to get extra fancy I love to use vanilla bean paste

How to Make Lemon Blueberry Olive Oil Cake

  1. Prep the Oven & Pans:
    Preheat oven to 350°F. Grease and line two 8-inch cake pans with parchment paper.
  2. Mix Dry Ingredients:
    In a medium bowl, whisk together the flour, baking powder, baking soda, and salt. Set aside.
  3. Infuse Sugar with Lemon:
    In a large mixing bowl, add the granulated sugar and lemon zest. Use your hands to rub the zest into the sugar, releasing the lemon’s natural oils for extra flavor.
  4. Add Olive Oil & Eggs:
    Whisk the olive oil into the sugar mixture until light and creamy. Then add the eggs one at a time, whisking between each addition. Stir in the lemon juice.
  5. Combine Wet & Dry:
    Alternately add the flour mixture and the milk in three batches, starting and ending with flour. (⅓ flour, ½ milk, ⅓ flour, remaining milk, final ⅓ flour). Mix until just combined and batter is smooth. Then fold in the blueberries.
  6. Bake:
    Divide the batter evenly between the two pans. Bake for 35–40 minutes or until a toothpick inserted in the center comes out clean.
  7. Cool the Cakes:
    Let the cakes cool slightly, then run a knife around the edges to loosen. Remove from pans and let cool completely on a wire rack.
  8. Whip the Cream:
    In a large bowl, beat the heavy whipping cream with powdered sugar and vanilla until medium peaks form.
  9. Assemble:
    Once cakes are fully cooled, top with whipped cream. Optional: add fresh blueberries or extra lemon zest on top for garnish.

Serving Suggestions

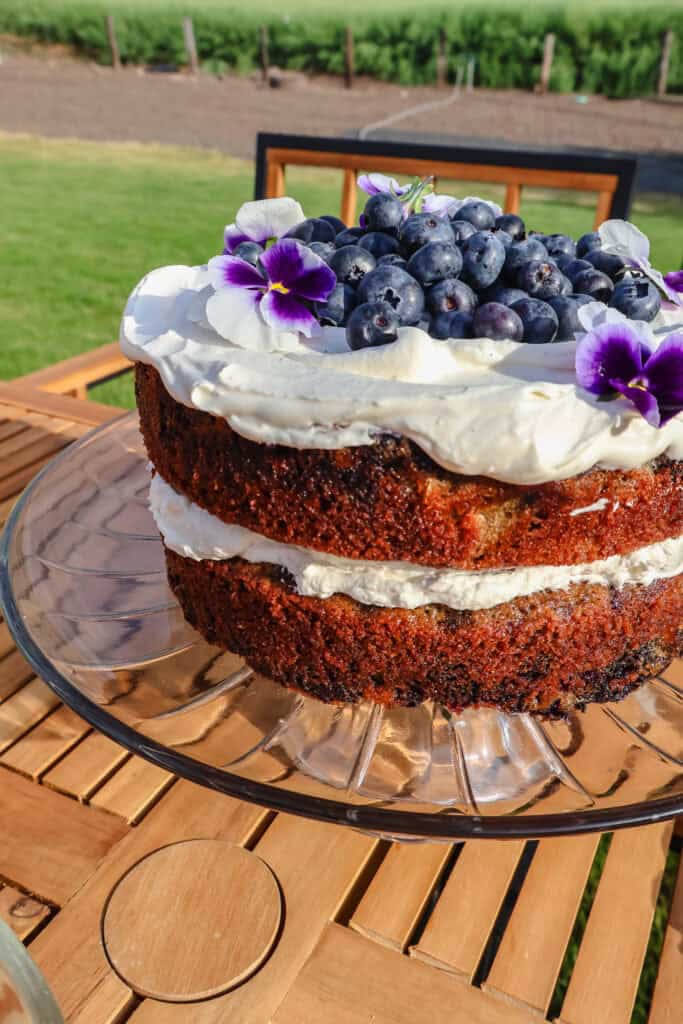
Serve this cake as a single-layer beauty topped with whipped cream and fresh berries, or stack the layers for a stunning two-tier dessert centerpiece. It’s perfect with a glass of iced tea or chilled prosecco on a hot summer afternoon.

Tips for Success

  • Use high-quality olive oil: Choose a fruity, not bitter, extra virgin olive oil for the best flavor.
  • Don’t overmix: Stir the batter until just combined to keep the cake light and airy.
  • Room temperature ingredients help create an even texture and better rise.

Variations & Add-Ins

  • Glaze it: Instead of whipped cream, top with a lemon glaze (powdered sugar + lemon juice).
  • Make it dairy-free: Swap milk with almond milk and use coconut whipped cream.

Frequently Asked Questions

Can I make this cake ahead of time?
Yes! Bake the cake layers up to two days in advance. Wrap tightly and refrigerate. Whip the cream topping just before serving.

How should I store leftovers?
Store the cake in an airtight container in the fridge for up to 3 days. The olive oil keeps it moist!

Can I freeze this olive oil cake?
Absolutely! Freeze the baked and cooled cake layers (without topping) for up to 2 months.

More Summer Desserts You’ll Love

  • No Bake Strawberry Cheesecake
  • Old Fashioned Vanilla Ice Cream
  • Strawberry Rhubarb Meringue Pie

Final Thoughts

This Lemon Blueberry Olive Oil Cake is a celebration of sunshine in every bite. With its bright citrus flavor, rich moist crumb, and cloud-like whipped topping, it’s a show-stopping dessert that’s surprisingly simple to make.

Lemon Blueberry Olive Oil Cake

No ratings yet
This moist and flavorful Lemon Blueberry Olive Oil Cake is the perfect summer dessert. Made with lemon zest, olive oil, and whipped cream topping—easy, bright, and delicious!
Print Recipe Pin Recipe
Servings: 12
Calories: 495kcal

Ingredients

  • 2 cups all-purpose flour
  • 1 tsp salt
  • 1 tsp baking powder
  • 1 tsp baking soda
  • 1 1/2 cups granulated sugar
  • 3 large eggs room temp
  • 1 lemon zest and juice
  • 1 cup olive oil
  • 1 whole milk at room temp
  • 2 cups heavy whipping cream for topping
  • ¼ cup powdered sugar
  • 1 teaspoon vanilla extract

Instructions

  • Preheat oven to 350F. Prepare 2 8” cake pans.
  • In a medium sized bowl combine the flour, baking powder, baking soda, and salt. Stir together and set aside.
  • In a large bowl combine the sugar and lemon zest. Mix together with your hands to get the lemon oils into the sugar.
  • Add the olive oil to the bowl and whisk to mix until light and creamy.
  • Add the eggs, one at a time, followed by the lemon juice.
  • Alternate adding the dry ingredients and milk, starting and ending with the flour mixture. Mix until just combined and batter is smooth. (Add ⅓ flour, ½ milk, ⅓ flour, ½ milk, and then ⅓ flour)
  • Pour batter into your prepared pans and bake for 35-40 minutes or until a toothpick inserted into the center of the cake comes out clean.
  • Allow cake to cool slightly before running a knife around the edge of the pan and releasing the cake to cool fully.
  • Whip cream with powdered sugar and vanilla extract to medium peaks and top cooled cake with whipped cream.

Nutrition

Calories: 495kcal | Carbohydrates: 45g | Protein: 5g | Fat: 34g | Saturated Fat: 12g | Polyunsaturated Fat: 3g | Monounsaturated Fat: 17g | Trans Fat: 0.004g | Cholesterol: 86mg | Sodium: 348mg | Potassium: 89mg | Fiber: 1g | Sugar: 29g | Vitamin A: 645IU | Vitamin C: 5mg | Calcium: 58mg | Iron: 1mg

Share this:

  • Click to share on X (Opens in new window) X
  • Click to share on Facebook (Opens in new window) Facebook
  • Click to share on Pinterest (Opens in new window) Pinterest

Like this:

Like Loading...
FacebookTweetPin

By: Kayla · In: Dessert, Recipes

About Kayla

Hi! I'm Kayla. I'm here to help inspire busy moms to get back in the kitchen and feel beautiful along the way! I'm married to my high school sweetheart and live on a farm with our two busy boys.

you’ll also love

Sourdough Cinnamon Roll Focaccia Muffins
Easy Peach Crisp for Two | Mini Date Night Dessert
cheeseburger slidersCheeseburger Sliders | Easy Dinner Idea

Reader Interactions

Leave a ReplyCancel reply

Next Post >

Easy Flatbread Pizza Dough – No Yeast

Primary Sidebar

Meet Kayla

Meet Kayla
hello!

LIVING OURFARM(LIFE)STYLE WHERE WE ​JUGGLE THE CHAOS OF MOTHERHOOD ONE ​KITCHEN ADVENTURE AT A TIME!

Read More

Connect

join the list

Categories

  • Blog
  • Recipes

Follow Along

@thefarmstyle


During the 2020-2021 school year I was pregnant wi
During the 2020-2021 school year I was pregnant with my second. What a crazy year to be teaching in general, but also being pregnant added a second layer to it.

Already a hard year… then I lost my daycare in March 2021.

No options for a toddler and newborn.
So I took a one-year unpaid maternity leave.

Toward the end of that year, I applied for two teaching jobs.
Got both offers.
But my gut screamed:
“Don’t take them.”

I cried to my husband.
Told him:
“I really think there’s something else out there for me.
I think I can replace my teaching income—and daycare—doing something different.”

He trusted me.
I trusted myself.

Now?
I’m living a life I once dreamed of.
Doing what I love.
Working from home.
Raising my babies.
And never missing a moment.


Need a little dinner inspiration for the week! Loo
Need a little dinner inspiration for the week! Look no further! These recipes are great for weeknights and everyone in my family loves them!

Comment DINNER for all the recipes sent straight to your inbox.

Monday - Big Mac Skillet
Tuesday - Cowboy Pasta
Wednesday - Jalapeño Popper Burgers
Thursday - Sheet Pan Quesadillas
Friday - Big Mac Pizza

Make sure to follow along for more dinner inspiration.

#weeknightdinner #weeknightmeals #weeknightdinners #weekdaydinner #mealplan #dinneridea


This Homemade Marshmallow Creme is so light, airy,
This Homemade Marshmallow Creme is so light, airy, easy to make and made without any corn syrup. It will make you question why you use to buy the jar stuff.

P.S. the ingredients on jet puffed marshmallow creme are: Corn Syrup, Sugar, Water, Contains Less than 2% of Dried Egg Whites, Cream of Tartar, Xanthan Gum, Artificial and Natural Flavor. 

INGREDIENTS
3 large egg whites
¾ cup granulated sugar
½ teaspoon cream of tartar
1 teaspoon pure vanilla extract

INSTRUCTIONS
Place a saucepan on the stovetop, fill it with about 2 inches of water and bring it to a boil.

In a heatproof bowl (large enough to sit on top of the saucepan without touching the water) combine the egg whites, granulated sugar and cream of tartar. (Alternatively, you use a double boiler.)

Increase the heat to medium-high and hand-whisk the egg mixture continuously. As it heats, it will become frothy and thinner.

Keep whisking until the sugar has fully dissolved into the egg-white mixture.

To check, dip a clean finger into the mixture and rub it between your fingers. It should feel smooth with no sugar granules. Be cautious, as the mixture will be hot. If you’re using a candy thermometer, the temperature should read 160F.

Once the sugar has dissolved, add the vanilla extract and whisk on high until stiff peaks form.

Your marshmallow fluff is now ready to use. Once it has cooled to room temperature, transfer it to clean jars to store in the fridge or use immediately.


POV: your afternoon coffee tastes like a spoonful
POV: your afternoon coffee tastes like a spoonful of cookie dough.

This Cookie Dough Shaken Espresso with vanilla cold foam is sweet, bold, and totally worth shaking up at home. Barista who?
Save this one for your next iced coffee craving!

Comment COFFEE for all the details sent straight to your inbox. 

INGREDIENTS
For the Cookie Dough Shaken Espresso:
2 shots espresso
1-2 tbsp brown sugar
1/2 tsp vanilla bean paste or vanilla extract
1 tbsp chocolate syrup
1 Pinch flakey sea salt
Ice
For the Vanilla Cold Foam:
2-3 tbsp heavy cream
1 tbsp vanilla syrup

INSTRUCTIONS
Pull two fresh shots of espresso and let them cool slightly.
In a jar with a tight lid, combine espresso, brown sugar syrup, vanilla bean paste, salt and a handful of ice. Shake vigorously for 10–15 seconds until chilled and frothy.
Add chocolate syrup to your glass. I like to smear the chocolate syrup on the sides of the glass for a little extra decor.
Pour the shaken espresso into the glass filled with ice.
In a milk frother or small jar, combine cold heavy cream and vanilla syrup.
Froth until light and airy but still pourable. (A handheld frother works great here!)
Spoon the cold foam over the top of your shaken espresso.

#CookieDoughLatte #ShakenEspresso #IcedCoffeeRecipe #VanillaColdFoam #CoffeeLoversClub #HomemadeCoffee #CoffeeBreak #SummerSips #EasyCoffeeDrinks #CoffeeInspo


This very berry Italian soda is the perfect red, w
This very berry Italian soda is the perfect red, white, and blue drink to make for your Fourth of July celebration. 

1 tbsp blueberry syrup
8 oz sparkling water or club soda
1 tbsp half and half
1 tbsp cherry or strawberry syrup

Serve with ice and enjoy!


Need a little dinner inspiration for the week! Loo
Need a little dinner inspiration for the week! Look no further! These recipes are great for weeknights and everyone in my family loves them! 

Comment DINNER for all the recipes sent straight to your inbox. 

Monday - Jalapeño Popper Chicken 
Tuesday - Cheesesteak Pasta
Wednesday - Greek Chicken Salad
Thursday - Sheet Pan Hawaiian Chicken
Friday - Blackstone Chicken Bacon Ranch

Make sure to follow along for more dinner inspiration. 

#weeknightdinner #weeknightmeals #weeknightdinners #weekdaydinner #mealplan #dinneridea


Footer

On the Blog

  • Blog
  • Recipes

Info

  • About
  • Disclosure, Privacy Policy, and Terms

Copyright © 2025 · Theme by 17th Avenue

%d

    Rate This Recipe

    Your vote:


    A rating is required
    A name is required
    An email is required
    We use cookies to ensure that we give you the best experience on our website. If you continue to use this site we will assume that you are happy with it.