• About
  • Nav Social Icons

  • Skip to primary navigation
  • Skip to main content
  • Skip to primary sidebar
  • Skip to footer
  • Home
  • About
  • Recipes
    • Blackstone
    • Breads
    • Breakfast
    • Drinks
    • Dessert
    • Dinner
    • Sides
    • Snacks
  • Shop
  • Cart
  • My account
  • Mobile Menu Widgets

    Connect

    Search

The Farmstyle

The Farmstyle

by Kayla Zenner

  • Home
  • About
  • Shop
  • Recipes
    • Blackstone
    • Breads
    • Breakfast
    • Drinks
    • Dessert
    • Dinner
    • Snacks
    • Sides
    • All Recipes
  • Cart

Maple Glazed Donuts for Valentines Day

February 10, 2025 · In: Breads, Breakfast, Recipes

FacebookTweetPin
Jump to Recipe Print Recipe

These maple glazed donuts use my favorite dough base, then are dipped in a pink maple glaze for the perfect Valentine’s Day donut.

Maple Glazed Donuts for Valentine's Day

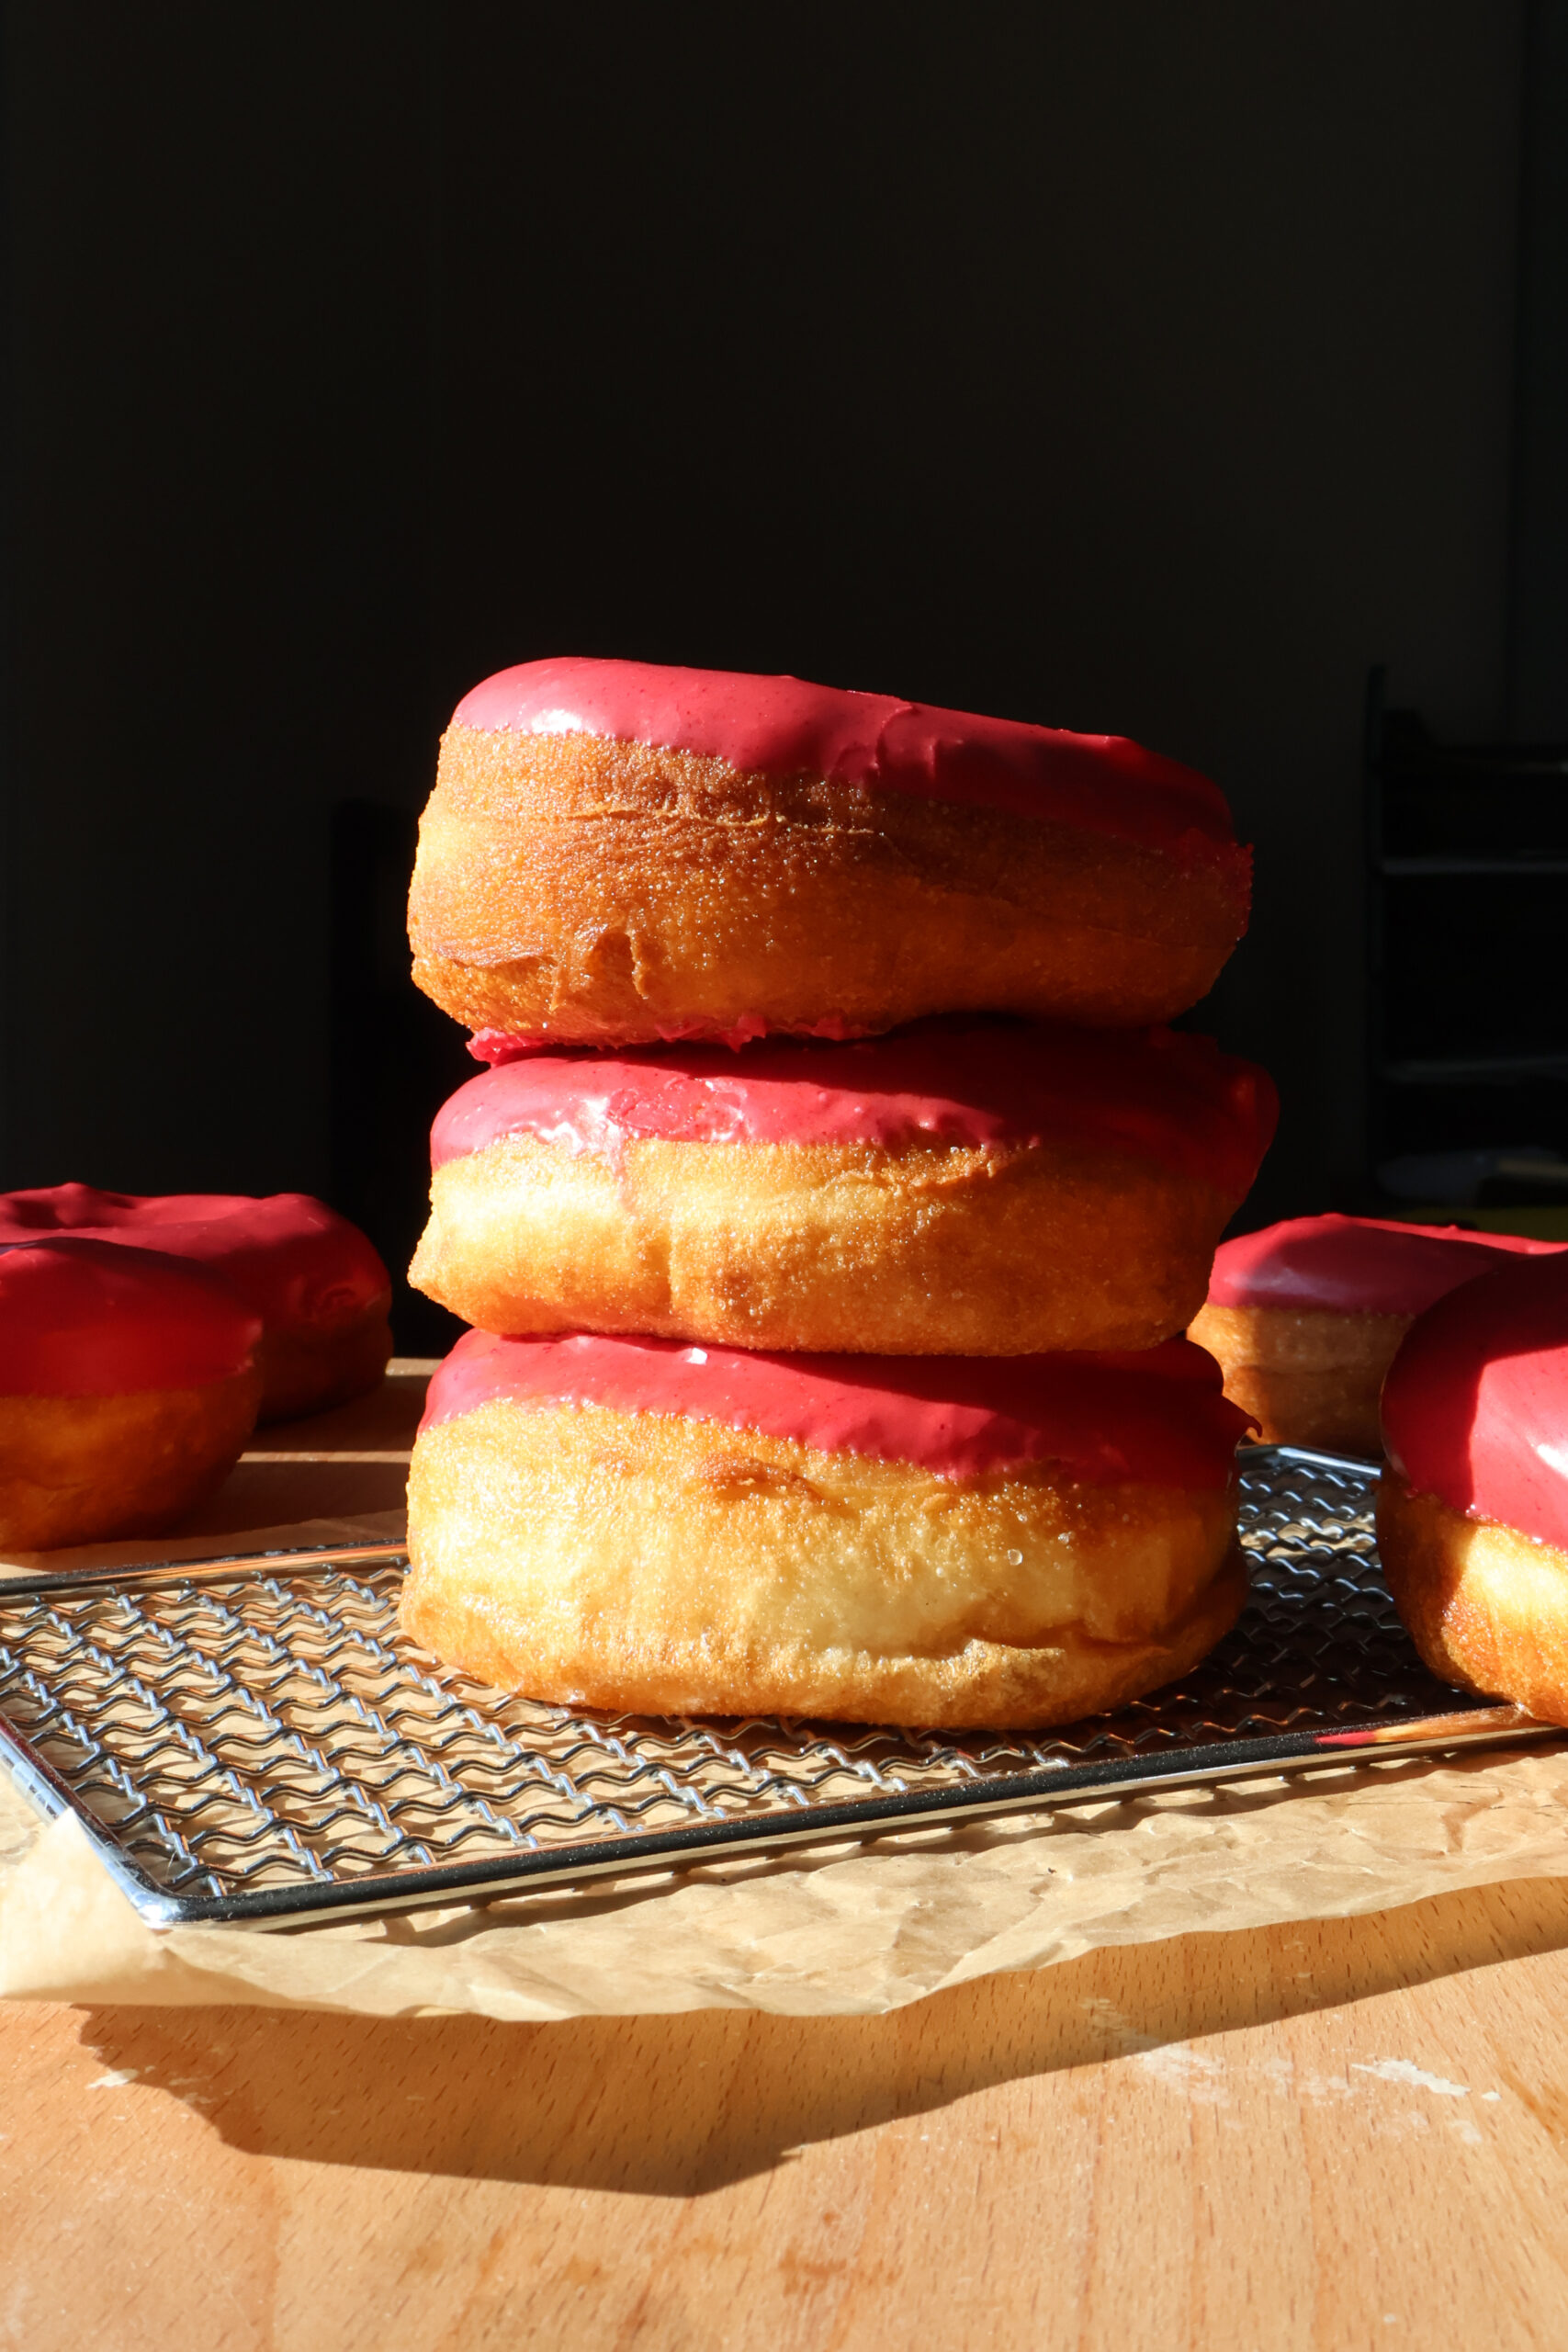
The Best Maple Glazed Donuts

There’s something undeniably comforting about biting into a warm, fresh donut. And when that donut is dipped in a maple glaze? Pure bliss. Maple glazed donuts are the a favorite and we made these Valentine’s Day themed by adding some of my favorite dye free coloring (affiliate). Whether you’re a seasoned baker or a donut enthusiast looking to try something new, you will love these maple glazed donuts.

Why I love this recipe!

I love a recipe that is multipurpose! The base of this donut dough is the same as my sandwich bread, cinnamon rolls, dinner rolls, and so much more! If you don’t want 24 donuts, you can easily take half of the dough and make something else with it!

Maple Glazed Donuts for Valentine's Day

What’s in Homemade Maple Donuts?

  • Flour – All Purpose is preffered for a fluffier loaf, but Bread Flour is totally fine also. You will just have a chewier loaf.
  • Yeast – I like to use Dry Active Yeast
  • Milk – This is the my favorite for a fluffy donut, you can swap for water if needed.
  • Butter – Adds buttery flavor to the dough. If you need a dairy free option I have swapped the butter for avocado oil.
  • Egg – I have left out the egg before because I ran out, but the egg gives the dough extra structure and fluffiness.
  • Sugar – this is used to help activate the yeast.
  • Powdered Sugar – for the maple glaze.
  • Maple Syrup – for the maple glaze.
Maple Glazed Donuts for Valentine's Day

How to make fluffy homemade donuts

  • Combine 1/4 cup warmed water with yeast and sugar. Set aside until foamy. If your yeast does not foam up, do not proceed to the next step. This means your yeast is not active.
  • Once the yeast mixture is foamy combine all yeast mixture, milk, butter, egg, salt, and 5 cups of flour. Mix to combine, adding in additional flour until the mixture pulls away from the bowl.
  • Knead mixture for 7-10 minutes, or until the dough is smooth. Shape into a ball, place back into bowl, cover, and let rise for an hour, until doubled.
  • Place dough onto counter and divide into 2 sections. Roll each section into a rectangular shape and cut out your donuts. I use a large mouth mason jar ring and then a piping tip for the inside hole. You can also purchase a donut cutter.
  • Place dough onto individual parchment squares, cover, and let dough rise for another 30-60 minutes.
  • While dough is rising heat your oil in a large pan to 350F. Use a candy thermometer to ensure your oil is at the perfect temperature.
  • Gently place 2-3 donuts into hot oil at a time (you don’t want to crowd the donuts) and fry for 2-3 minutes, before flipping and frying for an additional 2-3 minutes. The donuts should be nice and golden brown.
  • Remove donuts to a cooling rack to allow extra grease to drain and to cool.
  • In a small bowl combine maple glaze ingredients. Once donuts have cooled enough to handle dip into maple glaze and place back onto the cooling rack.
  • Enjoy immediately or store in an airtight container for 2-3 days.
Maple Glazed Donuts for Valentine's Day

    Share Your Experience

    I would love to hear about your experience making and enjoying my Maple Glazed Donuts for Valentine’s Day! Feel free to tag me on Instagram or leave a review below. Your feedback helps me improve our recipes and provides inspiration to fellow home bakers.

    Save this recipe for later by simply using the pin button on the recipe card or any of the photos above. Happy cooking!

    Maple Glazed Donuts for Valentine's Day

    Maple Glazed Donuts for Valentine’s Day

    No ratings yet
    These maple glazed donuts use my favorite dough base, then are dipped in a pink maple glaze for the perfect Valentine's Day donut.
    Print Recipe Pin Recipe
    Prep Time:2 hours hrs
    Cook Time:30 minutes mins
    Course: Breakfast
    Keyword: bread
    Servings: 24 donuts
    Calories: 1869kcal

    Ingredients

    Donuts

    • 2 1/4 tsp yeast
    • 2 tbsp sugar
    • 1/4 cup water warmed
    • 1 1/2 tsp salt
    • 5 tbsp butter
    • 1 egg
    • 6 cups flour
    • 2 cups milk

    Maple Glaze

    • 1 cup powdered sugar
    • 2-3 tbsp maple syrup
    • red food coloring
    US Customary – Metric

    Instructions

    • Combine 1/4 cup warmed water with yeast and sugar. Set aside until foamy. If your yeast does not foam up, do not proceed to the next step. This means your yeast is not active.
    • Once the yeast mixture is foamy combine all yeast mixture, milk, butter, egg, salt, and 5 cups of flour. Mix to combine, adding in additional flour until the mixture pulls away from the bowl.
    • Knead mixture for 7-10 minutes, or until the dough is smooth. Shape into a ball, place back into bowl, cover, and let rise for an hour, until doubled.
    • Place dough onto counter and divide into 2 sections. Roll each section into a rectangular shape and cut out your donuts. I use a large mouth mason jar ring and then a piping tip for the inside hole. You can also purchase a donut cutter.
    • Place dough onto individual parchment squares, cover, and let dough rise for another 30-60 minutes.
    • While dough is rising heat your oil in a large pan to 350F. Use a candy thermometer to ensure your oil is at the perfect temperature.
    • Gently place 2-3 donuts into hot oil at a time (you don't want to crowd the donuts) and fry for 2-3 minutes, before flipping and frying for an additional 2-3 minutes. The donuts should be nice and golden brown.
    • Remove donuts to a cooling rack to allow extra grease to drain and to cool.
    • In a small bowl combine maple glaze ingredients. Once donuts have cooled enough to handle dip into maple glaze and place back onto the cooling rack.
    • Enjoy immediately or store in an airtight container for 2-3 days.

    Nutrition

    Calories: 1869kcal | Carbohydrates: 316g | Protein: 51g | Fat: 42g | Saturated Fat: 24g | Polyunsaturated Fat: 3g | Monounsaturated Fat: 10g | Trans Fat: 1g | Cholesterol: 186mg | Sodium: 2105mg | Potassium: 851mg | Fiber: 11g | Sugar: 30g | Vitamin A: 1389IU | Vitamin C: 0.1mg | Calcium: 381mg | Iron: 18mg

    Share this:

    • Share on X (Opens in new window) X
    • Share on Facebook (Opens in new window) Facebook
    • Share on Pinterest (Opens in new window) Pinterest

    Like this:

    Like Loading...
    FacebookTweetPin

    By: Kayla · In: Breads, Breakfast, Recipes

    About Kayla

    Hi! I'm Kayla. I'm here to help inspire busy moms to get back in the kitchen and feel beautiful along the way! I'm married to my high school sweetheart and live on a farm with our two busy boys.

    you’ll also love

    Pumpkin French Toast Latte
    Oven Roasted Prime Rib Recipe
    Honey Whole Wheat Sandwich Bread

    Reader Interactions

    Leave a ReplyCancel reply

    Next Post >

    French Onion Pot Roast | Cozy Weekend Dinner

    Primary Sidebar

    Meet Kayla

    Meet Kayla
    hello!

    LIVING OURFARM(LIFE)STYLE WHERE WE ​JUGGLE THE CHAOS OF MOTHERHOOD ONE ​KITCHEN ADVENTURE AT A TIME!

    Read More

    Connect

    join the list

    Categories

    • Blog
    • Recipes

    Follow Along

    @thefarmstyle


    100,000 of you. I’m honestly still trying to wrap
    100,000 of you. I’m honestly still trying to wrap my head around that.

What started as me just sharing what I was making for my family, little moments, and pieces of my life has turned into this incredible community, and that’s because of YOU. 

The comments, the messages, the times you’ve made my recipes in your own kitchens… it all means more than I can put into words.

Thank you for being here, for supporting me, and for growing alongside me. I don’t take a single one of you for granted.

We’re just getting started 🤍


    Comment GARDEN and I’ll send you all the details t
    Comment GARDEN and I’ll send you all the details to your inbox. 

The best thing about these garden beds is that they can be made to any dimension that you want! I created four 4x8 beds, two 3x8 beds, and two 2x3 beds using the exact same method each time!

Materials (for ONE 4x8 bed)
* (4) 2x8 boards, cut to 8 ft long
* (4) 2x8 boards, cut to 4 ft long 
* (24) 3” exterior wood screws 
* (4) 2x4 boards, cut to 14” long

Instructions
1. Cut Your Boards (if needed)
Cut your boards to length before assembling. We had (4) 12’ boards, we cut into an 8’ board and 4’ board. However, you can also buy (6) 8’ boards and then cut 2 of them in half. 

2. Drill Pilot Holes (optional)
On each 8’ board measure ¾” in from each end and Drill 2 pilot holes per end, spaced about 2–3” from the top and bottom
This helps prevent the wood from splitting when you add screws.

3. Build the First Layer (Bottom Frame)
Lay out:
 * (2) 8 ft boards (long sides)
 * (2) 4 ft boards (short sides)
Form a rectangle with the short boards sitting inside the long boards. Then attach the boards using 3” screws into the pilot holes you created in the previous step. 

4. Stack the Second Layer
Repeat process by placing the second set of boards directly on top of the first frame, lining up edges carefully

5. Add Corner Supports 
Place the 2x4 board inside each corner
These should sit flush with the bottom and sit an inch below the top. 
Screw through the outside boards into the 2x4 board once in the top 2x8 board and once in the bottom 2x8 board. 

 Pro Tips
Use untreated cedar for best longevity, however I used fir for a more cost effective version. These may only last me 5 years, BUT the cost of cedar deterred me from going that route. 

Avoid pressure-treated wood unless it’s labeled safe for gardens

Use a garden safe stain on the interior before filling to help with board longevity.


    Comment SALAD for all the recipe details.

    Spring
    Comment SALAD for all the recipe details. 

Spring salads > everything else right now 🥗🌸

Fresh, colorful, and actually satisfying… these are the kind of salads you crave (not just eat because you feel like you should).

Save this for your weekly menu + tell me which one you’re making first.

Strawberry Balsamic Salad
Blueberry Summer Salad
Streak Harvest Salad
Citrus Kale Salad
Summer Fruit Salad
Greek Pasta Salad
Rainbow Pasta Salad


    Comment SMOOTHIE for all the recipe details.

    Thi
    Comment SMOOTHIE for all the recipe details. 

This Blackberry Coconut Smoothie is creamy, refreshing, and dairy-free, made with coconut milk, frozen blackberries, and coconut yogurt. A quick and easy smoothie recipe ready in just 5 minutes.


    Comment RECIPE for all the details!

    These cheese
    Comment RECIPE for all the details! 

These cheesesteak quesadillas scored ⭐️⭐️⭐️⭐️⭐️ from my kids! BONUS: they are so easy to make on the @blackstoneproducts griddle.


    Help me restore my @blackstoneproducts griddle aft
    Help me restore my @blackstoneproducts griddle after being a tiny bit neglectful the past few months. 
#blackstonegriddle #griddlenation


    Footer

    On the Blog

    • Blog
    • Recipes

    Info

    • About
    • Disclosure, Privacy Policy, and Terms

    Copyright © 2026 · Theme by 17th Avenue

    %d

      Rate This Recipe

      Your vote:


      A rating is required
      A name is required
      An email is required
      We use cookies to ensure that we give you the best experience on our website. If you continue to use this site we will assume that you are happy with it.