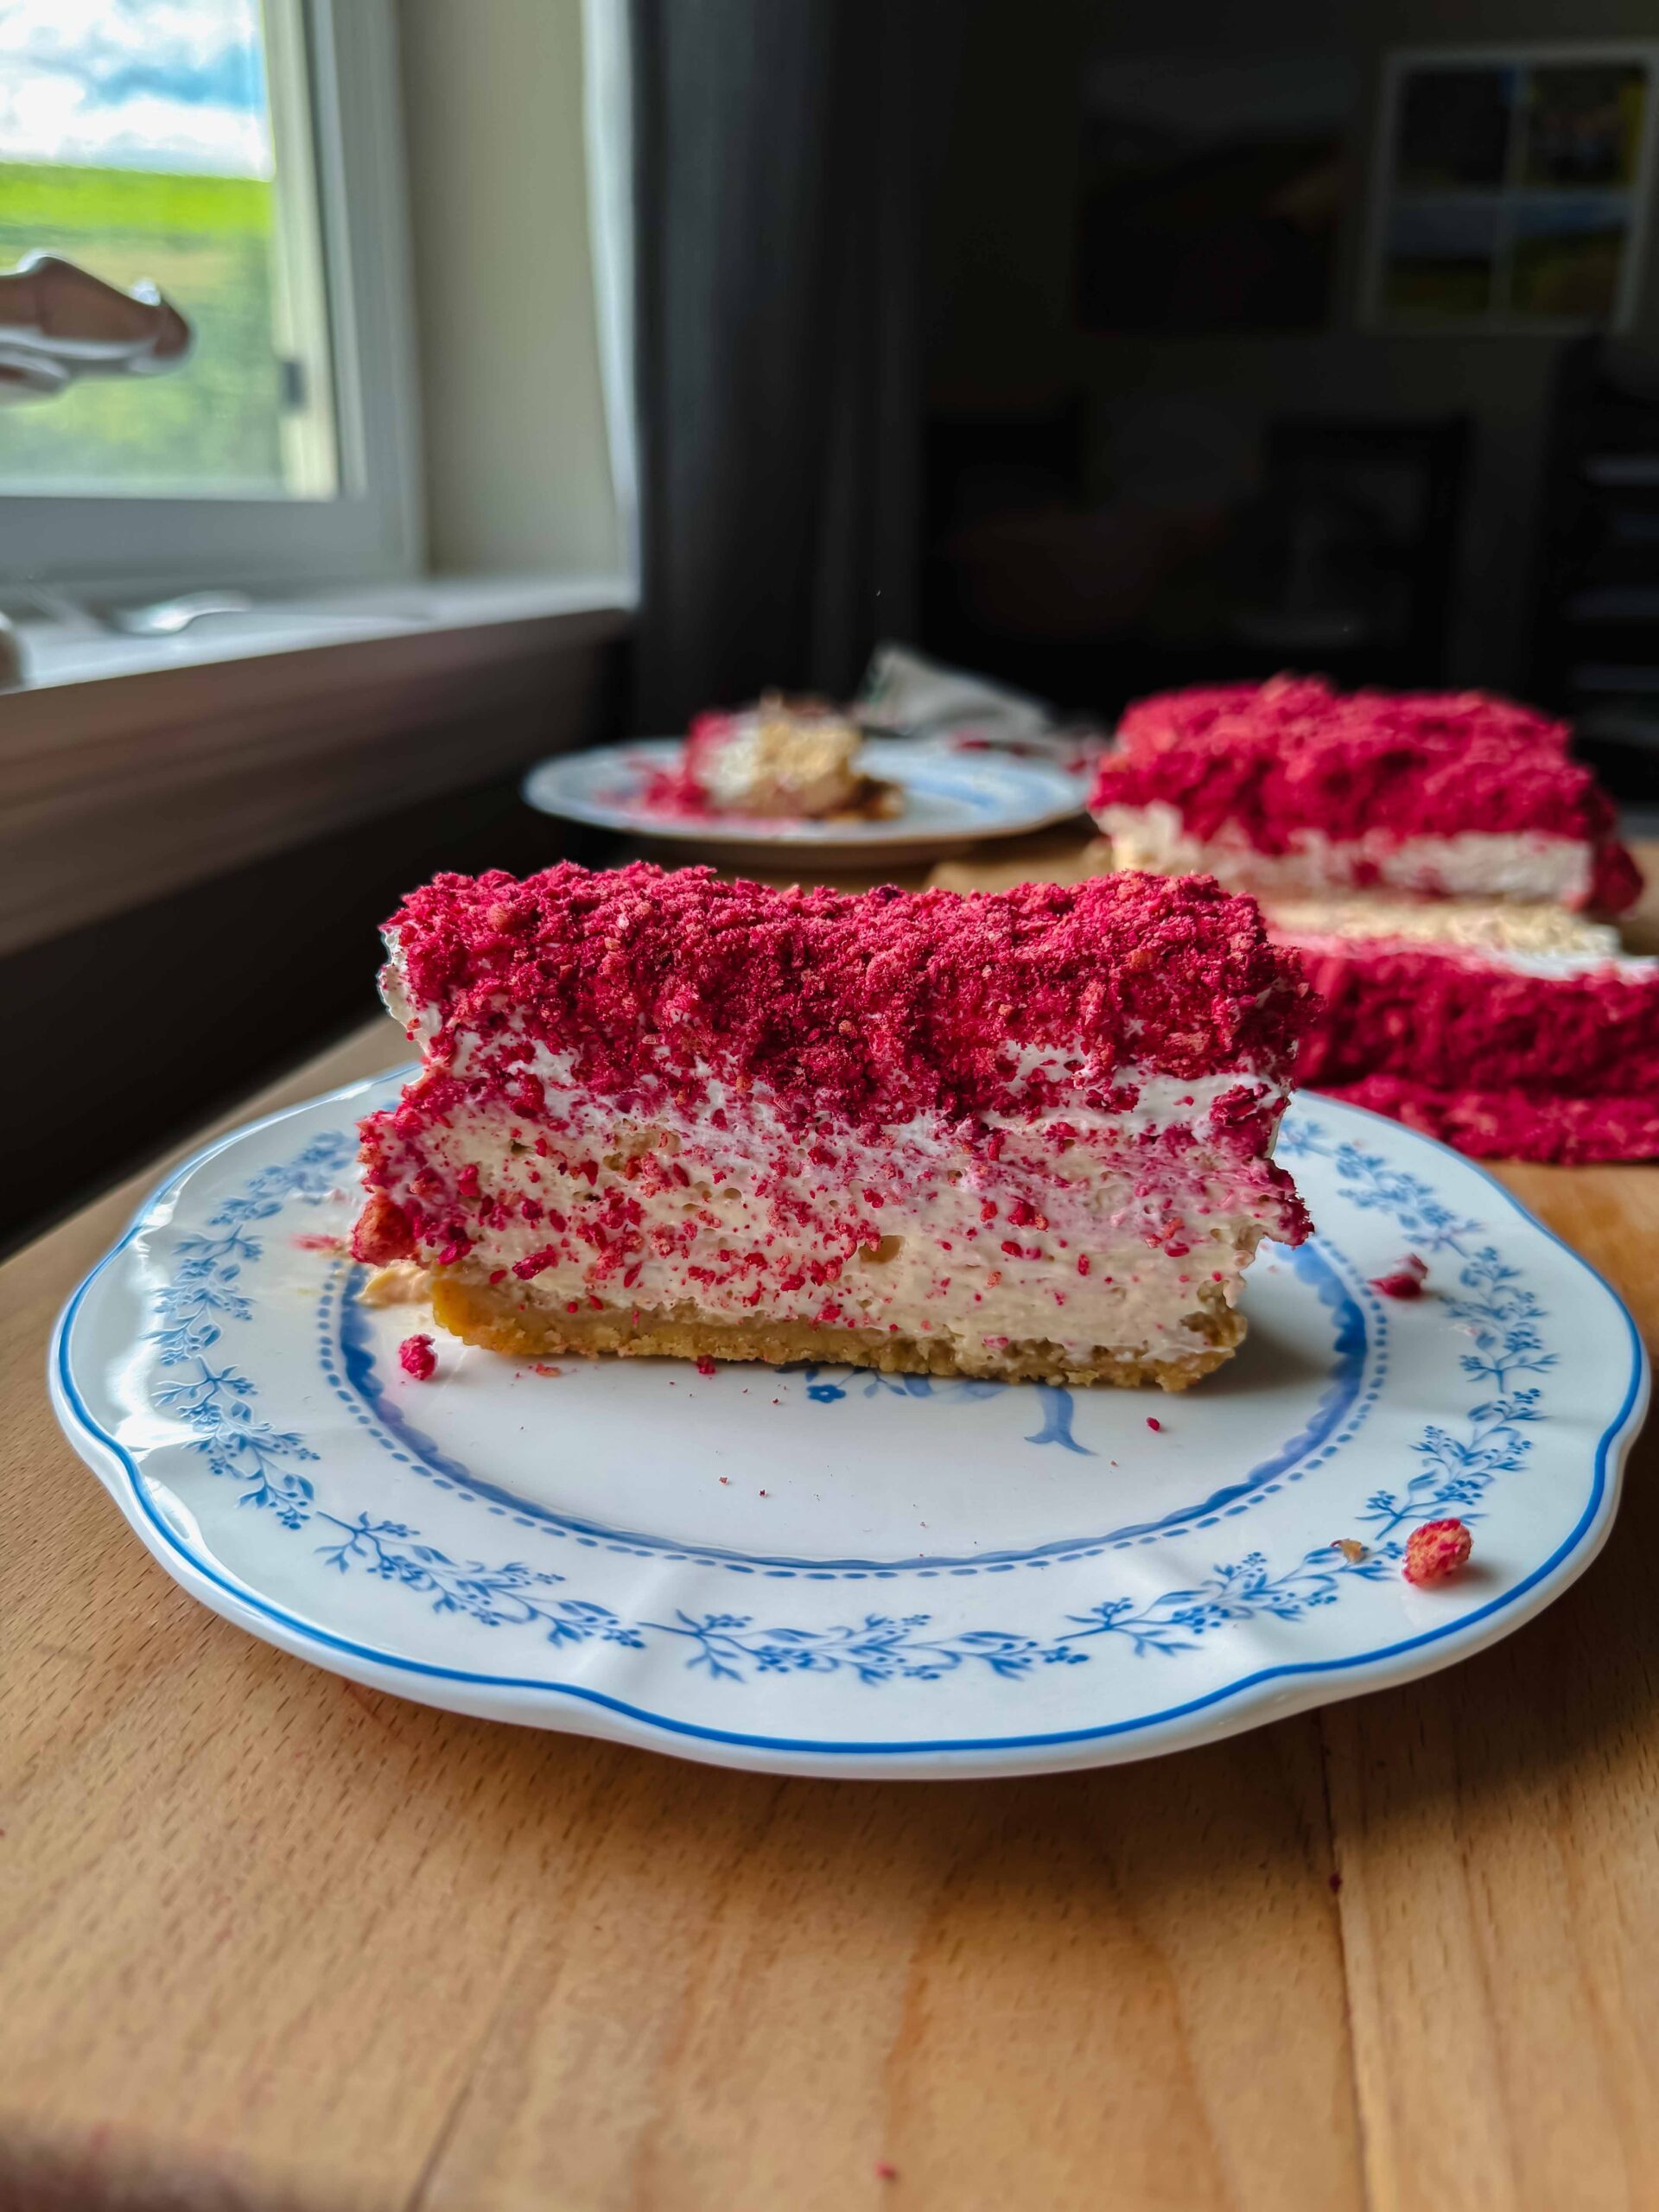
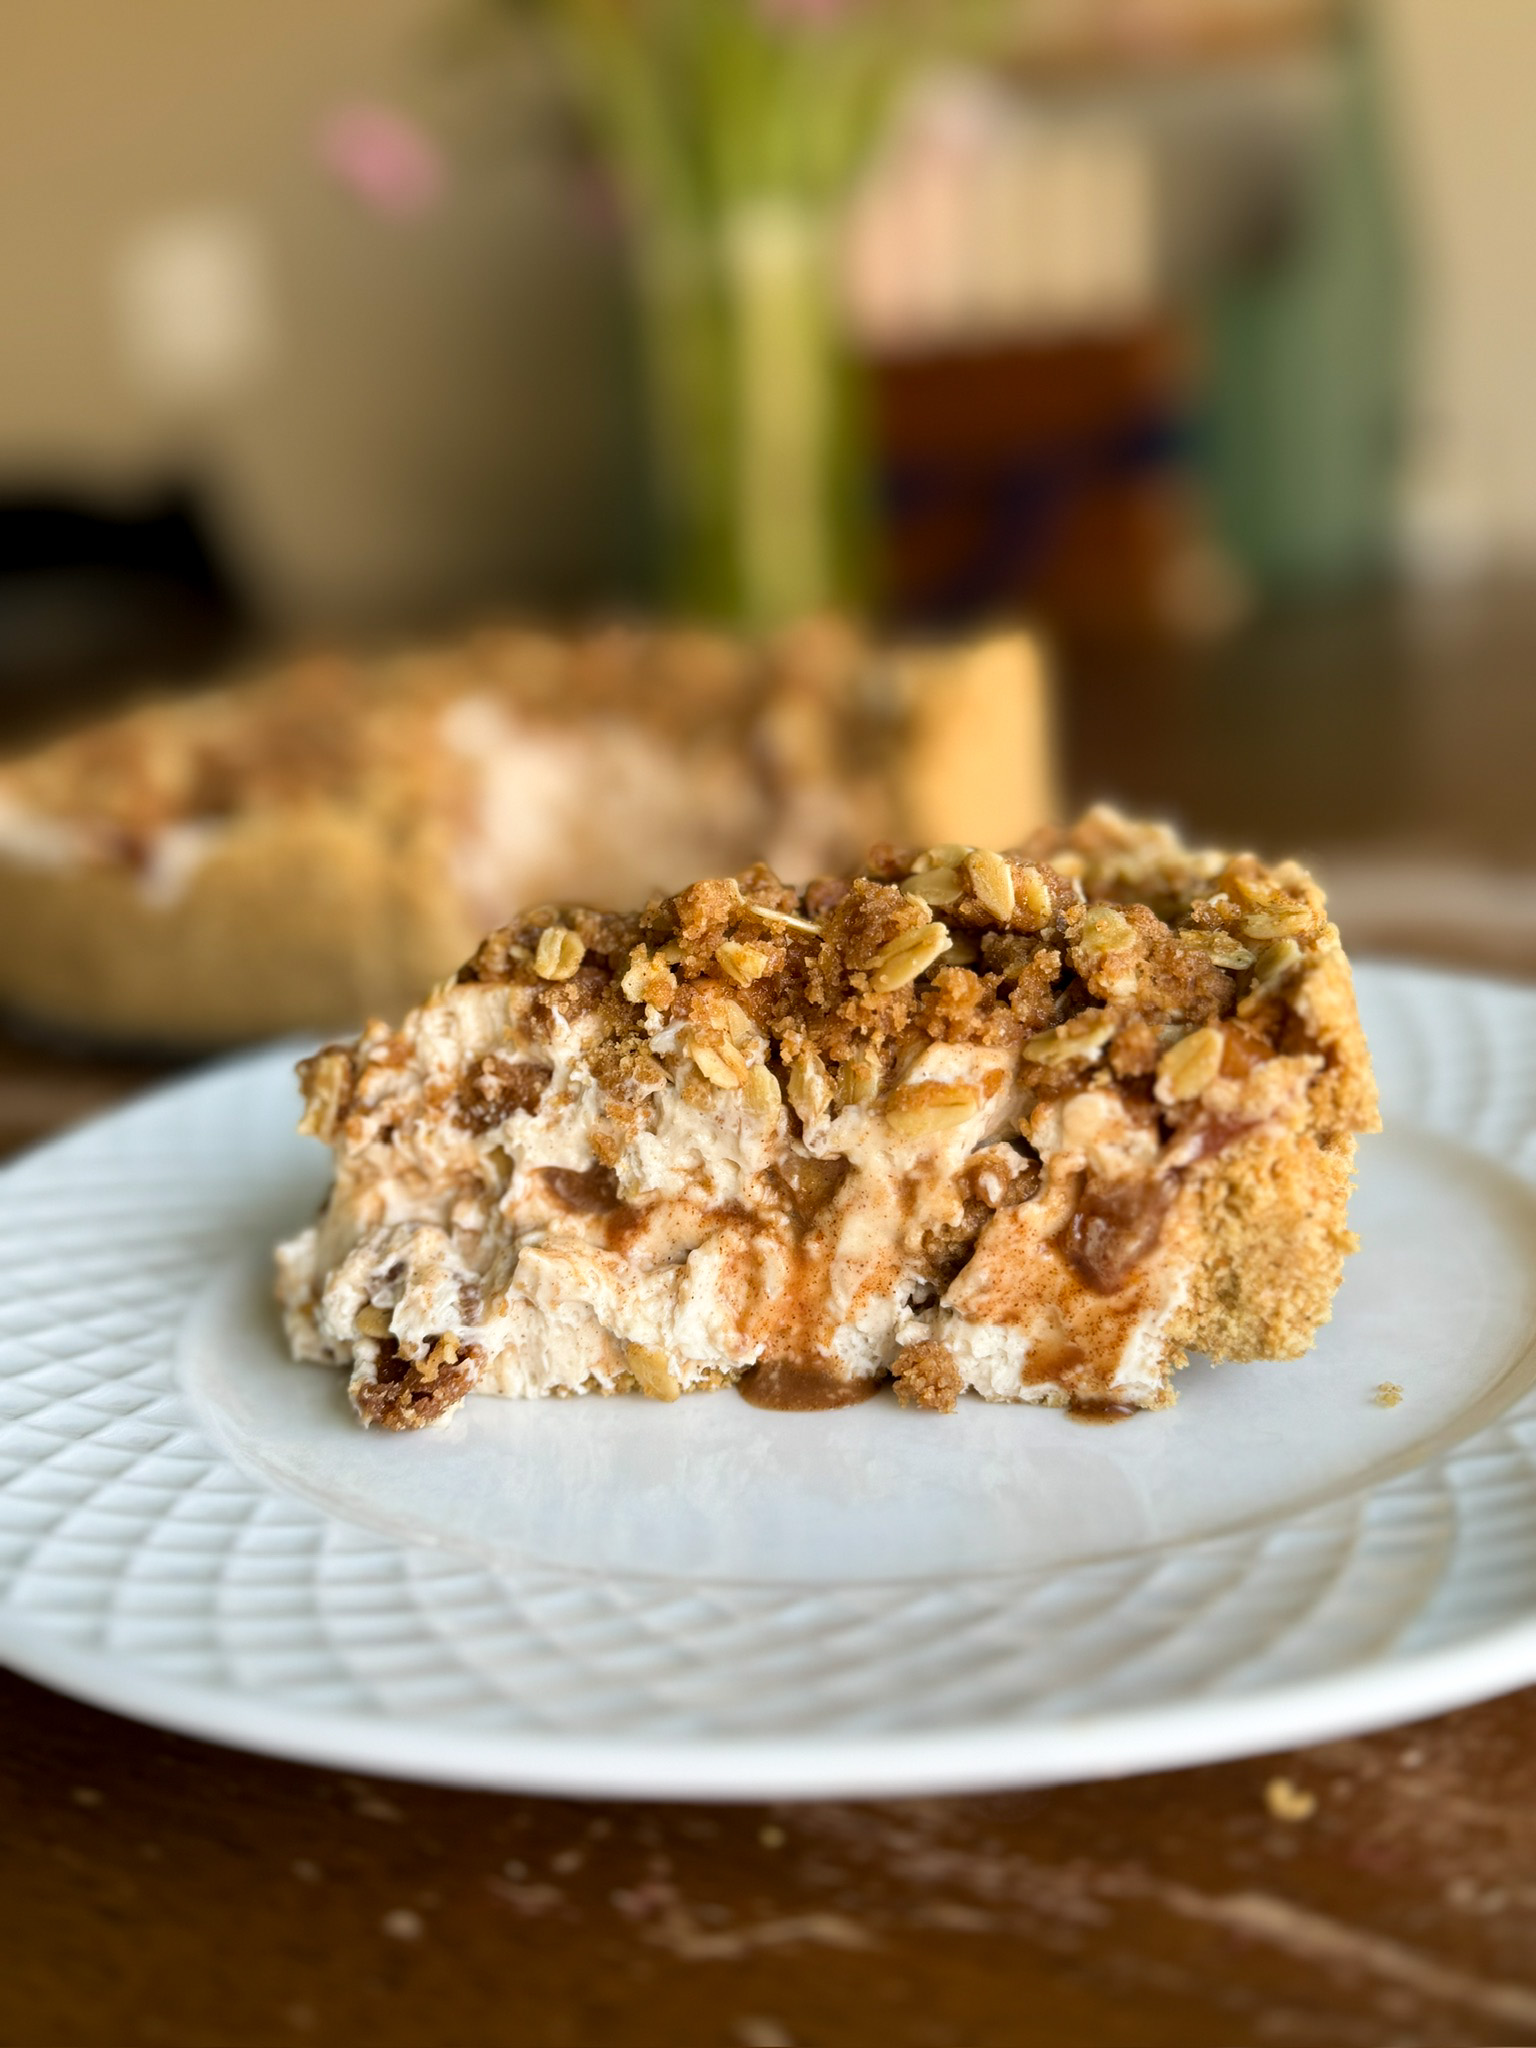
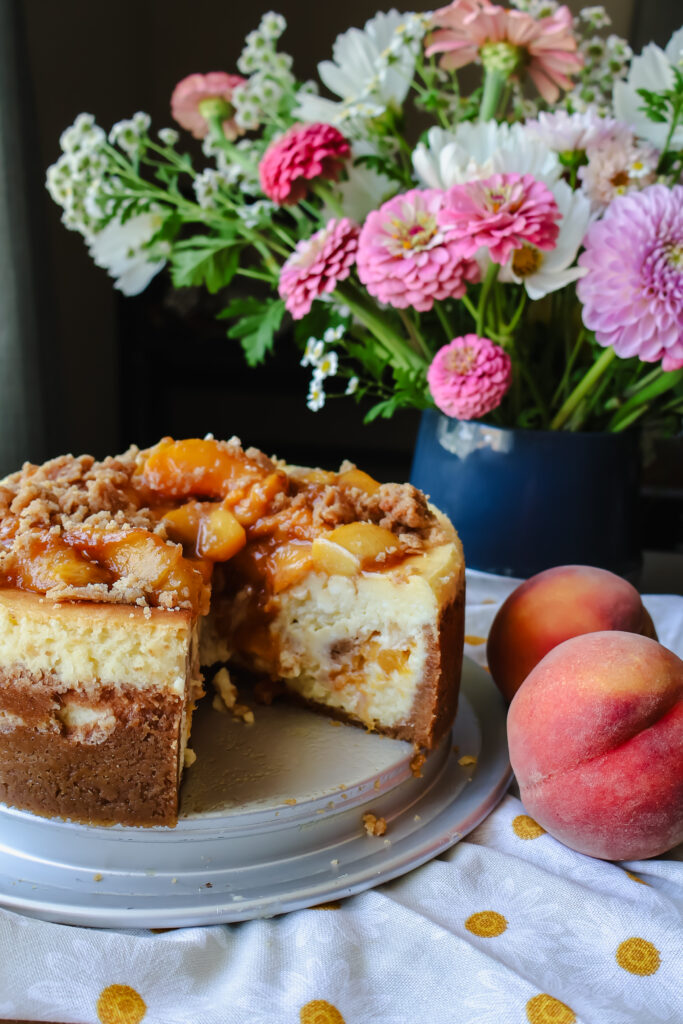
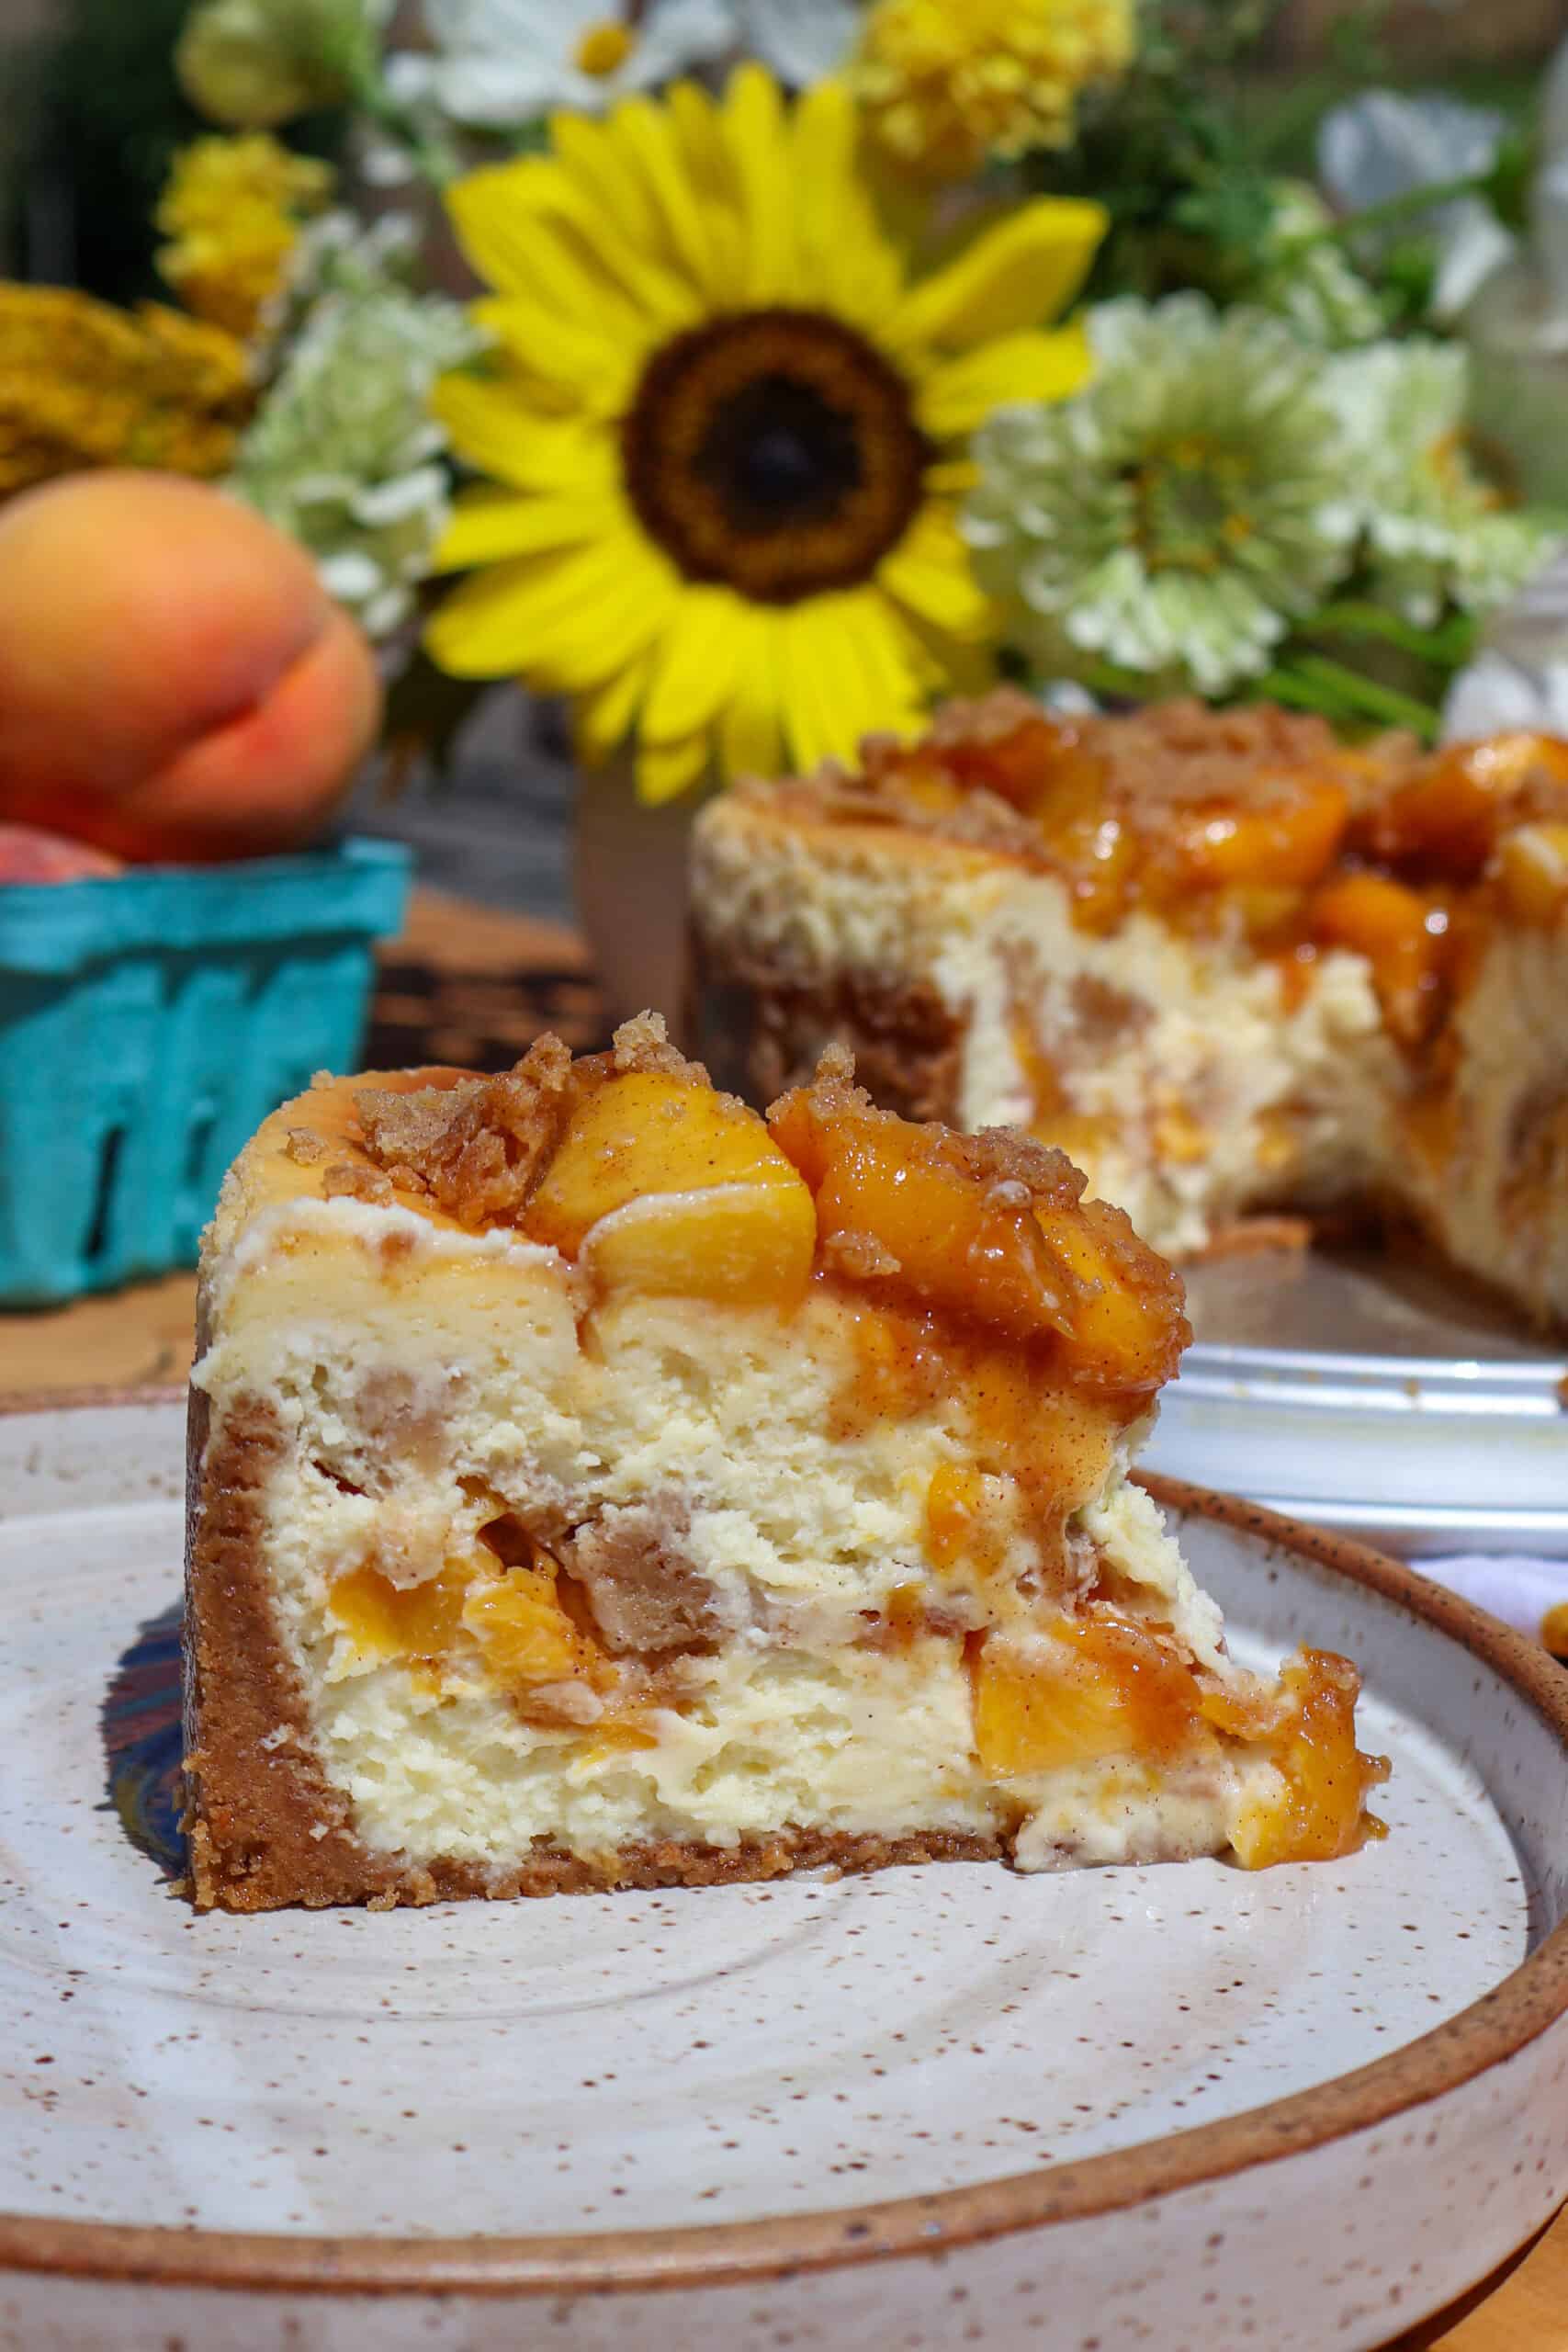
Peach Cobbler Cheesecake
If you want to bring one dessert that everyone will talk about all summer, peach cobbler cheesecake is it. The steps are straightforward, the ingredients are simple, and the payoff is a stunning dessert that looks like it came from a bakery. Roasted peaches, buttery crumble, and creamy cheesecake - all in one slice. This one is just as good as my peach cobbler pancakes!

Recipe Overview: Peach Cobbler Cheesecake
⏱ Prep Time: 45 minutes
⏳ Total Time: 11 hours (includes chill time)
👥 Serving: 12 slices
🔥 Calories: ~540 kcal per serving
🥣 Main Ingredients: Cream cheese, fresh peaches, graham crackers, sour cream, cinnamon, brown sugar, butter
👌 Difficulty: Moderate - layered cheesecake with roasted peaches, cinnamon crumb, and a water bath
⭐ Why You'll Love It: This Peach Cobbler Cheesecake combines two classic desserts into one unforgettable treat. It's perfect for holidays, potlucks, BBQs, or anytime you want a show-stopping dessert that everyone will be asking the recipe for.
Summarize and Save this Content On
Table of Contents
- Recipe Overview: Peach Cobbler Cheesecake
- Why You'll Love This Peach Cobbler Cheesecake
- Key Ingredients
- How to Make Peach Cobbler Cheesecake
- Tips for the Best Cheesecake Results
- Peach Cobbler Cheesecake FAQs
- How to tell when cheesecake is done?
- Cheesecake Storage Tips
- What to Serve with Peach Cobbler Cheesecake
- 📖 Recipe
- Tips for the Best Results
Peach season is one of my favorite times of year on the farm. There is nothing like fresh peaches, and I wanted to find a way to use them in something really special. This recipe started as an experiment, I kept thinking about how the warm, cinnamon spiced peaches from a cobbler would taste layered inside a creamy cheesecake. One test bake later and my whole family was hooked. My boys were sneaking slices before it even made it to the table!
If you love fruity desserts with a little something extra, you are going to want to save this one. It's the kind of recipe I pull out when I want to impress at a summer cookout or a family get-together without spending the whole day in the kitchen stressing. And if you are a peach dessert lover like me, my Peach Cobbler Cinnamon Rolls are another recipe on repeat around here all summer long.
Why You'll Love This Peach Cobbler Cheesecake
- 🍑 Seasonal Freshness - Uses ripe, juicy peaches that are in peak season during summer.
- 🧀 Ultra-Creamy Texture - Classic cheesecake base made with cream cheese, sour cream, and a hint of vanilla.
- 🍰 Perfect Layers - A baked graham cracker crust, smooth cheesecake filling, and layers of roasted cinnamon peaches and crumb topping.
- 🎉 Make-Ahead Friendly - Needs to chill overnight, making it ideal for prepping ahead for gatherings.
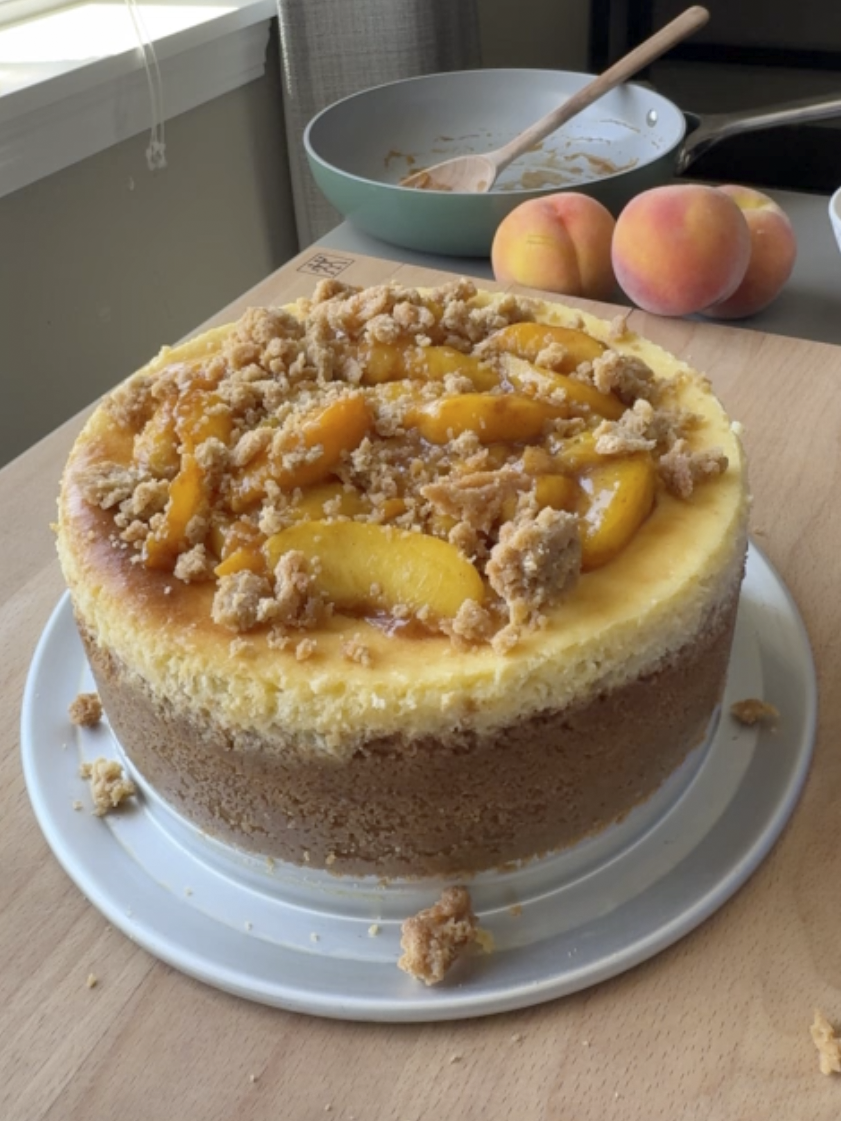
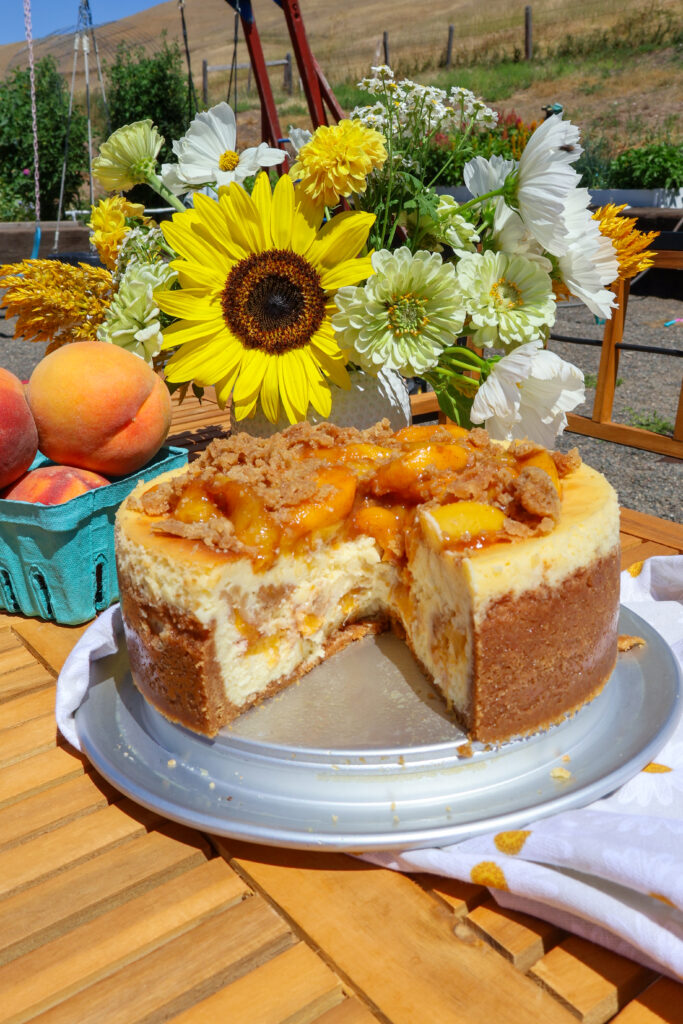
This dessert has four parts - a graham cracker crust, creamy cheesecake filling, roasted peaches, and a buttery crumble. They all come together in one springform pan and the result is honestly a total showstopper. Let me walk you through everything!
Key Ingredients
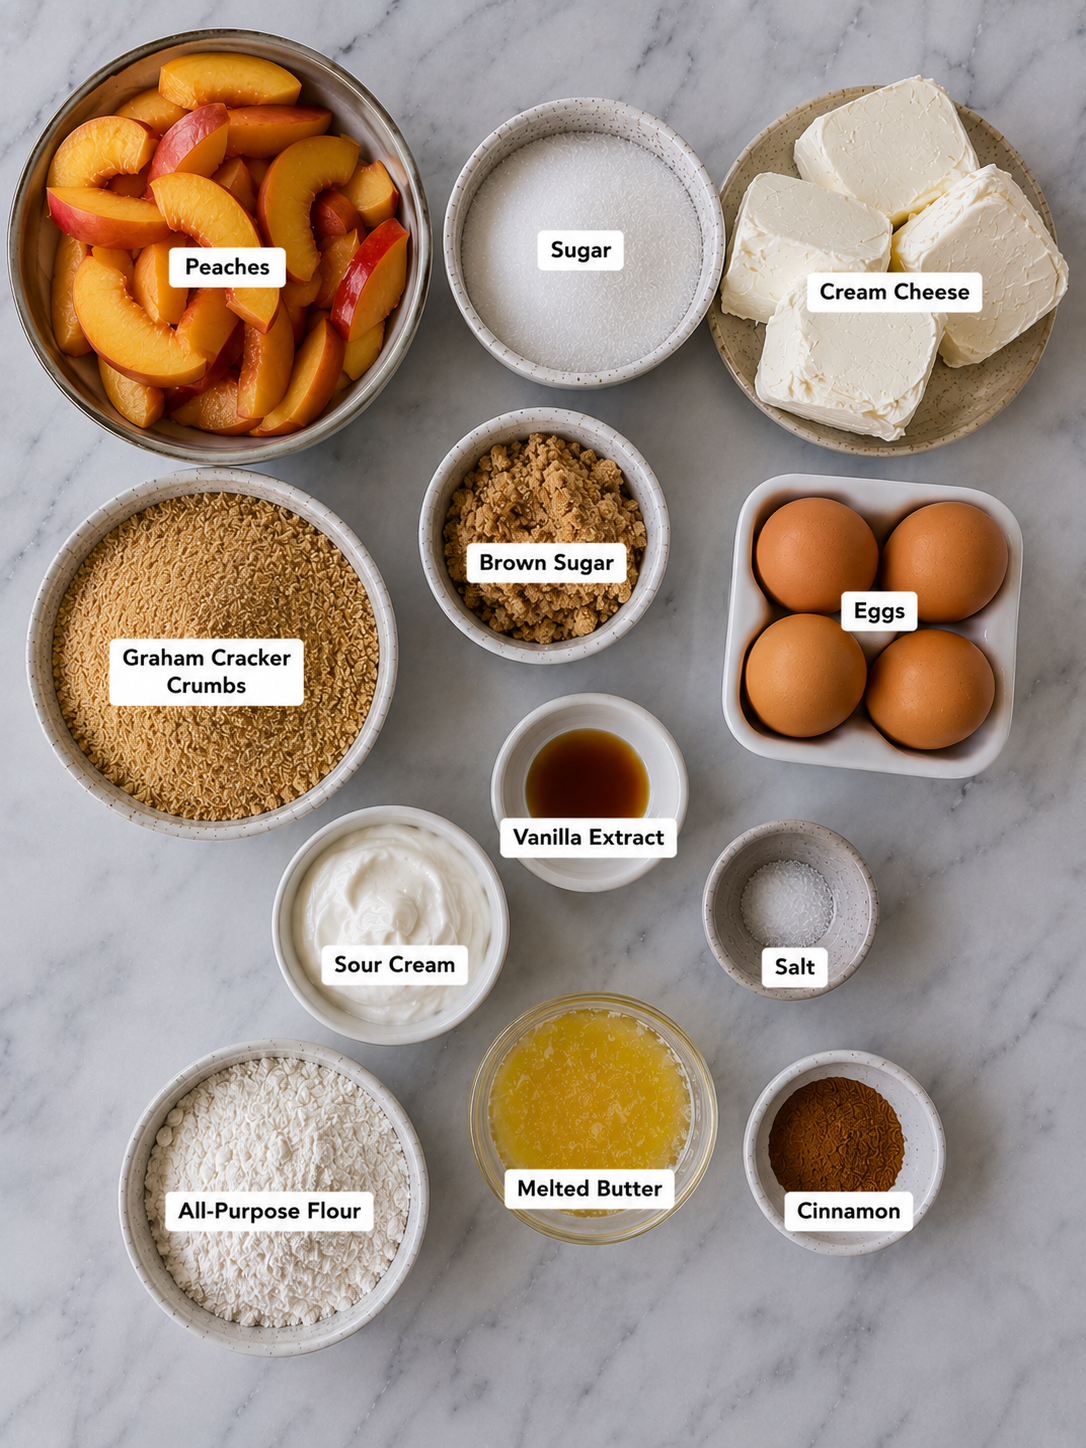
You don't need anything wild or hard to find for this recipe. Here's what to know before you get started:
- Cream cheese - Use full-fat block cream cheese and make sure it is fully at room temperature. Cold cream cheese will leave lumps in your batter no matter how long you mix it.
- Sour cream - This is what gives the filling that smooth, rich texture. Don't skip it!
- Fresh peaches - Fresh peaches roasted with cinnamon and sugar are everything here. If fresh peaches aren't in season, frozen peaches work too - just thaw and pat them dry first.
- Graham crackers - Classic for a reason. They give you that buttery, slightly sweet crust that holds everything together.
- Flour (in the cheesecake batter) - Just two tablespoons helps stabilize the filling so it bakes up nice and smooth.
I keep a good stash of pantry baking staples on hand all the time, and you likely already have most of what you need for the crumble and crust.
How to Make Peach Cobbler Cheesecake
Step 1:Preheat oven to 375.
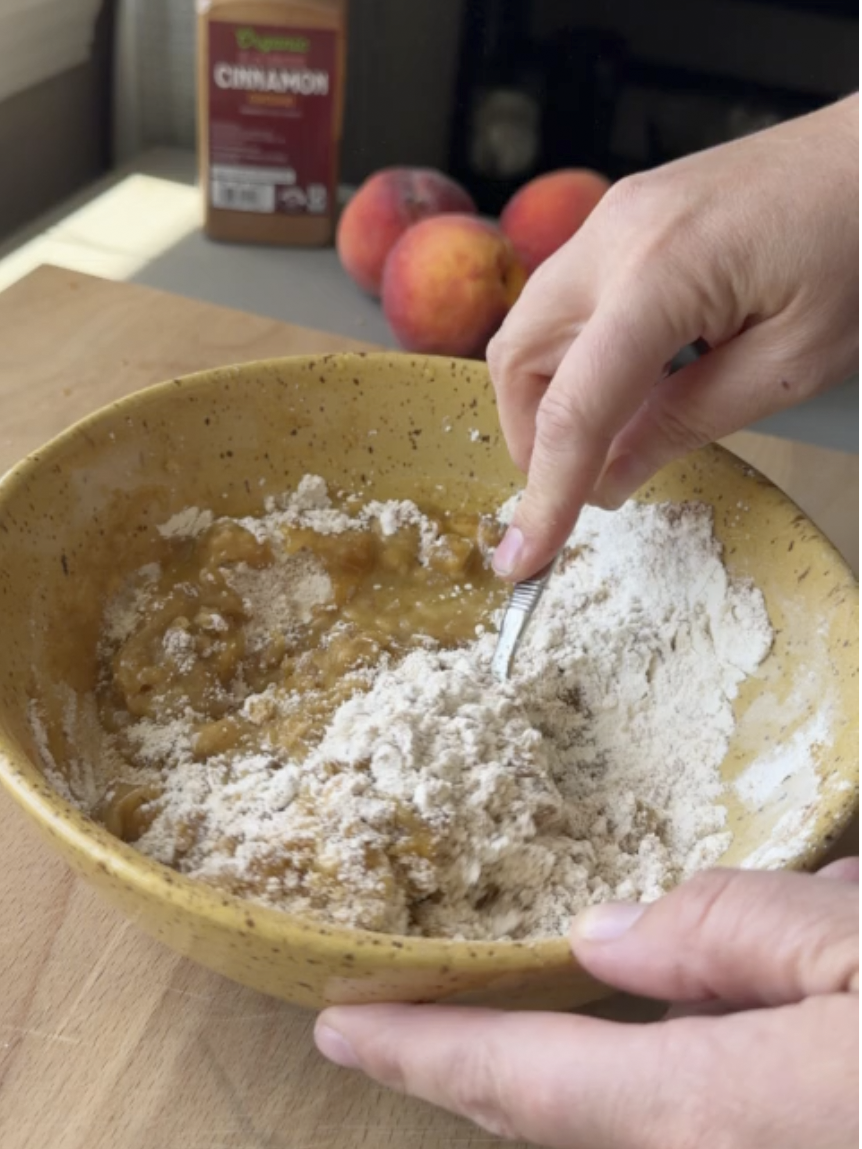
Mix together all the crumb ingredients until it resembles wet sand.
Place onto a half sheet pan.
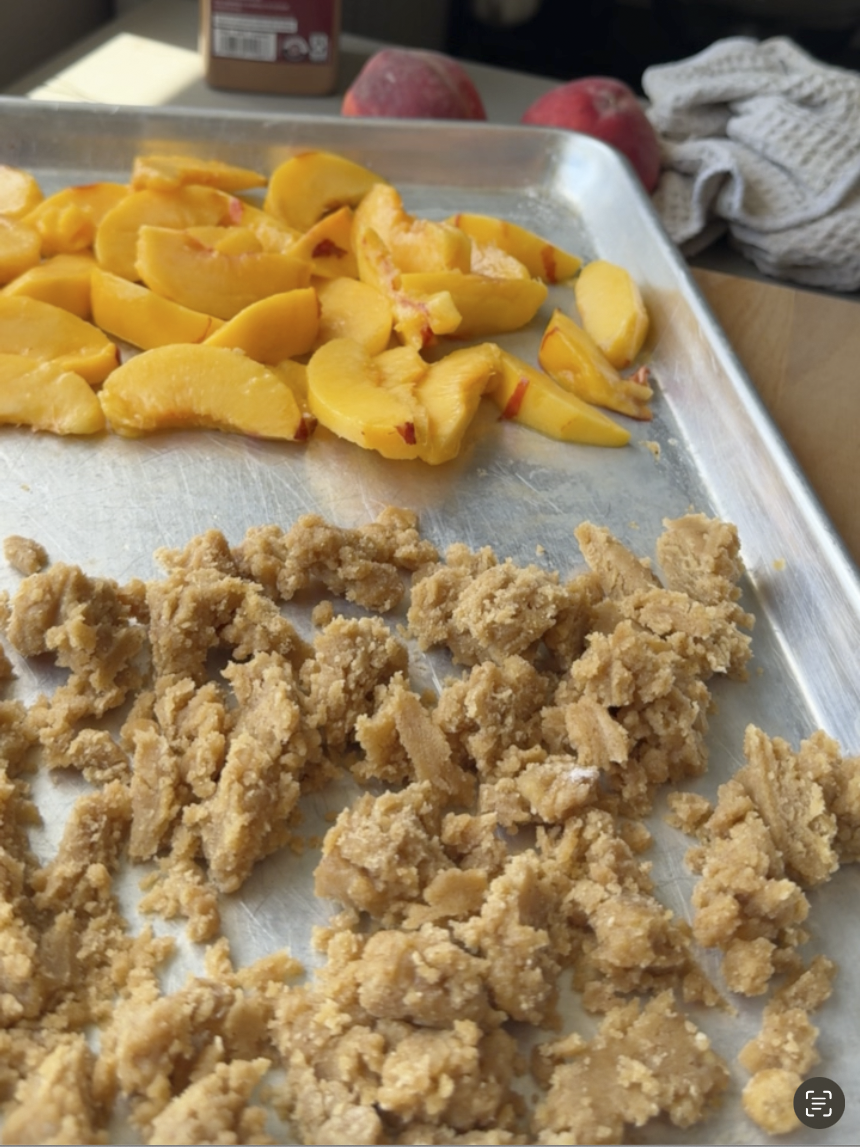
Step 2: Mix together the roasted peaches ingredients and place onto the other half a sheet pan.
Bake for 15 minutes.
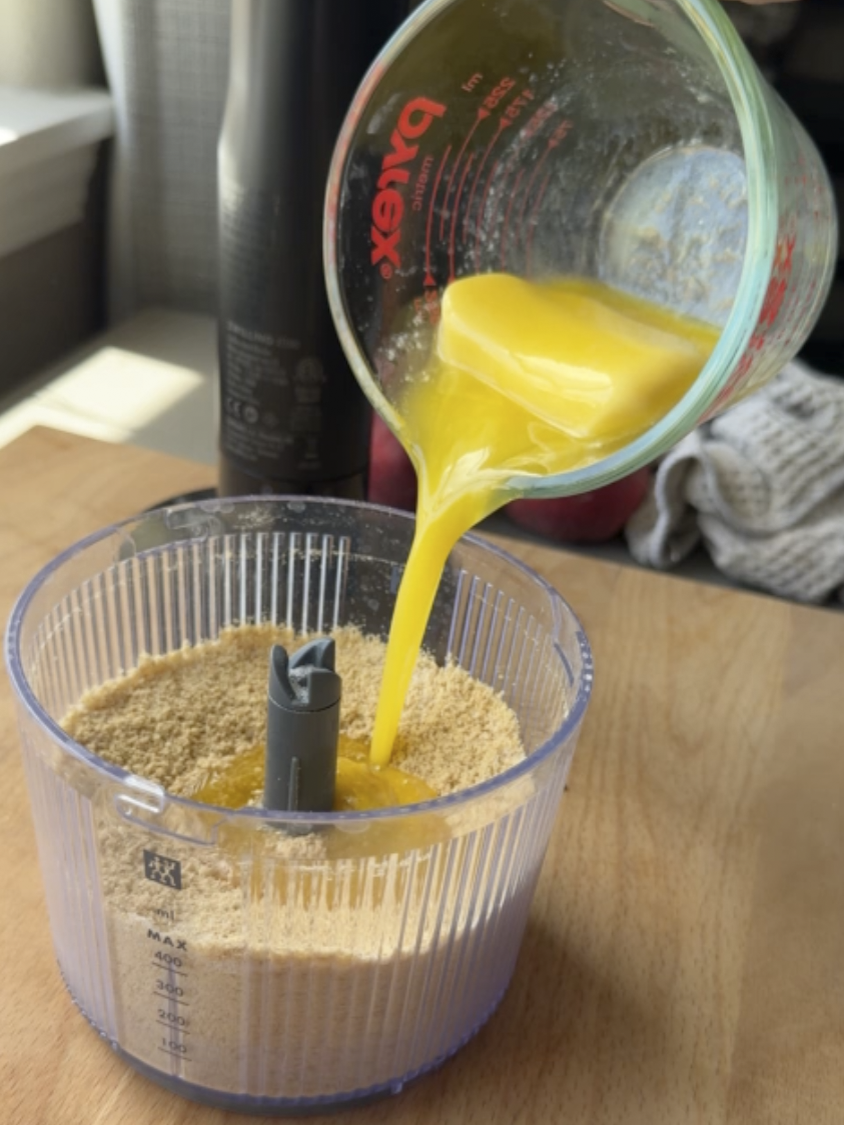
Step 3: In a medium bowl, combine the graham cracker crumbs, melted butter, sugar, and salt. Stir until well combined.
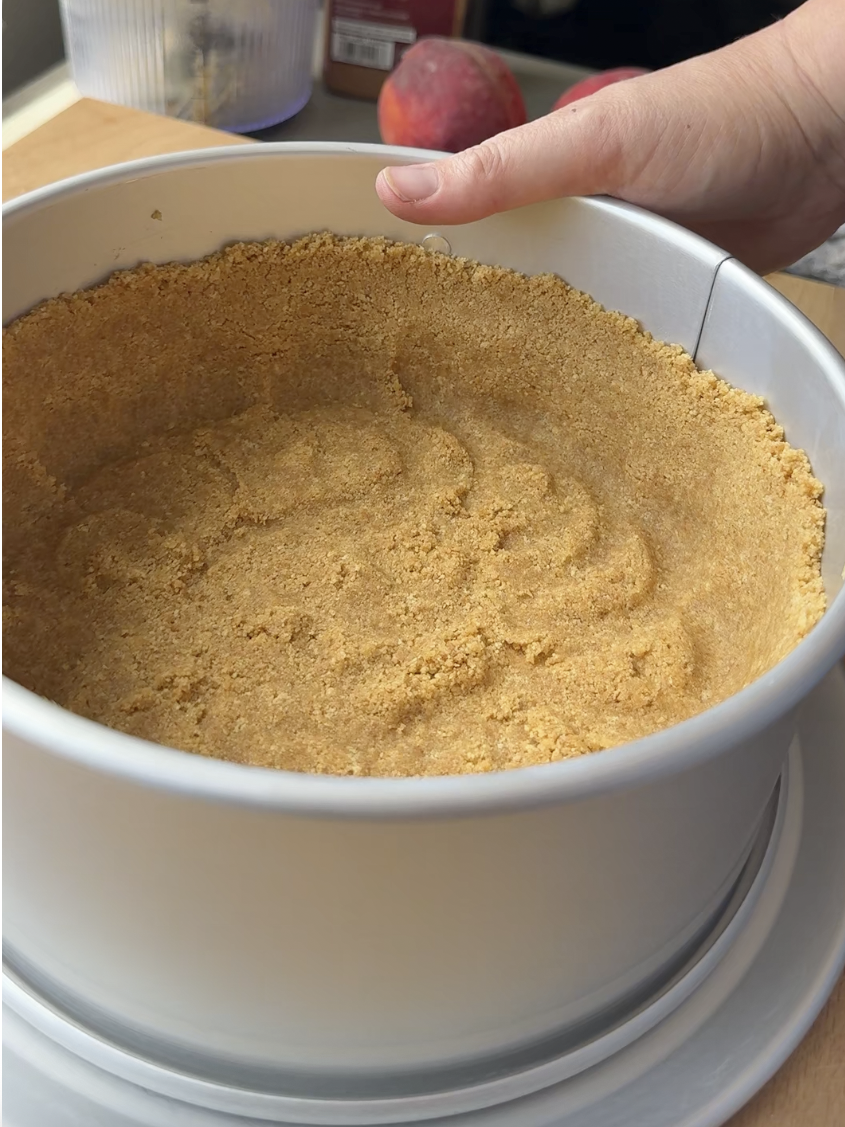
Step 4: Wrap the bottom of an 8" springform pan with foil. This helps to ensure that water doesn't leak into the bottom of your pan while baking.
Press the crumbs into an even layer on the the bottom of the spring form pan, pressing up onto the sides if desired. Bake the crust for 10 minutes, until set. Remove the pan from the oven and set aside.
Reduce the oven temperature to 325°F. Set a kettle of water to boil.
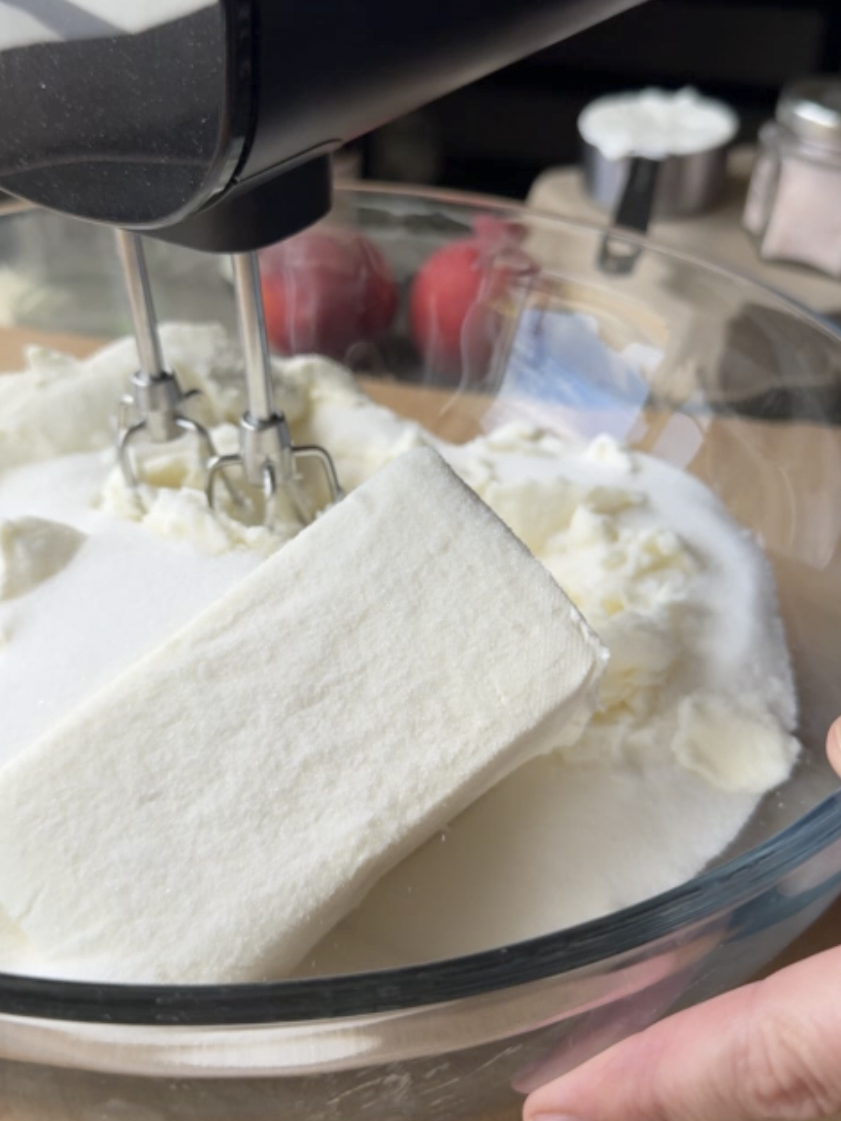
Step 5: In the bowl of an electric mixer fitted with the paddle attachment or beaters, beat the cream cheese, sugar, and flour together on medium speed until just smooth, about 1 minute.
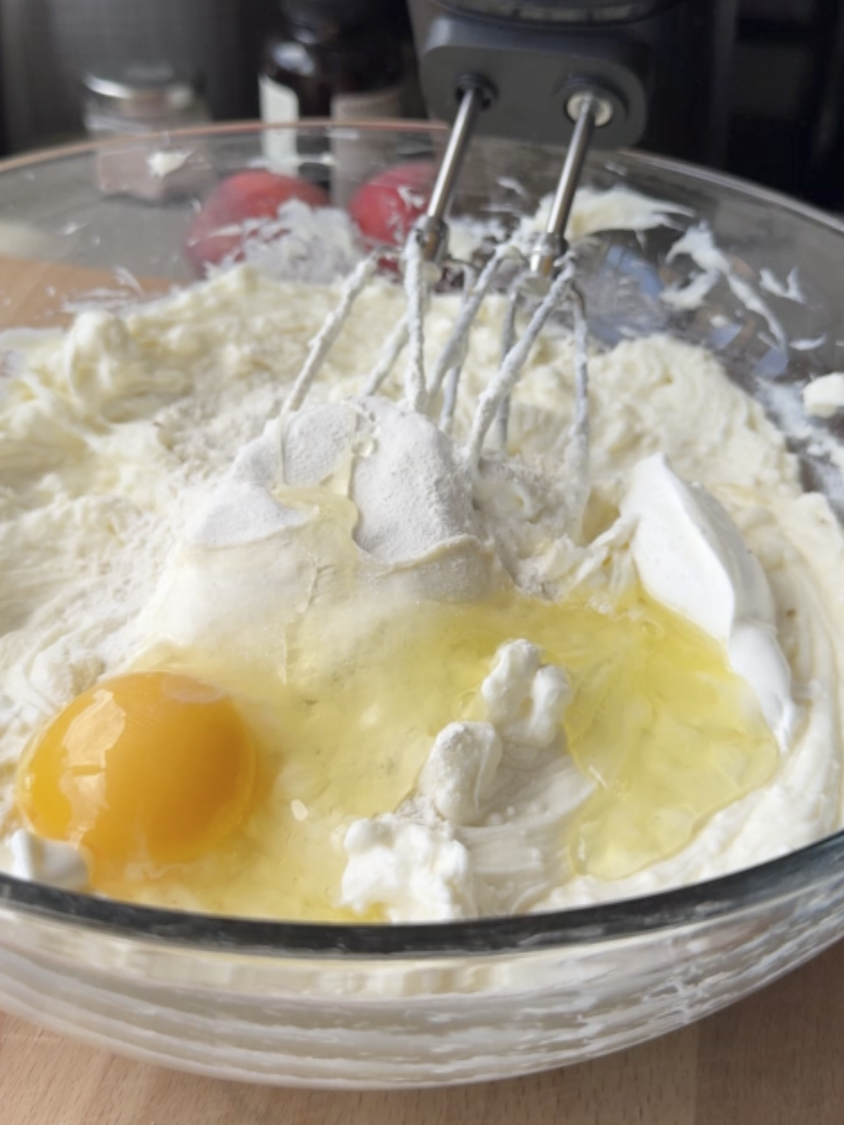
Step 6: Scrape the bottom and sides of the bowl to be sure the mixture is evenly combined. Add the vanilla and salt; beat on low speed until just combined.
Add the eggs, one at a time, mixing on low speed until incorporated, scraping the bowl as necessary.
Mix in the sour cream. Make sure the batter is uniform but do not over-mix.

Step 7: Add half of the cheesecake batter to pan, then add half of the peaches and crumb. Top with remaining cheesecake.
Add remaining peaches and crumb to the refrigerator for later.
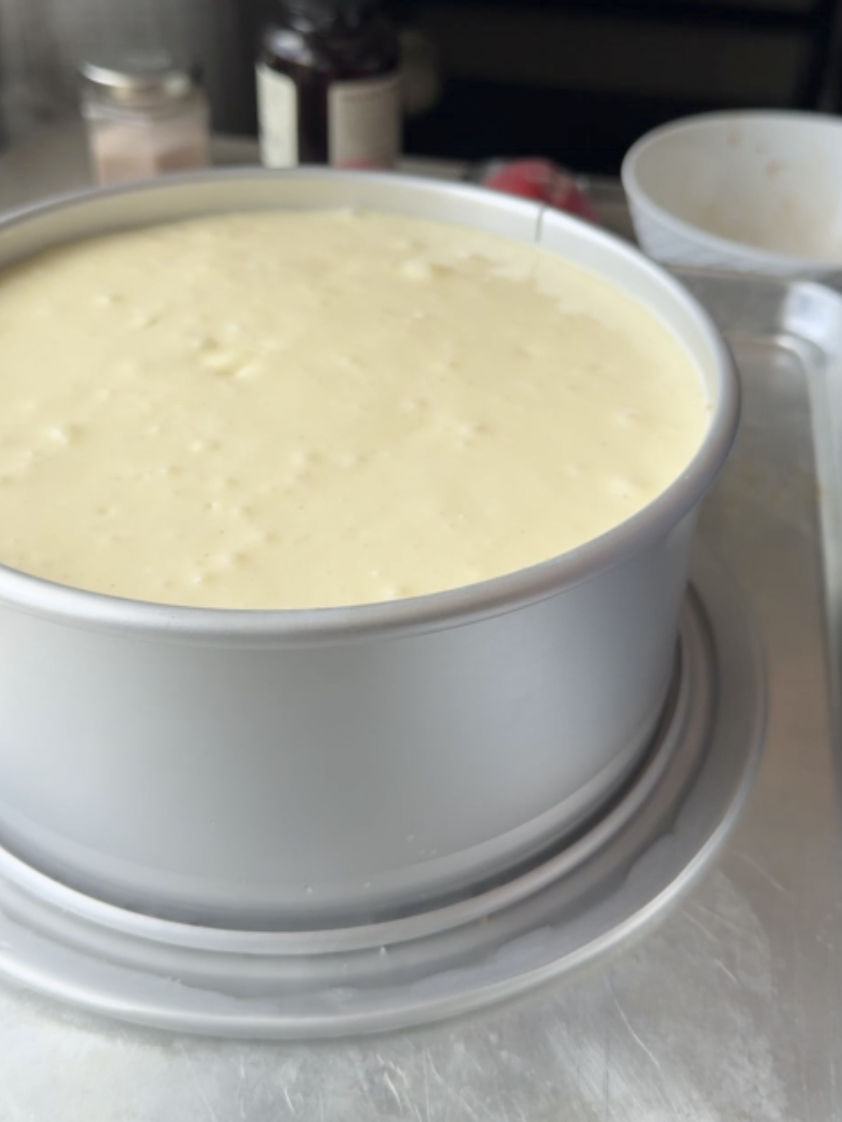
Step 8: Place the cheesecake pan in a large roasting pan.
Pour the boiling water into the large roasting pan to come about 1 inch up the side of the cake pan. Bake until the cake is just set, 1 hour and 30 minutes to 1 hour and 45 minutes. (If the cheesecake starts to look too golden on top towards the end, cover it loosely with foil.)
Step 9: Remove the springform pan from the water bath and discard the foil. If necessary, run a thin-bladed knife around the edge of the cake to make sure it's not sticking to the sides (which can cause cracks as it cools), then cover with plastic wrap and transfer to the refrigerator to cool for at least 8 hours or overnight.
Once ready to serve top with remaining peaches and crumb and enjoy!
Tips for the Best Cheesecake Results
These are the things I learned from making this recipe that will save you from any headaches:
- Room temperature cream cheese is a must. Take it out at least an hour before you start. This is the number one thing that affects your final texture.
- Do not skip the water bath. I know it adds a step, but it keeps the filling silky smooth and prevents cracks on top.
- Wrap that springform pan well. Use heavy-duty foil or double wrap with regular foil. Water sneaking in under the crust is not fun.
- Chill overnight if you can. Eight hours is the minimum but overnight is even better. The texture improves so much with a full chill.
- Taste your peaches before you roast. If they are really sweet, you can pull back slightly on the sugar in the roasted peach mixture.
- Don't crack the oven door to check constantly. Sudden temperature changes can cause the top to crack. Trust the timing!
If you love fruity baked desserts, my strawberry rhubarb cobbler follows some of the same easy steps and is another crowd favorite around here.

Peach Cobbler Cheesecake FAQs
Yes! If fresh peaches aren't available, frozen peaches work great. Thaw them completely and pat them dry before tossing with the cinnamon and sugar. Canned peaches work in a pinch too, just drain them really well and pat dry before roasting.
This usually happens from overmixing the batter, skipping the water bath, or opening the oven door too often. All three of those things cause sudden shifts that crack the top. Even if it does crack, just pile on those peaches and crumble and nobody will ever know!
Yes, and I actually recommend it! This cheesecake needs at least 8 hours to chill, so making it the day before is ideal. Just wait to add the peach and crumble topping until right before you serve.
I recommend sticking with an 8" pan for this recipe since the layers are designed for that size. A 9" pan will work but your cheesecake will be slightly shorter and may bake a little faster, so keep an eye on it.
How to tell when cheesecake is done?
The edges are set, but the center jiggles slightly. Gently shake the pan: the outer 2-3 inches should look firm, while the very center (about the size of a quarter) should wobble like Jell-O, not slosh like a liquid. This slight jiggle means the residual heat will finish setting the center as it cools.
Top is matte, not shiny. A done cheesecake will look slightly dull or matte on the surface (especially in the center). If it's still glossy, it likely needs more time.
A thermometer reads 150-155°F in the center. If you're unsure, insert an instant-read thermometer just off-center. When it reaches 150-155°F (65-68°C), it's done. Avoid going much higher-overbaking can lead to cracks or a dry texture.
Cracks may start to form near the edge. Tiny cracks at the edges are a sign it's nearly done or very close. If large cracks form, it may be slightly overbaked (but still totally delicious!).
Cheesecake Storage Tips
- Refrigerator - Store covered in the fridge for up to 5 days. Keep the extra peach and crumble topping stored separately and add it fresh right before serving each time.
- Freezer - You can freeze this cheesecake! Wrap individual slices tightly in plastic wrap and then in foil. Freeze for up to 2 months. Thaw overnight in the fridge before eating.
What to Serve with Peach Cobbler Cheesecake
If you tried this Peach Cobbler Cheesecake or any other recipe on my blog, please leave a 🌟 star rating and let me know how it went in the comments below. I love hearing from you!
📖 Recipe
Peach Cobbler Cheesecake
Ingredients
Equipment
Instructions
- Preheat oven to 375.
- Mix together the roasted peaches ingredients and place onto half a sheet pan. Then make the crumb.
- Mix together all the crumb ingredients until it resembles wet sand.
- Place onto the other half of the sheet pan and bake for 15 minutes.
- Remove from oven and allow to cool.
- In a medium bowl, combine the graham cracker crumbs, melted butter, sugar, and salt. Stir until well combined.
- Wrap the bottom of an 8" springform pan with foil. This helps to ensure that water doesn't leak into the bottom of your pan while baking.
- Press the crumbs into an even layer on the the bottom of the spring form pan, pressing up onto the sides if desired. Bake the crust for 10 minutes, until set. Remove the pan from the oven and set aside.
- Reduce the oven temperature to 325°F. Set a kettle of water to boil.
- In the bowl of an electric mixer fitted with the paddle attachment or beaters, beat the cream cheese, sugar, and flour together on medium speed until just smooth, about 1 minute.
- Scrape the bottom and sides of the bowl to be sure the mixture is evenly combined. Add the vanilla, flour and salt; beat on low speed until just combined.
- Add the eggs, one at a time, mixing on low speed until incorporated, scraping the bowl as necessary.
- Mix in the sour cream. Make sure the batter is uniform but do not over-mix.
- Add half of the cheesecake batter to pan, then add half of the peaches and crumb. Top with remaining cheesecake.
- Add remaining peaches and crumb to the refrigerator for later.
- Place the cheesecake pan in a large roasting pan.
- Pour the boiling water into the large roasting pan to come about 1 inch up the side of the cake pan. Bake until the cake is just set, 1 hour and 30 minutes to 1 hour and 45 minutes. (If the cheesecake starts to look too golden on top towards the end, cover it loosely with foil.)
- The cake will wobble just a bit when the pan is moved, but will not look liquid at all; it will continue to cook as it cools.
- Carefully remove the roasting pan from the oven allow the cheesecake to cool in the water bath until the water is just warm.
- Remove the springform pan from the water bath and discard the foil. If necessary, run a thin-bladed knife around the edge of the cake to make sure it's not sticking to the sides (which can cause cracks as it cools), then cover with plastic wrap and transfer to the refrigerator to cool for at least 8 hours or overnight.
- Once ready to serve top with remaining peaches and crumb and enjoy!
Nutrition
Video
Notes
Tips for the Best Results
These are the things I learned from making this recipe that will save you from any headaches:- Room temperature cream cheese is a must. Take it out at least an hour before you start. This is the number one thing that affects your final texture.
- Do not skip the water bath. I know it adds a step, but it keeps the filling silky smooth and prevents cracks on top.
- Wrap that springform pan well. Use heavy-duty foil or double wrap with regular foil. Water sneaking in under the crust is not fun.
- Chill overnight if you can. Eight hours is the minimum but overnight is even better. The texture improves so much with a full chill.
- Taste your peaches before you roast. If they are really sweet, you can pull back slightly on the sugar in the roasted peach mixture.
- Don't crack the oven door to check constantly. Sudden temperature changes can cause the top to crack. Trust the timing!