S'mores Cake
This homemade S'mores Cake is made with rich chocolate layers, fluffy marshmallow frosting, and buttery graham cracker crumble. The perfect layered cake for summer parties or cozy fall gatherings.

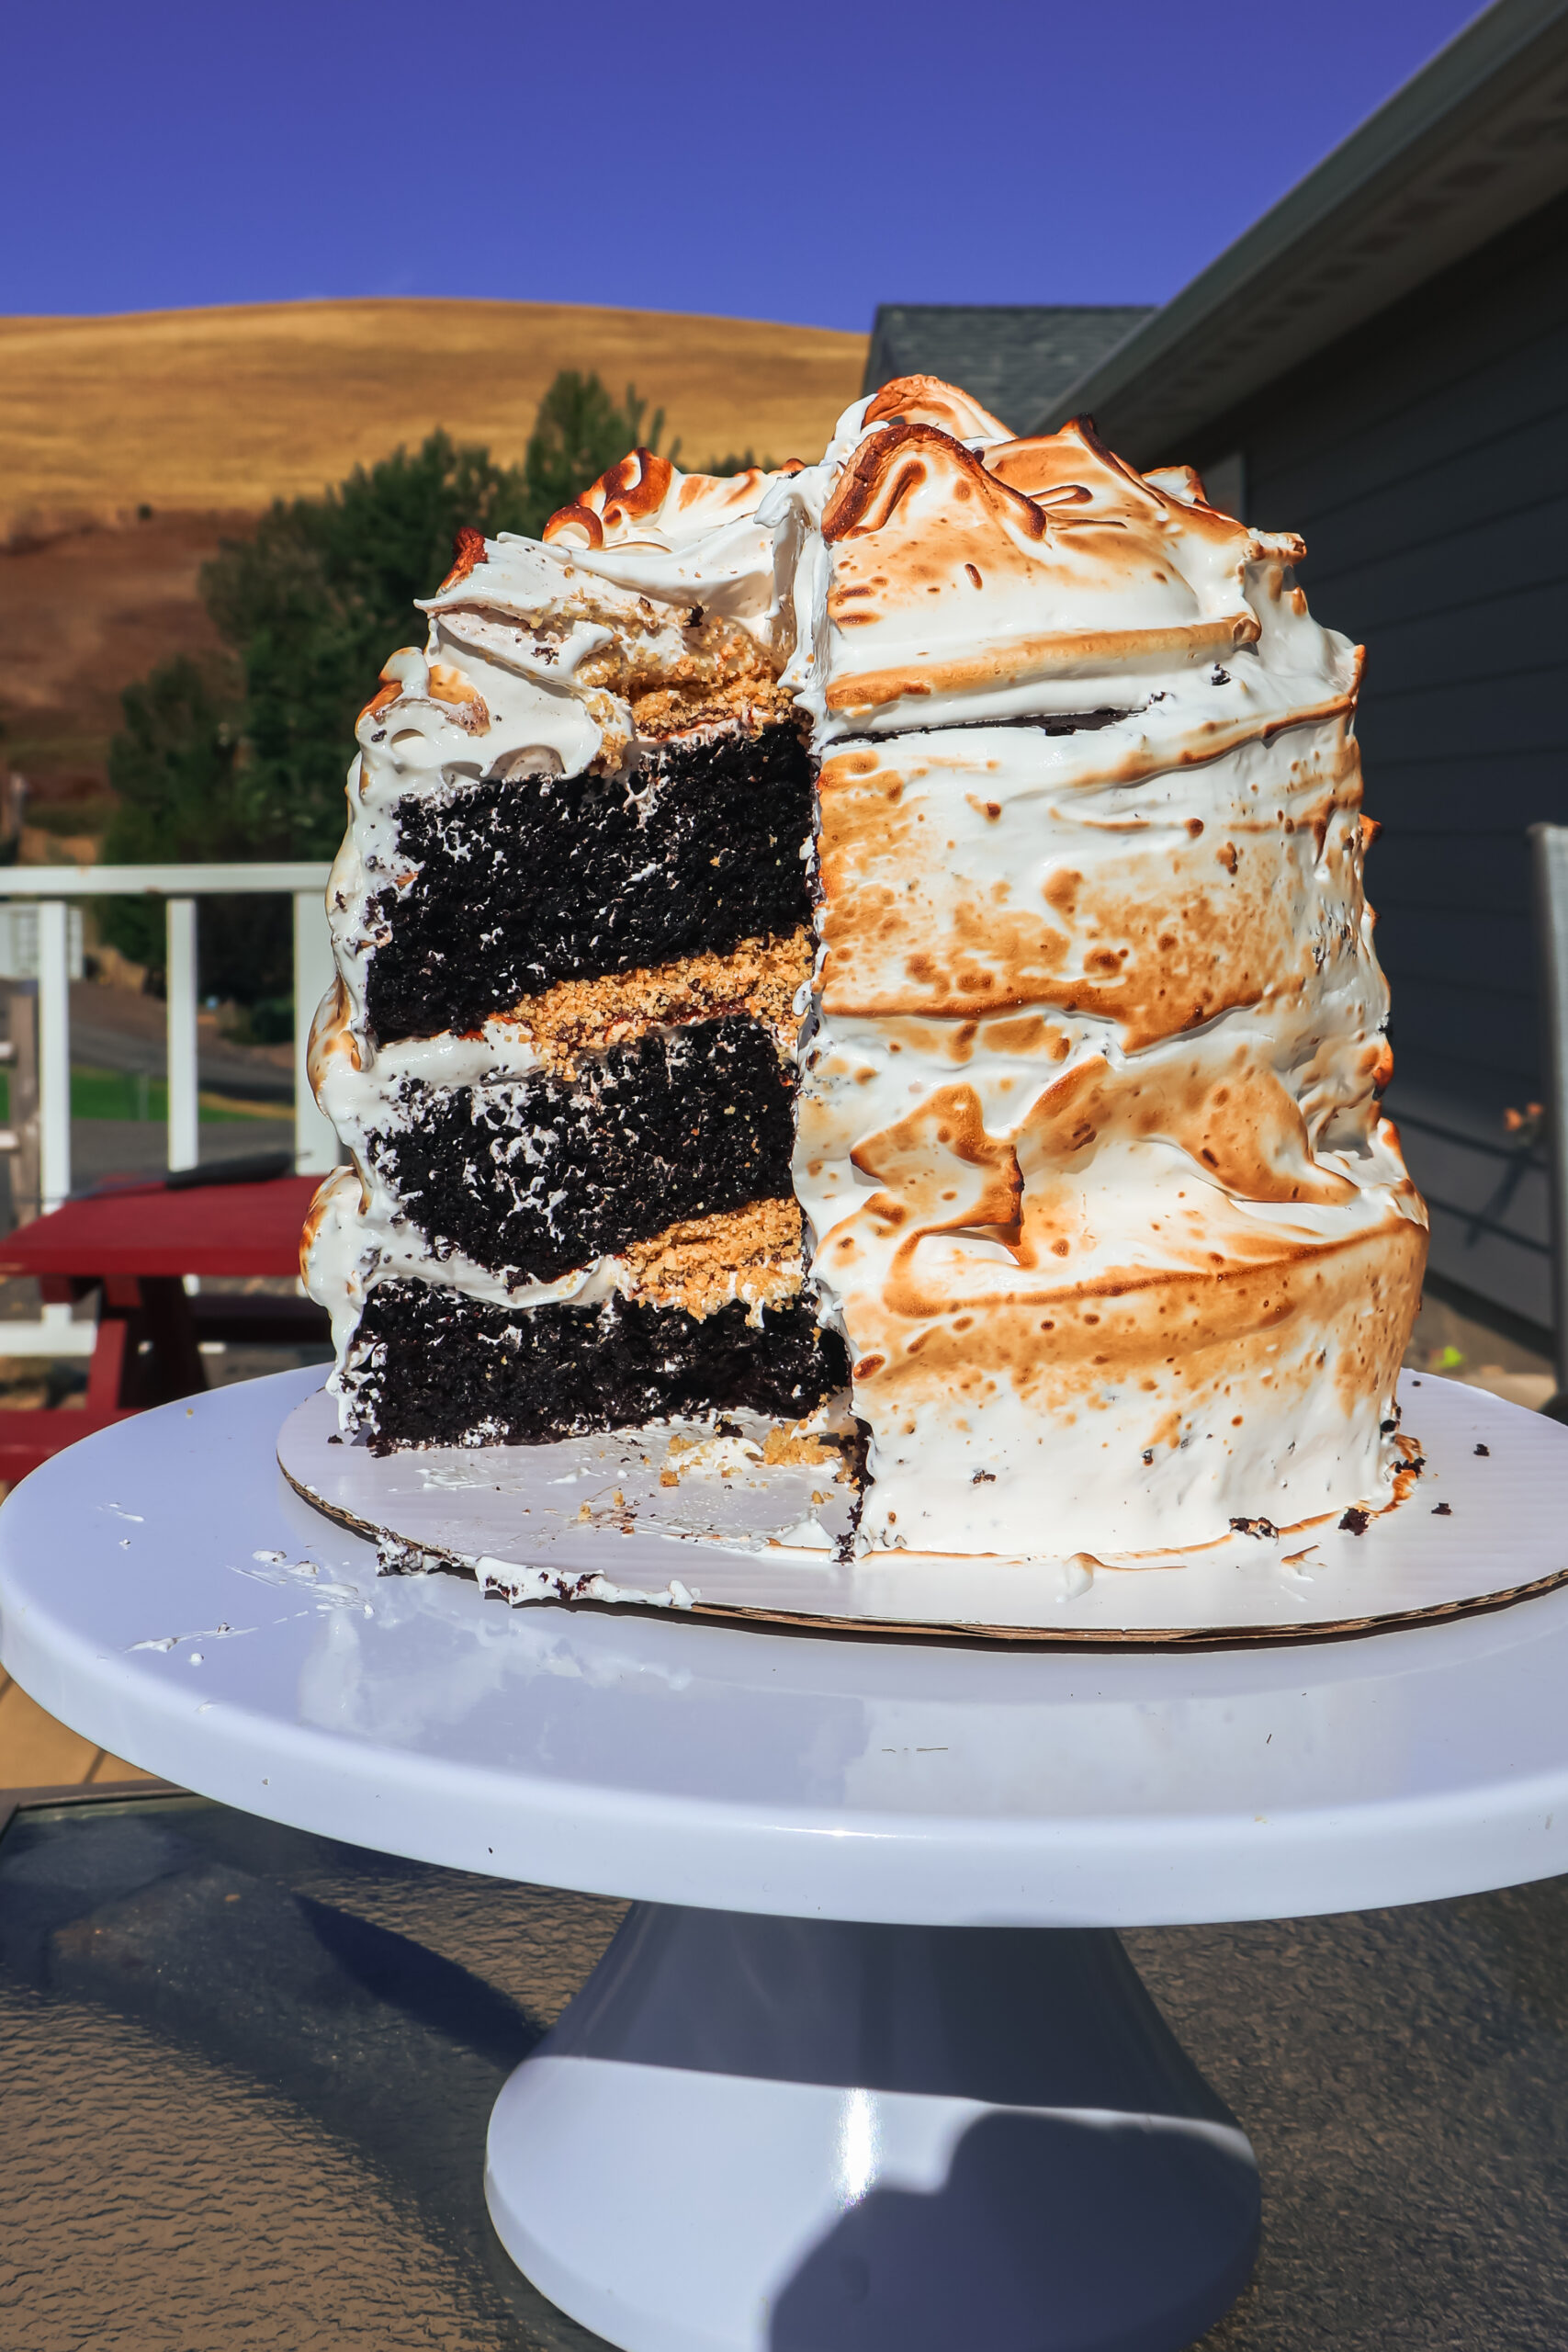
If you love classic s'mores-the gooey marshmallow, melty chocolate, and crunchy graham cracker combo-just wait until you try it in cake form. This S'mores Cake is the ultimate summer (or anytime) dessert: three rich layers of chocolate cake, fluffy toasted marshmallow frosting, and a buttery graham cracker crumble. It's perfect for birthdays, celebrations, or whenever you want a show-stopping treat that tastes like a campfire favorite.
Made from scratch with pantry staples, this cake delivers a deep chocolate flavor thanks to Dutch cocoa and coffee, while the glossy meringue-style frosting brings all the marshmallow vibes. Finish it off with graham cracker crunch, and you've got a nostalgic, bakery-worthy cake no one can resist.

Why You'll Love This S'mores Cake Recipe
- 🍫 Rich chocolate flavor from Dutch cocoa and brewed coffee
- 🔥 Fluffy marshmallow frosting that's perfectly toastable
- 🍯 Crunchy graham cracker crumble adds texture and golden sweetness
- 🎂 Perfect for layering - works beautifully as a 3-layer 6" cake or 2-layer 8"
- 👩🍳 No boxed mixes or marshmallow fluff - everything is made from scratch
Ingredients for the Ultimate S'mores Cake
Chocolate Cake
- Granulated sugar - Sweetens and helps create a tender crumb
- Dutch cocoa powder - Gives the cake its rich, chocolatey depth
- All-purpose flour - The sturdy base for your layers
- Baking soda + baking powder - Helps the cake rise beautifully
- Salt - Balances sweetness and enhances flavor
- Oil - Keeps the cake moist for days, I like to use avocado oil
- Vanilla extract - Adds warmth and depth
- Eggs - Bind and add structure
- Buttermilk - Makes the cake tender and slightly tangy
- Strong brewed coffee - Intensifies the chocolate flavor (don't skip this!)
Marshmallow Frosting
- Egg whites - Whipped into a light, fluffy meringue
- Granulated sugar - Sweetens and stabilizes the meringue
- Salt - A small pinch goes a long way
- Vanilla extract - Rounds out the flavor with a hint of warmth
Tip: Double the frosting if you prefer to frost the sides of the cake instead of leaving it "naked-style."
Graham Cracker Crumble
- Graham cracker crumbs - The signature s'mores crunch
- Melted butter - Helps bind and toast the crumble
- Honey (or sugar) - Adds sweetness and a golden color

Step-by-Step Instructions
1. Bake the Chocolate Cake Layers
Preheat oven to 325°F. Grease and line three 6-inch cake pans (or two 8-inch pans) with parchment paper.
In a large bowl, whisk together the dry ingredients. Create a well in the center, and add oil, vanilla, eggs, and buttermilk. Whisk until smooth. Pour in the brewed coffee and stir gently to combine.
Divide batter evenly among the pans and bake for 25-30 minutes or until a toothpick comes out clean. Let cool completely on a wire rack.
2. Make the Marshmallow Frosting
Create a double boiler by placing a heatproof bowl over a pot of simmering water. Add the egg whites and sugar to the bowl, whisking constantly until it reaches 160°F and the sugar is fully dissolved.
Remove from heat and whisk (or use a stand mixer) until stiff peaks form-about 3-5 minutes. Stir in vanilla and a pinch of salt.
3. Prepare the Graham Cracker Crumble
In a medium bowl, mix graham cracker crumbs with melted butter and honey (or sugar). Stir until fully combined. Set aside.
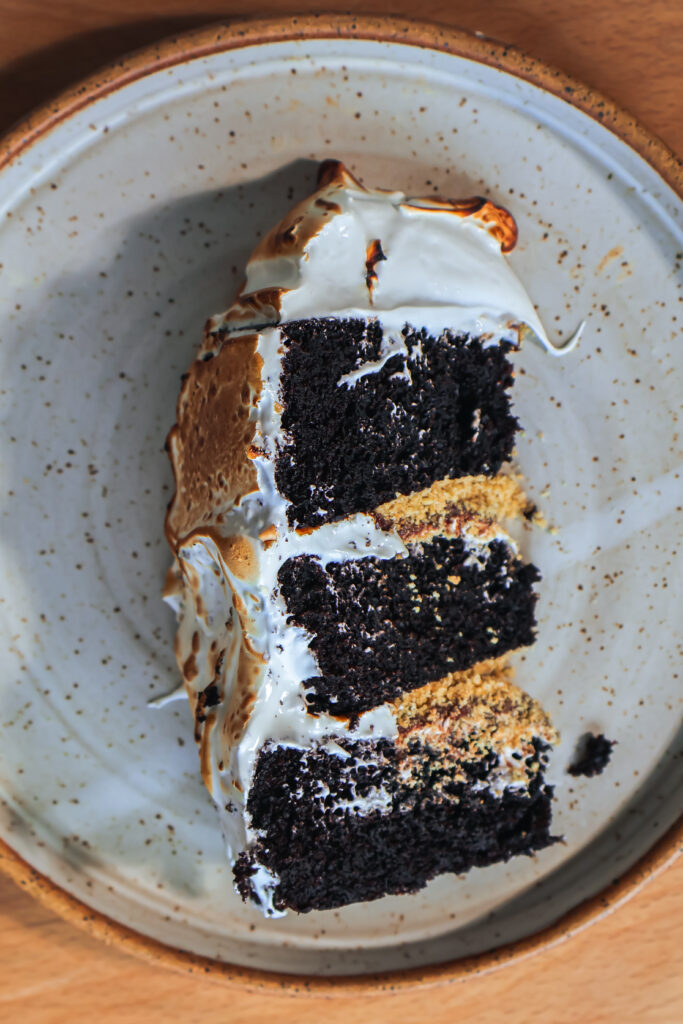
4. Assemble the S'mores Cake
Place one cooled cake layer on a cake stand. Spread marshmallow frosting over the top and sprinkle with half the graham cracker crumble. Repeat with the second layer. Top the final layer with frosting only (or frost the whole cake if doubling frosting).
For the full s'mores experience, toast the meringue with a kitchen torch just before serving.
Make It Your Own
- 🎂 Swap chocolate cake for graham-flavored vanilla layers for a twist
- 🍫 Add a layer of ganache between the cakes for extra chocolate indulgence
- 🔥 No torch? Place slices under a broiler for 1 minute to toast the meringue
- 🍰 Want cupcakes instead? This recipe makes amazing s'mores cupcakes too!
How to Store S'mores Cake
Store covered at room temperature for up to 2 days, or in the fridge for up to 5. Let sit at room temperature before serving for the best texture.
📖 Recipe
S'mores Cake
Ingredients
Instructions
- Preheat oven to 325°F. Grease and line three 6-inch cake pans (or 2 8-inch cake pans) with parchment paper.
- In a large bowl, whisk together the sugar, cocoa powder, flour, baking soda, baking powder, and salt. Create a well in the dry ingredients.
- Add the oil, vanilla, eggs, and buttermilk to the well whisking until no lumps remain. Pour in the brewed coffee, mixing until just combined.
- Divide the batter evenly between the prepared pans (about 500 g each for 6" cake pans and 750 g each for 8" cake pans) and bake until a knife inserted in the center of the cake comes out clean, 25 to 30 minutes. Cool completely on a wire rack before frosting.
- Once the cakes are cool, make the frosting.
- Place a large pot with 2-inches of water in it on the stove over medium heat and get a heatproof mixing bowl to make a double boiler. Place the egg whites and granulated sugar in the mixing bowl and place the bowl over the hot water.
- Whisk gently and cook until the mixture reaches 160°F and the sugar granules have dissolved.
- Remove the bowl from the double boiler and whisk until stiff peaks form, about 3 minutes.
- Make the graham cracker crumble. In a medium bowl combine the graham cracker crumbs, melted butter, and honey. Stir to combine.
- Assemble the cake. Place one layer of the cake on cake stand or plate. Frost the top of the cake with the marshmallow frosting and sprinkle half of the graham cracker crumble on top. Repeat with the second layer. Frost the top of the third layer. Toast the meringue before serving and enjoy!