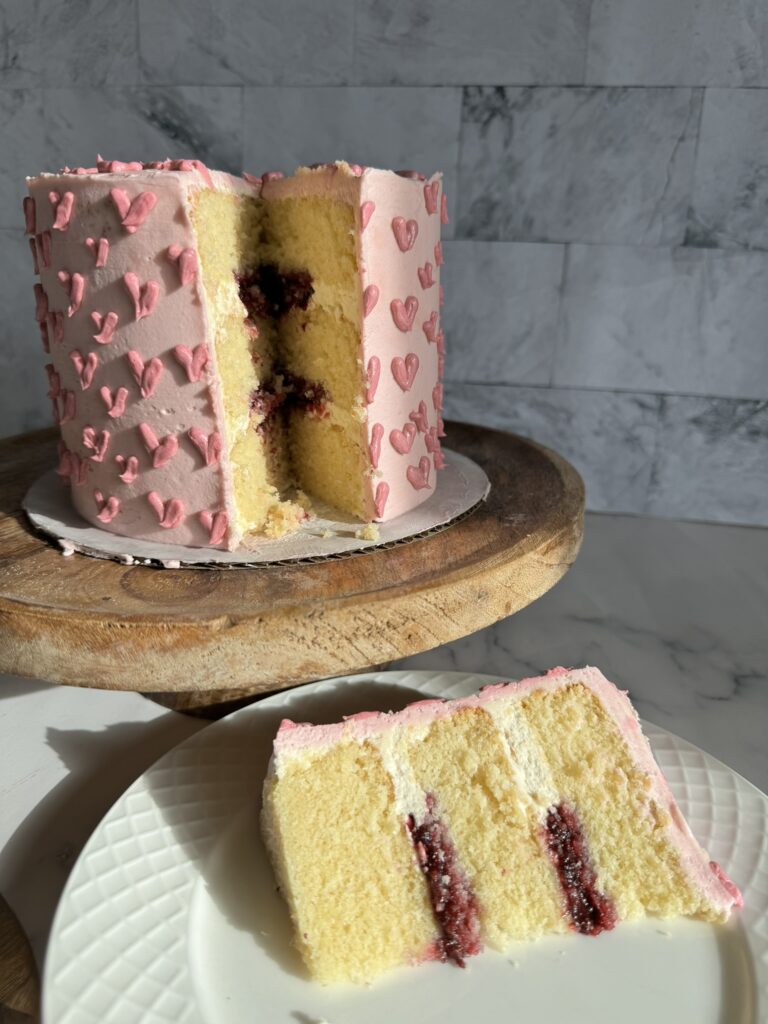
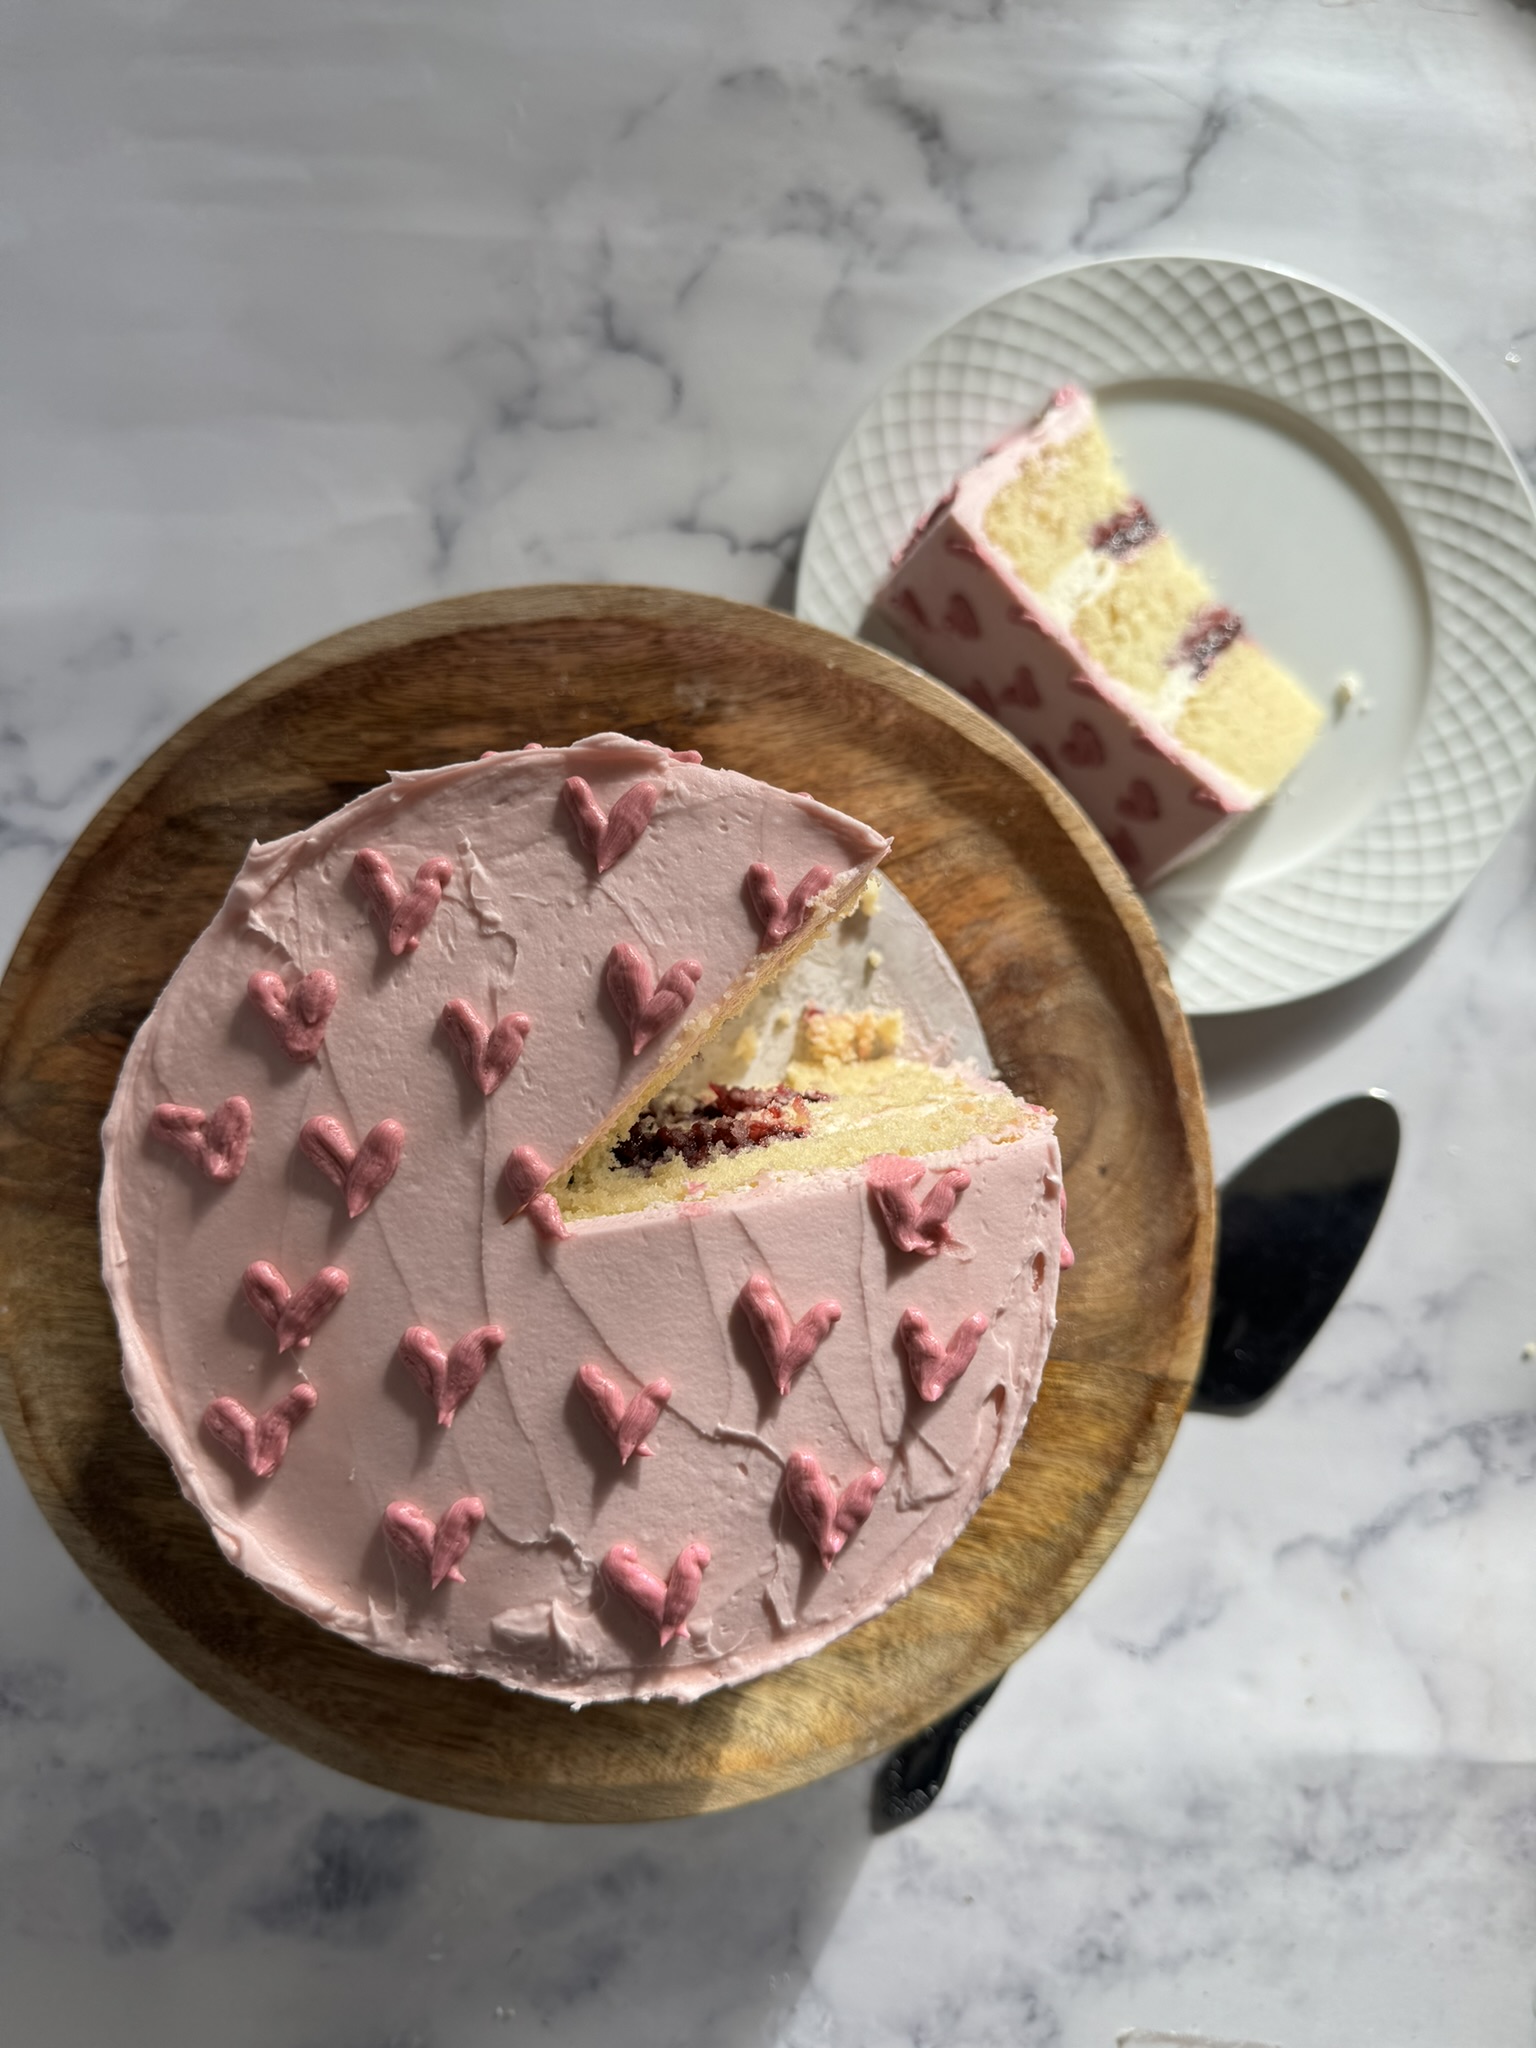
The Best Vanilla Cake with Raspberry Filling
This homemade vanilla cake is light and fluffy. Complete with a raspberry filling you will have the best vanilla cake recipe.

This post contains affiliate links. I earn a small commission when you choose to use them, which I really appreciate!
My husband LOVE this vanilla cake with raspberry filling. It was what we had for our wedding cake and really the only cake that he ever requests. If you are wanting to throw out the boxed mix, then this vanilla cake recipe will the your best friend! It is super easy to make and turns out perfect every time.
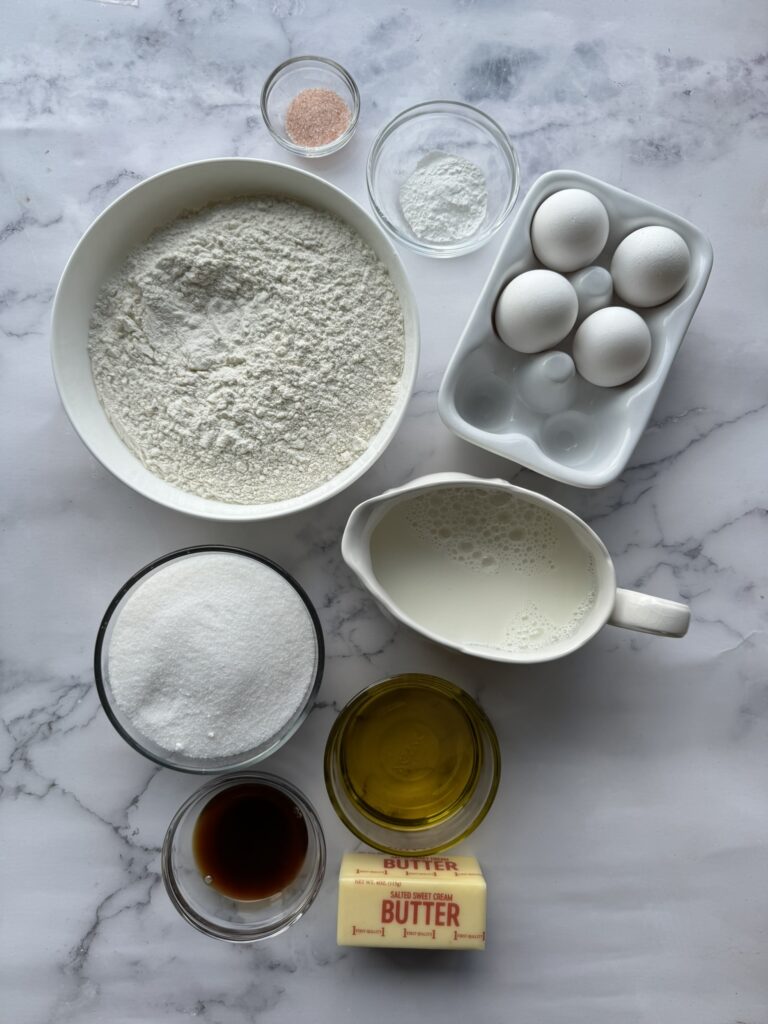
What Ingredients are In Homemade Vanilla Cake?
- Butter + Olive Oil - The combination of butter and olive oil helps to keep structure to the cake while also keeping the cake incredibly moist.
- Sugar - granulate sugar here
- Eggs - add structure to the batter and rise
- Vanilla Extract - gives the vanilla flavor to our cake. HINT: swap this for another extract for a different flavor.
- Cake Flour - keeps the cake nice and fluffy. You can also make your own cake flour by sifting together 2 ⅔ cups all purpose flour with ⅓ cup corn starch.
- Salt - adds flavor to the batter.
- Baking Powder - this is what makes the cakes rise.
- Milk - I use whole milk, but your favorite milk will work here (including oat or almond)
How to Make Homemade Cake
- Preheat the oven to 325°F and grease and flour three 6 inch cake pans or two 8 inch cake pans. Set aside.
- In a large mixing bowl combine softened butter and oil together until combined.
- Add in sugar to the oil and butter, mix on high until pale yellow and fluffy.
- Add the eggs mix to combine. Add the vanilla extract. Beat the mixture on high incorporate as much air as possible.
- In separate bowl combine cake flour, salt, and baking powder. Alternate mixing in the dry ingredients and the milk in 2 batches, starting with the buttermilk and ending with the dry ingredients. It's okay if the batter still has a few lumps in it-you don't want to over mix it.
- Split the batter evenly into the prepared pans and bake for 30 minutes or until the cake is a lightly golden brown. This will depend on your oven. Take out of the oven and transfer to a cooling rack.
What Ingredients do I use for Raspberry Filling
- Raspberries - fresh or frozen works great
- Sugar - granulated sugar to add sweetness
- Lemon Juice - the little bit of acid helps to balance everything out.
How to Make Raspberry Filling
- Add all filling ingredients to a sauce pan and cook over medium heat. Stirring frequently until reduced and thick.
- Remove from stove and allow to cool.
What Ingredients do I use for Vanilla Buttercream?
- Butter - is it buttercream without butter?
- Powdered Sugar - sifting your powdered sugar makes a HUGE difference
- Vanilla Extract - don't skimp and measure with your heart.
- Heavy Cream - I prefer to use heavy cream over milk, but you can use whole milk if you want. It is important to use room temperature here though. Adding cold milk or cream to your butter mixture will cause it to curdle.
How to Make Vanilla Buttercream
- Place the softened butter and powdered sugar in a stand mixer fitted with a whisk attachment. Beat the butter and sugar together until combined. The mixture will be thick.
- Switch to the beater attachment and add heavy cream and vanilla extract. Beat for 5 full minutes until light and fluffy.
Favorite Cake Supplies
These are a few of my favorite cake supplies to make baking and decorating your cake easier.
- Cake Pans - here are the 6 inch size and 8 inch size
- Cake Stand - here is an 11" cake turn table
- Cake Scrapers - a pack of 4 for different textures on your cake
- Off Set Spatula - three different sizes great for spreading out the icing
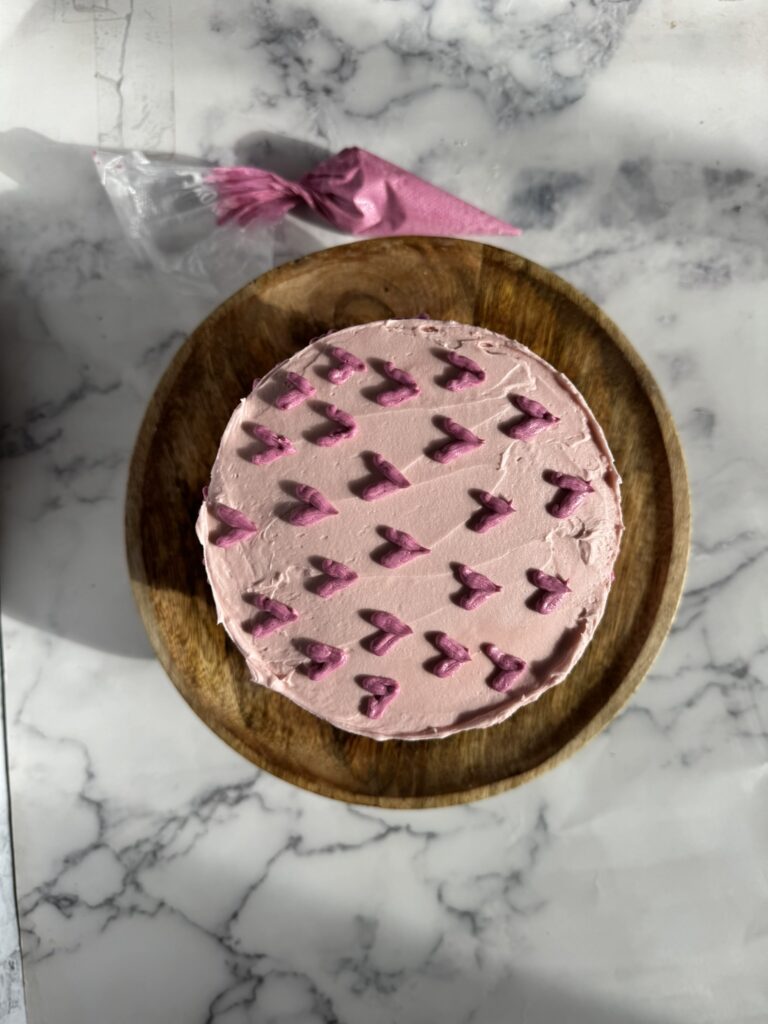
Tips for Decorating
After your cakes have cooled wrap in plastic wrap and freeze for a few hours. This helps to firm up the cakes making them MUCH easier to decorate!
Share Your Experience
I would love to hear about your experience making and enjoying my Homemade Pizza Crust! Feel free to tag me on Instagram or leave a review below. Your feedback helps me improve our recipes and provides inspiration to fellow home cooks.
Save this recipe for later by simply using the pin button on the recipe card or any of the photos above. Happy cooking!
📖 Recipe
Ingredients
Instructions
- Preheat the oven to 325°F and grease and flour three 6 inch cake pans or two 8 inch cake pans. Set aside.
- In a large mixing bowl combine softened butter and oil together until combined.
- Add in sugar to the oil and butter, mix on high until pale yellow and fluffy.
- Add the eggs mix to combine. Add the vanilla extract. Beat the mixture on high incorporate as much air as possible.
- In separate bowl combine cake flour, salt, and baking powder. Alternate mixing in the dry ingredients and the milk in 2 batches, starting with the buttermilk and ending with the dry ingredients. It's okay if the batter still has a few lumps in it-you don't want to over mix it.
- Split the batter evenly into the prepared pans and bake for 30 minutes or until the cake is a lightly golden brown. This will depend on your oven. Take out of the oven and transfer to a cooling rack.
- Add all filling ingredients to a sauce pan and cook over medium heat. Stirring frequently until reduced and thick.
- Remove from stove and allow to cool.
- Switch to the beater attachment and add heavy cream and vanilla extract. Beat for 5 full minutes until light and fluffy.


Looks cute and tasty. Confused about you mentioning mixing in buttermilk though because you say you use whole milk.
Whoops sorry about that typo! I did use whole milk in this recipe!
hi kayla, can i use buttermilk instead of whole milk
I have not tested with buttermilk.
Do you add jam to make buttercream pink?
Just food coloring.
I tried this recipe and the raspberry mixture did not thicken at all . Very soupy. I’m not sure what to do at this point.
How long did you simmer the mixture for? Raspberries have natural pectin that is activated when heated. This will naturally thicken your mixture especially as it cools.
This looks so good! What a great combination of flavors!