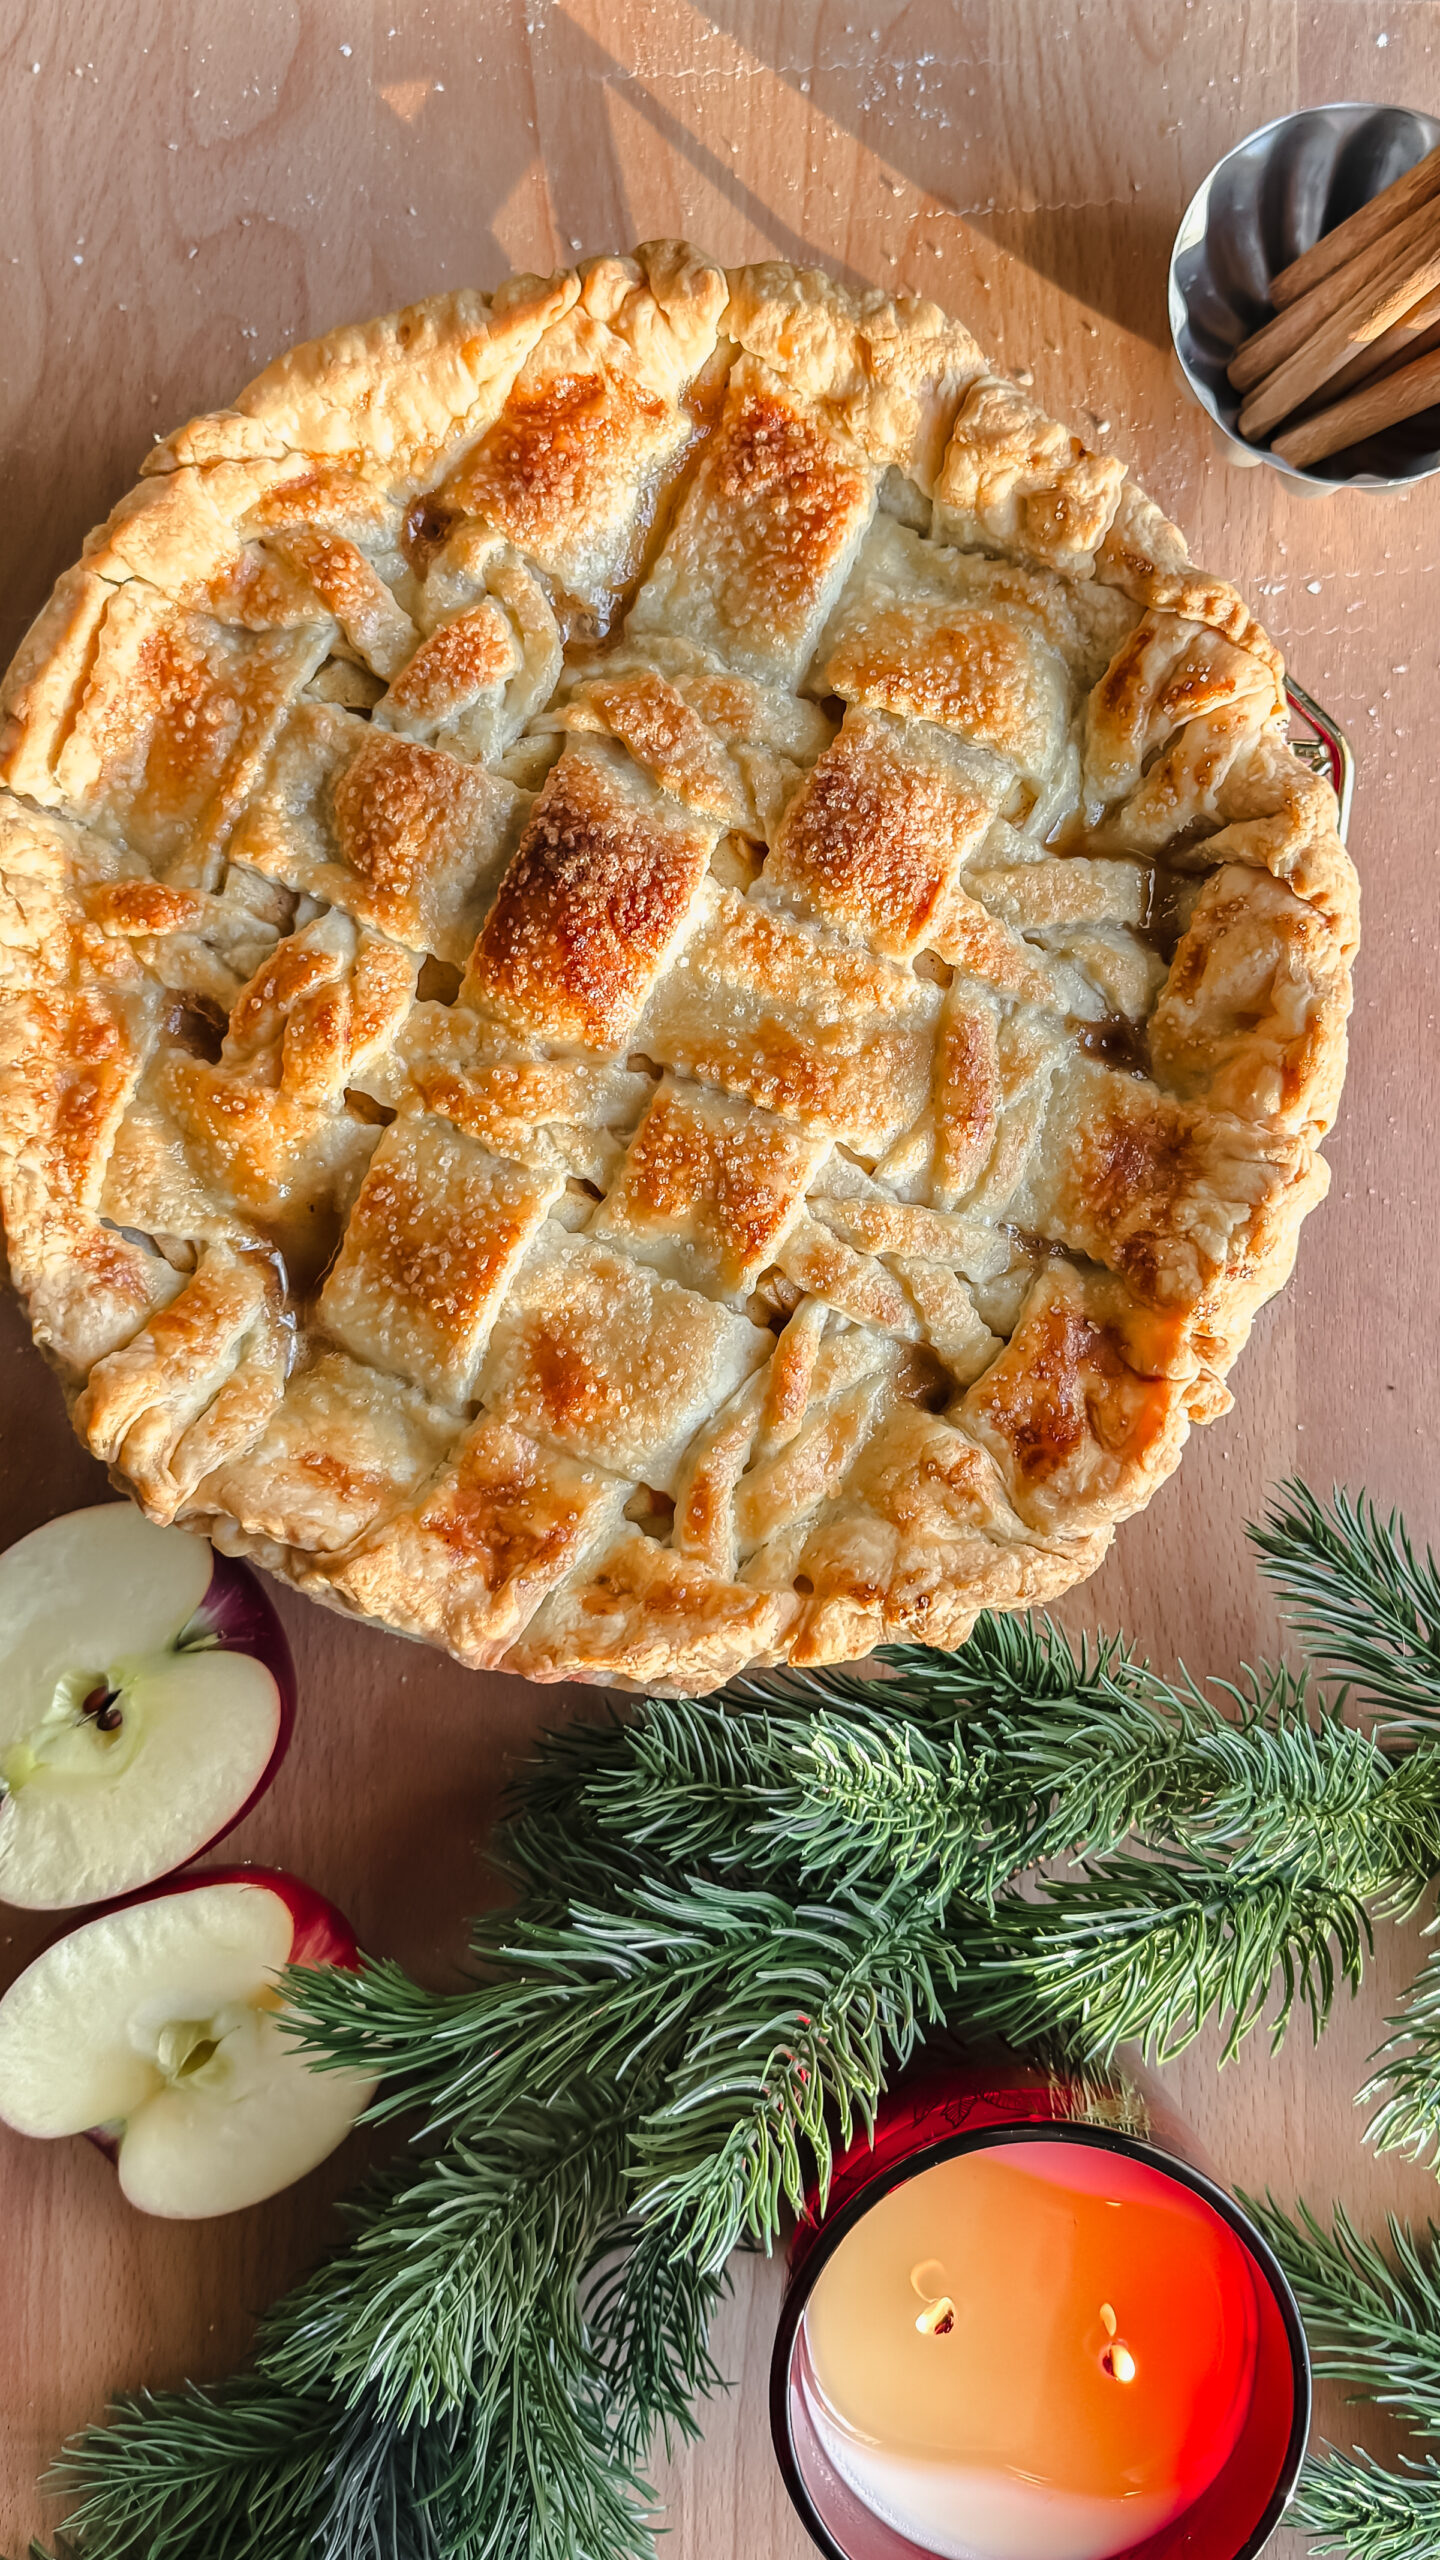
• About
  • Nav Social Icons

  • Skip to primary navigation
  • Skip to main content
  • Skip to primary sidebar
  • Skip to footer
  • Home
  • About
  • Recipes
    • Blackstone
    • Breads
    • Breakfast
    • Drinks
    • Dessert
    • Dinner
    • Sides
    • Snacks
  • Shop
  • Cart
  • My account
  • Mobile Menu Widgets

    Connect

    Search

The Farmstyle

The Farmstyle

by Kayla Zenner

  • Home
  • About
  • Shop
  • Recipes
    • Blackstone
    • Breads
    • Breakfast
    • Drinks
    • Dessert
    • Dinner
    • Snacks
    • Sides
    • All Recipes
  • Cart

Caramel Apple Pie

December 11, 2025 · In: Dessert, Recipes

FacebookTweetPin
Jump to Recipe Print Recipe

This homemade Caramel Apple Pie is a fall favorite made with tender spiced apples, gooey caramel sauce, and a flaky double pie crust. A delicious twist on classic apple pie that’s perfect for holidays, cozy mornings, and dessert tables.

There’s nothing quite like a warm slice of homemade pie, and this Caramel Apple Pie takes the best parts of a classic apple pie and elevates it with rich, buttery caramel throughout the filling. Tender cinnamon-spiced apples meet gooey caramel sauce and a flaky double crust to create a dessert that’s truly unforgettable.

Inspired by the classic apple pie you know and love, this recipe adds simple caramel goodness that melts into every bite. It bakes up beautifully with bubbling filling and a golden crust that’s perfect with a scoop of vanilla ice cream or a dollop of whipped cream on top.

Why You’ll Love This Caramel Apple Pie

  • Warm cinnamon and spiced apples with deep caramel flavor throughout
  • A flaky homemade pie crust on the top and bottom
  • A crowd-pleasing dessert that’s perfect for fall, Thanksgiving, or special occasions
  • A gorgeous centerpiece pie that smells like holiday comfort as it bakes

This caramel apple pie takes everything great about a classic apple pie and makes it even more delicious by adding gooey, buttery caramel sauce into the mix.

Ingredients

For the Pie Filling

  • Apples: Choose crisp apples like Honeycrisp, Granny Smith, or Pink Lady — they hold their shape and have a balanced sweet-tart flavor.
  • Brown Sugar: Sweetens the apples and helps create a rich caramel-like sauce when it cooks down.
  • All-Purpose Flour: Helps thicken the juice released by the apples so your filling isn’t runny.
  • Cinnamon & Nutmeg: Classic warm spices that pair perfectly with apples.
  • Lemon Juice: Brightens the flavor and prevents the apples from browning.
  • Caramel Sauce: Adds deep, buttery sweetness. You can use homemade caramel (combine butter, brown sugar, cream, and vanilla) or a good-quality store-bought version.

For the Pie Crust

  • All-Purpose Flour: The foundation of the flakiest crust.
  • Cold Butter: Ensures a tender, flaky crust — a must for both top and bottom.
  • Salt: Enhances all the other flavors.
  • Ice-Cold Water: Helps bring the dough together without melting the butter.

Easy Caramel Apple Pie Recipe

Instructions

1. Preheat the Oven

Preheat your oven to 400°F.

2. Prepare the Pie Crust

  1. In a large bowl, combine pie crust flour and salt.
  2. Add cold, cubed butter and work into the flour with a pastry cutter or two knives until the mixture looks like coarse crumbs.
  3. Slowly add ice-cold water, 1 tablespoon at a time, until the dough just starts to come together.
  4. Divide dough in half, wrap, and chill while you make the filling.

3. Make the Caramel Apple Filling

  1. Core and slice your apples into a large bowl (peeling is optional).
  2. Add brown sugar, flour, cinnamon, nutmeg, lemon juice, and caramel sauce. Toss to combine.
  3. Let the caramel and spices coat the apples evenly.

4. Assemble the Pie

  1. Roll out one half of the chilled pie dough and fit it into a 9-inch pie pan.
  2. Pour the caramel apple filling into the crust.
  3. Roll out the second half of dough and place it over the filling. You can do a full top, a lattice, or any decorative style you prefer.
  4. Seal the edges and trim any excess dough.

5. Egg Wash (Optional)

In a small bowl, whisk an egg with a little water. Brush over the top crust to help it bake up golden brown.

6. Bake the Pie

Place the pie in the oven and bake for 45–50 minutes. If the crust starts to brown too quickly, tent it with aluminum foil.

7. Cool Before Serving

Let the pie cool before slicing. This allows the caramel-apple filling to thicken slightly so it isn’t too runny when you cut into it.

Tips for the Best Caramel Apple Pie

  • Mix apple varieties like Honeycrisp and Granny Smith for a balance of sweet and tart flavor.
  • If using store-bought caramel, choose a thick caramel sauce so it doesn’t dilute the filling.
  • Add a pinch of salt to your caramel for a salted caramel apple pie twist.
  • Let the pie cool for at least an hour before slicing to help the filling set.

Serving Suggestions

This caramel apple pie is delicious on its own, but even better with:

  • A scoop of vanilla ice cream
  • Homemade whipped cream
  • A drizzle of extra caramel sauce
  • A sprinkle of flaky sea salt for contrast

Closing Thoughts

This Caramel Apple Pie is everything cozy baking should be, rich, sweet, and full of warm spices. It’s a perfect addition to fall menus, holiday dinners, or anytime you want a dessert that brings a smile. If you try this recipe, let me know how it turned out! Leave a comment below and don’t forget to follow me on Instagram for more delicious, seasonal recipes you’ll love.

Caramel Apple Pie

No ratings yet

This homemade Caramel Apple Pie is a fall favorite made with tender spiced apples, gooey caramel sauce, and a flaky double pie crust. A delicious twist on classic apple pie that’s perfect for holidays, cozy mornings, and dessert tables.

Print Recipe Pin Recipe
Prep Time:20 minutes mins
Cook Time:45 minutes mins
Course: Dessert
Keyword: apple, pie
Servings: 8 people

Ingredients

  • 3 pounds apples I love using honey crisp
  • 1/2 cup caramel syrup
  • 1 cup brown sugar
  • 1 teaspoons vanilla extract
  • 1 tbsp lemon juice
  • ⅓ cup all-purpose flour
  • 1 teaspoon salt
  • 2 teaspoons ground cinnamon
  • 1 teaspoon ground nutmeg
  • ½ teaspoon allspice
  • 1 pie crust
  • 1 egg

Instructions

  • Preheat oven to 400.
  • Core and slice apples and place into a large bowl. You may also peel if you prefer that.
  • Add in brown sugar, flour, vanilla extract, lemon juice, caramel sauce, salt and spices. Mix to combine.
  • Roll out pie crust and place first half into your pie dish.
  • Pour apple mixture into prepared pie pan.
  • Top apple mixture with the second half of the rolled out dough.
  • In a small bowl combine egg and 1 tbsp water. Brush the egg wash mixture on top of the pie crust. This helps to give a nice golden brown color to your pie.
  • Bake for 45-50 minutes. If your crust starts to get too brown cover with tin foil to stop the browning process.
  • Allow to cool before slicing as this allows all the extra juices to thicken. But to be honest we never can resist cutting into a warm apple pie.

Share this:

  • Share on X (Opens in new window) X
  • Share on Facebook (Opens in new window) Facebook
  • Share on Pinterest (Opens in new window) Pinterest

Like this:

Like Loading...
FacebookTweetPin

By: Kayla · In: Dessert, Recipes

About Kayla

Hi! I'm Kayla. I'm here to help inspire busy moms to get back in the kitchen and feel beautiful along the way! I'm married to my high school sweetheart and live on a farm with our two busy boys.

you’ll also love

Soft Dinner Rolls Recipe
Viral Watermelon Salad with Feta, Cucumber, and Mint
Easy Air Fryer Ranch Potatoes

Reader Interactions

Leave a ReplyCancel reply

Next Post >

Individual Chicken Pot Pies

Primary Sidebar

Meet Kayla

Meet Kayla
hello!

LIVING OURFARM(LIFE)STYLE WHERE WE ​JUGGLE THE CHAOS OF MOTHERHOOD ONE ​KITCHEN ADVENTURE AT A TIME!

Read More

Connect

join the list

Categories

  • Blog
  • Recipes

Follow Along

@thefarmstyle


100,000 of you. I’m honestly still trying to wrap
100,000 of you. I’m honestly still trying to wrap my head around that.

What started as me just sharing what I was making for my family, little moments, and pieces of my life has turned into this incredible community, and that’s because of YOU. 

The comments, the messages, the times you’ve made my recipes in your own kitchens… it all means more than I can put into words.

Thank you for being here, for supporting me, and for growing alongside me. I don’t take a single one of you for granted.

We’re just getting started 🤍


Comment GARDEN and I’ll send you all the details t
Comment GARDEN and I’ll send you all the details to your inbox. 

The best thing about these garden beds is that they can be made to any dimension that you want! I created four 4x8 beds, two 3x8 beds, and two 2x3 beds using the exact same method each time!

Materials (for ONE 4x8 bed)
* (4) 2x8 boards, cut to 8 ft long
* (4) 2x8 boards, cut to 4 ft long 
* (24) 3” exterior wood screws 
* (4) 2x4 boards, cut to 14” long

Instructions
1. Cut Your Boards (if needed)
Cut your boards to length before assembling. We had (4) 12’ boards, we cut into an 8’ board and 4’ board. However, you can also buy (6) 8’ boards and then cut 2 of them in half. 

2. Drill Pilot Holes (optional)
On each 8’ board measure ¾” in from each end and Drill 2 pilot holes per end, spaced about 2–3” from the top and bottom
This helps prevent the wood from splitting when you add screws.

3. Build the First Layer (Bottom Frame)
Lay out:
 * (2) 8 ft boards (long sides)
 * (2) 4 ft boards (short sides)
Form a rectangle with the short boards sitting inside the long boards. Then attach the boards using 3” screws into the pilot holes you created in the previous step. 

4. Stack the Second Layer
Repeat process by placing the second set of boards directly on top of the first frame, lining up edges carefully

5. Add Corner Supports 
Place the 2x4 board inside each corner
These should sit flush with the bottom and sit an inch below the top. 
Screw through the outside boards into the 2x4 board once in the top 2x8 board and once in the bottom 2x8 board. 

 Pro Tips
Use untreated cedar for best longevity, however I used fir for a more cost effective version. These may only last me 5 years, BUT the cost of cedar deterred me from going that route. 

Avoid pressure-treated wood unless it’s labeled safe for gardens

Use a garden safe stain on the interior before filling to help with board longevity.


Comment SALAD for all the recipe details.

Spring
Comment SALAD for all the recipe details. 

Spring salads > everything else right now 🥗🌸

Fresh, colorful, and actually satisfying… these are the kind of salads you crave (not just eat because you feel like you should).

Save this for your weekly menu + tell me which one you’re making first.

Strawberry Balsamic Salad
Blueberry Summer Salad
Streak Harvest Salad
Citrus Kale Salad
Summer Fruit Salad
Greek Pasta Salad
Rainbow Pasta Salad


Comment SMOOTHIE for all the recipe details.

Thi
Comment SMOOTHIE for all the recipe details. 

This Blackberry Coconut Smoothie is creamy, refreshing, and dairy-free, made with coconut milk, frozen blackberries, and coconut yogurt. A quick and easy smoothie recipe ready in just 5 minutes.


Comment RECIPE for all the details!

These cheese
Comment RECIPE for all the details! 

These cheesesteak quesadillas scored ⭐️⭐️⭐️⭐️⭐️ from my kids! BONUS: they are so easy to make on the @blackstoneproducts griddle.


Help me restore my @blackstoneproducts griddle aft
Help me restore my @blackstoneproducts griddle after being a tiny bit neglectful the past few months. 
#blackstonegriddle #griddlenation


Footer

On the Blog

  • Blog
  • Recipes

Info

  • About
  • Disclosure, Privacy Policy, and Terms

Copyright © 2026 · Theme by 17th Avenue

%d

    Rate This Recipe

    Your vote:


    A rating is required
    A name is required
    An email is required
    We use cookies to ensure that we give you the best experience on our website. If you continue to use this site we will assume that you are happy with it.