• About
  • Nav Social Icons

  • Skip to primary navigation
  • Skip to main content
  • Skip to primary sidebar
  • Skip to footer
  • Home
  • About
  • Blog
    • Mom Life
    • Farm Life
    • Recipes
      • Breakfast
      • Dessert
      • Dinner
      • Sides
      • Snacks
  • Shop
    • Shop – Digital Books
  • Cart
  • My account
  • Mobile Menu Widgets

    Connect

    Search

The Farmstyle

The Farmstyle

by Kayla Zenner

  • Home
  • About
  • Shop
    • Shop – Meal Plans
    • Shop My Favorites
  • Blog
    • Breakfast
    • Dessert
    • Dinner
    • Snacks
    • Sides
    • All Recipes
  • Cart

Easy Shrimp Spring Rolls | 15 Minute Recipe

January 22, 2025 · In: Dinner, Lunch, Recipes, Sides

FacebookTweetPin
Jump to Recipe Print Recipe

Shrimp Spring Rolls are filled with fluffy rice, crisp vegetables, and shrimp for the perfect snack or appetizer made in less than 5 minutes. 

Easy Shrimp Spring Rolls | 15 Minute Recipe

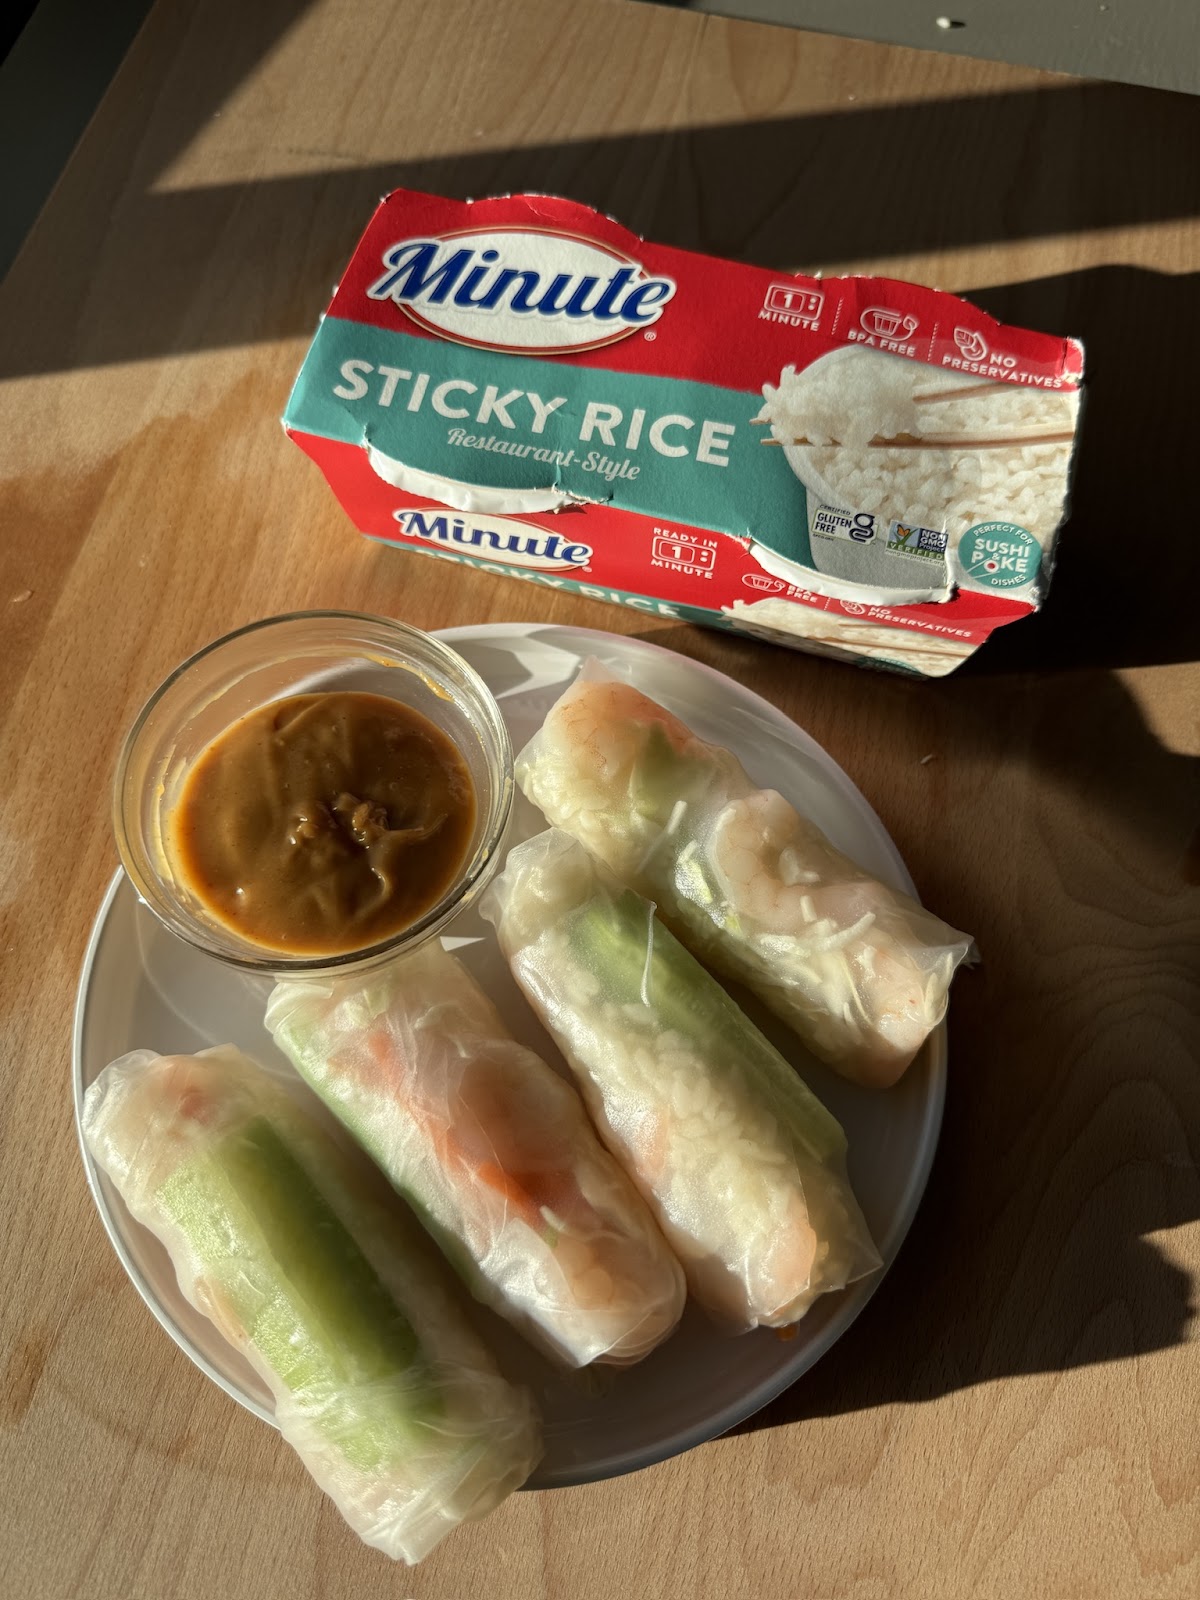
This post is sponsored by Minute Rice. 

I’m always on the hunt for a simple lunch/snack that I can throw together in less than 15 minutes. Thanks to the Minute Rice Cups I keep stocked in my pantry, I can simply heat in the microwave for 60 seconds and then assemble these fresh spring rolls. We love Minute Rice Cups because they are Non-GMO, Gluten-Free, No Preservatives, MSG-Free, Cholesterol-Free and are ready whenever I need them. 

Why You’ll Love This Recipe

  • Fun to make: Assembling your own spring rolls is an enjoyable hands-on activity the whole family will love. 
  • Versatile: Customize the filling with your favorite ingredients, add more of one ingredient, swap for another, or leave one out.
  • Great for entertaining: These fresh spring rolls make an excellent appetizer or snack, and they’re sure to impress your guests with their vibrant colors and flavors.
  • Good For You: Packed with nutrient-dense ingredients, lots of fresh veggies, these shrimp spring rolls are a great choice that doesn’t skimp on flavor.
Easy Shrimp Spring Rolls | 15 Minute Recipe

Ingredients you will need: 

  • Rice: I used the Minute Sticky Rice Cups. 
  • Shrimp: I used precooked shrimp to speed up the process. 
  • Shredded Cabbage: Thinly sliced yourself, or purchase angel hair at the store
  • Shredded Carrots: I purchased pre-shredded from the store.  
  • Cucumbers: for a refreshing crunch
  • Rice Paper Wrappers: translucent rice paper wrappers, also known as spring roll wrappers are the key to forming your spring rolls.

How to Make Shrimp Spring Rolls

  • Prepare one Minute Sticky Rice Cup according to package instructions. 
  • Add warm water to a shallow dish large enough for the rice paper wrappers, I used a pie pan! Dip rice paper wrappers in warm water until it softens slightly, about 15-20 seconds. Don’t let papers sit in water too long otherwise they’ll become too soft and floppy and tear as you roll.
  • Place wrapper on a hard surface, like a plate. Add rice, carrots, cucumber, cabbage, and shrimp.
  • Roll wrapper from left to right, folding in the top and the bottom sides of the wrapper toward the middle (like an envelope) about halfway through wrapping.
  • Complete steps 1 to 4 for each wrapper. 
Easy Shrimp Spring Rolls | 15 Minute Recipe

Tips For Success

  • Don’t overfill the rolls: Resist the temptation to stuff your shrimp spring rolls with too much filling, as this can make them difficult to roll and may cause them to tear.
  • Keep the filling ingredients dry: Make sure your filling ingredients are relatively dry to prevent the rice paper from becoming too soggy. You can always use a paper towel to pat dry your veggies after rinsing them.
  • Work quickly: Rice papers can dry out and become less pliable as you work with them, so it’s essential to work quickly when assembling your spring rolls.
  • Wet your hands: Dampening your hands slightly can help prevent the rice paper from sticking to your fingers while assembling the rolls.
  • Make ahead: If you’re preparing these spring rolls for a party or event, you can make them a few hours ahead and store them in the refrigerator, covered with a damp cloth to prevent them from drying out.
Easy Shrimp Spring Rolls | 15 Minute Recipe

How to Store Leftover Spring Rolls

  • To store leftover shrimp spring rolls, wrap them individually in plastic wrap or place them in an airtight container with a sheet of parchment paper between each roll to prevent them from sticking together. Store them in the refrigerator for 2-3 days.
  • It’s important to note that spring rolls are best enjoyed fresh, as the rice paper wrappers can become chewy and less enjoyable after refrigeration. If possible, make and enjoy them on the same day for the best texture and flavor.

Easy Shrimp Spring Rolls

Shrimp Spring Rolls are filled with fluffy rice, crisp vegetables, and shrimp for the perfect snack or appetizer made in less than 5 minutes. 
No ratings yet
Print Recipe Add to Collection Go to Collections
Cook Time 15 minutes mins
Course Appetizer, Main Course
Servings 4 rolls
Calories 267 kcal

Ingredients
  

  • 1 Minute Rice Sticky Rice Cup
  • 4 Rice Paper Wrappers
  • 12 precooked shrimp
  • 1 cucumber cut into matchstick slices
  • ½ cup matchstick carrots
  • ½ cup shredded cabbage

Instructions
 

  • Prepare one Minute Sticky Rice Cup according to package instructions.
  • Add warm water to a shallow dish large enough for the rice paper wrappers, I used a pie pan! Dip rice paper wrappers in warm water until it softens slightly, about 15-20 seconds. Don’t let papers sit in water too long otherwise they’ll become too soft and floppy and tear as you roll.
  • Place wrapper on a hard surface, like a plate. Add rice, carrots, cucumber, cabbage, and shrimp.
  • Roll wrapper from left to right, folding in the top and the bottom sides of the wrapper toward the middle (like an envelope) about halfway through wrapping.
  • Complete steps 1 to 4 for each wrapper.

Nutrition

Calories: 267kcalCarbohydrates: 52gProtein: 12gFat: 1gSaturated Fat: 0.2gPolyunsaturated Fat: 0.3gMonounsaturated Fat: 0.2gCholesterol: 50mgSodium: 161mgPotassium: 316mgFiber: 2gSugar: 2gVitamin A: 2738IUVitamin C: 7mgCalcium: 60mgIron: 1mg
Tried this recipe?Let us know how it was!

Share this:

  • Click to share on X (Opens in new window) X
  • Click to share on Facebook (Opens in new window) Facebook
  • Click to share on Pinterest (Opens in new window) Pinterest

Like this:

Like Loading...

Related

FacebookTweetPin

By: Kayla · In: Dinner, Lunch, Recipes, Sides

About Kayla

Hi! I'm Kayla. I'm here to help inspire busy moms to get back in the kitchen and feel beautiful along the way! I'm married to my high school sweetheart and live on a farm with our two busy boys.

you’ll also love

Steak Harvest Salad with Homemade Balsamic Vinaigrette
Creamy Chicken, Bacon and Corn Pasta
Air Fryer Cinnamon Sugar Pumpkin Donut Bites

Top Posts & Pages

Chicken Bacon Ranch Skillet on the Blackstone
Easy Sheet Pan Kielbasa and Tortellini Dinner
Soft and Fluffy Sandwich Bread

Join the List

Stay up to date & receive the latest posts in your inbox.

Reader Interactions

Leave a ReplyCancel reply

Next Post >

Double Chocolate English Muffins

Primary Sidebar

Meet Kayla

Meet Kayla
hello!

LIVING OURFARM(LIFE)STYLE WHERE WE ​JUGGLE THE CHAOS OF MOTHERHOOD ONE ​KITCHEN ADVENTURE AT A TIME!

Read More

Connect

join the list

Categories

  • Blog
  • Recipes

Follow Along

@thefarmstyle


Homemade butter is one of the easiest things you c
Homemade butter is one of the easiest things you can make at home! It requires one simple ingredient and can be done in a few minutes!

Comment BUTTER for all the details sent straight to your inbox. 

INGREDIENTS 
2 cups heavy cream 
1/2 tsp salt optional

INSTRUCTIONS
Add heavy cream to the bowl of a stand mixer with the whisk attachment.

Gradually increase the speed of the mixer to high and whip until the butter and buttermilk separate. This timing depends on several different factors, but typically when I’m making butter it takes about 15-20 minutes.

You should start to notice your cream has turned into fluffy whipped cream around the 5 minute mark. At this point I will stop the mixer every 5 minutes or so to scrape down the sides of the bowl to make sure that everything gets incorporated.

Once it looks like the cream is starting to break I will place a towel over my stand mixer. As soon as the butter and buttermilk separate the liquid will splash and you will make a mess of the kitchen.

Remove the butter from the liquid (Do not throw the liquid out, this is buttermilk and can be used in other recipes). Gently press the butter between your hands until you get most of the liquid out. Removing all the excess buttermilk will help your butter stay fresher longer.

Once you have pressed as much of the buttermilk out as possible rinse in ice water.

If you want to have salted butter this is where you add it.

Now you have fresh made butter!


This chicken bacon ranch pasta is the ultimate com
This chicken bacon ranch pasta is the ultimate comfort food with a homemade alfredo seasoned with ranch seasoning and topped off with crispy bacon, you cannot get any better.

Comment RANCH for all the details to your inbox. 

INGREDIENTS
2 chicken breasts
1/2 tsp salt
1/2 tsp garlic powder
1/2 tsp onion powder
1/2 tsp parika
1/2 lb bacon
1/2 cup butter
1 and 1/2 cups heavy cream
4 cloves garlic minced
2 cups parmesan cheese freshly grated
2 tbsp dry ranch seasoning
2 cup pasta

INSTRUCTIONS
In a large pot boil salted water and cook pasta according to package. Drain and set aside for later, reserving 1/2 cup of pasta water for later.

In a large skillet over medium heat cook bacon until crispy. Remove from pan and drain grease. Chop bacon into smaller pieces.

Slice chicken or cube chicken into small pieces and season with salt, garlic powder, onion powder, and paprika. Add to pan that you cooked the bacon in. Cooking until the chicken has reached an internal temperature of at least 165.

Remove chicken from the pan and add butter and heavy cream. Simmer over low for 2-3 minutes.

Whisk in garlic and ranch seasoning. Then add in shredded parmesan cheese. Whisking until fully melted. Add in pasta water a few tablespoons at a time if the sauce seems too thick.

Add in cooked pasta, chicken, and bacon. Serve immediately.

#weeknightdinner #weeknightmeals #weeknightdinners #chickenbacon


This super easy sheet pan lasagna is stacked full
This super easy sheet pan lasagna is stacked full of all the lasagna flavors without needing cook the noodles and hassle with layering!

Comment LASAGNA for all the details to your inbox. 

INGREDIENTS
1 lb ground Italian sausage
1 lb ground beef
28 oz marinara
1 & 1/2 cup ricotta cheese
2 tsp italian seasoning
1 tsp garlic powder
1 tsp onion powder
1 egg
2 cups mozzarella cheese shredded
1 cup parmesan cheese shredded

INSTRUCTIONS
Preheat oven to 350.

In a large skillet brown ground beef and Italian sausage until no longer pink. Add in jar of marinara.

In a small bowl combine ricotta, egg, 1/2 cup mozzarella cheese, garlic powder, onion powder, and Italian seasoning. Mix to combine.

Add half of the meat mixture to a large sheet pan (I used a half sheet pan), then break up the noodles into bite size pieces and layer on top of meat mixture.

Add remaining meat mixture and spread evenly over noodles. Since we did not precook the noodles, you will want to ensure that all of the noodles are covered in the sauce.

Sprinkle with remaining mozzarella and parmesan cheese, then dollop ricotta mixture on top.

Bake for 20-30 minutes until cheese is melted and noodles are fully cooked.

OPTIONAL: Broil the mixture for the last 2-3 minutes to crisp up the top.


#ad | This Strawberry No Bake Cheesecake is super
#ad | This Strawberry No Bake Cheesecake is super easy to create using the @zwilling_usa XTEND Cordless System. One battery works across the entire suite, allowing you to navigate the kitchen without the need for an outlet. This is the product you didn’t know you needed.
 
Comment CHEESECAKE for all the details straight to your inbox. 

INGREDIENTS
16 oz cream cheese
1/2 cup granulated sugar
1 cup heavy cream
1 tsp vanilla extract
1 cup strawberries
12 sheets graham crackers
1/2 cup melted butter

INSTRUCTIONS
In a large bowl add cream cheese and sugar. Mix with the Zwilling XTEND Cordless Hand Mixer until light and fluffy. Set aside. 

In another bowl add heavy cream and whip until stiff peaks form using the Zwilling Xtend Hand Blender with the whisk attachment. Set aside. 

Using the Zwilling XTEND Cordless Hand Blender blend strawberries until smooth. 

Add whipped cream and half of the strawberry puree to the cream cheese mixture. Mix to combine.

Using the mini chopper attachment of the Zwilling XTEND Cordless Hand Blender add graham cracker sheets and pulse until fine crumbs form. Add in melted butter and pulse until well combined.

Add the graham cracker mixture to an 10” springform pan and gently press into the springform pan.

Top graham crackers with cream cheese mixture, then drizzle remaining strawberry puree.

Serve immediately for a softer texture or cool in refrigerator for a few hours to set.
 
#zwilling1731 #xtend


I’ve been working all week to get my kitchen gar
I’ve been working all week to get my kitchen garden in and absolutely cannot wait for it to turn into my little piece of summer paradise. 

This year I’m growing peppers, cucumbers, tomatoes, carrots, radishes, zucchini, pumpkins, all the herbs, and flowers galore! Anything else I’m missing?


Homemade brioche bread is our absolute favorite. I
Homemade brioche bread is our absolute favorite. It’s super easy to make and the extra step of letting the dough rise in the refrigerator is really worth the flavor pay off. 

Comment BRIOCHE for all the details to your inbox. 

INGREDIENTS
2 1/4 tsp active dry yeast
¼ cup milk lukewarm
2 tbsp sugar
3 eggs
2.5 cups all-purpose flour
1 tsp salt
½ cup butter chilled and cut into small cubes

INSTRUCTIONS
Mix the yeast, lukewarm milk, and sugar, and let it sit for 5 minutes until foaming.
In the bowl of a stand mixer add flour, salt, and eggs. Once the yeast mixture is foamy add to the flour mixture as well. Mix to combine using the dough hook on the stand mixer.
Add the butter in pieces and knead for another 15 minutes at speed level 2 (your dough should be sticky but comes easily from the bowl using a silicone spatula).
Place the dough in a greased bowl, cover with a damp tea towel, and let it rise at room temperature for one hour. Refrigerate for 4-16 hours. This is what makes your brioche soft & airy.
Take the dough out of the fridge, place on a lightly floured surface, divide into six pieces. Gently form each piece into a small roll and place to fill a 9x5 loaf pan. Let rise at room temperature for another 1.5-2 hours
Preheat the oven to 400 F. Bake for 30-35 minutes until brown. Allow the brioche to cool down on a cooling rack before slicing.


Footer

On the Blog

  • Blog
  • Recipes

Info

  • About
  • Disclosure, Privacy Policy, and Terms

Copyright © 2025 · Theme by 17th Avenue

%d

    Rate This Recipe

    Your vote:


    A rating is required
    A name is required
    An email is required
    We use cookies to ensure that we give you the best experience on our website. If you continue to use this site we will assume that you are happy with it.Ok