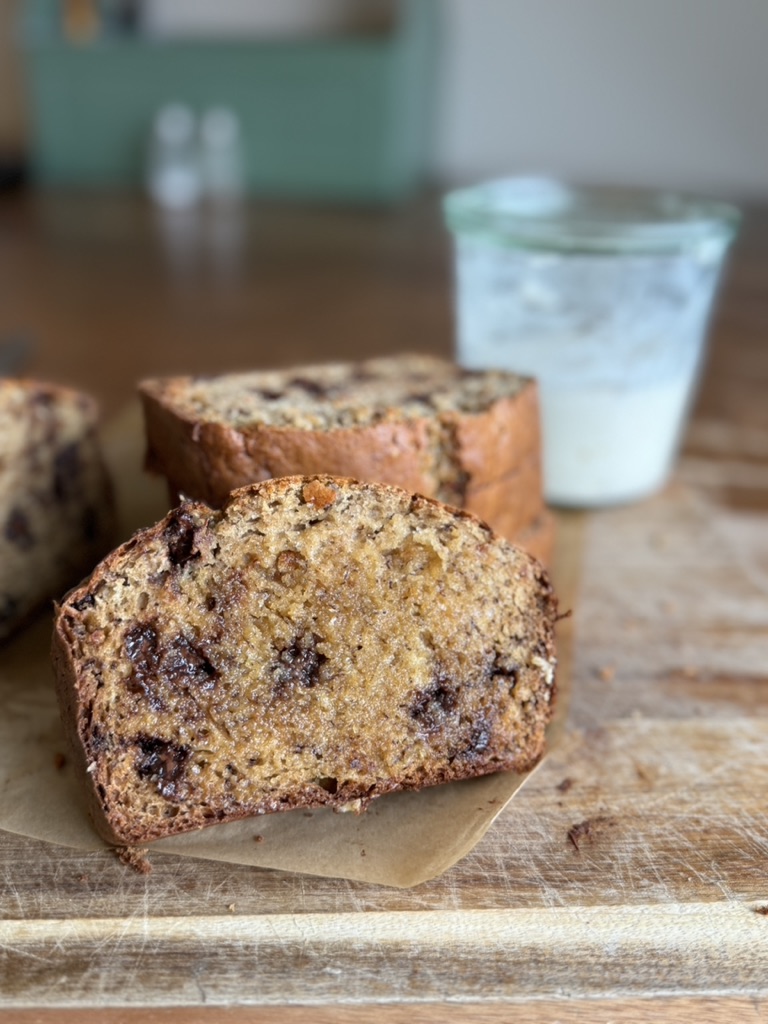
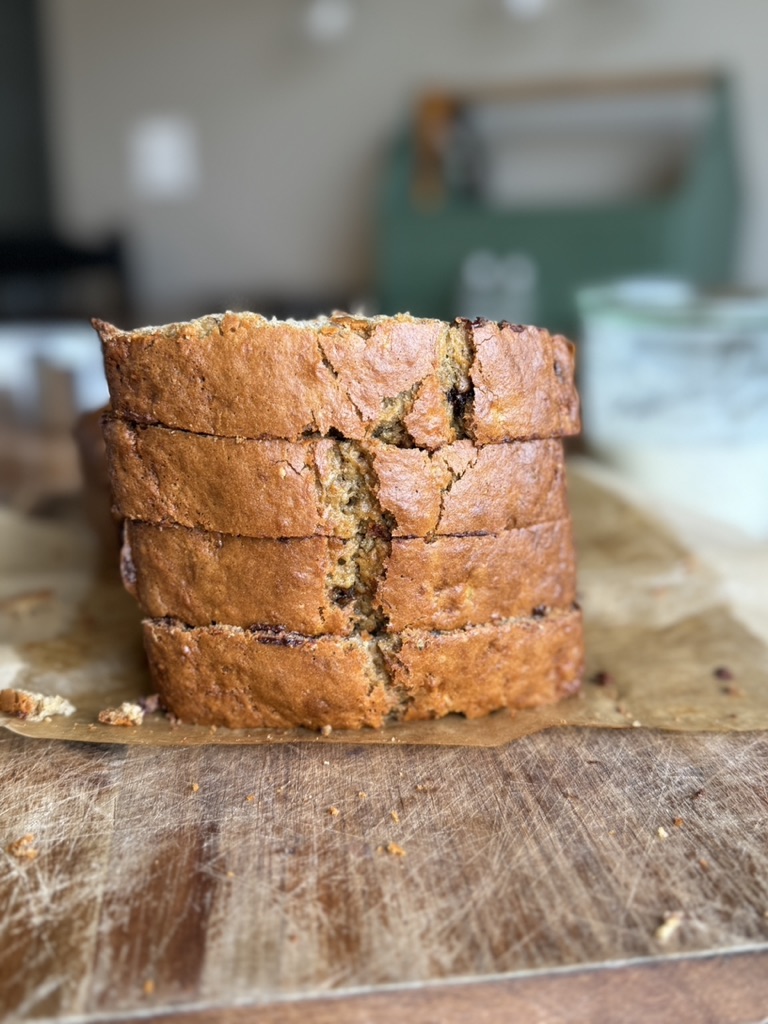
Sourdough Discard Banana Bread with Chocolate Chips
This sourdough banana bread with chocolate chips is one of our favorite ways to use up sourdough discard! It's soft, fluffy and has a slight sourdough tang! Bonus it comes together in a single bowl.
Sourdough discard recipes are one of my favorites to create and this Sourdough Discard Banana Bread is definitely one for the books! If you don't already have an established sourdough starter you can find my step by step instructions to help you get started and my beginner friendly artisan style loaf if you are ready to make regular bread.

Ingredients
- Banana - ripe banana are best to bring the flavor through
- Sugar - regular granulated sugar works, but I have also made this with maple sugar!
- Eggs
- Sourdough Discard - unfed flat starter, this recipe works well with fed starter as well.
- Butter - salted or unsalted both work
- Flour - all purposed flour is best
- Baking Soda and Baking Powder
- Cinnamon
- Salt
- Chocolate Chips - this would be great with chocolate chunks also!
How to Make the Best Sourdough Discard Banana Bread
- Preheat oven to 350F.
- Mash bananas in a large bowl. Add sugar, eggs, melted butter and discard. Stir to combine.
- Add in all dry ingredients and mix to combine. Fold in chocolate chips.
- Pour batter into greased or parchment lined loaf pan. Bake for 1 hour or until toothpick comes out clean.
If you make this recipe, please leave a star rating at the bottom of the page! This provides helpful feedback to both me and other readers. And if you want more delicious, scratch-made recipes you can subscribe to my newsletter and follow along on Instagram, Pinterest, and Facebook!
📖 Recipe
Sourdough Discard Banana Bread with Chocolate Chips
This sourdough banana bread with chocolate chips is one of our favorite ways to use up sourdough discard! It's soft, fluffy and has a slight sourdough tang! Bonus it comes together in a single bowl.
Ingredients
Instructions
- Preheat oven to 350F.
- Mash bananas in a large bowl. Add sugar, eggs, melted butter and discard. Stir to combine.
- Add in all dry ingredients and mix to combine. Fold in chocolate chips.
- Pour batter into greased or parchment lined loaf pan. Bake for 1 hour or until toothpick comes out clean.


SO delicious!!! I switched the chocolate chips for walnuts and used a little less sugar than what was called for & it turned out amazing! My husband and I can’t stop eating it. Will definitely make again!
This makes me so happy to hear!