Bakery Style Hot Chocolate Cookies
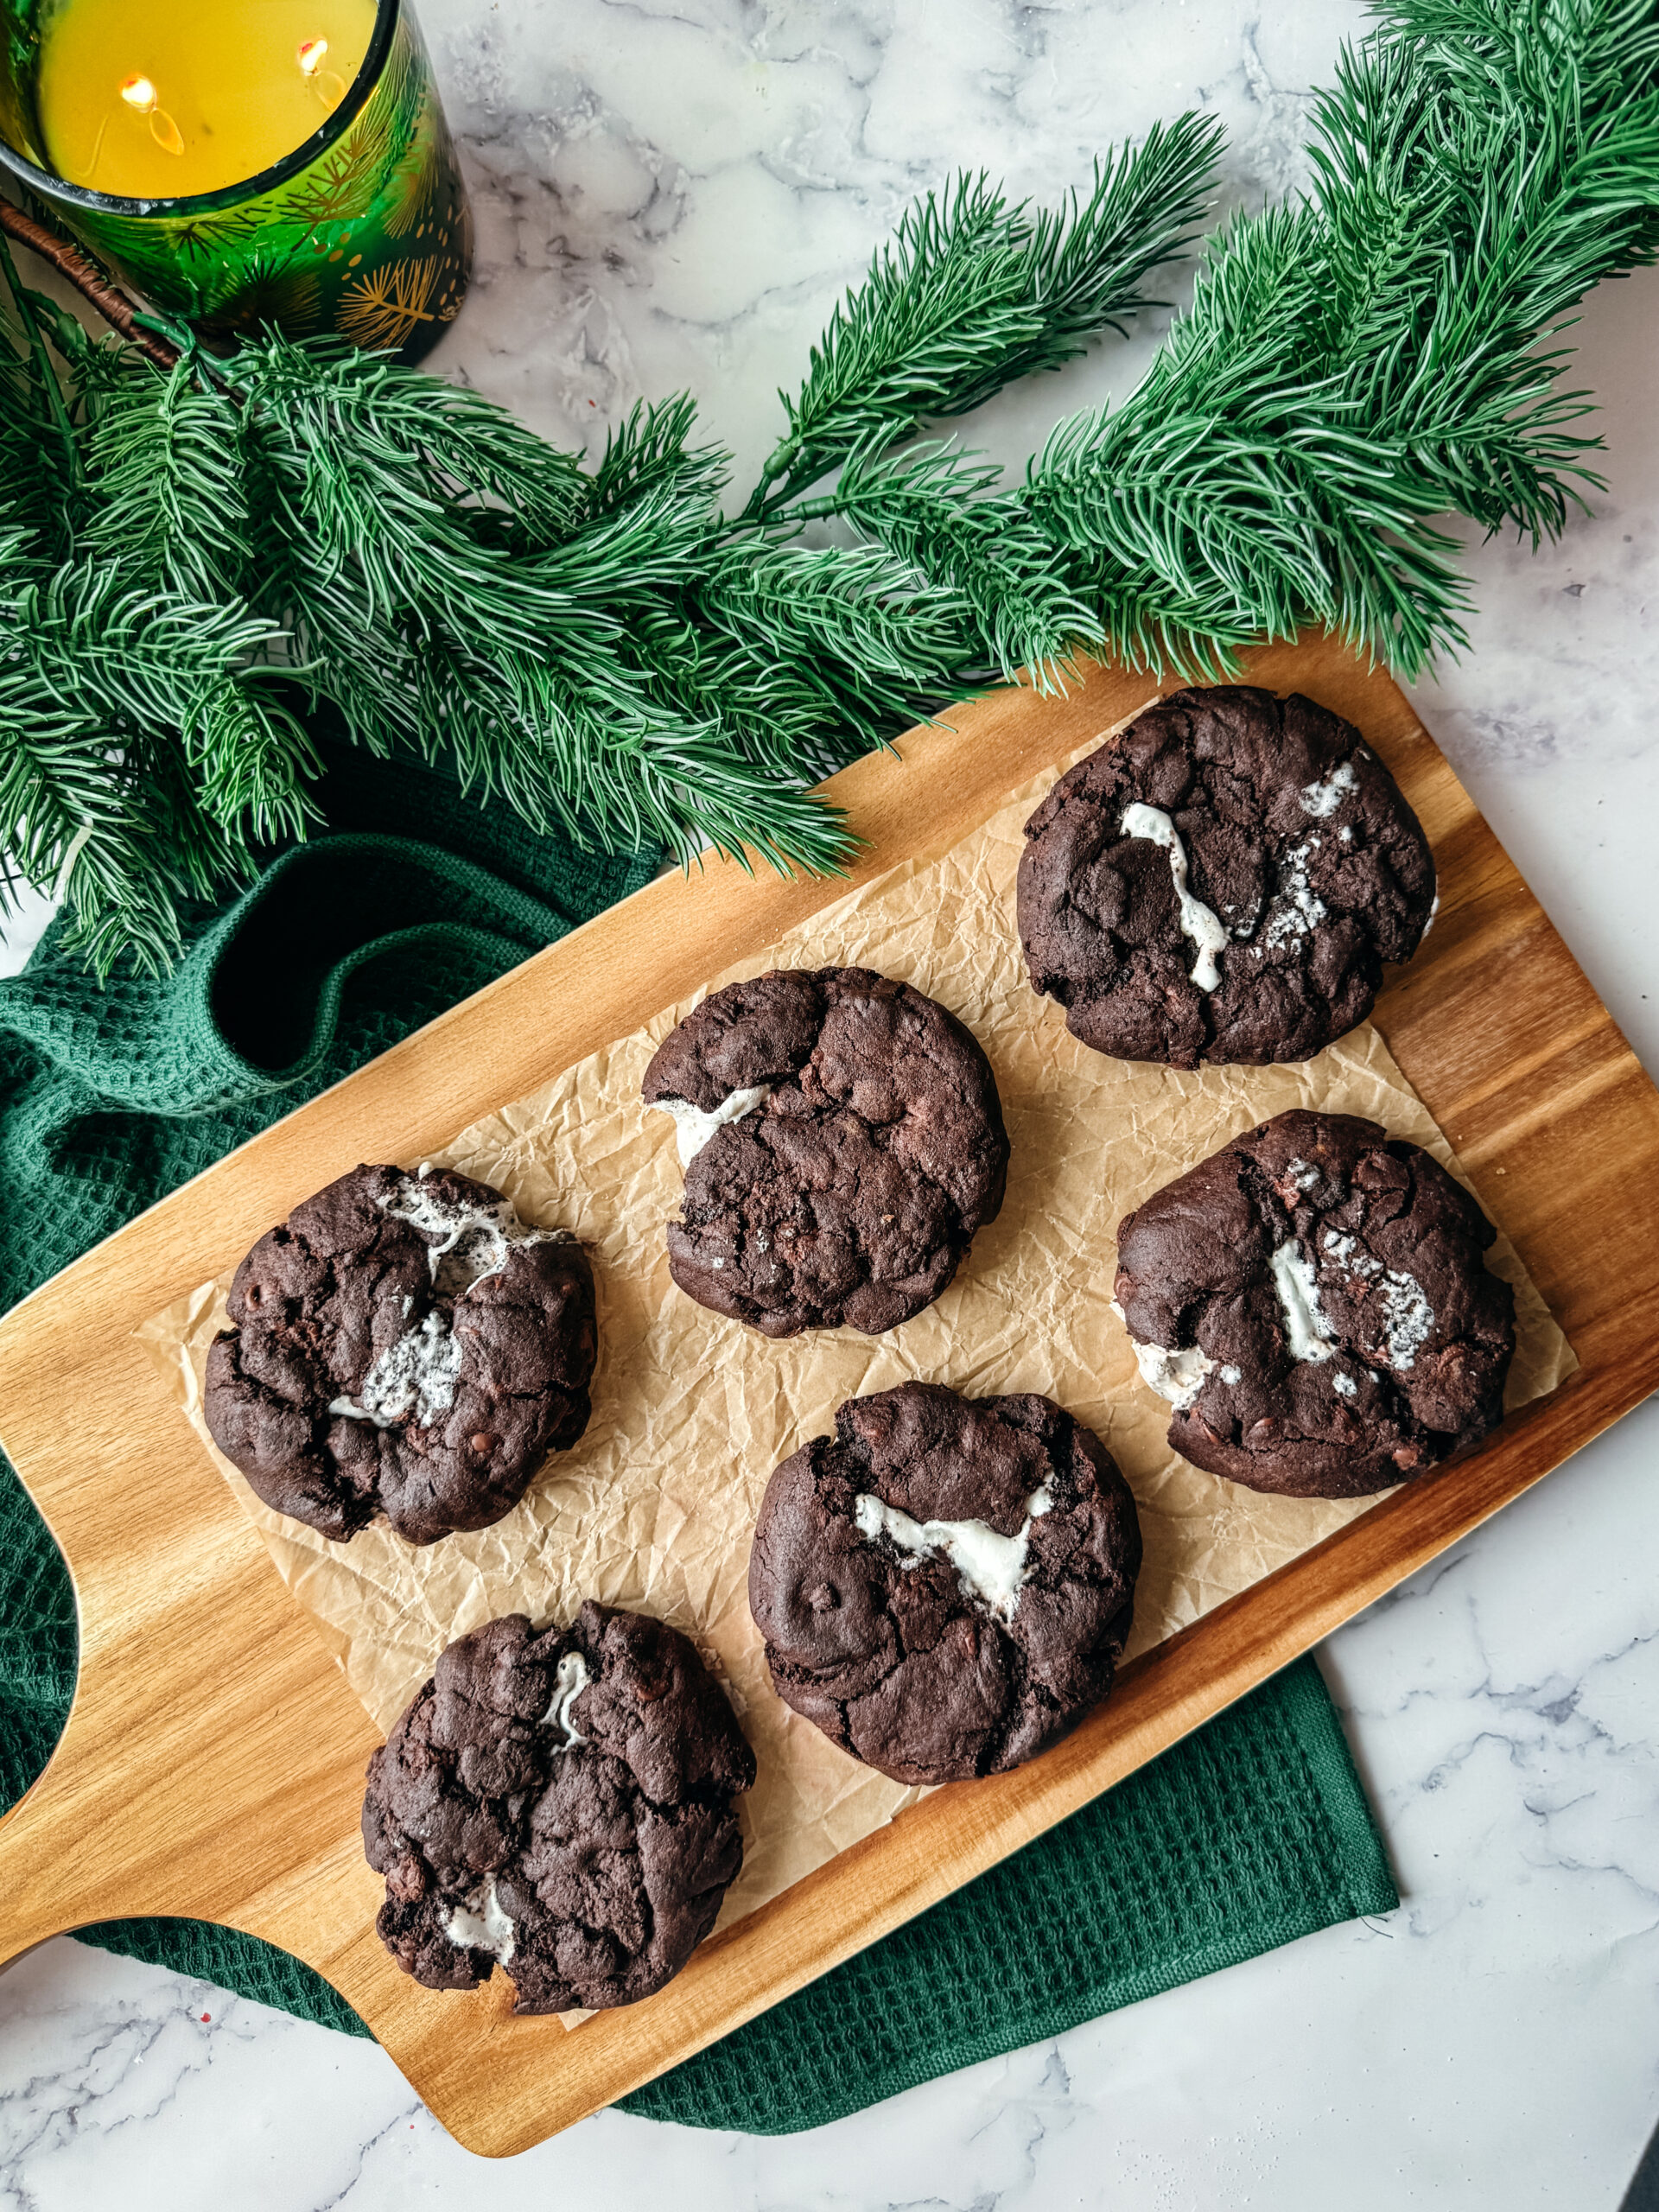
These Hot Chocolate Cookies are thick and chewy chocolate cookies and stuffed with a marshmallow for the ultimate hot cocoa without a cup.
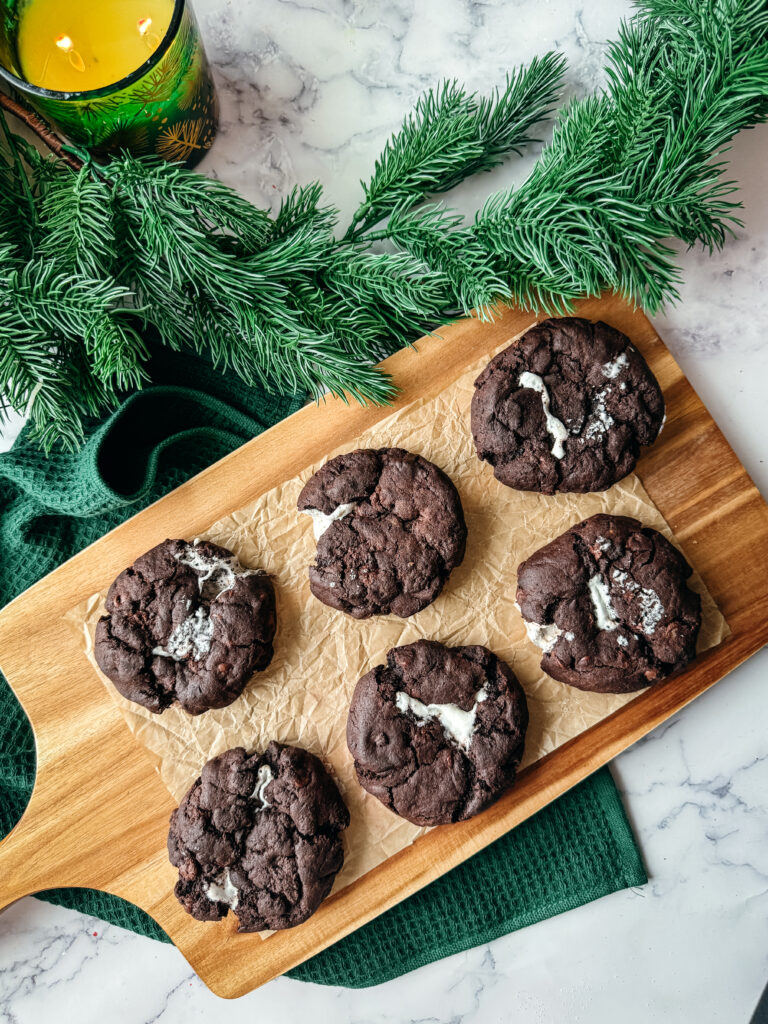
If you're searching for the ultimate winter cookie, these Stuffed Hot Chocolate Cookies are everything you love about a warm mug of hot cocoa-wrapped up into a soft, gooey, chocolatey cookie. Each cookie is filled with a melted marshmallow center, creating that signature hot chocolate flavor in every bite.
These marshmallow-stuffed cookies are rich, decadent, and perfect for holiday cookie exchanges, Christmas parties, cozy baking weekends, or anytime you crave a warm, hot chocolate-inspired dessert. They look impressive, but they're surprisingly simple to make and bake beautifully every time.

Why You'll Love These Hot Chocolate Cookies
- A gooey marshmallow center that melts as the cookies bake
- Deep chocolate flavor thanks to Dutch-processed cocoa
- Thick, soft, bakery-style cookies with chewy edges and fudgy centers
- Perfect Christmas cookie recipe for holiday dessert boards
- Kid-friendly and fun to bake-a winter classic turned cookie
These stuffed cookies taste like sipping hot cocoa by the fire… but better.

Ingredients
- Butter - unsalted and softened butter
- Sugar - both brown sugar and granulated sugar give the perfect chewy texture.
- Egg - gives structure to the dough and acts as a binder for the dough
- Vanilla Extract - for a touch of warmth
- Flour - all purposed works best in this recipe
- Cocoa Powder - dutch processed is my go to!
- Baking Soda and Baking Powder - the combination creates the perfect cookie texture
- Chocolate Chips - semi sweet is usual for this recipe, but milk or dark chocolate would be great as well.
- Marshmallows - I used my homemade marshmallows, but store bought works as well.

How to make Bakery Style Hot Chocolate Cookies
- Preheat the oven to 350 then line a baking sheet with parchment paper then set aside.
- Cream the butter, brown sugar, granulated sugar together until light and creamy. Add in the egg, vanilla extract, and peppermint extract and mix until combined.
- Add in the flour, cocoa powder, baking powder and baking soda and mix just until the dry mixture disappears.
- Fold in the chocolate chips then using a large cookie scoop out 6 equally sized cookie dough balls, flatten out each ball of dough and place a marshmallow in the center. Gently wrap the dough around the marshmallow ensuring there are no holes in the dough. Place seam side up onto the baking sheet.
- Chill cookie dough in the fridge for 30 minutes before baking.
- Bake in the preheated oven for 10-12 minutes. Let the cookies cool on the baking sheet for 10 minutes before transferring to a cooling rack.

How to Store These Hot Cocoa Cookies
Store cookies in an airtight container at room temperature for up to 3 days. Or freeze them for 2 months. Just let them thaw in the air tight container before opening so they can soften back up.
To re-create that gooey marshmallow center, microwave for 5-8 seconds before eating.
What if I don't want Jumbo Cookies?
You can make 12 smaller cookies! Follow all the same directions, just divide dough into 12 scoops, cut each marshmallow in half, and bake for 8-10 minutes.

Tips for Perfect Hot Cocoa Cookies
- Chill the dough so the marshmallow stays inside and doesn't leak.
- Seal every seam to keep the filling contained.
- Use full-size marshmallows for the best gooey center.
- Let them cool on the baking sheet so they continue to set without overbaking.
How to Serve
These cookies are best enjoyed warm, when the marshmallow is soft and melty. Serve with:
- Hot chocolate
- Peppermint mocha
- Homemade chai
- A scoop of vanilla ice cream
They're also perfect for gifting or adding to Christmas cookie boxes.

Share Your Experience
I would love to hear about your experience making and enjoying my Bakery Style Hot Chocolate Cookies! Feel free to tag me on Instagram or leave a review below. Your feedback helps me improve our recipes and provides inspiration to fellow home cooks.
Save this recipe for later by simply using the pin button on the recipe card or any of the photos above. Happy cooking!
📖 Recipe
Bakery Style Hot Chocolate Cookies
Ingredients
Instructions
- Preheat the oven to 350 then line a baking sheet with parchment paper then set aside.
- Cream the butter, brown sugar, granulated sugar together until light and creamy. Add in the egg and vanilla extract and mix until combined.
- Add in the flour, cocoa powder, baking powder and baking soda and mix just until the dry mixture disappears.
- Fold in the chocolate chips then using a large cookie scoop out 6 equally sized cookie dough balls, flatten out each ball of dough and place a marshmallow in the center. Gently wrap the dough around the marshmallow ensuring there are no holes in the dough. Place seam side up onto the baking sheet.
- Chill cookie dough in the fridge for 30 minutes before baking.
- Bake in the preheated oven for 10-12 minutes. Let the cookies cool on the baking sheet for 10 minutes before transferring to a cooling rack.


What would you recommend as far as freezing these before baking? I’m new to baking and want to make these in my cookie box but I’m intimidated to try and do everything in one day. Can the dough be frozen then thawed to bake or will it ruin the quality? Thanks 🙂
I fully assemble the cookies and then freeze. Bake from frozen for an extra 2-3 minutes and they turn out great!
Thank you so much!!
You forgot the peppermint extract measurement
I’m sorry! There is not peppermint extract in here! I miss typed that step!
If I use store bought marshmallows do you recommend just regular marshmallows or marshmallow fluff?
Regular marshmallows.
Hi! For a mini version what would you recommend as far as marshmallow? Half a big one? 3/4 mini marshmallows?
I would do half of a large marshmallow. A little easier to wrap.
Thank you! I just realized you said that in your post and I just didn’t read closely enough. I appreciate you responding nonetheless!
How long do you bake regular sizes cookies for this recipe vs jumbo?
Bake for 8-10 minutes.
For mini versions how much marshmallow would you use? Half a big one? 3-4 mini marshmallows? To about how much dough?
I’d use about 2-3 tbsp of dough and 1/2 a marshmallow. You will need to adjust your baking time a bit also.