• About
  • Nav Social Icons

  • Skip to primary navigation
  • Skip to main content
  • Skip to primary sidebar
  • Skip to footer
  • Home
  • About
  • Recipes
    • Blackstone
    • Breads
    • Breakfast
    • Drinks
    • Dessert
    • Dinner
    • Sides
    • Snacks
  • Shop
  • Cart
  • My account
  • Mobile Menu Widgets

    Connect

    Search

The Farmstyle

The Farmstyle

by Kayla Zenner

  • Home
  • About
  • Shop
  • Recipes
    • Blackstone
    • Breads
    • Breakfast
    • Drinks
    • Dessert
    • Dinner
    • Snacks
    • Sides
    • All Recipes
  • Cart

Chicken Bacon Ranch Sliders on the Blackstone Griddle

September 12, 2025 · In: Blackstone, Dinner, Lunch, Recipes, Snacks

FacebookTweetPin
Jump to Recipe Print Recipe

These chicken bacon ranch sliders on the Blackstone griddle are crispy, cheesy, and loaded with homemade ranch—perfect for parties, BBQs, or weeknight dinners.
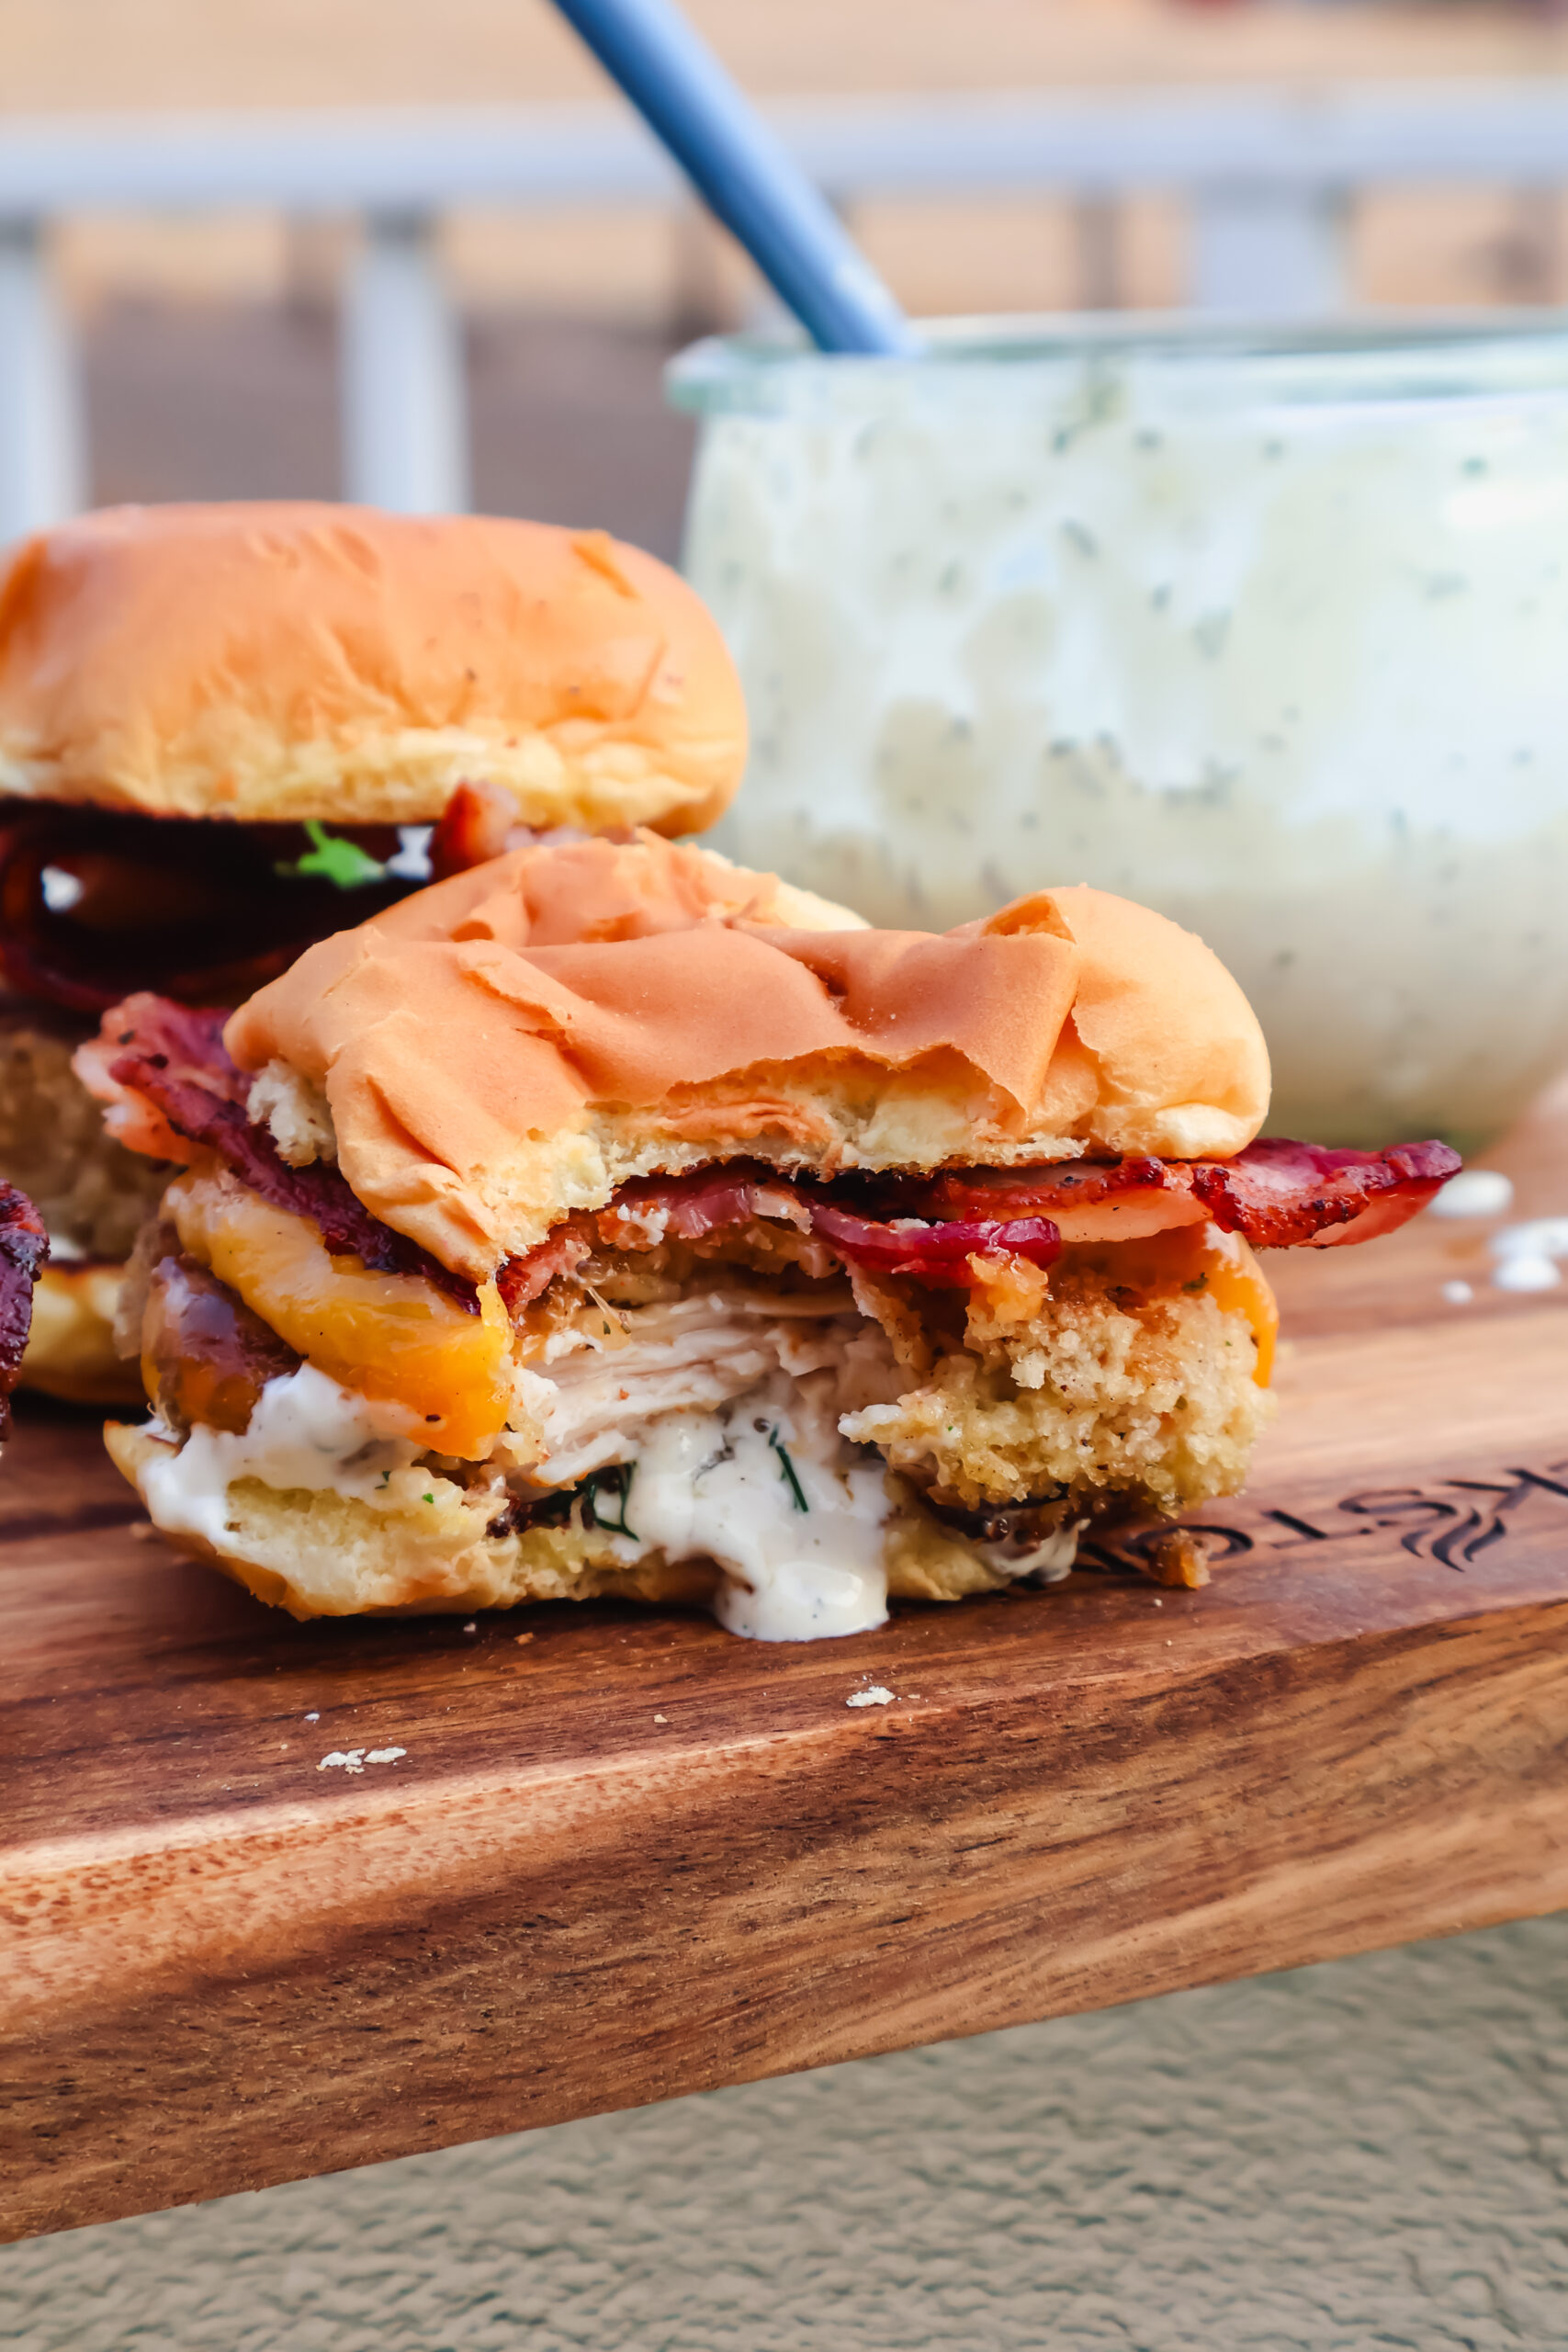
If you’re craving the ultimate handheld bite, these Chicken Bacon Ranch Sliders on the Blackstone griddle will hit the spot. Crispy breaded chicken, smoky bacon, melted cheese, and homemade ranch dressing all tucked into soft slider buns—this recipe is a guaranteed crowd-pleaser.

Whether you’re cooking for game day, a family gathering, or just an easy weeknight dinner, sliders on the Blackstone are quick, fun, and perfect for feeding a group.

Why You’ll Love These Chicken Bacon Ranch Sliders

  • Crispy & juicy chicken thanks to a three-step breading station.
  • Made on the Blackstone griddle for even cooking and big-batch convenience.
  • Homemade ranch dressing that’s fresh, herby, and better than store-bought.
  • Perfect party food—these sliders are bite-sized but loaded with flavor.

Ingredients

Here’s what you’ll need to make the best chicken bacon ranch sliders:

For the Sliders

  • Chicken breasts: Cut into smaller cutlets for perfectly sized sliders.
  • Eggs + Milk: Helps the breadcrumbs stick to the chicken.
  • Flour : The base layer for breading.
  • Breadcrumbs: Creates a crunchy golden crust. Panko works great here too.
  • Bacon: Smoky and salty—pairs perfectly with ranch.
  • Slider buns: Soft rolls that hold everything together.
  • Cheese: Provolone, cheddar, or pepper jack all work.
  • Salt and pepper: For seasoning the chicken.
  • Oil: Enough for shallow frying on the griddle.

For the Homemade Ranch

  • Mayonnaise: Creamy base.
  • Sour cream: Adds tang.
  • Garlic powder + Onion powder : Flavor boosters.
  • Salt: Balances flavors.
  • Fresh dill: Bright and herby.
  • Lemon juice: Adds freshness and tang.

Instructions

  1. Make the Ranch: In a small bowl, whisk together mayonnaise, sour cream, garlic powder, onion powder, salt, dill, and lemon juice. Set aside.
  2. Prep the Griddle: Preheat your Blackstone griddle to medium heat.
  3. Bread the Chicken: Set up a breading station with flour in one bowl, egg + milk mixture in another, and breadcrumbs in a third. Cut chicken breasts into 8 small cutlets, season with salt and pepper, then dredge in flour, dip in egg wash, and coat with breadcrumbs.
  4. Cook the Bacon: Add bacon to one side of the griddle and cook until crispy, flipping halfway.
  5. Cook the Chicken: Add oil to the other side of the griddle. Place chicken cutlets in the oil and cook 5–7 minutes per side until golden brown and internal temperature reaches 165°F. Add cheese slices during the last 1–2 minutes.
  6. Assemble the Sliders: Spread ranch on the bottom buns, layer with cheesy chicken, bacon, and top buns. Serve hot and enjoy!

Tips for Success

  • Don’t skip the breading station—it gives the chicken that perfect crispy crust.
  • Use a meat thermometer to ensure chicken hits 165°F without overcooking.
  • Make the ranch ahead of time—it gets even better after resting in the fridge for an hour.
  • Toast the buns on the griddle for extra flavor and crunch.

Serving Suggestions

  • Serve these sliders with fries, coleslaw, or grilled veggies for a complete meal.
  • Perfect for tailgates, BBQs, or family game nights.
  • Try swapping cheese varieties—pepper jack for a spicy kick or cheddar for extra richness.

FAQs About Chicken Bacon Ranch Sliders

Can I make these sliders ahead of time?
Yes! You can cook the chicken cutlets and bacon in advance, then reheat them on the griddle before assembling. For best results, add the ranch and assemble just before serving.

What’s the best cheese for chicken sliders?
Provolone and cheddar are classics, but pepper jack adds a spicy twist. You can even use mozzarella for a milder flavor.

Can I bake these sliders instead of cooking on the griddle?
Absolutely. Place breaded chicken on a parchment-lined sheet pan and bake at 400°F for about 20 minutes, flipping halfway through.

How do I store leftovers?
Store chicken and bacon separately in an airtight container in the fridge for up to 3 days. Reheat on the griddle or in the oven for crispiness.

Can I use store-bought ranch?
Yes—but homemade ranch adds fresh flavor that makes these sliders stand out. If you’re short on time, a high-quality bottled ranch works fine.

Closing Thoughts

I hope you love these Chicken Bacon Ranch Sliders on the Blackstone as much as we do! They’re always a hit at game day parties, BBQs, and even weeknight dinners. If you give this recipe a try, I’d love to hear from you—please leave a comment and rate the recipe below so others know what you thought. Don’t forget to snap a picture and tag me over on Instagram @thefarmstyle so I can see your sliders in action. Your feedback and support mean the world, and it helps me keep creating more Blackstone recipes for you to enjoy!

Chicken Bacon Ranch Sliders on the Blackstone Griddle

No ratings yet
These crispy chicken bacon ranch sliders on the Blackstone are cheesy, flavorful, and topped with homemade ranch—perfect for parties, BBQs, or weeknight meals.
Print Recipe Pin Recipe
Prep Time:15 minutes mins
Cook Time:20 minutes mins
Course: Appetizer, dinner, Main Course
Servings: 8 sliders
Calories: 552kcal

Ingredients

Sliders

  • 2 chicken breasts
  • 2 eggs
  • 1/4 cup milk
  • 1 cup breadcrumbs
  • 1 cup all purpose Flour
  • 8 slices bacon
  • 8 slider buns
  • 8 slices cheese
  • Salt and pepper
  • Oil for frying

Homemade Ranch

  • 1/2 cup mayonnaise
  • 1/2 cup sour cream
  • 1/2 tsp garlic powder
  • 1/2 tsp onion powder
  • 1/2 tsp salt
  • 1-2 tbsp fresh dill
  • 1 tbsp lemon juice

Instructions

  • Make the homemade ranch by combining all ingredients and mixing until will combined. Set aside for later.
  • Preheat your griddle to medium heat.
  • Prepare breading station; Add flour to one shallow bowl. Add eggs and milk to another shallow bowl and mix to combine. Add breadcrumbs to the last shallow bowl.
  • Cut each chicken breast in half lengthwise to create a cutlet, then into half again to create 8 small cutlets. Season with salt and pepper.
  • Coat each cutlet in flour, then egg mixture, then finish off with bread crumbs.
  • Add bacon to half of the griddle and cook until crispy, flipping halfway through.
  • Add a thick layer of oil to the other half of your griddle. Then add coated cutlets and cook until each side is golden brown (about 5-7 minutes each side). Internal temperature should be 165F.
  • Add cheese to the chicken towards the last 1-2 minutes.
  • Assemble sandwiches starting with the bottom roll, generous serving of ranch, chicken cutlet, bacon, and top roll. Enjoy!

Nutrition

Calories: 552kcal | Carbohydrates: 40g | Protein: 29g | Fat: 30g | Saturated Fat: 11g | Polyunsaturated Fat: 6g | Monounsaturated Fat: 8g | Trans Fat: 0.1g | Cholesterol: 128mg | Sodium: 704mg | Potassium: 360mg | Fiber: 2g | Sugar: 4g | Vitamin A: 431IU | Vitamin C: 2mg | Calcium: 278mg | Iron: 3mg

Share this:

  • Share on X (Opens in new window) X
  • Share on Facebook (Opens in new window) Facebook
  • Share on Pinterest (Opens in new window) Pinterest

Like this:

Like Loading...
FacebookTweetPin

By: Kayla · In: Blackstone, Dinner, Lunch, Recipes, Snacks

About Kayla

Hi! I'm Kayla. I'm here to help inspire busy moms to get back in the kitchen and feel beautiful along the way! I'm married to my high school sweetheart and live on a farm with our two busy boys.

you’ll also love

Homemade Cherry Pop-Tarts
Apple Crisp on the Blackstone
Easy Refrigerator Pickled Swiss Chard

Reader Interactions

Leave a ReplyCancel reply

Next Post >

Jam Jar Whiskey Cocktail (Easy Zero Waste Recipe)

Primary Sidebar

Meet Kayla

Meet Kayla
hello!

LIVING OURFARM(LIFE)STYLE WHERE WE ​JUGGLE THE CHAOS OF MOTHERHOOD ONE ​KITCHEN ADVENTURE AT A TIME!

Read More

Connect

join the list

Categories

  • Blog
  • Recipes

Follow Along

@thefarmstyle


100,000 of you. I’m honestly still trying to wrap
100,000 of you. I’m honestly still trying to wrap my head around that.

What started as me just sharing what I was making for my family, little moments, and pieces of my life has turned into this incredible community, and that’s because of YOU. 

The comments, the messages, the times you’ve made my recipes in your own kitchens… it all means more than I can put into words.

Thank you for being here, for supporting me, and for growing alongside me. I don’t take a single one of you for granted.

We’re just getting started 🤍


Comment GARDEN and I’ll send you all the details t
Comment GARDEN and I’ll send you all the details to your inbox. 

The best thing about these garden beds is that they can be made to any dimension that you want! I created four 4x8 beds, two 3x8 beds, and two 2x3 beds using the exact same method each time!

Materials (for ONE 4x8 bed)
* (4) 2x8 boards, cut to 8 ft long
* (4) 2x8 boards, cut to 4 ft long 
* (24) 3” exterior wood screws 
* (4) 2x4 boards, cut to 14” long

Instructions
1. Cut Your Boards (if needed)
Cut your boards to length before assembling. We had (4) 12’ boards, we cut into an 8’ board and 4’ board. However, you can also buy (6) 8’ boards and then cut 2 of them in half. 

2. Drill Pilot Holes (optional)
On each 8’ board measure ¾” in from each end and Drill 2 pilot holes per end, spaced about 2–3” from the top and bottom
This helps prevent the wood from splitting when you add screws.

3. Build the First Layer (Bottom Frame)
Lay out:
 * (2) 8 ft boards (long sides)
 * (2) 4 ft boards (short sides)
Form a rectangle with the short boards sitting inside the long boards. Then attach the boards using 3” screws into the pilot holes you created in the previous step. 

4. Stack the Second Layer
Repeat process by placing the second set of boards directly on top of the first frame, lining up edges carefully

5. Add Corner Supports 
Place the 2x4 board inside each corner
These should sit flush with the bottom and sit an inch below the top. 
Screw through the outside boards into the 2x4 board once in the top 2x8 board and once in the bottom 2x8 board. 

 Pro Tips
Use untreated cedar for best longevity, however I used fir for a more cost effective version. These may only last me 5 years, BUT the cost of cedar deterred me from going that route. 

Avoid pressure-treated wood unless it’s labeled safe for gardens

Use a garden safe stain on the interior before filling to help with board longevity.


Comment SALAD for all the recipe details.

Spring
Comment SALAD for all the recipe details. 

Spring salads > everything else right now 🥗🌸

Fresh, colorful, and actually satisfying… these are the kind of salads you crave (not just eat because you feel like you should).

Save this for your weekly menu + tell me which one you’re making first.

Strawberry Balsamic Salad
Blueberry Summer Salad
Streak Harvest Salad
Citrus Kale Salad
Summer Fruit Salad
Greek Pasta Salad
Rainbow Pasta Salad


Comment SMOOTHIE for all the recipe details.

Thi
Comment SMOOTHIE for all the recipe details. 

This Blackberry Coconut Smoothie is creamy, refreshing, and dairy-free, made with coconut milk, frozen blackberries, and coconut yogurt. A quick and easy smoothie recipe ready in just 5 minutes.


Comment RECIPE for all the details!

These cheese
Comment RECIPE for all the details! 

These cheesesteak quesadillas scored ⭐️⭐️⭐️⭐️⭐️ from my kids! BONUS: they are so easy to make on the @blackstoneproducts griddle.


Help me restore my @blackstoneproducts griddle aft
Help me restore my @blackstoneproducts griddle after being a tiny bit neglectful the past few months. 
#blackstonegriddle #griddlenation


Footer

On the Blog

  • Blog
  • Recipes

Info

  • About
  • Disclosure, Privacy Policy, and Terms

Copyright © 2026 · Theme by 17th Avenue

%d

    Rate This Recipe

    Your vote:


    A rating is required
    A name is required
    An email is required
    We use cookies to ensure that we give you the best experience on our website. If you continue to use this site we will assume that you are happy with it.